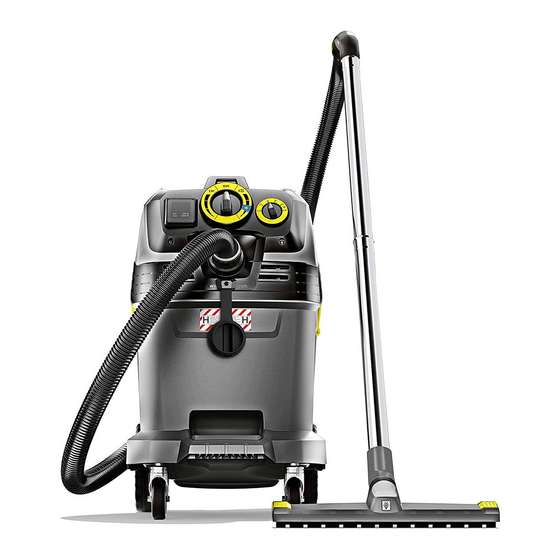
Kärcher NT 30/1 Tact Te H Manual Del Usuario
Ocultar thumbs
Ver también para NT 30/1 Tact Te H:
- Manual de instrucciones (248 páginas) ,
- Manual del usuario (40 páginas) ,
- Manual de instrucciones (204 páginas)

Manuales relacionados para Kärcher NT 30/1 Tact Te H


Resumen de contenidos para Kärcher NT 30/1 Tact Te H
- Página 1 NT 30/1 Tact Te H Deutsch NT 40/1 Tact Te H English Français NT 50/1 Tact Te H Italiano Nederlands Español 59673660 08/18...
- Página 4 “Click”...
- Página 5 “Click”...
- Página 6 “Click” û ü...
-
Página 7: Tabla De Contenido
Lesen Sie vor der ersten Benut- Altgeräte enthalten wertvolle re- zung Ihres Gerätes diese Origi- cyclingfähige Materialien, die ei- nalbetriebsanleitung, handeln Sie danach ner Verwertung zugeführt wer- und bewahren Sie diese für späteren Ge- den sollten. Batterien, Öl und brauch oder für Nachbesitzer auf. ähnliche Stoffe dürfen nicht in die –... -
Página 8: Geräteelemente
– Industriestaubsauger und ortsverän- 15 Verschlussstopfen derliche Entstauber gemäß TRGS 519 16 Bodendüse Anlage 7 dürfen für folgende Anwen- 17 Saugrohr dungen eingesetzt werden: 18 Anschlag für Werkzeugkoffer 1. Tätigkeiten mit geringer Exposition 19 Gummimuffe, schraubbar gemäß TRGS 519 Nummer 2.8 in ge- 20 Befestigungsöse schlossenen Räumen oder Arbeiten ge- 21 Filterabdeckung... -
Página 9: Sicherheitseinrichtungen
– Dieses Gerät enthält gesundheits- Hupe schädlichen Staub. Leerungs- und War- tungsvorgänge, einschließlich der Be- Intervallton seitigung der Staubsammelbehälter, Die Hupe ertönt (Intervallton), wenn die dürfen nur von Fachleuten durchgeführt Luftgeschwindigkeit unter 20 m/s absinkt. werden, die entsprechende Schutzaus- Hinweis: Die Hupe reagiert auf Unterdruck. rüstung tragen. - Página 10 Abbildung Einbau Sicherheitsfiltersack Schutzfolie abziehen und Entlüftungs- Saugkopf entriegeln und abnehmen. loch (1x NT 30/1 - 2x NT 40/1, NT 50/1) Abbildung mit selbstklebender Lasche verschlie- Sicherheitsfiltersack über Behälter stül- ßen. pen. Sicherheitsfiltersack mit angebrachtem Abbildung Kabelbinder fest verschließen.
-
Página 11: Bedienung
– Beim Aufsaugen von Nassschmutz mit Gerät einschalten der Polster- oder Fugendüse, bezie- hungsweise wenn überwiegend Was- Netzstecker einstecken. ser aus einem Behälter aufgesaugt Drehschalter auf gewünschtes Pro- wird, empfiehlt es sich, die Funktion gramm stellen. „Automatische Filterabreinigung“ abzu- Arbeiten mit Elektrowerkzeugen schalten. -
Página 12: Automatische Filterabreinigung
Hinweis: Für den Betrieb als Entstauber Gerät aufbewahren für ortsveränderlichen Betrieb (Bearbei- tungsgerät am Sauger eingesteckt) muss Abbildung die eingebaute Überwachung auf das an- Saugschlauch und Netzkabel entspre- geschlossene Bearbeitungsgerät (Stauber- chend Abbildung aufbewahren. zeuger) abgestimmt werden. Das heißt, ... -
Página 13: Flachfaltenfilter Wechseln
– Zur Wartung durch den Benutzer muss GEFAHR das Gerät auseinandergenommen, ge- Die Wirksamkeit der Filtration des Gerätes reinigt und gewartet werden, soweit es kann durch das Testverfahren wie in durchführbar ist, ohne dabei eine Ge- EN 60 335–2–69 22.AA.201.2 spezifiziert, fahr für das Wartungspersonal und an- geprüft werden. -
Página 14: Sicherheitsfiltersack/Entsorgungsbeutel Wechseln
Abbildung Abbildung Beide Verschlusszapfen der Filterabde- Sicherheitsfiltersack am Flansch nach ckung mit Schraubendreher gegen den oben herausziehen. Uhrzeigersinn drehen. Verschlusszap- Sauganschlussöffnung des Sicher- fen werden herausgedrückt. heitsfiltersacks mit Verschlussdeckel Filterabdeckung öffnen. dicht verschließen. Abbildung Abbildung Filterrahmen herausnehmen. ... -
Página 15: Kühlluftfilter Reinigen/Wechseln
Gefüllten Entsorgungsbeutel wechseln. Kühlluftfilter reinigen/wechseln Filterabdeckung richtig einrasten. Abbildung Flachfaltenfilter wechseln. Gerät abkühlen lassen. Nur NT 50/1: Kühlluftklappen mit Schraubendreher Ablassschlauch auf Dichtheit überprü- entriegeln und herausschwenken. fen. Kühlluftfilter reinigen (absaugen, aus- Staubaustritt beim Saugen waschen) oder wechseln. -
Página 16: Entsorgung
EU-Konformitätserklärung Kundendienst Kann die Störung nicht behoben wer- Hiermit erklären wir, dass die nachfolgend den, muss das Gerät vom Kundendienst bezeichnete Maschine aufgrund ihrer Kon- überprüft werden. zipierung und Bauart sowie in der von uns in Verkehr gebrachten Ausführung den ein- Entsorgung schlägigen grundlegenden Sicherheits- Das Gerät ist gemäß... -
Página 17: Technische Daten
Technische Daten NT 30/1 Tact NT 40/1 Tact NT 50/1 Tact Te H Te H Te H Netzspannung 220-240 220-240 220-240 AU: 240 AU: 240 AU: 240 Frequenz 1~ 50-60 1~ 50-60 1~ 50-60 Max. Leistung 1380 1380 1380 Nennleistung 1200 1200 1200... -
Página 18: Environmental Protection
Please read and comply with Notes about the ingredients (REACH) these original instructions prior You will find current information about the to the initial operation of your appliance and ingredients at: store them for later use or subsequent own- www.kaercher.com/REACH ers. -
Página 19: Device Elements
– After using the asbestos suction device 28 Rotating knob with suction output regu- in a cordoned off area in the sense of lation TRGS 519, the asbestos suction device 29 Socket should no longer be used in the so- 30 Floor nozzle holder called white area. -
Página 20: Safety Devices
Safety Devices Anti-static system Static charge is deflected by providing Monitoring of the flat fold filter earthing to the connection nozzles. This If the device is operated without a flat fold prevents the formation of sparks and cur- filter, it automatically switches off. rent shocks with attachments with electrical conductivity (included in the delivery). -
Página 21: Wet Vacuum Cleaning
Pull disposal bag over the container. Removing the dust disposal bag Ensure that the marking line is within Illustration the container and the ventilation hole is Release and remove the suction head. positioned on the back wall of the con- ... -
Página 22: Clip Connection
Note: Please refer to "Technical specifica- Clip connection tions" for the power connection specifica- Illustration tions of the power tools. The suction hose is equipped with a clip Illustration system. All accessories with a nominal Remove the elbow from the suction width of 35 mm can be connected. -
Página 23: After Each Operation
Storage Turn off the appliance Switch off the appliance at the rotating CAUTION knob. Risk of injury and damage! Note the weight Pull out the mains plug. of the appliance in case of storage. This appliance must only be stored in inte- After each operation rior rooms. -
Página 24: Exchanging The Flat Pleated Filter
WARNING WARNING Safety equipment for preventing hazards Do not reuse the main filter element after it must be serviced and maintained regularly. has been removed from the appliance. This means that the manufacturer's staff or Non-detachable filters should only be re- persons trained by the manufacturer must placed in suitable rooms (so-called decon- check the equipment for proper functioning... -
Página 25: Troubleshooting
DANGER Pull disposal bag over the container. Only persons trained in waste disposal are Ensure that the marking line is within permitted to dispose off the dust collection the container and the ventilation hole is container. positioned on the back wall of the con- ... -
Página 26: Automatic Filter Cleaning Cannot Be Switched Off
Suction turbine does not start again Horn sounds - permanent tone after the container has been Allow appliance to cool down. Clean/re- emptied place the cooling air filter. Turn off the appliance and wait for 5 sec- Automatic filter cleaning is not onds, turn it on again after 5 seconds. -
Página 27: Eu Declaration Of Conformity . En
EU Declaration of Conformity We hereby declare that the machine de- scribed below complies with the relevant basic safety and health requirements of the EU Directives, both in its basic design and construction as well as in the version put into circulation by us. -
Página 28: Technical Specifications
Technical specifications NT 30/1 Tact NT 40/1 Tact NT 50/1 Tact Te H Te H Te H Mains voltage 220-240 220-240 220-240 AU: 240 AU: 240 AU: 240 Frequency 1~ 50-60 1~ 50-60 1~ 50-60 Max. performance 1380 1380 1380 Rated power 1200 1200... -
Página 29: Protection De L'environnement
Lire ce manuel d'utilisation origi- Les appareils usés contiennent nal avant la première utilisation des matériaux précieux recy- de votre appareil, le respecter et le conser- clables lesquels doivent être ap- ver pour une utilisation ultérieure ou pour le portés à un système de recy- futur propriétaire. -
Página 30: Éléments De L'appareil
– Les aspirateurs industriels et dépous- 11 Récipient collecteur siéreurs mobiles selon le TRGS 519 12 Roues directionnelles (Prescriptions techniques pour les 13 Poignée substances dangereuses), annexe 7 14 Entrée d'air, air de refroidissement du peuvent être utilisés pour les applica- moteur tions suivantes : 15 Obturateurs... -
Página 31: Consignes De Sécurité
Consignes de sécurité Mise en service DANGER – Si l'air évacué est renvoyé dans la pièce, le taux de renouvellement d'air L dans la pièce doit être suffisant. Pour respecter les valeurs limites exigées, le débit volumétrique réintroduit doit re- présenter au maximum 50% du débit ... -
Página 32: Système Antistatique
Monter le sac d'élimination Système antistatique Illustration Les charges statiques sont évacuées par Déverrouiller et retirer la tête d'aspira- les embouts de raccordement reliés à la tion. terre. La formation d'étincelles et les chocs Mettre le sachet à éliminer en place. électriques avec les accessoires condui- ... -
Página 33: Clip De Fixation
Retrait du sac de filtre de sécurité. – L'appareil se met automatiquement Nettoyer la partie intérieure du réservoir hors marche lorsque le niveau de li- à l'aide d'un chiffon humide. quide maxi est atteint. Éliminer le sac de filtre de sécurité dans –... -
Página 34: Nettoyage Automatique Du Filtre
Remarque : Les données relatives au dé- Travailler avec des outils bit volumétrique en fonction de la dépres- électriques sion sont indiquées sur la plaque signalé- DANGER tique. Risque de blessure et d'endommagement ! Nettoyage automatique du filtre La prise n'est destinée qu'au raccord direct d'outils électriques sur l'aspirateur. -
Página 35: Transport
– Pour la maintenance par l'utilisateur, Transport l'appareil doit être désassemblé, net- PRÉCAUTION toyé et entretenu, dans la mesure du Risque de blessure et d'endommagement ! possible, sans que le personnel de Respecter le poids de l'appareil lors du maintenance ni d'autres personnes ne transport. - Página 36 DANGER Les filtres montés de manière fixe doivent L'efficacité de la filtration de l'appareil peut être remplacés uniquement à des endroits être contrôlée par le processus de test appropriés (par ex. ce qu'on appelle des comme spécifié dans EN 60 335–2–69 stations de décontamination) par un spé- 22.AA.201.2.
-
Página 37: Nettoyer/Remplacer Le Filtre De L'air De Refroidissement
Remplacer le sac de filtre de sécurité Remplacement du sac d'élimination DANGER Illustration La poussière produite doit être transportée Déverrouiller et retirer la tête d'aspira- dans des réservoirs étanches à la pous- tion. sière. Un transbordement n'est pas autori- ... -
Página 38: Assistance En Cas De Panne
Assistance en cas de panne De la poussière s'échappe lors de l'aspiration DANGER Avant d'effectuer tout type de travaux sur Illustration l'appareil, le mettre hors service et débran- Contrôler/corriger la position de mon- cher la fiche électrique. tage correcte du filtre à plis plat. Remarque : l'appareil doit immédiatement ... -
Página 39: Service Après-Vente
Déclaration UE de conformité Service après-vente Si la panne ne peut être réparée, l'appa- Nous certifions par la présente que la ma- reil doit être contrôlé par le service chine spécifiée ci-après répond de par sa après-vente. conception et son type de construction ain- si que de par la version que nous avons Mise au rebut mise sur le marché... -
Página 40: Caractéristiques Techniques
Caractéristiques techniques NT 30/1 Tact NT 40/1 Tact NT 50/1 Tact Te H Te H Te H Tension du secteur 220-240 220-240 220-240 AU: 240 AU: 240 AU: 240 Fréquence 1~ 50-60 1~ 50-60 1~ 50-60 Puissance maximale 1 380 1 380 1 380 Puissance nominale... -
Página 41: Protezione Dell'ambiente
Prima di utilizzare l'apparecchio Gli apparecchi dismessi conten- per la prima volta, leggere le gono materiali riciclabili preziosi presenti istruzioni originali, seguirle e con- e vanno consegnati ai relativi servarle per un uso futuro o in caso di riven- centri di raccolta. Batterie, olio e dita dell'apparecchio. -
Página 42: Parti Dell'apparecchio
– Dopo l'impiego dell'aspiratore di amian- 25 Archetto di spinta (solo NT 50/1) to nell'area isolata in conformità alla 26 Interruttore girevole per sezione del TRGS 519, l'aspiratore di amianto non tubo flessibile di aspirazione può più essere impiegato nella cosid- 27 Scala della sezione del tubo flessibile di detta area bianca. -
Página 43: Dispositivi Di Sicurezza
– Rispettare le disposizioni di sicurezza Clacson applicabili pertinenti per i materiali da trattare. Suono intermittente – Per posizionare in modo sicuro l'appa- Viene attivata una segnalazione acustica recchio, azionare il freno di staziona- (suono intermittente) se la velocità dell’aria mento sulla ruota orientabile. -
Página 44: Aspirazione Ad Umido
– I filtri plissettati piatti non usati possono Rimuovere il sacchetto filtro di essere conservati e trasportati solo sicurezza nell'imballaggio (cartone). Sbloccare e staccare la testa aspirante. AVVERTIMENTO Figura Durante l'aspirazione non rimuovere mai il Estrarre verso l'alto il sacco filtrante di filtro plissettato piatto e il sacco filtrante di sicurezza sulla flangia. -
Página 45: Collegamento A Clip
Svuotare l'acqua sporca – Apparecchio ON – Pulizia filtro automatica: ON Solo NT 50/1: – Impostazione della potenza Figura di aspirazione (min-max) Scaricare l'acqua sporca dal tubo di (eco = modalità di risparmio scarico. energetico) Norme generali Accendere l’apparecchio AVVERTIMENTO Non rimuovere mai il filtro plissettato piatto ... -
Página 46: Trasporto
La scala graduata indica la sezione del Deposito dell’apparecchio tubo flessibile di aspirazione. Avviso: Per il funzionamento come depol- Figura verizzatore ad uso mobile (apparecchio di Conservare il tubo flessibile di aspira- lavorazione inserito nell'aspiratore) occorre zione ed il cavo di alimentazione secon- regolare il dispositivo di controllo integrato do quanto illustrato nella figura. -
Página 47: Cura E Manutenzione
AVVERTIMENTO Cura e manutenzione Gli equipaggiamenti di sicurezza per la pre- PERICOLO venzione o l’eliminazione di pericoli devono Disattivare l'apparecchio ed estrarre la spi- essere sottoposti regolarmente a manuten- na di alimentazione prima di effettuare in- zione. Ciò significa che essi devono essere terventi sull'apparecchio. -
Página 48: Sostituzione Del Filtro Plissettato Piatto
Sostituzione del filtro plissettato Sostituzione del sacco filtrante di piatto sicurezza/sacchetto di smaltimento PERICOLO Chiudere il raccordo di aspirazione La polvere che si viene a creare deve esse- Figura re trasportata in contenitori a chiusura er- Chiudere il raccordo di aspirazione, metica. -
Página 49: Pulizia/Sostituzione Del Filtro Dell'aria Di Raffreddamento
Figura Guida alla risoluzione dei Inserimento del sacchetto filtro di sicu- guasti rezza. Rimettere la testa aspirante e bloccarla. PERICOLO Disattivare l'apparecchio ed estrarre la spi- Sostituzione del sacchetto di na di alimentazione prima di effettuare in- smaltimento terventi sull'apparecchio. -
Página 50: Smaltimento
Fuoriuscita di polvere durante Impossibile attivare la pulizia l'aspirazione automatica del filtro Figura Informare il servizio assistenza clienti. Verificare/correggere il posizionamento Servizio assistenza corretto del filtro plissettato piatto. Sostituire il filtro plissettato piatto. Se il guasto persiste, rivolgersi al servi- zio di assistenza clienti per un controllo. -
Página 51: Dichiarazione Di Conformità Ue It
Dichiarazione di conformità Con la presente si dichiara che la macchina qui di seguito indicata, in base alla sua con- cezione, al tipo di costruzione e nella ver- sione da noi introdotta sul mercato, è con- forme ai requisiti fondamentali di sicurezza e di sanità... -
Página 52: Dati Tecnici
Dati tecnici NT 30/1 Tact NT 40/1 Tact NT 50/1 Tact Te H Te H Te H Tensione di rete 220-240 220-240 220-240 AU: 240 AU: 240 AU: 240 Frequenza 1~ 50-60 1~ 50-60 1~ 50-60 Potenza max. 1380 1380 1380 Potenza nominale 1200... -
Página 53: Zorg Voor Het Milieu
Lees vóór het eerste gebruik Onbruikbaar geworden appara- van uw apparaat deze originele ten bevatten waardevolle mate- gebruiksaanwijzing, ga navenant te werk rialen die geschikt zijn voor her- en bewaar hem voor later gebruik of voor gebruik. Lever de apparaten een latere eigenaar. -
Página 54: Apparaat-Elementen
– De industriële stofzuiger en mobiele 12 Zwenkwiel ontstoffer conform Duitse TRGS 519 13 Handgreep bijlage 7 mogen voor de volgende toe- 14 Luchttoevoer, motor-koellucht passingen worden gebruikt: 15 Afsluitstop 1. Activiteiten met geringe blootstelling 16 Vloersproeier conform Duitse TRGS 519 nummer 2.8 17 Zuigbuis in gesloten ruimten of werkzaamheden 18 Aanslag voor gereedschapskist... -
Página 55: Veiligheidsinrichtingen
– Gebruik van het apparaat en de sub- Zuigslang aansluiten en afhankelijk van stanties waarvoor het moet worden ge- de gebruikssoort van zuigkop voorzien bruikt, incl. de veilige werkwijze bij de of op het stofopwekkende apparaat afvoer van het opgezogen materiaal al- aansluiten. -
Página 56: Natzuigen
Opmerking: Het apparaat is geschikt als Veiligheidsfilterzak verwijderen industriële stofzuiger voor het opzuigen en Zuigkop ontgrendelen en wegnemen. als ontstoffer voor gebruik op verschillende Afbeelding plaatsen voor het opzuigen van droge, niet Veiligheidsfilterzak aan de flens om- brandbare stoffen met grenswaarden voor hoog eruit trekken. -
Página 57: Bediening
Algemeen Apparaat inschakelen WAARSCHUWING Steek de netstekker in de contactdoos. Bij het zuigen mag de vlakvouwfilter nooit Draaischakelaar op gewenst program- verwijderd worden. ma zetten. – Bij het opzuigen van nat vuil met de Werken met elektrische werktuigen stof- of voegkop, resp. -
Página 58: Vervoer
Aanwijzing: Voor de werking als ontstoffer Apparaat opslaan voor ter plaatse veranderbare werking (be- werkingsapparaat aan de zuiger ingesto- Afbeelding ken) moet de ingebouwde bewaking op het Zuigslang en stroomkabel bewaren in aangesloten bewerkingsapparaat (stofop- overeenstemming met de afbeelding. wekker) worden afgestemd. - Página 59 – Voor het onderhoud door de gebruiker GEVAAR moet het apparaat uit elkaar genomen, De efficiëntie van het filteren van het appa- gereinigd en onderhouden worden, raat kan gecontroleerd worden door het voor zover dat uitgevoerd kan worden testprocedé zoals gespecifieerd in zonder dat daarbij gevaren ontstaan EN 60 335–2–69 22.AA.201.2.
-
Página 60: Veiligheidsfilterzak/ Stofverzamelzak Vervangen
Bestelnr. vlakke harmonicafilter: 6.907- GEVAAR 671.0 De afvoer van de stofverzamelzak mag al- Afbeelding leen gebeuren door ingewerkte personen. Beide afsluitstoppen van de filterafdek- Zuigkop ontgrendelen en wegnemen. king met schroevendraaier tegen de Afbeelding richting van de wijzers van de klok ... -
Página 61: Hulp Bij Storingen
Stofzak over reservoir stulpen. Zuigturbine start na het legen van Let erop dat de markeringslijn binnen de container niet opnieuw het reservoir ligt en de ontluchtingsope- ning aan de achterwand van het reser- Apparaat uitschakelen en 5 seconden voir is gepositioneerd. -
Página 62: Afvalverwijdering
EU-conformiteitsverklaring Claxon klinkt - continue toon Apparaat laten afkoelen. Koelluchtfilter Hierbij verklaren wij dat de hierna vermelde reinigen/vervangen. machine door haar ontwerp en bouwwijze en in de door ons in de handel gebrachte Automatische filterreiniging werkt uitvoering voldoet aan de betreffende fun- niet damentele veiligheids- en gezondheidsei- ... -
Página 63: Technische Gegevens
Technische gegevens NT 30/1 Tact NT 40/1 Tact NT 50/1 Tact Te H Te H Te H Netspanning 220-240 220-240 220-240 AU: 240 AU: 240 AU: 240 Frequentie 1~ 50-60 1~ 50-60 1~ 50-60 Max. vermogen 1380 1380 1380 Nominaal vermogen 1200 1200 1200... -
Página 64: Protección Del Medio Ambiente
Antes del primer uso de su apa- Los aparatos viejos contienen rato, lea este manual original, materiales valiosos reciclables actúe de acuerdo a sus indicaciones y que deberían ser entregados guárdelo para un uso posterior o para otro para su aprovechamiento poste- propietario posterior. -
Página 65: Elementos Del Aparato
– Tanto la aspiradora industrial como el 15 Tapón de cierre desempolvador portátil, conforme a 16 Boquilla barredora de suelos TRGS 519 instalación 7, deben utilizar- 17 Tubo de aspiración se para las siguientes aplicaciones: 18 Tope para maletín de herramientas 1. -
Página 66: Dispositivos De Seguridad
– Este aparato contiene polvo nocivo ADVERTENCIA para la salud. Las tareas de vaciado y Efectúe la aspiración únicamente con los mantenimiento, así como el desecha- elementos filtrantes; de lo contrario, el mo- miento del depósito acumulador de pol- tor de aspiración sufrirá daños y se pondrá vo sólo podrán ser realizados por espe- en riesgo la salud de las personas debido a cialistas ataviados con el correspon-... -
Página 67: Aspiración De Líquidos
Aviso: El equipo es apto como aspirador Cerrar la toma de aspiración industrial para aspirar y como desempolva- Figura dor de funcionamiento móvil para aspirar Colocar el tapón de cierre bien ajustado polvos secos, no inflamables con valores en la conexion de aspiración. MAK. -
Página 68: Enganche De Clip
Cerrar herméticamente la bolsa para Manejo eliminación de residuos con abrazade- ra de cables por debajo del orificio. Interruptor giratorio Extraer la bolsa de basura. Limpiar el interior del recipiente con un Aparato APAGADO paño húmedo. Eliminar la bolsa de desechos de –... -
Página 69: Transporte
Montar el adaptador de herramientas a Después de cada puesta en marcha la manguera de succión. Figura Vacíe el recipiente. Conectar el adaptador de herramientas Limpie el aparato por dentro y por fuera a la herramienta electrica. aspirándolo y frotar con un paño húme- Nota: Los diferentes cortes trasversales de la manguera de aspiración son necesarios... -
Página 70: Almacenamiento
– Durante los trabajos de mantenimiento Almacenamiento y reparación, se deben desechar todos PRECAUCIÓN los objetos que estén sucios y no se ¡Peligro de lesiones y daños! Respetar el puedan limpiar suficientemente. Dichos peso del aparato en el almacenamiento. objetos deberán ser desechados en Este aparato sólo se puede almacenar en bolsas no transparentes, en concordan- interiores. -
Página 71: Cambio De La Bolsa Filtrante De Seguridad/Bolsa Para Eliminación De Residuos
PELIGRO Colocar el bastidor del filtro. Peligro por polvo nocivo para la salud. Al Cerrar la cubierta del filtro, se debe oír realizar trabajos de mantenimiento (p.ej. cómo encaja. cambio de filtro), utilice una mascarilla pro- Presionar los pasadores de cierre de la tectora P2 o superior y ropa de un solo uso. -
Página 72: Limpiar/Cambiar El Filtro De Aire De Refrigeración
Limpiar el interior del recipiente con un Limpiar/cambiar el filtro de aire de paño húmedo. refrigeración Eliminar la bolsa de filtro de seguridad en una bolsa cerrada que no deje salir Figura el polvo de acuerdo con las normativas ... -
Página 73: Sonido De La Bocina: Sonido Discontinuo
La capacidad de aspiración La limpieza automática de filtro no disminuye funciona Eliminar las obstrucciones de la boqui- La manguera de aspiración no está no lla, tubo o manguera de aspiración o el conectada. filtro plano de papel plegado. La limpieza automática de filtro no ... -
Página 74: Declaración Ue De Conformidades
Declaración UE de conformidad Por la presente declaramos que la máquina designada a continuación cumple, tanto en lo que respecta a su diseño y tipo construc- tivo como a la versión puesta a la venta por nosotros, las normas básicas de seguridad y sobre la salud que figuran en las directivas comunitarias correspondientes. -
Página 75: Datos Técnicos
Datos técnicos NT 30/1 Tact NT 40/1 Tact NT 50/1 Tact Te H Te H Te H Tensión de red 220-240 220-240 220-240 AU: 240 AU: 240 AU: 240 Frecuencia 1~ 50-60 1~ 50-60 1~ 50-60 Potencia Máx. 1380 1380 1380 Potencial nominal 1200... - Página 76 Filtersysteme / Filter Systems / Système de filtres Flachfaltenfilter Sicherheitsfiltersack Entsorgungsbeutel (PTFE H) * Safety filter bag Disposal bag Flat pleated filter Sac filtrant de Sachet d‘élimination (PTFE H) * sécurité Filtre plat à plis (PTFE H) * Bestell-Nr. 6.907-671 2.889-183 2.889-231 Order No.
- Página 80 http://www.kaercher.com/dealersearch...