Publicidad
Enlaces rápidos
D Montageanleitung
E Mounting instructions
F Instructions de montage
I Istruzioni di montaggio
S Instrucciones de montaje
N Montagehandleiding
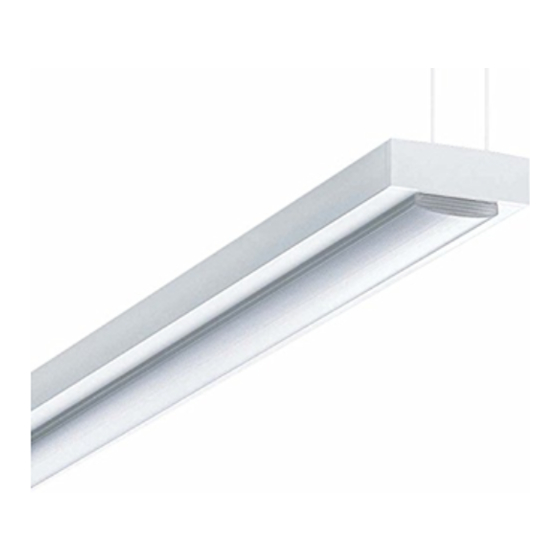
5041 T, 5051 T
00285412 / IX 16
TRILUX GmbH & Co. KG
Postfach 1960 . D-59753 Arnsberg
Tel. +49 (0) 29 32.301-0
Fax +49 (0) 29 32.301-375
info trilux.de . www.trilux.de
Publicidad

Manuales relacionados para Trilux 5041 T Serie


Resumen de contenidos para Trilux 5041 T Serie
- Página 1 I Istruzioni di montaggio S Instrucciones de montaje N Montagehandleiding 5041 T, 5051 T 00285412 / IX 16 TRILUX GmbH & Co. KG Postfach 1960 . D-59753 Arnsberg Tel. +49 (0) 29 32.301-0 Fax +49 (0) 29 32.301-375 info trilux.de . www.trilux.de...
- Página 2 • Modulo LED gruppo a rischio 1 • LED module risk group 1 • In case of malfunctions or failure with the LED module, please contact TRILUX. • In caso di disturbi o di guasto del modulo LED rivolgersi a TRILUX.
- Página 3 S Uso previsto • LED module risicoklasse 1 • Gelieve bij storingen of uitval van de ledmodule contact op te nemen met TRILUX. Luminaria 5041 T..., 5051 T... está concebida para el montaje en espacios interiores con una temperatura ambiente t a 25 °C adosada al techo o suspendida.
- Página 4 ca. kg ca. kg 5041 T/28/54... 5051 T/28/54... 5041 T/35/49/80... 5051 T/35/49/80... 900 (28/54W) 1200 (35/49/80W) 1193 (28/54W) 1493 (35/49/80W) 1215 (28/54W) 1215 (28/54W) 1515 (35/49/80W) 1515 (35/49/80W)
- Página 5 ca.10 D Position beachten! E Consider the correct position! F Considérer la position correcte ! I Fare attenzione alla posizione! S Considerar la posición correcta! N Positie in acht nemen!
- Página 6 05041 KA D Elektrischer Anschluss E Electrical connection F Raccordement électrique I Collegamento elettrico S Conexión eléctrica N Elektrische verbinding 50...EDD 50...E D Leuchtmittel einsetzen EInsert lamps min. 2,0 Nm min. 55 FInsérer les lampes IInserire lampade SInsertar las lámparas NLampen inzetten...
- Página 7 07690... 05000 DD ca.10 A 03 D...
- Página 8 5041...L/..., 5051...L/... 07690 E-T min. 1,2 Nm D Blindprofil vorher entsprechend ablängen E Cut blank profile into corresponding sections previously F Couper d'abord le profilé d'obturation à dimension I Prima tagliare a misura il profilo cieco S Antes, recortar el perfil ciego a la medida adecuada N Blind profiel van tevoren overeenkomstig inkorten 05051 S 05051 S/2m...
- Página 9 D Seil wird eingefädelt D Leitung ist bauseitig zu stellen E Wire is to be introduced E The cable is to be supplied by the customer F Le câble métallique doit être introduit F Le câble doit être fourni par le client I Fune metallica da inserire I La linea di rete elettrica è...
- Página 10 D Elektrischer Anschluss E Electrical connection F Raccordement électrique I Collegamento elettrico S Conexión eléctrica N Elektrische verbinding 50...EDD 50...E D Bei der Leuchtentype 5051 T die Transportsicherungsfolie entfernen und den Spiegel demontieren ( siehe Seite 8, Punkt 2 ). E Remove the transport protection foil from luminaire type 5051 T and remove the reflector ( see page 8, point 2 ).
- Página 11 05000 AN 05000 ZR 05000 ZR/2m max. 3 x 1,5 max. 5 x 0,75 A 03 S 05000 A19 D Wanneneinbau E Diffuser mounting F Montage de la vasque I Montaggio del diffusore S Montaje del difusor N Inbouw bak D Klebestreifen benutzen E Use adhesive tape F Utiliser le papier collant...
- Página 12 D Zubehör 05900 A 21 725 00 E Accessories F Accessoires I Accessori S Accesorios N Toebehoren D Zubehör 05900 AN 21 726 00 E Accessories F Accessoires I Accessori S Accesorios N Toebehoren click D HINWEIS Beachten Sie die Hinweise und Montageschritte der Montageanleitung 05900 AN...
- Página 13 D Montage E Assembly F Montage I Montaggio S Montaje N Montage D Zubehör ZST/1000 46 037 00 E Accessories F Accessoires ZST/2000 46038 00 I Accessori S Accesorios N Toebehoren 1158 / 1458 (...RPX)
- Página 14 D Zubehör ZS/1000 46 035 00 E Accessories F Accessoires ZS/2000 46 036 00 I Accessori S Accesorios N Toebehoren 1158 / 1458 (...RPX)
- Página 15 D Vor dem Einsetzen der Anschlussleitung (bau- seitig) Öffnung der Deckenanschlussdose bauseitig D Zubehör aufbohren (Ø 8 mm). E Accessories ZAE/01 515 46 917 00 E Before inserting the power cable (be supplied by F Accessoires ZAE/03 515 46 918 00 the customer) drill an opening (Ø...
- Página 16 E Keep these instructions for future maintenance work or dismantling. D Onderhoudsaanwijzingen For important information on the energy efficiency of TRILUX luminaires and on Reinigen van PLEXIGLAS-bakken met lichte zeepoplossing, vervolgens met maintaining and disposing of luminaires, please visit our webpage at: antistatisch middel* behandelen.