Publicidad
Enlaces rápidos
Publicidad

Resumen de contenidos para SANUS VuePoint FTVS1
- Página 1 FTVS 1 Swivel TV Base INSTRUCTION MANUAL WE’RE HERE TO HELP Our US-based install experts Want to watch a video that shows are standing by to help. how easy this assembly will be? 888-333-9952 Call us at: SANUS.com/2612 Watch it now at: SANUS.com/chatSV Or, chat at:...
- Página 2 NOTE: The FTVS1 can support screen sizes up to a maximum of 60" diagonal. NOTE: The FTVS1 has no user serviceable parts.
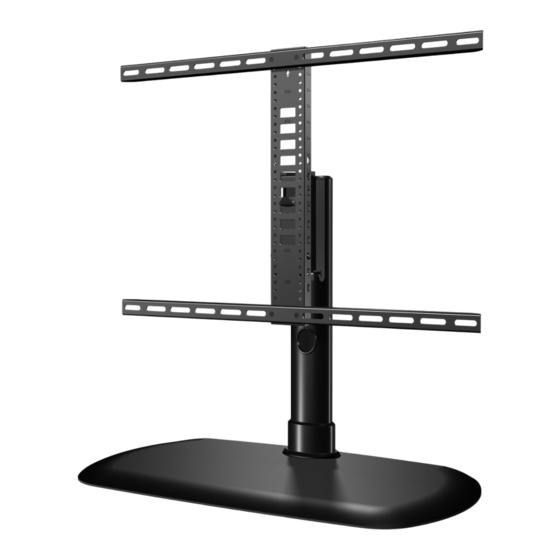
- Página 3 Dimensions TV INTERFACE 600mm 23.62in 75mm 2.95in 400mm 15.75in 75mm 2.95in FRONT VIEW - MAXIMUM HEIGHT TOP VIEW - SWIVEL SIDE VIEW - MAXIMUM HEIGHT CABLE MANAGMENT THROUGH TUBE CABLE MANAGMENT THROUGH TUBE 726.4mm 28.60in 722.6mm 28.45in 278.1mm 10.95in 35deg 16mm 35deg .63in...
- Página 4 Dimensions - TV Interface 23.62 in. (600 mm) 19.69 in. (500 mm) 15.75 in. (400 mm) 11.81 in. (300 mm) 7.87 in. (200 mm) 4.00 in. (100 mm) 25.36 in. (644.16 mm) 7.87 in. 15.75 in. 17.13 in. (200 mm) (400 mm) (435 mm) 4.00 in.
- Página 5 Supplied Parts and Hardware WARNING: This product contains small items that could be a choking hazard if swallowed. Before starting assembly, verify all parts are included and undamaged. If any parts are missing or damaged, do not return the damaged item to your dealer;...
- Página 6 STEP 2 Parts and Hardware STEP 3 Parts and Hardware STEP 4 Hardware Vertical Height Adjustment Bracket Lock Screws Post 1/4-20 x 3/8 in. Interface Screws (Vertical Height Adjustment Bracket) Base 10-32 x 3/8 in.
- Página 7 STEP 1 Attach TV Brackets to TV Standard configurations 1.1 Select TV Screw Diameter 1.2 Select TV Screw Length are shown. For special applications, or if you Test the three TV screw diameters (M4, are uncertain about your For flat-back TVs, Spacers supplied for: M6, or...
- Página 8 1.3 Attach Horizontal Brackets Position your TV brackets over your TV hole pattern - making sure the brackets are centered. Secure TV brackets using your selection for screw/washer ( : Flat Back) or screw/washer/spacer ( : Round Back / Extra Space). CAUTION: Avoid potential personal injuries and property damage! DO NOT use power tools for this step.
- Página 9 STEP 2 Attach Vertical Bracket Make sure the vertical height adjustment bracket is CENTERED on the TV and secure using interface screws IMPORTANT: Ensure all brackets are securely fastened before moving on to the next step.
- Página 10 STEP 3 Attach Post to Base Insert post into base Secure post to base with the two lock screws IMPORTANT: Ensure post is securely fastened to base before moving on to the next step.
- Página 11 STEP 4 Attach TV to Post Determine the height from the base that you would like your TV to hang. Examples Lowest Position Highest Position Lowest TV Position Highest TV Position...
- Página 12 Hang the TV/bracket assembly (at your desired height) onto Secure the TV/bracket assembly to post with two lock screws the post IMPORTANT: Keep the base clear while installing TV. IMPORTANT: Ensure TV/bracket assembly is securely fastened to post before moving on to the next step.
-
Página 13: Cable Management
Cable Management Route your cables through either the front or top opening of post , then out the back. -
Página 14: Listo Para Comenzar
NOTA: el FTVS1 puede soportar televisores de un tamaño máximo en diagonal de 60 pulgadas (153 cm). NOTA: el FTVS1 no contiene piezas que el usuario pueda reparar. -
Página 15: Seleccione El Diámetro De Los Tornillos Para El Televisor
PASO 1 Fije los soportes al televisor ESPAÑOL PÁGINA 7 1.1 Seleccione el diámetro de los tornillos para el televisor Pruebe los tres diámetros de tornillo del televisor (M4, M6 y M8) en los encastres enroscados de la parte trasera del televisor para determinar cuál es el diámetro de tornillo adecuado para su televisor. - Página 16 Thank you for choosing Sanus VuePoint! Please take a moment to let us know how we did: Call us: 1-888-333-9952 Email us: info@sanus.com Leave a review: vuepoint. sanus.com Find us on Facebook: SANUS Follow us on Twitter @sanussystems Milestone AV Technologies and its affi liated corporations and subsidiaries (collectively, “Milestone”), intend to make this manual accurate and complete. However, Milestone makes no claim that the information contained herein covers all details, conditions, or variations.


