Capítulos
Tabla de contenido
Solución de problemas

Manuales relacionados para Truper ROU-NX3


Resumen de contenidos para Truper ROU-NX3
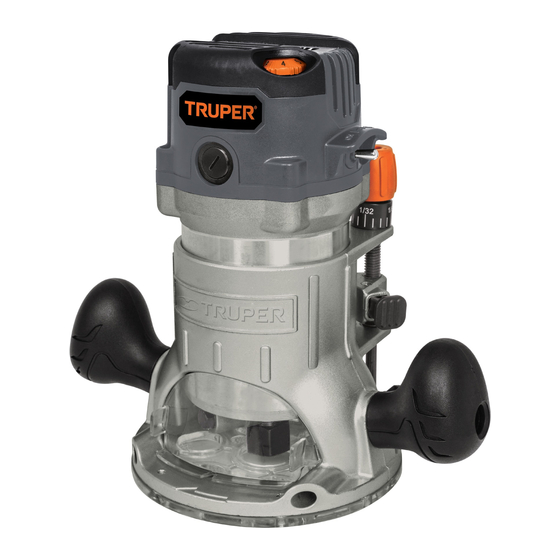
- Página 1 Instructivo de Rebajadora Potencia 1 440 W Este instructivo es para: Modelo Código ROU-NX3 16686 ROU-NX3 Lea este instructivo por completo ATENCIÓN antes de usar la herramienta.
-
Página 2: Tabla De Contenido
Guarde este instructivo para futuras referencias. Puesta en marcha Los gráficos de este instructivo son para referencia, pueden variar del aspecto real de la Operación herramienta. Mantenimiento Solución de problemas Notas Centros de Servicio Autorizados Sucursales Póliza de Garantía ROU-NX3 ESPAÑOL... -
Página 3: Especificaciones Técnicas
Especificaciones técnicas ROU-NX3 Código 16686 Descripción Rebajadora Tensión Frecuencia 120 V 60 Hz Corriente Potencia 12 A 1 440 W Velocidad 10000 r/min - 25000 r/min Mordaza de collarines para brocas con zancos de 6,3 mm (1/4”) y 12,7 mm (1/2”) Diámetro de la base... -
Página 4: Advertencias Generales De Seguridad Para Herramientas Eléctricas
Advertencias generales de seguridad para herramientas eléctricas ¡ADVERTENCIA! Lea detenidamente todas las advertencias de seguridad y todas las instrucciones que se enlistan a continuación. La omisión de alguna de ellas puede dar como resultado un choque eléctrico, incendio y/o daño serio. Conserve las advertencias y las instrucciones para futuras referencias. Área de trabajo Retire cualquier llave o herramienta de ajuste antes de arrancar Mantenga el área de trabajo limpia y bien iluminada. -
Página 5: Advertencias De Seguridad
Advertencias de Seguridad para uso de rebajadoras PELIGRO ADVERTENCIA • RIESGO DE CONTRAGOLPE. • Aleje las manos del área de corte y de Por contragolpe nos referimos al movimiento repentino y la broca de corte. Al operar la herramienta sosténgala con con fuerza que sufre la herramienta hacia afuera de la firmeza por ambos mangos con las dos manos para evitar pieza de trabajo y que puede hacer perder el control al... -
Página 6: Partes
Partes Control Protector de velocidad Cable de del cable alimentación Interruptor Botón de ajuste de altura Cilindro Base fija Botón de ajuste de altura Mango Mango Perilla de ajuste Seguro Cubierta fino de altura del eje antiastillas Base complementaria Control para cuidado del material de velocidad Puerto de... -
Página 7: Ensamble
Ensamble Desmontaje y montaje del cilindro • El motor de la rebajadora está alojado en el cilindro vertical (A) que sube o baja dentro de la base fija (B) para ajustar la broca a la altura adecuada para el trabajo a realizar. -
Página 8: Instalación De La Base Complementaria
Ensamble Instalación de la base complementaria • La base complementaria (A) es fundamental para proteger el material de trabajo durante el corte y realizar un trabajo más fino. ATENCIÓN • En caso de usar brocas mayores de 31,7 mm (1 ”) retire la base complementaria, tome en cuenta que el acabado será... -
Página 9: Velocidad
Puesta en marcha Encendido y control de operación • Conecte la rebajadora a la fuente de alimentación. El indicador de encendido (A) se iluminará en verde y se apagará cuando la rebajadora sea desconectada. • Utilice el interruptor (B) para encender o apagar el motor de la rebajadora. -
Página 10: Operación
Operación • Es importante realizar cortes de prueba en material de desecho antes de realizar el corte en el material definitivo. Los cortes de prueba permiten al operador ensayar el corte para realizar ajustes de velocidad y profundidad, así como para tener nociones de la respuesta del material, la dirección de corte y el acomodo óptimo de la rebajadora. -
Página 11: Mantenimiento
Operación Guía paralela • Instale la guía paralela (G) en la base de la rebajadora (página 8), y apóyela en el canto de la pieza de trabajo para hacer cortes rectos. Brocas con tope guía • Las brocas con topes incorporados son ideales para trabajar bordes. -
Página 12: Solución De Problemas
Solución de problemas Problema Causa Solución La rebajadora no • Cable desconectado del suministro eléctrico. • Conecte el cable al suministro eléctrico. funciona. • El interruptor está en la posición “OFF”. • Coloque el interruptor en la posición “ON”. • Los carbones están desgastados por •... -
Página 13: Notas
Notas ESPAÑOL... -
Página 14: Centros De Servicio Autorizados
Centros de Servicio Autorizados En caso de tener algún problema para contactar un Centro de Servicio consulte nuestra página www.truper.com donde obtendrá un listado actualizado, o llame al teléfono: 01(800) 690-6990 ó 01(800) 018-7873 donde le informarán cuál es el Centro de Servicio Autorizado más cercano. - Página 15 ZAMORA, MICH. TEL.: 01(351) 517-8420 671432 MERCADO DE LA SOLDADURA DEL SURESTE, S.A. DE C.V. BLVD. ADOLFO RUÍZ CORTÍNEZ 2001-B, 670805 LA NUEVA FERRETERÍA TRUPER COL. ATASTA, VILLAHERMOSA, C.P. 86100 TEL.: 01(933) GENERAL PUEBLITA No. 356, COL. CENTRO C.P. 58600, 161-4820 | 161-4479 ZACAPU, MICH.
-
Página 16: Sucursales
Sello del establecimiento comercial: Fecha de entrega: Importado por: Truper, S.A. de C.V. Parque Industrial No. 1, Jilotepec, C.P. 54240, Estado de México, México. Tel.: 01 (761) 782 9100, R.F.C.: THE-791105-HP2 www.truper.com ESPAÑOL... - Página 17 Manual Router Power 2 Hp Applies for: Model Code ROU-NX3 16686 ROU-NX3 Read this manual thoroughly CAUTION before using the tool.
- Página 18 Assembly Keep this manual for future references. Start Up The illustrations in this manual are for reference Operation only. They might be different from the real tool. Maintenance Troubleshooting Notes Authorized Service Centers Branches Warranty Policy ROU-NX3 ENGLISH...
-
Página 19: Technical Data
Technical Data ROU-NX3 Code 16686 Description Router Voltage Frequency 120 V 60 Hz Current Power 12 A 2 HP Speed 10 000 RPM - 25 000 RPM Chuck Jaw For bits with 1/4” and 1/2” shanks Base Diameter Maximum Bit Diameter 6”... -
Página 20: General Power Tool Safety Warnings
General power tool safety warnings WARNING! Read carefully all safety warnings and instructions listed below. Failure to comply with any of these warnings may result in electric shock, fire and / or severe damage. Save all warnings and instructions for future references. -
Página 21: Safety Warnings For Routers
Safety Warnings for Routers • KICKBACK RISK. We refer as kickback DANGER • Keep hands away from the cutting area WARNING to the sudden and strong movement the tools have and from the cutting bit. When operating the tool hold it outwards from the work piece that could make the user firmly by both handles to prevent accidental loss of loosing control or cause injuries. -
Página 22: Parts
Parts Power cord protector Speed Power Control Cord Switch Height Adjusting Cylinder Button Fixed Base Height Adjusting Handle Handle Button Height Fine Axis Anti-chip Adjusting Knob Lock Cover Additional Base to Speed Guard the Material Control Vacuuming Port Carbon Brushes Cap Motor Height Fast Adjustment Bracket... -
Página 23: Assembly
Assembly Cylinder Assembly and Disassembly • The router motor is housed in the vertical cylinder (A) going up and down inside the fixed base (B) to adjust the bit to the height that is the right one to the job to do. CAUTION •... -
Página 24: Start Up
Assembly Additional Base Assembly • The additional base (A) is fundamental to protect the work piece while cutting and to get a finer job. CAUTION • When using bits bigger than 1 ”. Remove the additional base and keep in mind the finish will be rough. - Página 25 Start Up Switching On and Operation Control • Connect the router to the power source. The ON indicator (A) will show a green light and will switch off when disconnecting the router. • Use the switch (B) to switch on or off the router motor. To switch on the tool push the switch into the “ON”...
-
Página 26: Operation
Operation • Making trial cuts on scrap wood before cutting the definitive material is important. Trial cuts allow the operator to rehearse the cut and make speed and depth adjustments. Also is useful to learn how the material will react, the direction of the cut and the optimum setup of the router. -
Página 27: Parallel Guide
Operation Parallel Guide • Fix the parallel guide (G) in the router base (page 8) and support it in the work piece edge to make straight cuts. Bits with Guide Stopper • Bits built with an incorporated stopper are ideal for edges. -
Página 28: Troubleshooting
Troubleshooting Problem Cause Solution The router is not • The cord is disconnected from the power • Connect the cord to the power source. functioning. source. • Set the switch into the “ON” position. • The switch is into the “OFF” position. •... -
Página 29: Notes
Notes ENGLISH... -
Página 30: Authorized Service Centers
Authorized Service Centers In the event of any problem contacting a Service Center, please see our webpage www.truper.com to get an updated list, or call our toll-free numbers 01(800) 690-6990 or 01 (800) 018-7873 to get information about the nearest Authorized Service Center. - Página 31 ZAMORA, MICH. TEL.: 01(351) 517-8420 671432 MERCADO DE LA SOLDADURA DEL SURESTE, S.A. DE C.V. BLVD. ADOLFO RUÍZ CORTÍNEZ 2001-B, 670805 LA NUEVA FERRETERÍA TRUPER COL. ATASTA, VILLAHERMOSA, C.P. 86100 TEL.: 01(933) GENERAL PUEBLITA No. 356, COL. CENTRO C.P. 58600, 161-4820 | 161-4479 ZACAPU, MICH.
-
Página 32: Branches
This warranty shall be effective when presenting the product and the valid Warranty policy duly stamped by the supplier or the proof of purchase. To comply with this warranty, Truper will cover transportation expenses in case consumer’s address is out of range from Authorized Service Centers listed herein or at the website www.truper.com or at our toll-free numbers: 01 (800) 690-6990 or 01(800) 018-7873.