Tabla de contenido

Manuales relacionados para LUCCI Air AIRFUSION A


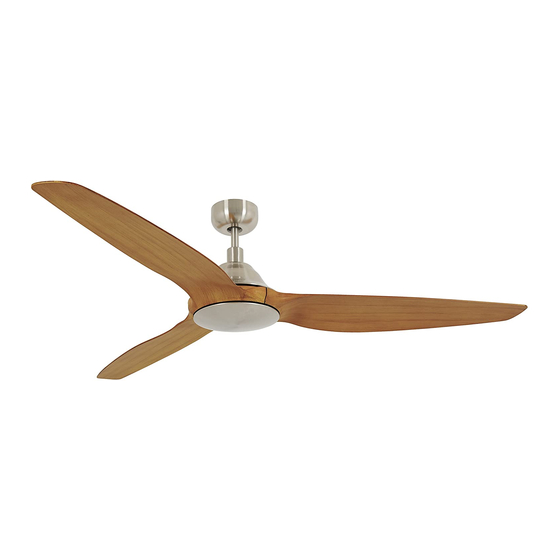
Resumen de contenidos para LUCCI Air AIRFUSION A
- Página 1 LUCCI AIRFUSION TYPE A DC CEILING FAN INSTALLATION OPERATION MAINTENANCE WARRANTY INFORMATION CAUTION READ INSTRUCTIONS CAREFULLY FOR SAFE INSTALLATION AND FAN OPERATION. V1.0-MUTIL-2016-2-25...
- Página 2 Airfusion Type A Installation Instructions CONTENTS Installation Instruction Manual ..................2 Installationsanleitung ......................11 Guide d’installation......................20 Manual de instrucciones de instalación................29 Manuale delle istruzioni di installazione................38 Installatiehandleiding......................48 1 | P a g e...
-
Página 3: Safety Precautions
Airfusion Type A Installation Instructions THANKYOU FOR YOUR PURCHASE Thankyou for purchasing the latest in energy saving ceiling fans. This fan runs on DC (direct current) power which gives it the benefit of being super energy efficient whilst still maintaining high volume air-movement and silent operation. -
Página 4: Before Installation
Airfusion Type A Installation Instructions The fan should be mounted so that the blades are at least 2.1 metres above the floor for Australia. This fan is suitable for indoor use only. Mounting the fan in a situation where it is subject to water or moisture is dangerous. -
Página 5: Installing The Fan
Airfusion Type A Installation Instructions INSTALLING THE FAN TOOLS REQUIRED: Phillips / flat head screwdriver Pair of pliers Adjustable spanner Step ladder Wire cutter Wiring, supply cable as required by local provincial and national wiring codes and regulations. INSTALLING THE MOUNTING BRACKET The ceiling fan must be installed in a location so that the blades are 300mm spacing from the tip of the blade to the nearest objects or walls. - Página 6 Airfusion Type A Installation Instructions HANGING THE FAN MOTOR ASSEMBLY Lift the fan assembly onto the mounting bracket. Fig. 4 Ensure the notch of the ball joint is positioned on the stopper of the mounting bracket to prevent the fan from rotating when in operation.
-
Página 7: Using Your Ceiling Fan
Airfusion Type A Installation Instructions INSTALL CANOPY Loosen the 2 screws from the bottom of the mounting bracket. Fig. 7 Slide the canopy up to the mounting bracket and place the key hole on the canopy over the screw on the mounting bracket, turn the canopy until it locks in place at the narrow section of the key holes and secure it by tightening the two set screws. - Página 8 Airfusion Type A Installation Instructions Turn on the power to receiver 1. Keep the power OFF to receiver 2. (Each ceiling fan must have its own isolation switch, so that only the ceiling fan that needs to be paired with the transmitter will be ON). ...
- Página 9 Airfusion Type A Installation Instructions : SPEED DECREASE BUTTON (C): Press the button to decrease the fan speed. The LED indicator (D) will indicate the fan speed (1-12 speed) accordingly. LED INDICATOR (D): Indicates the fan current fan speed level (1-12 speed). ...
-
Página 10: After Installation
Airfusion Type A Installation Instructions Solution: Switch off the main power to ceiling fan. Press and hold the “ ” button on transmitter for 3 seconds within 60 seconds of switching the power to the receiver of the ceiling fan. ... -
Página 11: Warranty Information
Airfusion Type A Installation Instructions WARRANTY INFORMATION IN AUSTRALIA / NEW ZEALAND – Please refer to the separate WARRANTY STATEMENT. IN EUROPE – If you are a European customer please contact the retail outlet where the fan was purchased for warranty service. 10 | P a g e... -
Página 12: Sicherheitshinweise
Airfusion Type A Installation Instructions HERZLICHEN GLÜCKWUNSCH ZUM ERWERB UNSERES DECKENVENTILATORS Wir beglückwunschen Sie zum Kauf des derzeit modernsten und energieeffizientesten Deckenventilators. Dieser wird durch Gleichstrom betrieben, wodurch er Energie spart und gleichzeitig einen hohen Grad an Ventilation bietet sowie geräuschlos arbeitet. -
Página 13: Vor Der Installation
Airfusion Type A Installation Instructions VOR DER INSTALLATION Entnehmen Sie den Ventilator aus der Verpackung und überprüfen Sie, ob alle Bestandteile vorhanden sind. Diese sollten Folgendes beinhalten: Abb. 1 Baldachin x 1 Stange x 1 Kupplungsabdeckung x 1 Motorbaugruppe x 1 Flügel x 3 Untere Abdeckung x 1 Kunststoffanker x 2... -
Página 14: Installation Des Ventilators
Airfusion Type A Installation Instructions INSTALLATION DES VENTILATORS BENÖTIGTE WERKZEUGE: Schlitzschraubendreher von Phillips Zange Universalschraubenschlüssel Stufenleiter Drahtzange Verkabelung und Versorgungskabel nach den jeweiligen lokalen und nationalen Verdrahtungsvorgaben INSTALLATION DER HALTERUNG Der Deckenventilator muss so angebracht sein, dass zwischen der Spitze eines jeden Rotorenblattes und der Wand oder dem nächstgelegenen Objekt ein Abstand von mindestens 300mm besteht. - Página 15 Airfusion Type A Installation Instructions INSTALLATION DES VENTILATORMOTORS Befestigen Sie das Ventilatorenaggregat an der Halterung. Abb. 4 Stellen Sie sicher, dass die Aussparung des Kugelgelenks am Verschluss der Halterung angebracht ist, damit der Ventilator, sobald er in Betrieb ist, nicht rotiert. Abb. 5 Abb.
- Página 16 Airfusion Type A Installation Instructions INSTALLATION DER ABDECKUNG Lösen Sie die 2 Schrauben vom unteren Teil der Halterung. Abb. 7 Schieben Sie die Abdeckung bis zur Halterung hoch und platzieren Sie das Schlüsselloch der Abdeckung auf der Halterung und über den Schrauben. Drehen Sie die Abdeckung bis diese im schmalen Abschnitt des Schlüsselloches einrastet und fixieren Sie diese durch das Festdrehen der beiden Schrauben.
- Página 17 Airfusion Type A Installation Instructions HINWEIS: Stellen Sie sicher, dass der Netzschalter des Empfängers auf EIN gestellt ist, bevor Sie dem Empfänger einen Sender zuweisen. Zuweisung Sender/Empfänger für Ventilator 1: Die beiden Ventilatoren 1 und 2 über den Hauptschalter der Stromversorgung vom Empfänger trennen. ...
- Página 18 Airfusion Type A Installation Instructions : TASTE VENTILATOR EIN/AUS (A): Diese Taste drücken, um den Ventilator ein/aus zu schalten. Drücken Sie innerhalb von 60 Sekunden nach Einschalten des Stroms des Empfängers die Taste und halten Sie diese drei Sekunden lang gedrückt, um Sender und Empfänger aufeinander abzustimmen. : TASTE GESCHWINDIGKEIT ERHÖHEN (B): Drücken Sie die Taste, um die Geschwindigkeit des Ventilators zu erhöhen.
-
Página 19: Nach Der Installation
Airfusion Type A Installation Instructions WIEDERHERSTELLUNG DER BINDUNG ZWISCHEN EMPFÄNGER & FERNBEDIENUNG Falls die Fernbedienung und der Empfänger nach erfolgter Installation oder während des Betriebs ihre Bindung verlieren, muss die Bindung zwischen Fernbedienung und Empfänger wiederhergestellt werden. Nachfolgend finden Sie eine Erläuterung der Symptome sowie Hinweise zur Wiederherstellung der Bindung zwischen der Fernbedienung des Gleichstrom-Deckenventilators und dem Empfänger. -
Página 20: Reinigung Und Pflege
Airfusion Type A Installation Instructions Beanstandungen wie z. B. Motorengeräusche. Alle elektronischen Motoren sind bis zu einem gewissen Grad hörbar. REINIGUNG UND PFLEGE Die einzige erforderliche Wartung ist die regelmäßige Reinigung Ihres Ventilators. Verwenden Sie dafür eine weiche Bürste oder einen fusselfreien Lappen, um ein Verkratzen der Lackierung zu vermeiden. ... -
Página 21: Félicitations Pour Votre Achat
Airfusion Type A Installation Instructions FÉLICITATIONS POUR VOTRE ACHAT Félicitations pour l'achat du plus récent des ventilateurs de plafond à économie d'énergie. Ce ventilateur fonctionne par CC (alimentation en courant continu) qui lui donne l'avantage d'être super-économe en énergie tout en conservant un volume élevé... -
Página 22: Avant L'installation
Airfusion Type A Installation Instructions AVANT L'INSTALLATION Déballez votre ventilateur et vérifier le contenu. Vous devez disposer des éléments suivants: Fig. 1 Dais x 1 Down rod x 1 Protection des connexions x 1 Ensemble moteur x 1 Pales x 3 Protection inférieure X 1 Chevilles en plastique x 2 Vis pour pales x 10... -
Página 23: Installation Du Ventilateur
Airfusion Type A Installation Instructions Installation du ventilateur OUTILS NÉCESSAIRES: Un tournevis cruciforme / à tête plate Une paire de pinces Une clé à molette Un escabeau Une pince coupante Le câblage, le câble d'alimentation tel que requis par les codes et les règles de câblage locaux, provinciaux et nationaux. - Página 24 Airfusion Type A Installation Instructions MISE EN PLACE DE L’ASSEMBLAGE DU VENTILATEUR Accrocher le ventilateur sur le support de montage. Figue. 4 Assurer que l'encoche du joint à rotule est placée sur la butée du support de montage pour empêcher la rotation du ventilateur lorsqu’il sera en fonctionnement.
- Página 25 Airfusion Type A Installation Instructions INSTALLER LE DAIS Desserrez les deux vis du bas du support de montage. Fig. 7 Faites glisser le dais jusqu'au support de montage et placez le trou de la serrure sur le dais au-dessus de la vis sur le support de montage, faites tourner ensuite le dais jusqu'à...
- Página 26 Airfusion Type A Installation Instructions Arrêtez les deux ventilateurs de plafond 1 et 2 avec l’interrupteur du secteur. Installez les 2 piles DC 1.5 V dans le compartiment. Assurez-vous de respecter la polarité. Mettez le ventilateur 1 en marche. Laissez le ventilateur 2 ARRÊTÉ. (Chaque ventilateur de plafond doit avoir son propre interrupteur isolé, de telle sorte que seul le ventilateur qui doit être couplé...
- Página 27 Airfusion Type A Installation Instructions Appuyez sur ce bouton et maintenez-le enfoncé pendant 3 secondes dans les 60 secondes qui suivent la mise en marche du ventilateur pour coupler la télécommande et le ventilateur. : BOUTON D’ACCÉLÉRATION (B) : Appuyez sur ce bouton pour augmenter la vitesse du ventilateur. L’indicateur LED (D) indiquera la vitesse du ventilateur (vitesse de 1 à...
-
Página 28: Entretien Et Nettoyage
Airfusion Type A Installation Instructions dysfonctionnement et la méthode nécessaire pour réparer le couplage entre la télécommande et le ventilateur électrique de plafond. Problèmes : Perte de contrôle – Le ventilateur ne tourne plus qu’à vitesse maximale après son installation ... -
Página 29: Information Technique
Airfusion Type A Installation Instructions Ne pas utiliser d'eau pour nettoyer votre ventilateur de plafond. Cela pourrait endommager le moteur ou les pales et créer la possibilité d'un choc électrique. Le moteur a un lubrificateur à roulement à billes en permanence. Il n'a pas besoin d'huile. Remarque: Toujours couper l'alimentation à... -
Página 30: Enhorabuena Por Su Compra
Airfusion Type A Installation Instructions ENHORABUENA POR SU COMPRA Enhorabuena por adquirir lo ultimo en ventiladores de techo que ahorran energía. Este ventilador funcionan con alimentación CC (corriente continua) lo que le otorga la ventaja de ser muy eficiente energéticamente a la vez que todavía mantiene un gran volumen de movimiento de aire y un funcionamiento silencioso. -
Página 31: Antes De La Instalación
Airfusion Type A Installation Instructions ANTES DE LA INSTALACIÓN Desembale el ventilador y compruebe los contenidos. Debe disponer de lo siguiente: Fig. 1 Cubierta del toldo x 1 Barra colgante x 1 Tapa de acople x 1 Motor x 1 Alabes x 3 Tapa inferior x 1 Tacos de plástico x 2... -
Página 32: Instalación Del Ventilador
Airfusion Type A Installation Instructions INSTALACIÓN DEL VENTILADOR HERRAMIENTAS NECESARIAS: Destornillador Phillips / de cabeza plana Alicates Llave inglesa Escalera Tijeras para cortar cable Cable, cable de alimentación necesario según los códigos y normativas eléctricas locales, nacionales y provinciales. INSTALACIÓN DE LA ABRAZADERA DE MONTAJE El ventilador de techo debe instalarse en una ubicación de forma que los alabes presenten un espacio de 300mm desde la punta del alabe a los objetos o paredes más cercanos. - Página 33 Airfusion Type A Installation Instructions COLGAR EL MOTOR DEL VENTILADOR Levante el ventilador sobre la abrazadera de montaje. Figura 4 Asegúrese que la muesca de la rótula está colocada sobre la pieza de cierre de la abrazadera de montaje para evitar que el ventilador gire cuando está...
-
Página 34: Uso Del Ventilador De Techo
Airfusion Type A Installation Instructions INSTALACIÓN DE LA CUBIERTA DEL TOLDO Afloje los 2 tornillos de la parte inferior de la abrazadera de montaje. Figura 7 Deslice el toldo hasta la abrazadera de montaje y coloque el orificio pequeño del toldo sobre el tornillo de la abrazadera de montaje;... - Página 35 Airfusion Type A Installation Instructions Apague ambos ventiladores de techo desde la alimentación del receptor. Ponga las 2 pilas de 1.5VDC en el compartimento. Asegúrese de que la polaridad de las baterías es la correcta. Corte la corriente del receptor 1. Mantenga el receptor 2 APAGADO. (Cada ventilador de techo debe llevar su propio interruptor de aislamiento, de manera que solo estará...
- Página 36 Airfusion Type A Installation Instructions Pulse el botón para encender/apagar el ventilador. Mantenga pulsado el botón durante 3 segundos antes de que transcurran 60 segundos después de encender el receptor para conectar el transmisor con el receptor. : BOTÓN PARA AUMENTAR LA VELOCIDAD (B): Pulse el botón para aumentar la velocidad del ventilador. El indicador LED (D) mostrará...
-
Página 37: Tras La Instalación
Airfusion Type A Installation Instructions la conexión entre el mando y el receptor. A continuación, se muestran los síntomas de funcionamiento y el método para reparar la conexión del mando a distancia y el receptor del ventilador de techo DC. Problemas: ... -
Página 38: Información Técnica
Airfusion Type A Installation Instructions No use agua cuando limpie el ventilador de techo. Puede provocar daños en el motor o en los alabes y crear la posibilidad de una descarga eléctrica. El motor presenta un cojinete de bolas permanentemente lubricado. No es necesario engrasarlo. NOTA: apague siempre la alimentación del interruptor de corriente antes de intentar limpiar el ventilador. -
Página 39: Precauzioni Di Sicurezza
Airfusion Type A Installation Instructions CONGRATULAZIONI PER IL VOSTRO ACQUISTO Congratulazioni per aver acquistato il prodotto più recente tra i ventilatori da soffitto a risparmio d’energia. Questo ventilatore funziona a CC (corrente continua) con il vantaggio che è super efficiente dal punto di vista energetico, pur mantenendo un alto volume di spostamento d’aria ed un funzionamento silenzioso. -
Página 40: Prima Dell'installazione
Airfusion Type A Installation Instructions PRIMA DELL’INSTALLAZIONE Disimballate il vostro ventilatore e verificate il contenuto. Dovreste avere quanto segue: Fig. 1 Copertura x 1 Staffa di sospensione x 1 Coperchio giunto x 1 Gruppo motore x 1 Pale x 3 Coperchio inferiore x 1 Ancoraggi in plastica x 2 Viti pale x10... -
Página 41: Installazione Del Ventilatore
Airfusion Type A Installation Instructions INSTALLAZIONE DEL VENTILATORE ATTREZZI NECESSARI: Cacciavite a stella/a testa piatta Un paio di pinze Una chiave inglese regolabile Scala Pinza tagliafili Fili elettrici, cavo d’alimentazione, come richiesti dai codici e regolamenti elettrici locali, provinciali e nazionali. - Página 42 Airfusion Type A Installation Instructions COME APPENDERE IL GRUPPO MOTORE DEL VENTILATORE Sollevare il gruppo ventilatore sulla staffa di montaggio Figura 4 Assicuratevi che la tacca della giunzione a sfera sia posizionata sul fermo della staffa di montaggio per impedire al ventilatore di ruotare quando in funzione.
-
Página 43: Utilizzo Del Vostro Ventilatore A Soffitto
Airfusion Type A Installation Instructions INSTALLAZIONE DEL COPERCHIO DELLA CALOTTA Allentate le 2 viti dal fondo della staffa di montaggio. Figura 7 Fate scivolare la calotta fino alla staffa di montaggio e mettete il foro sulla calotta direttamente sulla vite sulla staffa di montaggio, girate la calotta fino a che si blocca al suo posto nella sezione stretta dei fori ed assicuratela stringendo le due viti predisposte. - Página 44 Airfusion Type A Installation Instructions Inserire le 2 batterie da x 1,5VDC nell’apposito compartimento. Assicurarsi di rispettare la corretta polarità della batteria. Attivare l’alimentazione al ricevitore 1. Mantenere il ricevitore 2 in posizione OFF. (Ogni singolo ventilatore deve avere il proprio interruttore di isolamento in modo che solo il ventilatore da associare al trasmettitore abbia l’interruttore su ON).
- Página 45 Airfusion Type A Installation Instructions Tenere premuto il pulsante 3 r 3 secondi nei 60 secondi in cui si commuta l’alimentazione al ricevitore per l’associazione del trasmettitore con il ricevitore. : PULSANTE AUMENTO VELOCITÀ (B): Premere il pulsante per aumentare la velocità del ventilatore. L’indicatore LED (D) mostrerà...
-
Página 46: Dopo L'installazione
Airfusion Type A Installation Instructions Problemi: Perdita di controllo – In seguito all’installazione il ventilatore funziona solo a velocità massima Perdita di controllo – Non è possibile invertire la marcia del ventilatore in seguito all’installazione Perdita di controllo – Il telecomando non comunica con il ricevitore Soluzioni: ... -
Página 47: Informazioni Tecniche
Airfusion Type A Installation Instructions NOTA: Spegnete sempre l’alimentazione all’interruttore di rete prima di tentare di pulire il vostro ventilatore. INFORMAZIONI TECNICHE Modelli VENTILATORI A Alimentazione Tensione CORRENTE CONTINUA nominale Batteria per telecomando nominale AIRFUSION TYPE A (motore) solo per pale da 60” 220-240V CA 2 x 1.5Vdc AAA INFORMAZIONI SULLA GARANZIA... -
Página 48: Veiligheidsvoorschriften
Airfusion Type A Installation Instructions GEFELICITEERD MET UW AANKOOP Gefeliciteerd met de aankoop van de nieuwste generatie energiezuinige plafondventilatoren. Deze ventilator draait op DC (gelijkstroom), wat hem het voordeel geeft super energiezuinig te zijn, met behoud van een hoog volume aan luchtbewegingen en fluisterstille werking. -
Página 49: Voor De Installatie
Airfusion Type A Installation Instructions VOOR DE INSTALLATIE Pak de ventilator uit en controleer de inhoud. U moet de volgende onderdelen hebben: Fig. 1 Overkapping x 1 Neerwaartse staaf Aansluitend deksel x 1 Montage motor x 1 Bladen x 3 Dekplaat beneden x 1 Plastic bevestigingsbouten x 2 Bladschroeven x 10... - Página 50 Airfusion Type A Installation Instructions INSTALLATIE VAN DE VENTILATOR BENODIGD GEREEDSCHAP: Phillips / platte schroevendraaier Tang Verstelbare sleutel Ladder Kniptang Bedrading, voedingskabel zoals vereist door de lokale provinciale en nationale bedradingscodes en -regels. INSTALLATIE VAN DE MONTAGEBEUGEL De plafondventilator moet zo geïnstalleerd worden dat de top van de ventilatorbladen 300mm verwijderd is van het dichtsbijzijnde object of muur.
- Página 51 Airfusion Type A Installation Instructions OPHANGEN VAN DE MOTORUNIT Plaats de motorunit op de montagebeugel. Fig. 4 Zorg ervoor dat inkeping van het kogelgewricht op de stop van de montagebeugel gepostioneerd is, om te voorkomen dat de venilator begint te draaien. Fig. 5 Fig.
- Página 52 Airfusion Type A Installation Instructions INSTALLATIE VAN DE COVER VOOR DE OVERKAPPING Draai de 2 schroeven aan de onderkant van de montagebeugel los. Fig. 7 Schuif de overkapping tot aan de bevestigingsbeugel en plaats het sleutelgat op de overkapping over de schroef op de montagebeugel, draai de overkapping totdat deze vastklikt op het smalle gedeelte van de sleutelgaten en draai deze vast met de twee stes schroeven.
- Página 53 Airfusion Type A Installation Instructions Plaats de 2 x 1.5V gelijkstroombatterijen in het compartiment. Zorg dat de polariteit van de batterij correct is. Schakel de voeding in naar ontvanger 1. Houd ontvanger 2 op UIT (OFF). (Elke plafondventilator moet zijn eigen isolatieschakelaar hebben, zodat alleen de plafondventilator AAN (ON) zal zijn die met de zender moet worden gekoppeld.
- Página 54 Airfusion Type A Installation Instructions knop voor het koppelen van de zender en de ontvanger : KNOPPEN VOOR HET VERHOGEN VAN DE SNELHEID (B): Druk op de knop om de snelheid van de ventilator te verhogen. De LED-indicator (D) geeft nu de snelheid van de ventilator weer (1-12 snelheden). : KNOPPEN VOOR HET VERLAGEN VAN DE SNELHEID (C): Druk op de knop om de snelheid van de ventilator te verlagen.
-
Página 55: Onderhoud & Reiniging
Airfusion Type A Installation Instructions en de ontvanger. Problemen: Geen besturing - Ventilator draait alleen maar heel snel na de installatie hiervan Geen besturing - Geen omgekeerde functie na de installatie hiervan Geen besturing - Afstandszender kan niet met de ontvanger communiceren Oplossing: ... -
Página 56: Technische Informatie
Airfusion Type A Installation Instructions beschadigen en creëert de mogelijkheid op een elektrische schok. De motor heeft permanent gesmeerde kogellagers. Olie toevoegen is niet nodig. OPMERKING: Schakel de stroom altijd uit vooraleer uw ventilator te reinigen. TECHNISCHE INFORMATIE AIRFUSION TYPE A Nominaal SERIES DC Nominale spanning...