Publicidad
Idiomas disponibles
Idiomas disponibles
Publicidad
Tabla de contenido

Manuales relacionados para Steren AMP-60


Resumen de contenidos para Steren AMP-60
-
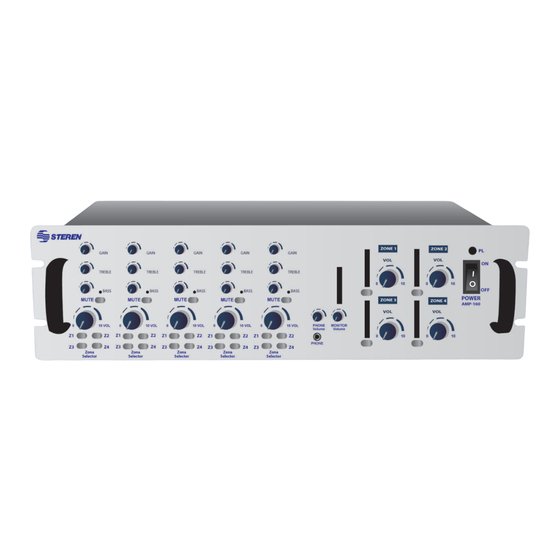
Página 2: Amplificador Para Publidifusión En 4 Zonas De 160W
Amplificador para publidifusión Steren. Por favor revise este manual completamente para estar seguro de instalar y poder operar apropiadamente este producto. Para apoyo, compras y todo lo nuevo que tiene Steren, visite nuestro sitio Web en: www.steren.com... - Página 3 IMPORTANTE • Verifique la línea de voltaje antes de utilizar el equipo Conectar el amplificador a una línea de voltaje diferente a la que utiliza puede provocar fuego y dañar el equipo. Si tiene alguna pregunta acerca de los requerimientos de voltaje o acerca del voltaje que se utiliza en su área, contacte a un distribuidor cercano antes de conectar el equipo al tomacorriente.
- Página 4 • Instalación Para asegurar la correcta operación y evitar posibles daños al equipo, coloque la unidad en una superficie firme y plana. Cuando coloque la unidad en un estante, asegúrese de que el este y cualquier equipo para montar puede soportar el peso del amplificador. Asegúrese de que el equipo cuenta con la suficiente ventilación, tanto en la parte superior como inferior.
- Página 5 CONTROLES GAIN 1.- Ganancia: Esta perilla controla la ganancia de entrada. Muévala en sentido de las manecillas del reloj y la entrada se incrementará. Muévala hacia la izquierda y la entrada decrecerá. 2.- Agudos: Este control ajusta las frecuencias agudas. Puede utilizarlo TREBLE para eliminar los ruidos de las frecuencias altas o para incrementar el sonido de los platillos, o frecuencias altas de la voz humana.
-
Página 6: Panel Trasero
10.- Volumen de monitor: Este control permite ajustar el nivel de salida de señal al monitor. MONITOR 11.- Volumen zona 1: Permite controlar el nivel de volumen de la salida Volume ZONE 1 de señal de la zona 1. 12.- Indicador gráfico: Indica el nivel total de salida de señal. 13.- Selector de monitor: Presione el botón de monitor, la señal del amplificador 1 se conectará... - Página 7 16.- Ventilador: Cuando la temperatura está por debajo de 50°C, el ventilador se detiene. Cuando la temperatura está por encima de los 50°C, el ventilador empieza a funcionar y se incrementa la velocidad hasta que la temperatura disminuye. 17.- Cable de energía: Permite conectar el cable de energía suministrado. 18.- Fusible: El fusible protege el circuito de corriente alterna de la unidad, y puede ser reemplazado en caso de que el fusible se queme.
- Página 8 25.- Entradas de línea: Permite conectar una fuente de audio externa con un alto nivel de salida de señal, como un sintonizador AM/FM, ipod, reproductor de CD, etc. Utilice interruptores de entrada sensibles que sean apropiados para diferentes equipos. Puede conectar equipos con conectores RCA y señales no balanceadas.
-
Página 9: Conexiones
CONEXIONES... -
Página 12: Especificaciones
ESPECIFICACIONES Alimentación: 115/230V~ 50/60Hz 2A máx Potencia de salida: 4 x 40W 4 x 90Wpmpo Respuesta de frecuencia: 50Hz – 17kHz (-3dB) Relación señal a ruido: 72dB Entradas / sensibilidad – impedancia: Canal 1 – 3 / XLR y ¼”: balanceada Micrófono: -42dB / -38dB –... - Página 13 1.- Para hacer efectiva la garantía, presente ésta póliza y el producto, en donde fue adquirido o en Electrónica Steren S.A. de C.V. 2.- Electrónica Steren S.A de C.V. se compromete a reparar el producto en caso de estar defectuoso sin ningún cargo al consumidor. Los gastos de transportación serán cubiertos por el proveedor.
- Página 15 Steren product. This manual includes all the feature operations and troubleshooting necessary to install and operate your new Steren´s Powered pa mixer / amplifier. Please review this manual thoroughly to ensure proper installation and operation of this product.
- Página 16 IMPORTANT • Verify line voltage before use Connecting the amplifier to a line voltage other than that for which it is intended can create a safety and fire hazard, and may damage the amplifier. If you have any questions about the voltage requirements for your specific model, or about the line voltage in your area, contact your selling dealer before plugging the unit into a wall outlet.
- Página 17 • Installation - To ensure proper operation and to avoid the potential for safety hazards, place the unit on a firm and level surface. When placing the unit on a shelf, be certain that the shelf and any mounting hardware can support the amplifier’s weight. - Make certain that the proper space is provided both above and below the unit for ventilation.
- Página 18 CONTROLS GAIN 1.- Gain: This knob controls input gain. Turn clockwise and the input will be increased. Turn counter clockwise and the input will be decreased. 2.- Treble: This knob adjust high frequencies. Use it to eliminate noises in TREBLE high frequencies or to enhance the sound of cymbals, or high harmonics of human voice.
-
Página 19: Rear Panel
10.- Monitor volume control: This knob allows you to set the monitor volume output level. MONITOR Volume 11.- Zone 1 volume level: Use this knob to control the volume level of ZONE 1 the Zone 1 signal output 12.- LED VU-metre: Indicates the overall output signal level 13.- Monitor selector: Press monitor, the signal from the amplifier 1 will connect to monitor volume. - Página 20 16.- Fan: When the temperature is under 50°C, the fan stops. But if the temperature is over 50°C, the fan will starts to run and the speed of the fan will be increased until the temperature decrease. 17.- Power cord: Allows you to connect the supplied power cord. 18.- Fuse: This fuse protects the alternating current circuit of the unit, and can be replaced only in case of the fuse broke.
- Página 21 25.- Line in: Use this connectors to plug an external audio source with a high signal output level, such as AM/FM tuner, tape deck, CD player, etc. Use sensitive input switches suitable for different devices. You can connect devices with RCA connectors and non-balanced signals. 26.- Mic / Line channel (Mono): These are channels 1, 2 and 3 and you can connect low impedance - balanced microphones to XLR connector.
- Página 22 CONNECTIONS Connecting speakers with a 25V output...
- Página 23 Connecting speakers with a 70V output...
- Página 24 Connecting speakers with a 100V output...
- Página 25 SPECIFICATIONS Input: 115/230V~ 50/60Hz 2A max Power output: 4 x 40W 4 x 90Wpmpo Frequency response: 50Hz – 17kHz (-3dB) SNR: 72dB Inputs / sensitivity - impedance: Channel 1 – 3 / XLR y ¼”: balanced Microphone: -42dB / -38dB – 600Ω, balanced / non-balanced Line: -26dB / -20dB –...
- Página 26 Part number: AMP-160 Brand: Steren WARRANTY This Steren product is warranted under normal usage against defects in workmanship and materials to the original purchaser for one year from the date of purchase. CONDITIONS 1.- This warranty card with all the required information, invoice, product box or package, and product, must be presented when warranty service is required.
- Página 27 Este instructivo puede mejorar con su ayuda, llámenos a: Help us to improve this instruction manual, call us to: 01800 500 9000 Centro de Servicio a Clientes Customer Service Center...