Publicidad
Idiomas disponibles
Idiomas disponibles
Publicidad
Tabla de contenido

Manuales relacionados para Steren AMP-200


Resumen de contenidos para Steren AMP-200
- Página 1 AMP-200 Amplificador de audio Manual de instrucciones V0411a S6-B...
- Página 2 Amplificador de audio Steren. Por favor revise este manual completamente para estar seguro de instalar y poder operar apropiadamente este producto. Para apoyo, compras y todo lo nuevo que tiene Steren, visite nuestro sitio Web en: www.steren.com...
- Página 3 IMPORTANTE • Verifique la línea de voltaje antes de utilizar el equipo Conectar el amplificador a una línea de voltaje diferente a la que utiliza puede provocar fuego y dañar el equipo. Si tiene alguna pregunta acerca de los requerimientos de voltaje, o acerca del voltaje que se utiliza en su área, contacte a un distribuidor cercano antes de conectar el equipo al tomacorriente.
- Página 4 • Instalación Para asegurar la correcta operación y evitar posibles daños al equipo, coloque la unidad en una superficie firme y plana. Cuando coloque la unidad en un estante, asegúrese de que el estante y cualquier equipo para montar puede soportar el peso del amplificador. Asegúrese de que el equipo cuenta con la suficiente ventilación, tanto en la parte superior como inferior.
-
Página 5: Características
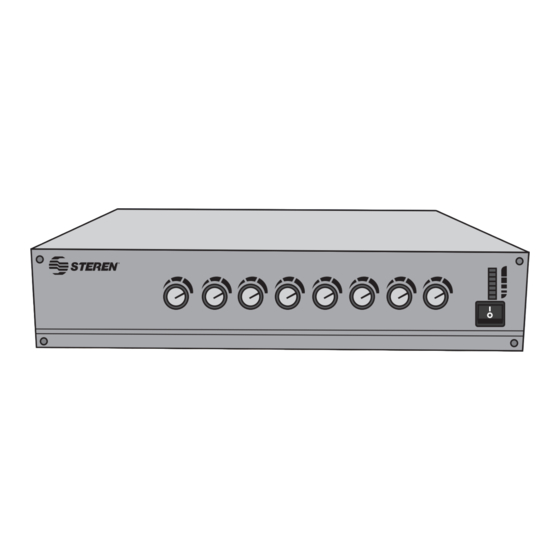
CARACTERÍSTICAS Su nuevo amplificador de audio de 150W RMS (200W máximo) cuenta con controles independientes de 4 entradas para micrófonos tipo XLR, 1 entrada auxiliar tipo RCA, control de graves y agudos, control maestro e indicador de unidades de volumen (VUM), impedancia de salida de 4 a 16ohms y salida de línea. - Página 6 1.- Control de volumen individual: Permite ajustar el nivel de volumen de la fuente de audio conectada a las entradas Input 1, Input 2, Input 3, Input 4 y Auxiliar. 2.- Control de graves: Permite ajustar los tonos graves. 3.- Control de agudos: Permite ajustar los tonos agudos. 4.- Control de volumen maestro: Permite ajustar el nivel de volumen general.
- Página 7 10.- Terminal de prioridad: Utilice esta terminal con un contacto auxiliar, pregunte a un técnico para mayor información. Permite que la señal proveniente de la entrada AUX IN disminuya, mientras las señales de las entradas IN2, IN3 e IN4 cuentan con ganancia, teniendo prioridad en la señal.
- Página 8 13.- Terminales de salida: Utilice estas terminales para conectar las bocinas.
- Página 9 14.- Tierra: Permite conectar a tierra el amplificador. Acuda con un técnico para mayor información. 15.- Interruptor de Línea / Micrófono / Fuente fantasma: Cambie entre la señal de audio de la entrada de línea, el micrófono y la fuente fantasma. En caso de utilizar el interruptor de fuente fantasma es necesario conectar micrófonos de tipo condensador.
- Página 10 18.- Entradas de auxiliar: Permite conectar equipos de audio con terminales RCA como sintonizadores de radio, caseteras, reproductores de CD, etc. 19.- Terminal main in: Una vez que remueva el puente entre el conector de pre-out y main-in puede conectar un procesador externo de señal. Permite mejorar la señal cuando es necesario (ajustando tiempos de retraso, ecualización, eliminar ruidos, etc.).
-
Página 11: Conexiones
CONEXIONES... -
Página 12: Ejemplo De Instalación En Gabinete
EJEMPLO DE INSTALACIÓN EN GABINETE VISTA TRASERA VISTA FRONTAL ESPECIFICACIONES Alimentación: 115V~ 60Hz 24V - - - Distorsión total: < 3% Potencia de salida: 150 W/95W Dimensiones: 435 x 335 x 100mm Consumo: 345W 15A Peso: 12,7 Kg Impedancia: 4,8,16 Ohms Consumo nominal: 335,52 kWh/mes Respuesta en frecuencia: 80 -13000 Hz Consumo en espera: no aplica... - Página 13 1.- Para hacer efectiva la garantía, presente ésta póliza y el producto, en donde fue adquirido o en Electrónica Steren S.A. de C.V. 2.- Electrónica Steren S.A de C.V. se compromete a reparar el producto en caso de estar defectuoso sin ningún cargo al consumidor. Los gastos de transportación serán cubiertos por el proveedor.
- Página 14 AMP-200 Audio amplifier Instruction Manual S6-B V0411a...
- Página 15 Thank You on purchasing your new Steren product. This manual includes all the feature operations and troubleshooting necessary to install and operate your new Steren´s Audio amplifier. Please review this manual thoroughly to ensure proper installation and operation of this product.
- Página 16 IMPORTANT • Verify line voltage before use Connecting the amplifier to a line voltage other than that for which it is intended can create a safety and fire hazard, and may damage the amplifier. If you have any questions about the voltage requirements for your specific model, or about the line voltage in your area, contact your selling dealer before plugging the unit into a wall outlet.
- Página 17 • Installation - To ensure proper operation and to avoid the potential for safety hazards, place the unit on a firm and level surface. When placing the unit on a shelf, be certain that the shelf and any mounting hardware can support the amplifier’s weight. - Make certain that the proper space is provided both above and below the unit for ventilation.
- Página 18 HIGHTLIGHTS Your new 150W RMS audio amplifier (200W maximum) counts with independent controls for: 4 XLR type microphone inputs, 1 type RCA auxiliary input, bass and treble controls, main volume control, VU-meter. 4 to 16ohm output impedance. Line output. CONTROLS FRONT VIEW REAR VIEW...
- Página 19 1.- Input level control: Allow one to control the volume level from the audio sources connected to Input 1, Input 2, Input 3, Input 4 and Auxiliary input, individually. 2.- Bass control: This control enhances or attenuates the low frequency reproduction. 3.- Treble control: This control enhances or attenuates the high frequency reproduction.
- Página 20 10.- Priority terminal: When short-circuiting these terminals (i.e. by means of using an electrical switch) the audio signals coming from Aux In, are attenuated while the signals coming from IN2, IN3 and IN4 are gaining priority. 11.-Tel. Paging inputs: Lets you connect an auxiliary signal (600Ω) as a commuter. Ask to a technician for more information.
- Página 21 13.-Output terminals: Use this terminals to connect the speakers.
- Página 22 14.- Ground: Allow one to ground the amplifier. Ask to a technician for more information. 15.- Line / Mic / Phantom switch: Switch between the line input, microphone or phantom power audio signal. If you use the phantom power option, you must use condenser type microphones. 16.- Terminals for balanced microphones.
- Página 23 18.- Auxiliary inputs: Allow one to plug audio devices with RCA jacks such as radio tuner, tape deck, CD players, etc. 19.- Main in terminal: After removing the bridging-strip between the Pre-Out and the Main-In terminals you can include an external signal processor. Provides a proper solution whenever shaping or improving the audio signal when is necessary (adjusting delay times, equalizing, eliminating noises, etc.) The input is non-balanced and is controlled by the main volume control and bass and treble knobs.
- Página 24 CONECTION...
- Página 25 RACK INSTALLATION EXAMPLE REAR VIEW FRONT VIEW SPECIFICATIONS Power input: 115V~ 60Hz 24V - - - THD: < 3% Power output: 150 W/95W Dimensions: 18.1” x 13.3” x 6” Power consumption: 345W 15A Weight: 28 Lb Impedance: 4, 8, 16 Ohms Nominal consumption: 335,52 kWh/month Frequency response: 80 -13000 Hz Stand-by power consumption: not applicable...
- Página 26 Part number: AMP-200 Brand: Steren WARRANTY This Steren product is warranted under normal usage against defects in workmanship and materials to the original purchaser for one year from the date of purchase. CONDITIONS 1.- This warranty card with all the required information, invoice, product box or package, and product, must be presented when warranty service is required.
- Página 27 Este instructivo puede mejorar con tu ayuda, llámanos a: Help us to improve this instruction manual, call us to: 01800 500 9000 Centro de Servicio a Clientes Customer Service Center...