Tabla de contenido
Publicidad
Enlaces rápidos
Publicidad
Tabla de contenido

Manuales relacionados para Phanteks Evolv MATX


Resumen de contenidos para Phanteks Evolv MATX
- Página 1 USER’S MANUAL M A T X DESIGNED IN THE NETHERLANDS...
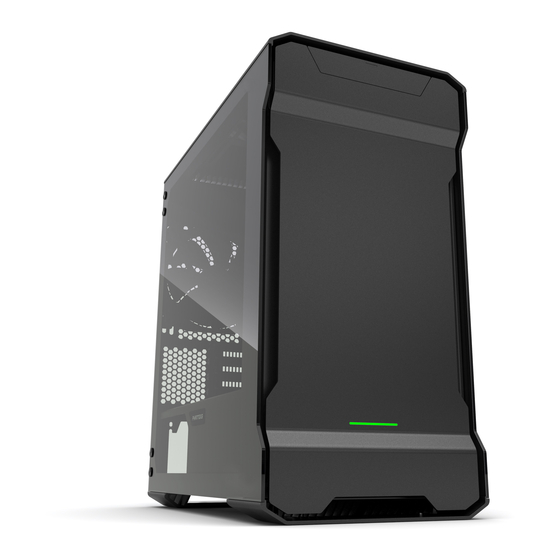
- Página 3 Phanteks believes that meaningful designs are created through the fusion of form and function. The EVOLV MATX is the successor of the very first Evolv case and combines 3mm anodized aluminum with dual tempered glass side panels. System builders and watercooling enthusiasts can now present their build with a premium touch.
-
Página 4: Tabla De Contenido
TABLE OF CONTENTS SPECIFICATIONS ..........................................EXPLODED VIEW ..........................................ACCESSORIES & BRACKETS ......................................FRONT I/O ............................................. CONNECTIONS ........................................... PANELS REMOVAL ..........................................MOTHERBOARD INSTALLATION ....................................FILTERS REMOVAL ..........................................HARD DRIVE INSTALLATION ......................................10. DROP-N-LOCK SSD BRACKET ......................................11. POWER SUPPLY INSTALLATION ....................................12. -
Página 5: Specifications
1. SPECIFICATIONS CASE SPECIFICATIONS CLEARANCE Dimension 230 mm x 453 mm x 400 mm (W x H x D) Graphic card 319 mm (12.5in) CPU cooler 9.1 x 17.8 x 15.7 in 192 mm (7.5 in) Form Factor Micro Tower Cable Management 26 mm (1.0 in) Material(s) -
Página 6: Exploded View
2. EXPLODED VIEW 1. Chassis 2. Top Panel 3. SSD Bracket 4. Fans 5. Right Side Panel 6. Front Panel 7. HDD Tray 8. Hard Drive Cage 9. Front Mesh cover 10. Left Side Panel 11. Mid-plate 12. Rear Dust Filter 13. - Página 7 1. Châssis 1. Telaio 1. Chassi 2. Filtres de poussière inférieurs 2. Filtri antipolvere inferiori 2. Painel Superior 3. Support SSD 3. Staffa SSD 3. Suporte do SSD 4. PH-F140SP 4. PH-F140SP 4. PH-F140SP 5. Panneau latéral droit 5. Pannello laterale destro 5.
-
Página 8: Accessories & Brackets
3. ACCESSORIES & BRACKETS SSD Bracket (2x) ITEM DESCRIPTION Support SSD (2x) Screw M3 x 5mm Motherboard/SSD SSD-Halterung (2x) Staffa SSD (2x) Motherboard Suporte do SSD (2x) Soporte de unidad de estado solido (2x) SSD beugel (2x) Thumb Screws 9*20mm HDD Bracket, Side Panel Pump Bracket KB4.8*10... -
Página 9: Front I/O
4. FRONT I/O 1. USB 3.0 1. USB 3.0 1. USB 3.0 2. Microphone 2. Microphone 2. Micrófono 3. Headphone 3. Casque 3. Cascos 4. LED Switch 4. Interrupteur LED 4. Interruptor LED 5. Power Button 5. Bouton d’alimentation 5. Botón de alimentación. 1. -
Página 10: Connections
T O P S U R G B L E D S T R I P S RGB LED STRIP Power SW H.D.D LED AUDIO RGB connector (expansion) 12V SATA input USB 3.0 Connects Phanteks’ mulicolor LED strip for interior lighting. -
Página 11: Panels Removal
6. PANELS REMOVAL Pull from the front and fully swing the panel out. Tirez depuis l’avant et faites tourner le panneau complètement pour le sortir. Von vorne ziehen und die Blende vollständig ausschwenken. Tirare la parte frontale e far scivolare fuori completamente il pannello. Puxe pela frente e retire o painel. - Página 12 6. PANELS REMOVAL Remove / Retirer / Entfernen / Remover / Quitar / Rimuovere / Verwijderen Pull up to remove the top panel. Tirez vers le haut pour enlever le panneau supérieur. Deckblende zum Entfernen nach oben ziehen. Sollevare per rimuovere il pannello superiore. Puxe para cima para remover o painel superior.
-
Página 13: Motherboard Installation
7. MOTHERBOARD INSTALLATION Standoff screws are pre-installed. Les vis du support sont préinstallées. Abstandhalterschrauben sind vorinstalliert. Le viti dei distanziatori sono installate precedentemente. Os parafusos separadores estão pré-instalados. Los tornillos separadores vienen preinstalados. Afstandschroeven zijn vooraf geïnstalleerd... -
Página 14: Filters Removal
8. FILTERS REMOVAL To clean the dust filters, run slow moving water through the filters. Dry filters before reinstalling. Pour nettoyer les filtres à poussière, faites couler de l’ e au sur les filtres. Séchez les filtres avant de réinstaller. Reinigen Sie die Staubfilter, indem Sie sie unter langsam fließendem Wasser abspülen. -
Página 15: Hard Drive Installation
9. HARD DRIVE INSTALLATION 3.5” INSTALLATION 2.5” INSTALLATION Place hard drive into tray and push in the arms to lock. Placez le disque dur dans le logement et poussez les bras pour le verrouiller. Align the SSD onto the mounting holes and screw in. Bringen Sie die Festplatten im Fach an und drücken die Arme zum Verriegeln hinein. -
Página 16: Drop-N-Lock Ssd Bracket
10. DROP-N-LOCK SSD BRACKET SSD INSTALLATION Slide in the SSD and screw in from the side to lock in place. Faites coulisser le disque SSD et vissez-le depuis le côté pour le verrouiller dans son emplacement. Schieben Sie die SSD ein und fixieren Sie diese seitlich mit Schrauben. Far scorre l’unità... -
Página 17: Power Supply Installation
11. POWER SUPPLY INSTALLATION REAR VIEW (4x) Use the provided screws to secure the PSU in place. Utilisez les vis fournies pour fixer le bloc d’alimentation en place. Befestigen Sie das Netzteil mit den mitgelieferten Schrauben. Utilizzare le viti fornite per fissare la PSU in sito. Use os parafusos para fixar a Unidade de Proteção e de Comutação. -
Página 18: Fans Compatibility
12. FAN COMPATIBILITY FAN COMPATIBILITY TABLE 140mm 120mm Front Rear... -
Página 19: Watercooling Installation
13. WATERCOOLING INSTALLATION WATERCOOLING RADIATOR COMPATIBILITY 120mm, 140mm 240mm *Radiator Bracket required 140mm 120mm 120mm, 140mm 240mm 280mm, 360mm *Midplate bracket needs to be removed... - Página 20 13. WATERCOOLING INSTALLATION 120 MM FORM FACTOR RADIATORS *Caution: Supported Radiator size and thickness varies depending on your setup. Radiator Size Front Rear *Avertissement : Les tailles de radiateur et les épaisseurs supportées varient en fonction de votre Taille de radiateur Avant Arrière Dessus...
-
Página 21: Hard Drive Cage Removal
14. HARD DRIVE CAGE HDD BRACKET REMOVAL To remove, unscrew the 4x screws on the midplate and the 4x screws on the bottom of the case. Para remover, solte os 4x parafusos na placa do meio e os 4x parafusos na parte inferior do gabinete. Zur Abnahme lösen Sie die 4 Schrauben an der mittleren Platte und die 4 Schrauben an der Unterseite des Gehäuses. -
Página 22: Pump Bracket Installation
El soporte de bomba con montaje universal le permite instalar varias bombas. Pompbeugel met universele schroefgaten geeft ondersteuning voor meerdere type pompen. Phanteks’ pump bracket can also be 1) mounted on a 120mm fan mount location or 2) onto a 120mm fan. This can be very useful for positioning pump/reservoir combo solutions. -
Página 23: Upgrade & Expand
16. UPGRADE & EXPAND The RGB controller in the Evolv MATX supports up to 5 meters of LED strips. This allows you to expand your LED lighting throughout the entire case as well as outside the case. We provide the following LED products:... - Página 24 PH-CB-RGB4P -Up to 6x fan connection -RGB Synchronization to M/B -PWM functionality -Easy plug and play -Cable management -Long cable length -Sync Phanteks cases, LED strips, and motherboard’s software. CABLE EXTENSION SET PH-CBCMBO PHANTEKS PH-F140MP - Available in multiple colors...
-
Página 25: Support And Services
17. SERVICES AND SUPPORT As a Phanteks customer, you are priority number one. We have a dedicated team of employees across the globe working hard every day to make sure we deliver the superior experience you deserve. We are here for you. - Página 26 DESIGNED IN THE NETHERLANDS...