Tabla de contenido
Publicidad
Idiomas disponibles
Idiomas disponibles
Enlaces rápidos
Publicidad
Tabla de contenido

Manuales relacionados para Carrier 51KPD09N7S


Resumen de contenidos para Carrier 51KPD09N7S
- Página 1 MANUAL DE INSTALACIÓN MANUEL D'INSTALLATION MANUALE DI INSTALLAZIONE For German/Dutch/Poland/Denmark/Estonia/Lithuania/Latvia/Norway/ Sweden languages, please visit the website: www.beijerref-carrier.com...
- Página 4 ead this manual before using the product! his appliance can be used by children aged from 8 years and above and persons with reduced physical, sensory or mental capabilities or lack of experience and knowledge if they have been given supervision or instruction concerning use of the appliance in a safe way and understand the hazards involved.
- Página 5 CAUTION In case they fall against the air inlet. It can cause fire or water leakage. Failure to observe this may result in the batteries being swallowed or other accidents. This may result in electric shock. Specialist MAINTENANCE is required to do deep-clean, lubricate and function check of all critical components. Contact a suitable service provider.
- Página 7 ON/OFF Button TIMER Button SWING Button SLEEP Button FOLLOW ME Lamp* FAN Button LED Display ION Button* POWER MANAGEMENT Lamp + / - Button MODE Button POWER Lamp NOTE...
- Página 10 CAUTION The unit should be placed within reach of a properly rated grounded socket. Power plug must be securely inserted into the socket outlet. Do not use extension cord , adapter or share the same power outlet with other appliance. Do not trap the power cord in any way.
- Página 14 The following may occur during normal operation, and may not indicate malfunction. Case Explanation / Solution LED Display Description Action E1/E2/E3/E4...
- Página 18 517 14...
-
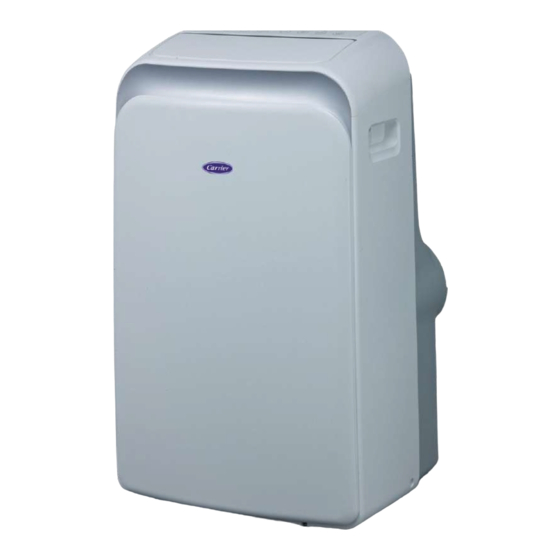
Página 19: Nombres De Los Componentes
2.1 NOMBRES DE LOS COMPONENTES (11) (12) (13) (14) (10) (15) 2.2 ACCESORIOS... -
Página 20: Panel De Control
2.3 PANEL DE CONTROL (10) (11) [ ] Dependiendo del modelo NOTA... -
Página 23: Condiciones De Funcionamiento
4.1 CONDICIONES DE FUNCIONAMIENTO Modo Condiciones de funcionamiento Modo DRY... -
Página 24: Funcionamiento
4.2 FUNCIONAMIENTO COOL / DRY / HEAT / FAN / AUTO 1) Pulse MODE y seleccione 2) Pulse +/- en la unidad o pulse TEMP en el mando a distancia para seleccionar la temperatura. 3) Pulse FAN en la unidad o en el mando a distancia para seleccionar la velocidad del ventilador. -
Página 25: Retraso Del Compresor (Compressor Delay)
FOLLOW ME de nuevo. de desconectar el modo SLEEP. metabolismo del cuerpo. Retraso del compresor (Compressor Delay) En el arranque hay un retardo de 3 a 4 minutos para proteger el compresor. el ventilador. Este retardo solo dura unos minutos. la unidad exterior. -
Página 26: Limpieza General
Limpieza general Limpieza del filtro de aire Retire el filtro superior Retire el filtro inferior - Abra la rejilla - Desenrosque la rejilla - Saque el filtro. - Saque el filtro. Limpie el filtro de aire Puede utilizar una aspiradora o agua pura para limpiar el filtro de aire. Si el polvo acumulado es demasiado espeso, utilice un cepillo urarse NOTA: del almacenamiento... - Página 27 Caso Pantalla LED...
- Página 31 517 14...
- Página 32 (11) (12) (13) (14) (15) (10) 2.2 ACCESSOIRES...
- Página 33 (10) (11) REMARQUE entes...
-
Página 36: Conditions De Fonctionnement
4.1 CONDITIONS DE FONCTIONNEMENT Mode Conditions de fonctionnement Mode Cooling 17~35 Mode Dry 13~35 Mode Heating 5~30... -
Página 37: Fonction Timer
4.2 FONCTIONNEMENT Modes de fonctionnement de base : COOL/DRY/HEAT/FAN/AUTO Mode COOL 1) Appuyez sur MODE 2) Appuyez sur +/- TEMP 3) Appuyez sur FAN ventilateur. Mode DRY 2) Appuyez sur MODE Fonctionnement en mode DRY Mode HEAT du mode DRY). 2) Appuyez sur MODE 3) Appuyez sur +/- 4) Appuyez sur FAN... -
Página 38: Fonction Follow Me
Fonction FOLLOW ME* Lorsque la fonction Follow FOLLOW ME. Fonction IONIZER* FONCTION SLEEP de 1 7 heures avant la sortie du mode SLEEP. Compressor Delay Cold Draft Prevention Auto Defrost pendant quelques minutes avant que le chauffage ne reprenne. Auto Restart* Fonction de protection lorsque le bac d'eau est plein LED affiche "P1"... - Página 39 - Ouvrez la grille. - Sortez le filtre. - Sortez le filtre. portante, REMARQUE : Entreposage Dans des climats humides, faites fonctionner l'appareil en mode Fan only tant que l'appareil n'est pas sec. retirez les piles. 5. Reconnectez la source d'alimentation. autour des supports et connectez- l'appareil.
-
Página 40: Codes D'erreur
Explication/Solution 6.2 CODES D'ERREUR Description Action... - Página 42 Corretta eliminazione di questo prodotto...
- Página 44 517 14...
-
Página 45: Nomi Dei Componenti
2.1 NOMI DEI COMPONENTI (11) (12) (13) (14) (10) (15) 2.2 ACCESSORI... -
Página 46: Pannello Di Controllo
2.3 PANNELLO DI CONTROLLO (10) (11) [ ] A seconda del modello NOTA Tutte le immagini del manuale hanno scopo puramente illustrativo. Potrebbero non rappresentare fedelmente il climatizzatore acquistato... -
Página 49: Condizioni Operative
3.2 COLLEGAMENTO ALL'ALIMENTAZIONE PRINCIPALE 4.1 CONDIZIONI OPERATIVE Condizioni operative raffreddamento... -
Página 50: Funzionamento Del Timer
4.2 FUNZIONAMENTO RAFFREDDAMENTO / ASCIUTTO / RISCALDAMENTO / VENTOLA / AUTOMATICA 1) Premere il pulsante MODE e selezionare 2) Premere il pulsante +/- TEMP sul telecomando per impostare la temperatura desiderata. 3) Premere il pulsante FAN della ventola. 1) Collegare il tubo di scarico come indicato in figura. 2) Premere il pulsante MODE e selezionare ;... -
Página 51: Funzione Follow Me
Funzione FOLLOW ME* FOLLOW ME Funzione IONIZER* Gli ioni negativi vengono aggiunti all'aria per simulare gli effetti delle foreste e delle cascate sugli umani. FUNZIONE SLEEP per la prima Questa operazione consente di risparmiare energia e migliora il comfort durante le ore notturne mediante la sincronizzazione con il metabolismo corporeo. -
Página 52: Pulizia Generale
Pulizia generale Usare un piccolo panno umido durante la pulizia della griglia, dell'involucro esterno e del telecomando. Pulizia del filtro dell'aria Per mantenere il livello di prestazioni ottimale, controllare regolarmente i filtri dell'aria e pulirli se necessario. Rimozione del filtro superiore Rimozione del filtro inferiore - Tirare la griglia per aprirla - Svitare la griglia... - Página 53 6.1 GUIDE, CONSIGLI E PRECAUZIONI Caso Spiegazione / soluzione 6.2 CODICI DI GUASTO Display a LED Descrizione Azione...