Schlage FE575 Manual Del Usaurio
Ocultar thumbs
Ver también para FE575:
- Instrucciones de instalación (9 páginas) ,
- Guía de usuario (48 páginas) ,
- Instrucciones de instalación (8 páginas)
Publicidad
Enlaces rápidos
*23780026*
23780026
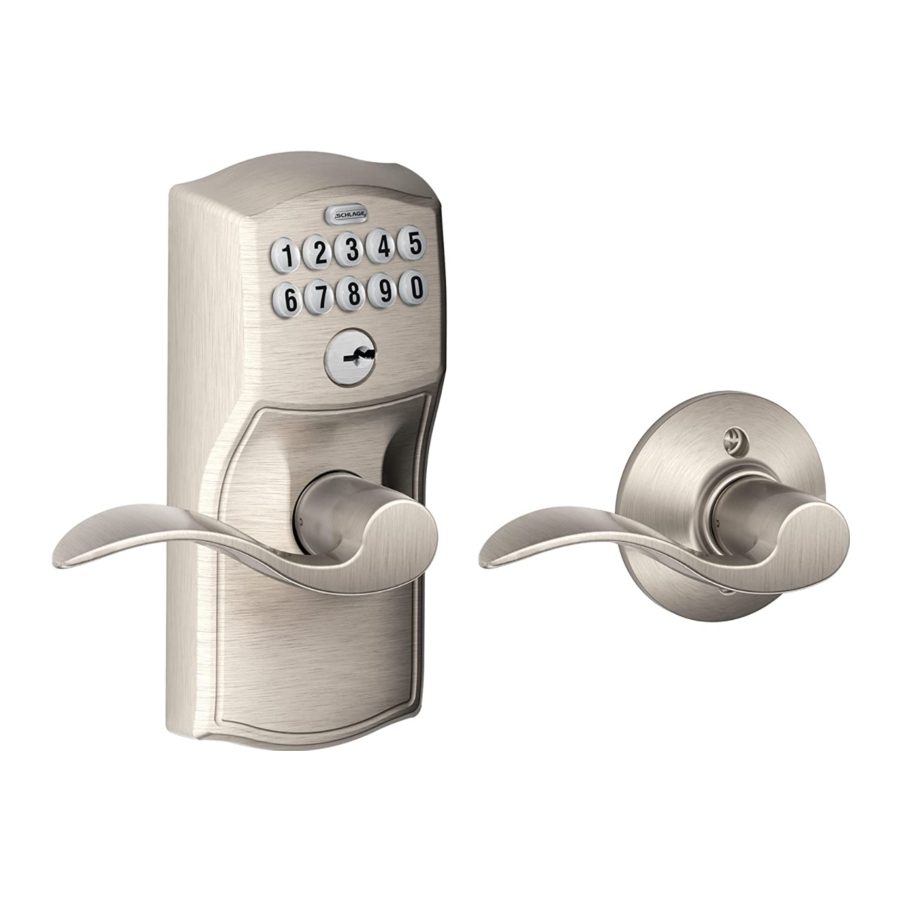
Model FE575
Tools Needed
Optional
• Phillips screwdriver
• Tape Measure
• Flathead
• Pencil
• Wood Block
• Hammer
Additional Parts
Pin Wrench
Optional Latch
Faceplate
Prepare for Installation
IMPORTANT NOTES
•
DO NOT use a power drill for installation!
•
Use a screwdriver to remove product from packaging.
•
Install and test lock with door open to avoid being locked out.
A
Check door dimensions.
See consumer.schlage.com/Service-Support for door
preparation instructions if dimensions are different.
2³⁄₄" (70 mm)
OR
2³⁄₈" (60 mm)
1" (25 mm)
Door Edge
Keypad Lock
Screwdriver
Key
2¹⁄₈" (53 mm)
Hole
Inside Lever
Keypad
Latch
B
Change faceplate, if necessary.
Choose the drawing that matches your door edge. If the hole has no
mortise, change to the circular faceplate.
Door Edge
Door Edge
Installation Instructions
Lever Screws (2)
Latch/Strike
Screws (4)
Strike
No change
necessary.
OR
Publicidad

Manuales relacionados para Schlage FE575


Resumen de contenidos para Schlage FE575
- Página 1 Use a screwdriver to remove product from packaging. • Install and test lock with door open to avoid being locked out. Check door dimensions. No change See consumer.schlage.com/Service-Support for door necessary. preparation instructions if dimensions are different. 2³⁄₄” (70 mm) Door Edge 2³⁄₈”...
- Página 2 Install Lock Install battery. Install latch. Make sure latch angle faces door jamb. Jamb Angle Angle Wood Block (Not Included) Actual Size Install keypad. Install strike onto door jamb. Actual Size Bar should slide smoothly through hole in latch. If not, check door dimensions.
- Página 3 Install lever. If needed, switch levers. If your lever looks like this, Correct then no change is necessary. If your lever does not look like this, switch the levers by following the steps below. Incorrect Insert the pin wrench into the hole in the lever.
-
Página 4: Program Lock
Lifetime Limited Mechanical and Finish Guaranteed Fit Program: Schlage products negligence), patent infringement, or otherwise, terms: Schlage does not authorize any person to Warranty and 3-Year Limited Electronics even if advised of the possibility of such damages. create for it any obligation or liability in connection... -
Página 5: Cerradura Con Teclado Verrou À Clavier Numérique
Si les dimensions sont différentes, visiter le site consumer.schlage. Borde de la puerta com/Service-Support pour plus d’information à propos des Bord de la porte instructions de préparation. - Página 6 Instale la traba Installez la serrure Instale la batería. Installez la pile. Instalar el pestillo. Installez le verrou. Asegúrese de que el ángulo del pestillo mire hacia la jamba de la puerta. Assurez-vous que l’angle du loquet fait face au montant de la porte. Jamba Ángulo Ángulo...
- Página 7 Instalar la palanca interna. Si es necesario, intercambie las palancas. Installez le levier intérieur. Au besoin, échangez les leviers. Si su palanca se ve como esta, no Correcto es necesario realizar ningún Correct cambio. Si su palanca no se ve como esta, intercambie las palancas siguiendo los pasos que se indican a continuación.
- Página 8 Producto. La maxima responsabilidad de Schlage, al amparo de esta garantía, se limita al precio original de compra del Producto. El Usuario Original no podrá interponer demanda alguna contra Schlage por supuesta infracción de esta garantía más de un (1) año después de producirse la causa de la demanda.