
Manuales relacionados para Gram GX Serie


Resumen de contenidos para Gram GX Serie
- Página 1 SERIES / SERIE / SÉRIE 6000 / 15K / 30K OPERATION MANUAL MANUAL DE UTILIZACION MANUEL D´UTILISATION...
-
Página 2: Tabla De Contenido
INDEX English Technical characteristics Front keypad backside display Messages Installation Turn-on / Turn-off the balance Reset to zero Tare function Stand-by function State of battery indicators Battery recharging Parameters setup Auto-zero range setting Filter setting Select weighing unit Limits setup Auto-turn-off Buzzer Resolution setup (d) - Página 3 ÍNDICE Español Características técnicas Teclado frontal Visor trasero Mensajes del display Instalación Conectar / desconectar la balanza Puesta a cero Función de tara Función ahorro de energía Indicadores del estado de la bateria Recarga de la batería Ajuste de parámetros Ajuste del rango de auto-cero Cambio de filtro Cambio de unidad de pesada...
- Página 4 SOMMAIRE Français Caracteristiques techniques Clavier frontal Viseur arrière Messages du display Instalation Connecter et déconnecter la balance Mise à zéro Fonction de Tare Fonction economie d´energie Idicateurs de l’etat de la batterie Charger la batterie Ajustement des parametres Ajustement du rang de zéro automatique Changement du filtre Changement d´unité...
-
Página 5: Technical Characteristics
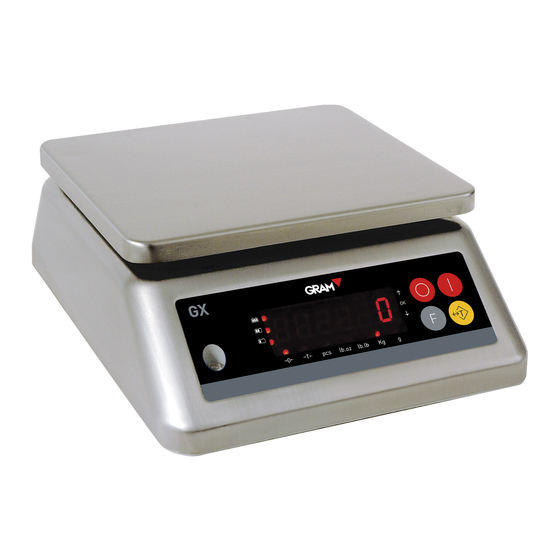
ENGLISH TECHNICAL CHARACTERISTICS Model GX-6000 GX-15K GX-30K Maximal capacity 15kg 30kg Minimal capacity Readability 0.5g Tare range 100% maximum capacity Precision Operating temperature -5~+35ºC Storage temperature -25~+50ºC 6V / 4Ah rechargeable battery and Power AC/Adaptor Dimensions 232 x 284 x 95 mm Pan size 225 x 186 mm Net weight... -
Página 6: Front Keypad
FRONT KEYPAD To turn on the balance and reset to zero the reading´s display. Tare function, to subtract the weight of a container. Access to calibration function. To turn off the balance. To setup parameters and data introduction. BACKSIDE DISPLAY... -
Página 7: Messages
MESSAGES dc x.xx Shows the current battery voltage “ x.xx V” - - - - - - It means that the weight placed on the weighing pan exceeds the maximum capacity, the balance will beep, you must immediately remove the weight from the weighing pan. -AdC- Means that the digital analogic converter (A/D) values, have been exceeded, the balance will beep. -
Página 8: Turn-On / Turn-Off The Balance
TURN ON / TURN OFF THE BALANCE Turn on Press the key , the balance will beep. The display will show the version number, the voltage level of battery and it will perform a self-checking 9, 8, 7, ,1,0, finally the display will show the value zero “0”, now the balance is ready for weighing. -
Página 9: Stand-By Function
container, the display will show its net weight. When the container is removed, the display will show a negative value and Tare symbol will disappear. STAND-BY FUNCTION After 40 seconds of no use, the balance will go into power saving mode (stand-by) and the display will show “0”. -
Página 10: Filter Setting
to choose the desired range: 0.5d,1d,1.5d,2d,2.5d,3d,3.5d,4d,4.5d,5d. (“d” is the division value, when n=3000). Press the key to confirm. Filter setting Press the key for 3 seconds until the message “range” is displayed, press again the key until seeing the message “FILtX” (FILt1 for a stable environment, FILt2 for an unstable environment and FILt3 for very unstable environment). -
Página 11: Auto-Turn-Off
Auto Turn-off (AOFF) Press the key for 3 seconds until the display shows the message “range”, press again the key until the display shows “Aoff”. Press the key to enter and press to select the desired option. To confirm and exit press the key N= NO (Auto turn-off disable) Y= YES (Auto turn-off able) Buzzer... -
Página 12: On Range Setup (On-Ra)
On range setup (on-ra) Press the key for 3 seconds until the display shows the message “range”, press again the key until you see “on-ra”. Press the access to the function and to select the desired option between 20% of F.E and 100% of F.E. -
Página 13: Limits Indicators
balance will return to normal weighing mode. LIMITS INDICATORS • When the weight exceeds the high limit, the indicator “over” will light on. • When the weight is between the low and high limits, the indicator “accept” will light on. •... -
Página 14: Maintenance
Adjustment 1. Move the switch in the position closest to keyboard. 2. Press the key for 3 seconds, the display will show “CAL 0.000” 3. Press the key , the zero adjustment will be completed. 4. The display will show the weight calibration. 5. -
Página 15: Guarantee
This balance is guaranteed for one year from the delivery date. The guarantee covers any fabrication defect of the material. During this period, GRAM PRECISION covers the manpower and the spare parts necessary to repair the scale. This guarantee does not cover the failures caused by an inappropriate use or overload. -
Página 16: Características Técnicas
ESPAÑOL CARACTERISTICAS TECNICAS Model GX-6000 GX-15K GX-30K Capacidad máxima 15kg 30kg Capacidad mínima Resolución / División 0.5g del display Rango de Tara 100% Capacidad máxima. Precisión Temperatura de trabajo -5~+35ºC Temperatura de -25~+50ºC almacenaje 6V / 4Ah batería recargable y Alimentación Adaptador AC Dimensiones... -
Página 17: Teclado Frontal
TECLADO FRONTAL Para conectar la balanza y poner a cero el display. Función de tara, para sustraer el peso de un recipiente. Acceso a la función de calibración. To turn off the balance. To setup parameters and data introduction. VISOR TRASERO... -
Página 18: Mensajes Del Display
MENSAJES DEL DISPLAY dc x.xx Indica el voltaje actual de la batería “ x.xx V” - - - - - - Significa que el peso colocado sobre el plato, ha sobrepasado la capacidad máxima, la balanza emitirá un sonido acústico y deberá... -
Página 19: Conectar / Desconectar La Balanza
CONECTAR / DESCONECTAR LA BALANZA Conectar Pulsar la tecla la balanza emitirá una señal acústica. En el display se visualizará el número de versión, el nivel de voltaje de la batería y realizará un auto chequeo 9, 8, 7, …..,1,0, una vez finalizado el display mostrará el valor cero, ahora la balanza está... -
Página 20: Función De Tara
FUNCION DE TARA Colocar un recipiente sobre el plato de la balanza y pulsar la tecla , el display se pondrá a cero y el símbolo Tara se activará en el display. Poner el producto dentro del recipiente y el display le indicará el peso neto del mismo. -
Página 21: Ajuste Del Rango De Auto-Cero
Ajuste del rango de auto-cero durante 3 segundos hasta que el display indique “range”, pulsar Pulsar la tecla la tecla hasta visualizar “2Ero”. Pulsar la tecla , el display mostrará el rango de cero actual, pulsar la tecla para seleccionar el rango deseado :0.5d,1d,1.5d,2d,2.5d,3d,3.5d,4d,4.5d,5d.(“d”... -
Página 22: Auto-Apagado
inferior- está iluminado. Pulsar la tecla para cambiar el primer dígito y la tecla para situarse y cambiar los siguientes dígitos. Pulsar la tecla para confirmar. Ahora el indicador “over” –límite superior- está iluminado. Pulsar la tecla para cambiar el primer dígito y la tecla para situarse y cambiar los siguientes dígitos. -
Página 23: Cambio De Resolución (D)
Cambio de resolucion (d) durante 3 segundos hasta que el display indique “range”, Pulsar la tecla pulsar nuevamente la tecla hasta visualizar “d” Pulsar la tecla para acceder a las tres opciones disponibles y pulsar para seleccionar la opción deseada y para confirmar y salir. -
Página 24: Indicadores De Límites
Realizacion del muestreo: Pulsar la tecla aparecerá “count” , colocar la muestra y pulsar la tecla para empezar a introducir el valor de la muestra. Pulsar la tecla para incrementar el valor del digito de la muestra y con la tecla para desplazarnos hacia la derecha, cuando parpadee el ultimo digito, si lo aceptamos con... -
Página 25: Calibración
CALIBRACION Selección de resolucion 1. Con el switch (situado parte inferior, protegida con una tapa y dos tornillos) hacia el teclado. 2. Pulsar la tecla para encender el equipo. 3. Mantener pulsada la tecla hasta que aparezca “rAngE” 4. Ir pulsando la tecla hasta que aparezca “d”... -
Página 26: Consejos De Mantenimiento
5. Pulsar la tecla y la calibración se realizará. 6. Volver a colocar el strap hacia la parte posterior del equipo CONSEJOS DE MANTENIMIENTO 1. Si la balanza no se va a utilizar durante un largo periodo de tiempo, deberá cargar la batería al menos cada 3 meses. -
Página 27: Garantía
Esta balanza está garantizada contra todo defecto de fabricación y de material, por un periodo de 1 año a partir de la fecha de entrega. Durante este periodo, GRAM PRECISION, se hará cargo de la reparación de la balanza. Esta garantía no incluye los daños ocasionados por uso indebido o sobrecargas. -
Página 28: Caracteristiques Techniques
FRANÇAIS CARACTERISTIQUES TECHNIQUES Modele GX-6000 GX-15K GX-30K Capacité maximale 15kg 30kg Capacité maximale Résolution / Division du 0.5g display Rang de tare 100% Capacité maximale Precisión Température de travail -5~+35ºC Température de -25~+50ºC stockage Alimentation 6V / 4Ah batterie rechargeable Dimensions 232 x 284 x 95 mm Dimensions du plateau... -
Página 29: Clavier Frontal
CLAVIER FRONTAL Pour connecter la balance et remettre le display à zéro. Fonction de tare, pour soustraire le poids d’un récipient. Accès à la fonction de calibrage. Pour déconnecter la balance. Pour ajuster les paramètres d’entrées de données. VISEUR ARRIÈRE... -
Página 30: Messages Du Display
MESSAGES DU DISPLAY dc x.xx Indique le voltage actuel de la batterie “ x.xx V”” - - - - - - Signifie que le poids placé sur le plateau a dépassé la capacité maximale, la balance émettra un signal sonore, enlever immédiatement le poids du plateau. -
Página 31: Connecter Et Déconnecter La Balance
CONNECTER / DECONNECTER LA BALANCE Connecter Appuyer sur la touche la balance émettra un signal sonore. Sur le display s’affichera le numéro de la version, le niveau du voltage de la batterie et réalisera une auto vérification 9, 8, 7, …..,1,0, une fois terminée le display affichera la valeur zéro. -
Página 32: Fonction De Tare
FONCTION DE TARE Placer un récipient sur le plateau de la balance et appuyer sur la touche , celui ci se remettra à zéro et le symbole Tare s’activera sur le display. Poser le produit à l’intérieur du récipient et le display indiquera son poids net. -
Página 33: Ajustement Du Rang De Zéro Automatique
Ajustement du rang de zéro automatique pendant 3 secondes jusqu’à ce que le dispaly indique “range”, appuyer Appuyer à nouveau sur jusqu’à visualiser “2Ero”. Appuyer sur , le display affichera le rang de zéro actuel, appuyer sur choisir le rang:0.5d,1d,1.5d,2d,2.5d,3d,3.5d ,4d,4.5d,5d. -
Página 34: Arrêt Automatique
pour modifier les autres chiffres. Appuyer sur pour confirmer. L ’indicateur “over” –limite supérieure- est désormais illuminé. Appuyer sur pour changer le premier chiffre et sur pour modifier les chiffres suivants. Appuyer sur pour confirmer. Arrêt automatique. (AOFF) pendant 3 secondes jusqu’à ce que le display indique “range”, Appuyer sur appuyer de nouveau sur jusqu’à... -
Página 35: Rang De Démarrage (On-Ra)
“range”, appuyer de nouveau sur la touche jusqu’à voir “d” Appuyer sur pour accéder aux trois options disponibles et appuyer sur pour séleccionner l’option voulue et pour confirmer et sortir. Rang de démarrage. (on-ra) Appuyer sur pendant 3 secondes jusqu’à ce que le display indique “range”, appuyer de nouveau jusqu’à... -
Página 36: Indicateurs De Limites
Realisation de l’échantillon apparaîtera “count” , puis poser l’échantillon et appuyer Appuyer sur pour commencer à inscrire la valeur de l’échantillon. Appuyer sur la touche pour augmenter la valeur de l’echantillon et avec la touche se déplacer vers la droite, orsque clignote le dernier chiffre, l’accepter avec la touche L’échantillon est terminé... -
Página 37: Calibrage
CALIBRAGE Selection de resolution 1. Avec le switch (situé dans la partie inférieure, protégé par un couvercle et deux vis) vers le clavier. 2. Appuyer sur la touche pour allumer la balance. 3. Maintenir appuyée la touche jusqu’à ce qu’apparaisse “rAngE” 4. -
Página 38: Conseils Pour L´entretien
5. Appuyer sur et le calibrage se réalisera. 6. Revenir au strap vers la partie supérieure de l’équipement. CONSEILS POUR L´ENTRETIEN 1. Si la balance n’est pas utilisée pendant un long moment, il faut recharger la batterie au moins tous les trois mois. 2. -
Página 39: Garantie
Cette balance est garantie contre tout défaut de fabrication et de matériel, pour une durée d’un an, à compter de la date de livraison. Durant cette période, GRAM PRECISION, se chargera de la réparation de la balance. Cette garantie n’inclut pas les dommages ocasiones par un usage inadéquat ou des surcharges. - Página 40 00/15112016 Gram Presicion S.L. Travesía Industrial, 11 · 08907 Hospitalet de Llobregat · Barcelona (Spain) Tel. +34 902 208 000 · +34 93 300 33 32 Fax +34 93 300 66 98 gram.es comercial www.gram-group.com...