Publicidad
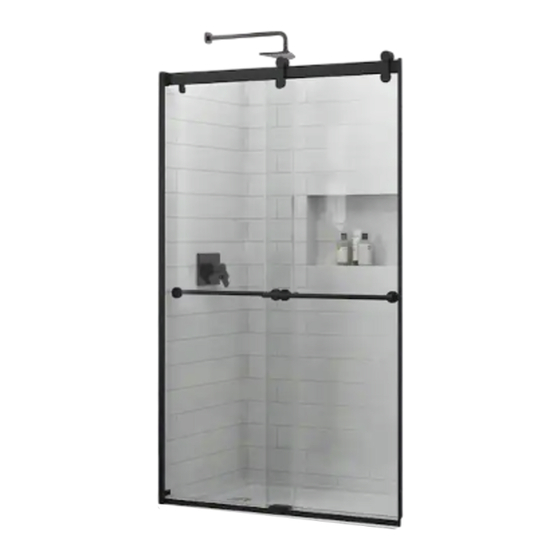
Frameless
Sliding
Traditional Shower and Bathtub Doors
Puertas para ducha y bañera corredizas sin marco tradicionales
Consult your local plumbing codes prior to installation.
Consulte los códigos de fontanería locales antes de la instalación.
IMPORTANT: Keep corner protectors on glass while installing or adjusting.
IMPORTANTE: Durante la instalación mantenga los protectores de esquinas del vidrio.
IMPORTANT: To complete an entire door
installation, you will need the following:
1. One carton containing (2) Glass Panels
2. One carton containing (1) Track Assembly Kit
3. One carton containing Door Handle(s)
INSTALLATION GUIDE
GUÍA DE INSTALACIÓN
Write purchased model number here.
Anote aquí el número del modelo adquirido.
IMPORTANTE: Para completar la instalación
entera de la puerta, necesitará lo siguiente:
1. Una caja que contiene (2) paneles de vidrio
2. Una caja que contiene (1) juego de montaje
de los rieles
3. Una caja con manijas para la puerta
1
DO NOT DISCARD CARTON!
See pg. 5 to identify
carton parts location!
NO ARROJE LA CAJA!
Vea la página 5 e identifique
la ubicacion de los
components en la caja
August 2016
Publicidad
Tabla de contenido

Manuales relacionados para Delta Frameless Sliding


Resumen de contenidos para Delta Frameless Sliding
- Página 1 DO NOT DISCARD CARTON! Frameless See pg. 5 to identify Sliding carton parts location! NO ARROJE LA CAJA! Vea la página 5 e identifique la ubicacion de los components en la caja Traditional Shower and Bathtub Doors Puertas para ducha y bañera corredizas sin marco tradicionales INSTALLATION GUIDE GUÍA DE INSTALACIÓN Consult your local plumbing codes prior to installation.
-
Página 2: Before You Start
This warranty gives you specific legal rights. You may also have other rights which vary from state/province to state/province. To activate your Delta Shower Door Product warranty, go to deltashowerdoors.com and click on the Support tab. - Página 3 HANDLE CARTON para una identificación de las partes. Para activar la garantía de su producto de puerta de ducha Delta, visite deltashowerdoors.com y haga clic en la pestaña Support (Soporte). CAJA DE MANIJAS...
-
Página 4: Door Assembly / Montaje De La Puerta
DOOR ASSEMBLY / MONTAJE DE LA PUERTA HARDWARE / HERRAJE I’M REVERSIBLE Flip Track for a Different Style SOY REVERSIBLE Voltee la guía para lograr un estilo diferente IMPORTANT: Keep corner protectors on glass while installing or adjusting. If missing, check foam in carton. IMPORTANTE: Durante la instalación mantenga los protectores de esquinas del vidrio. - Página 5 If enclosure is between 59 3/8"-60" then wall jambs can be reversed to remaining wall jamb. Coloque la jamba de pared (C) contra la pared, centrada en panels call Delta Customer Care to receive a replacement panel. gain better coverage. el listón inferior.
- Página 6 5/16" 1/8" Drill three 1/8" pilot holes into the wall through wall jamb 1) Remove wall jamb. 1) Reposition wall jamb (C). 2) Secure with screws (CC). 1) Attach a center bumper (EE) at center location. 2) Secure (C). 2) Drill three 5/16" holes into the wall through pilot holes 3) Attach a bumper (BB) at the top and bottom locations.
- Página 7 Bottom track / Riel inferior " " " A " A Patilla Double-check measurement before cutting. Using a miter Using a pencil or other marking tool (such as masking Place bottom track (D) on the ledge with leg facing out. 1) Remove bottom track (D).
- Página 8 IMPORTANT Top track / Riel superior DO NOT cut the top and bottom tracks the same length. Keep corner protectors on glass while installing " " or adjusting. If missing, check " B " B foam in carton. IMPORTANTE NO corte los rieles superior e inferior de la misma longitud.
- Página 9 Inside door / Inside door / Outside door / Puerta interior Puerta interior Puerta exterior End / Extremo End / Extremo To protect the glass from chips or scratches that could result 1) Install a screw (II) into smooth side of each hanger 1) Install a screw (II) into smooth side of each hanger Install the outside door with the uncoated or textured side from contact with screw (II), 1) install bushings (HH) into each...
- Página 10 NOTE: Center dividers come with one or two holes and Taladre un orificio piloto de 1/8" (0.3 cm) en el riel inferior a manufacturer's instructions. Las manijas de la puerta pivotada de Delta no están screws. través de la guía divisora central (E).
- Página 11 Next, install the la manija e instale la manija ensamblada a los casquillos trouble shooting guide in your instructions or call Delta second handle post and repeat the sealant steps. en los orificios pretaladrados de la puerta de la ducha.
- Página 12 TROUBLESHOOTING Symptom: Alignment Recommended Action 1. The top of the glass panel is tilted away Remove the glass panel from the top track and raise the roller on the bracket closest to the wall jamb. from the wall jamb. IMPORTANT: Once you have read the 2.
-
Página 13: Solución De Problemas
SOLUCIÓN DE PROBLEMAS Síntoma: Alineación Acción recomendada 1. La parte superior del panel de vidrio Retire el panel de vidrio del riel superior y suba el rodillo del soporte más próximo a la jamba de pared. está inclinada y separada de la jamba de pared.