Tabla de contenido
Publicidad
Enlaces rápidos
Publicidad
Tabla de contenido
Solución de problemas

Manuales relacionados para Baby Lock BL9


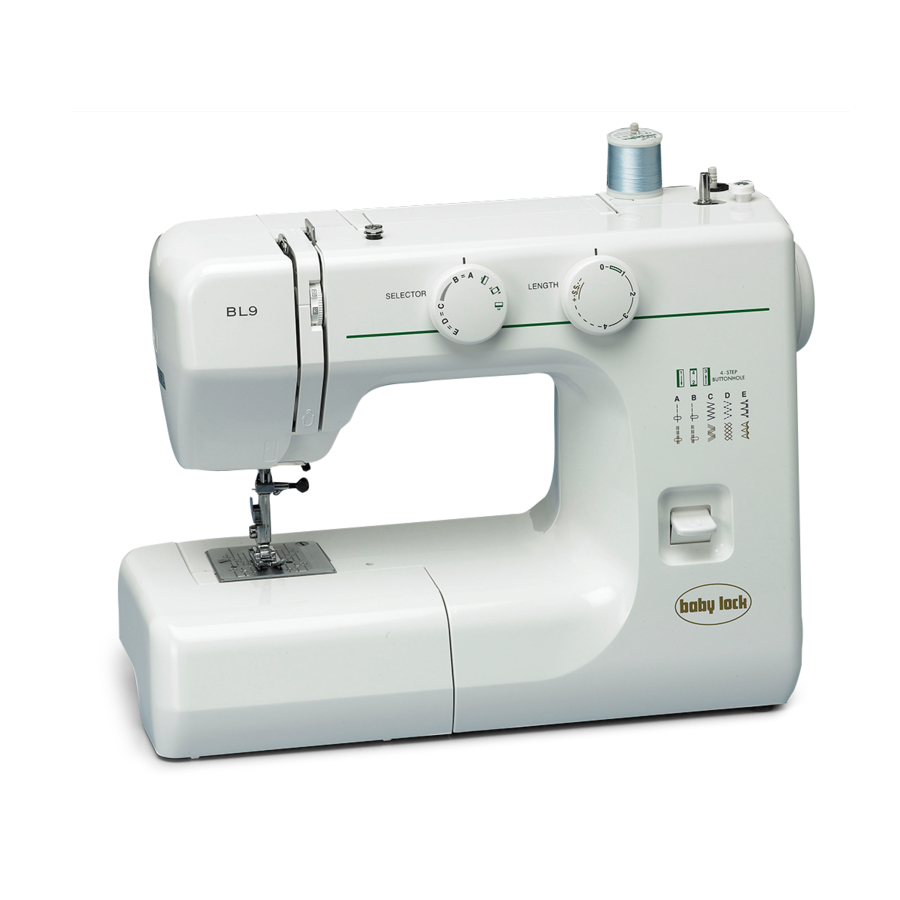
Resumen de contenidos para Baby Lock BL9
-
Página 2: Important Safety Instructions
IMPORTANT SAFETY INSTRUCTIONS This sewing machine is not a toy. Do not allow children to play with this machine. The machine is not intended for use by children or mentally infirm persons without proper supervision. This sewing machine is designed and manufactured for household use only. Read all instructions before using this sewing machine. -
Página 3: Instrucciones Importantes De Seguridad
INSTRUCCIONES IMPORTANTES DE SEGURIDAD Cuando se utiliza un aparato eléctrico es necesario tomar ciertas precauciones básicas de seguridad, como las siguientes: Lea todas las instrucciones antes de utilizar este aparato. PELIGRO — Para reducir el riesgo de choque eléctrico: 1. No deje nunca el aparato sin vigilancia mientras esté enchufado. Desenchufe siempre la máquina de la toma eléctrica inmediatamente después de utilizarla y antes de limpiarla. -
Página 4: Consignes Importantes De Securite
CONSIGNES IMPORTANTES DE SECURITE Pour utiliser un appareil électrique, il faut toujours respecter les consignes de sécurité fondamentales, notamment les consignes suivantes : Avant d’utiliser cet appareil, lisez toutes ces instructions. DANGER : Pour réduire les risques d’électrocution. 1. Il ne faut jamais laisser un appareil sans surveillance lorsqu’il est branché. Il faut toujours débrancher cette machine à... -
Página 5: Tabla De Contenido
TABLE OF CONTENTS SECTION 1. ESSENTIAL PARTS Name of Parts ..........................4 SECTION 2. GETTING READY TO SEW Standard Accessories ........................6 Accessories Storage Box ....................... 6 Operating Instructions ........................6 Connecting the Machine to the Power Supply ................8 Foot Control ............................ - Página 6 INDICE SECCIÓN 1. PIEZAS ESENCIALES Nombrees de las piezas ......................... 5 SECCIÓN 2. PREPARACIÓN PARA COSER Accesorios estándar ........................7 Caja de accesorios ......................... 7 Instrucciones para la operación ...................... 7 Conexión de la máquina a la toma de corriente ................9 Pedal de control ..........................
- Página 7 TABLE DES MATIÈRES SECTION 1. PIÈCES PRINCIPALES Noms des Pièces ..........................5 SECTION 2. SE PRÉPARER À COUDRE Accessoires standard ........................7 Rangement des accessoires ......................7 Consignes d’utilisation ........................7 Relier la machine au pouvoir ......................9 Contrôl de Vitesse de la Couture ....................9 Extension de plateau ........................
-
Página 8: Section 1. Essential Parts Name Of Parts
SECTION 1. ESSENTIAL PARTS Name of Parts q Reverse stitch button w Pattern selector dial e Stitch length dial r Bobbin winder stopper t Bobbin winder spindle y Spool pins u Bobbin winder thread guide i Thread guide o Thread take-up lever !0 Thread tension dial !1 Face plate !2 Needle plate... -
Página 9: Sección 1. Piezas Esenciales
SECCIÓN 1. PIEZAS ESENCIALES SECTION 1. PIÈCES PRINCIPALES Noms des Pièces Nombres de las piezas q Bouton de marche arrière w Sélecteur des motifs Botón de puntada reversa e Contrôle de la longueur du point Selector de puntada r Butée d’arrêt du dévidoir Selector de la longitud de puntada t Axe de dévidoir Tope del canillero... -
Página 10: Section 2. Getting Ready To Sew Standard Accessories
If the plug does not fit in the outlet, reverse the plug. If it still does not fit, contact a qualified electrician to install the proper outlet. Do not modify the plug in any way. “Foot Controller Model YC-482J YC-482J-EC or TJC-150 is used with Sewing Machine Model BL9.”... -
Página 11: Sección 2. Preparación Para Coser Accesorios Estándar
No “La pédale de contrôlle YC-482J, YC-482J-EC intente modificar la clavija de ninguna forma. ou TJC-150 s’utilise avec la machine modèle “Con esta maquina de coser Modelo BL9 debera BL9. usarse el pedal de control ModeloYC-482J, YC- 482J-EC o TJC-150.”... -
Página 12: Connecting The Machine To The Power Supply
• Connecting the Machine to the Power Supply Before connecting the power, make sure the voltage and frequency of your electrical power conform to the machine. Make sure the power switch is in the “ OFF ” position. (“ “). Insert the nonreversible plug into the machine socket and plug the machine into the electrical outlet. -
Página 13: Conexión De La Máquina A La Toma De Corriente
• Conexión de la máquina a la toma de • Relier la machine au pouvoir corriente Avant de brancher la machine soyez assuré que la prise électrique soit conforme au voltage et Antes de conectar la corriente, asegurarse de que fréquence. -
Página 14: Presser Foot Lifter
Presser Foot Lifter The presser foot lifter raises and lowers your presser foot. You can raise it about 0.6 cm (1/4˝) higher than the normal up position for easy removal of the presser foot or to help you to place heavy fabric under the foot. q Normal up position w Highest position To Attach and Remove the Presser Foot... -
Página 15: Palanca De Elevación Del Pie Prensatelas
Relevage et abaissement du pied-de-biche Palanca de elevación del pie prensatelas Le releveur de pied permet de relever et d’abaisser le La palanca de elevación del pie prensatelas sube y pied-de-biche. Vous pouvez le relever à environ 0.6 cm baja el pie prensatelas. Puede elevarlo unos 0,6 cm au-dessus de la position relevée normale pour pouvoir (1/4˝) por encima de la posición alzada normal para retirer facilement le pied-de-biche, ou pour vous aider à... -
Página 16: Changing Needle
Changing Needle CAUTION: Turn off the power switch when changing a needle. Raise the needle by turning the handwheel toward you and lower the presser foot. Loosen the needle clamp screw by turning it counter- clockwise. Remove the needle from the clamp. Insert the new needle into the clamp with the flat side away from you. -
Página 17: Cambio De La Aguja
Changer d’aiguille Cambio de la aguja Relever l’aiguille en tournant le volant vers soi et Precaución: rabaisser le pied presseur. Asegúrese de que ha apagado y ha desenchufado la Desserrer la vis du pince-aiguille en tournant dans le máquina de la red eléctrica antes de cambiar la aguja. sens opposé... -
Página 18: Setting Spool Pins
Setting Spool Pins The spool pins are used for holding the spool of thread in order to feed thread to the machine. To use, pull up the spool pin. Push down for storage. Removing or Inserting the Bobbin Case Open the hook cover. q Hook cover Raise the needle by turning the handwheel toward you. -
Página 19: Preparación De Los Pasadores Portacarretes
Fixer les portes-Bobines Preparación de los pasadores portacarretes Les portes-bobines sont utilisés pour placer les Los pasadores portacarretes se utilizan para sujetar el bobines nécessaire à l’enfilage de la machine. carrete de hilo con objeto de alimentar hilo a la Pour utiliser le porte-bobine levez-le vers le haut, máquina. -
Página 20: Winding The Bobbin
Winding the Bobbin z Pull the handwheel out. x Draw the thread from spool. Guide the thread around the bobbin winder thread guide. c Insert the thread through the hole in the bobbin from the inside to the outside. Align the notch (A) of bobbin to the bobbin winder spindle rib (B). -
Página 21: Devanado De La Canilla
Devanado de la canilla Remplissage de la canette z Saque el volante hacia fuera. z Tirez le volant vers l’extérieur pour dégager l’embrayage. x Suelte hilo del carrete. x Tirez le fil de la bobine. Guidez le fil autour du Guíe el hilo alrededor del guiahilos del canillero. -
Página 22: Threading The Machine
Threading the Machine Raise the take-up lever to its highest position by turning the handwheel toward you. Raise the presser foot. Place a spool of thread on the spool pin as shown, with thread coming from back of the spool. z Draw the thread into thread guide using both hands. -
Página 23: Enfilage De La Machine
Enfilage de la Machine Enhebrado de la máquina Levez le releveur de fil à la plus haute position en Suba la palanca para levantar el hilo a su posición más tournant le volant vers vous. alta girando el volante hacia usted. Levez le pied presseur. -
Página 24: Balancing Needle Thread Tension
Balancing Needle Thread Tension z Correct tension The thread tension is adjusted depending on the sewing materials, layers of fabric and sewing method. * The ideal straight stitch has threads locked between two layers of fabric, as illustrated (magnified to show detail). * For an ideal zigzag stitch, the bobbin thread does not show on the right side (top side) of the fabric, and the needle thread shows slightly on the wrong... -
Página 25: Compensación De La Tensión Del Hilo De La Aguja
Régler la tension du fil de l’aiguille Compensación de la tensión del hilo de la aguja z Bonne tension: z Tensión correcta La tension du fil doit être adaptée selon les tissus La tensión del hilo se ajusta según los materiales de utilisés, le nombre de couches de tissus et la costura, las capas de tela y el método de costura. -
Página 26: Pattern Selector Dial
Pattern Selector Dial Raise the needle and presser foot. Turning the selector dial to the desired pattern, matching the setting mark. q Setting mark Note: Do not turn the pattern selector dial while the needle is in the material. Stitch Length Dial Turn the stitch length dial to set the desired stitch length at the setting mark. -
Página 27: Sélecteur Des Motifs
Sélecteur des Motifs Botón selector de puntada Levez l’aiguille au-dessus du tissu et choissisez le Suba la aguja y el pie prensatelas. Gire el selector de motif désiré en tournant le sélecteur de motifs puntada para ajustar el símbolo correspondiente al correspondant à... -
Página 28: Reverse Stitch Button
Reverse Stitch Button As long as you keep the reverse stitch button depressed, the machine sews backwards. Darning Plate To set the darning plate: Position the darning plate with the 3 pins on the bottom. Fit the darning plate pins into the needle plate holes. The feed dogs will show through the darning plate holes. -
Página 29: Bouton De Marche Arrière
Bouton de marche arrière Botón de puntada reversa Mientras mantenga pulsado el botón de puntada Si vous tenez le bouton de la marche arrière vers le reversa, la máquina coserá hacia atrás. bas la machine coud les points en arrière. Plaque de reprisage Para colocar la Tapa Zurcidora Pour poser la plaque à... -
Página 30: Section 3. Basic Sewing Straight Stitch Sewing
SECTION 3. BASIC SEWING Straight Stitch Sewing q Pattern selector: A or B w Presser foot: Zigzag foot e Thread tension: 2–6 r Stitch length: 1.5–4 z Raise the presser foot and position the fabric with its edge lining up with a seam guide line on the needle plate. -
Página 31: Sección 3. Costura Básica
SECCIÓN 3. COSTURA BÁSICA SECTION 3. BASES DE LA COUTURE Costura de puntada recta Point Droit q Selector de Puntada: A ó B q Motif de point A ou B w Pied de biche w Pie prensatelas: Pied zigzag Prensatelas para zigzag e Tension du fil 2 - 6 e Tensión de hilo:... -
Página 32: Seam Guide Line
Seam Guide Line The numbers on the needle plate indicate the distance between the center needle position and the line r. The numbers in front are centimeters. The numbers in back are fractions of an inch. Number 3/8˝ 4/8˝ 5/8˝ 6/8˝... -
Página 33: Utilización De Las Guías De Costura De La Placa De Aguja
Utilización de las guías de costura de la placa Utiliser les guides de couture de la plaque à de aguja aiguille Las guías de costura de la placa de aguja le ayudan a Les guides de couture de la plaque à aiguille vous medir el ancho de las costuras. -
Página 34: Tricot Stitch
Tricot Stitch q Pattern selector: w Presser foot: Zigzag foot e Thread tension: 1–4 r Stitch length: 0.5–1.5 Place your fabric to allow a 1.6 cm (5/8˝) seam. Trim the seam allowance after sewing. Note : Be careful not to cut the stitches. Triple Stitch q Pattern selector: A or B... -
Página 35: Zigzag En Punto
Point pour tissu tricot (point zigzag multiple) Zigzag en punto q Motif de point q Selector de Puntada: w Pied de biche Pied zigzag w Pie prensatelas: Prensatelas para zigzag e Tension du fil e Tensión de hilo: 1–4 r Longueur de point 0,5-1,5 r Longitud de puntada: 0,5–1,5... -
Página 36: Sewing Buttons
Sewing Buttons q Pattern selector: w Presser foot: Zigzag foot e Thread tension: 1–3 r Stitch length: t Darning plate Use the darning plate for button sewing. (see page 24.) Adjust the stitch width with the pattern selector dial, and turn the handwheel to check if the needle enters into each hole in the button. -
Página 37: Coser Botones
Couture des boutons Coser botones q Motif de point: q Selector de Puntada: w Pied de biche: Pied zigzag w Pie prensatelas: Prensatelas para zigzag e Tension du fil: 3 – 7 e Tensión de hilo: r Longueur de point: Tous r Longitud de puntada: Cualquiera... -
Página 38: Buttonhole
Buttonhole q Pattern selector: w Presser foot: Buttonhole foot e Thread tension: 1–5 e Stitch length: To adjust buttonhole stitch density: Set the stitch length dial between 0.5 and 1.0 to adjust the buttonhole stitch density. Carefully mark buttonhole length on fabric. Place the fabric under the foot with the buttonhole marking running toward you. -
Página 39: Ojales
Boutonnière en 4 phases Ojales q Motif de point: q Selector de patrón: (BH) w Pied de biche: Pied de boutonnière w Prensatelas: Pie prensatelas para ojales e Tension du fil: 1 – 5 e Tensión del hilo: 1–5 r Longueur de point: (0,5–1) r Longitud de puntada: 1111 (0.5–1) -
Página 40: Blind Stitch Hemming
Blind Stitch Hemming q Pattern selector: w Presser foot: Zigzag foot e Thread tension: 2–4 r Stitch length: 1–3 z On heavyweight fabrics that ravel, the raw edge should be zig-zaged first. Then fold the hem, as illustrated, leaving 1/4˝ (0.7 cm) of the hem edge showing. -
Página 41: Dobladillos Con Puntada Invisible
Ourlet invisible Dobladillos con puntada invisible q Motif de point q Selector de Puntada: w Pied de biche Pied zigzag w Pie prensatelas: pie prensatelas para zigzag e Tension du fil 2 - 4 e Tensión de hilo: r Longueur de point r Longitud de puntada: z Haga el dobladillo hacia arriba y dóblelo hacia atrás z Sur les tissus épais qui s’effilochent, on devrait... -
Página 42: Section 4. Decorative Stitches Stretch Stitch Patterns
SECTION 4. DECORATIVE STITCHES Stretch Stitch Patterns q Pattern selector: A–E w Presser foot: Zigzag foot e Thread tension: 1–4 r Stitch length: S.S. If forward and reverse feeds become unbalanced due to the type of fabric, adjust the balance by turning the stitch length dial as follows: If patterns are compressed, turn the dial toward “+”. -
Página 43: Sección 4. Costura Decorativa Puntada Elástica
SECTION 4. LES POINTS DECORATIFS SECCIÓN 4. COSTURA DECORATIVA Puntada elástica Points stretch décoratifs q Selector de puntada: A -E q Motif de point: A – E w Pie prensatelas: Pie prensatelas para zigzag w Pied de biche: Pied Zigzag e Tensión de hilo: e Tension du fil: 1 –... -
Página 44: Smocking
Smocking q Pattern selector: w Presser foot: Zigzag foot e Thread tension: 1–4 r Stitch length: S.S. With the stitch length at “4”, sew straight stitching lines 1 cm (3/8˝) apart, across the area to be smocked. Knot the threads along one edge. Pull the bobbin threads and distribute the gathers evenly. -
Página 45: Fruncido Decorativo
Smocks Fruncido decorativo q Motif de point: q Selector de Puntada: D w Pied-de-biche: Pied zigzag w Pie prensatelas: Pie prensatelas para zigzag e Tension du fil: 1 – 4 e Tensión de hilo: r Longueur de point: S.S. r Longitud de puntada: S.S. Ajuste la longitud la puntada a “4”. -
Página 46: Section 5. Care Of Your Machine Dismantling And Assembling Hook Race Unit
SECTION 5. CARE OF YOUR MACHINE Dismantling and Assembling Hook Race Unit Note :Turn off the power switch and/or unplug the machine. To dismantle hook race unit: Raise the needle to its highest position and open the hook cover. Open the hinged latch of bobbin case and take it out of the machine. -
Página 47: Cuidado De Su Máquina
SECTION 4. SECCIÓN 5. ENTRETIEN DE VOTRE MACHINE CUIDADO DE SU MÁQUINA Démontage et Remontage du Crochet de la Navette Desmontaje y montaje Note: Mettez le commutateur sur arrêt et/ou Pista de la lanzadera débranchez la prise de la machine. Precaución: Apague el interruptor de alimentación y/o Pour démonter le crochet de la navette: desenchufe la máquina. -
Página 48: Oiling The Machine
Oiling the Machine Remove the cap, screw and face plate. Apply a few drops of fine quality sewing machine oil to the points indicated by the arrows in the illustrations. For a machine in constant use, oil two or three times a year. -
Página 49: Engrase
Engrase Huilage de la machine Aplicar unas gotas de aceite especial para máquinas de Enlevez le bouchon, la vis et le panneau frontal. coser en los puntos indicados en las figuras con una flecha. Appliquez quelques gouttes d’huile à machine à coudre Una máquina que se utiliza constantemente, es de bonne qualité... -
Página 50: Troubleshooting
Troubleshooting Cause Condition Reference 1. The needle thread is not threaded properly. The needle thread See Page 18 2. The needle thread tension is too tight. breaks. See Page 20 3. The needle is bent or blunt. See Page 12 4. -
Página 51: Localización Y Solución De Averías
Localización y solución de averías Causa Situación Referencia El hilo de la aguja no está enhebrado correctamente. Véase la Página 19 El hilo de la aguja La tensión del hilo de la aguja es demasiado alta. Véase la Página 21 (superior) se rompe La aguja está... -
Página 52: En Cas De Difficulté
En cas de difficulté Condition Cause Référence Le fil de 1. Le fil de l’aiguille n‘est pas enfilé correctement Voir Page 19 l’aiguille se 2. La tension du fil de l’aiguille est trop forte. Voir Page 21 rompt 3. L’aiguille est émoussée ou tordue. Voir Page 13 4. - Página 56 743-801-726 (E/F/S)