Publicidad
Idiomas disponibles
Idiomas disponibles
Enlaces rápidos
ADI140850
Installation Instructions – E4 Series Elements
Instructions d'installation pour les éléments E4 Series
Instrucciones de instalación para los elementos de la línea E4
IMPORTANT: Read carefully before installing fixture. Retain for future reference.
WARNING
Risk Nf Eltcorical ShNck ! DiscNnntco pNwtr ao fust
Nr circuio brtaktr btfNrt insoalling Nr strvicing.
WARNING
Ust Nnly tltmtnos prNvidtd by IRiS Lighoing
sysotms. Ust Nf Nohtr manufacourtr's rtfltcoNrs
vNids oht Undtrwriotr LabNraoNrits lisoings and
CSA ctroificaoiNn and cNuld cNnsoiouot a firt hazard.
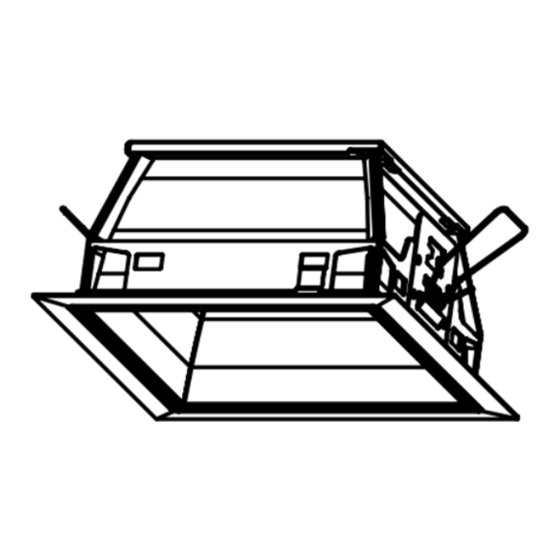
E4DL
E4AA
Figurt 1.
INSTALLATION
General Installation for All Elements
Elements are shipped with retention springs located
●
●
for 1/2 - 1 inch thick ceiling installations (Figure 2.). For
ceilings greater than 1 inch thick the springs must be
relocated. To relocate spring, push spring body to one
side of bracket compressing the coils. Pivot spring
body so that it is disengaged from the tabs (Figure 3.).
Remove spring from bracket (Figure 4.). Install spring in
upper position by hooking the short legs of the spring
on the inside of bracket (Figure 5.) and sliding spring
body over tab (Figure 6.). Compress spring coils and
guide spring body over second tab. (Figure 7.)
N
Note:
Spring relocation does not apply to E4AA and
E4LWW Elements.
Rimless Elements – E4DL, E4AA, E4MR, & E4LWW
●
●
elements (non-self flange) may be used in conjunction
with optional plaster lathing ring by removing the metal
trim ring. Remove metal trim ring as described below.
E4PIN, E4RPIN, E4RLWW & E4SL elements must be
ordered with the suffix RL for the rimless option.
Remove overspray protector from the platform and
●
●
discard.
Risk Nf Firt ! Supply cNnducoNrs (pNwtr wirts)
cNnntcoing oht fixourt muso bt raotd minimum 90°C.
If unctroain, cNnsulo an tltcorician.
For your safety read and understand instructions
completely before beginning installation.
E4MR
E4LWW
●
●
Figurt 2.
Figurt 5.
Figurt 8.
WARNING
CAUTION
E4SL
E4PIN
Fold torsion springs upward and insert element into
platform (Figure 8.). Push the element firmly against the
ceiling (Figure 9.). If element flange is NOT seated
completely against ceiling, pull the element away from the
platform. Check for possible obstructions or improperly
oriented element.
Figurt 3.
Figurt 6.
Figurt 9.
TM
INS #
E4RPIN
E4RLWW
Figurt 4.
Figurt 7.
Publicidad

Manuales relacionados para Eaton Cooper Lighting IRIS E4 Serie


Resumen de contenidos para Eaton Cooper Lighting IRIS E4 Serie
- Página 1 INS # ADI140850 Installation Instructions – E4 Series Elements Instructions d’installation pour les éléments E4 Series Instrucciones de instalación para los elementos de la línea E4 IMPORTANT: Read carefully before installing fixture. Retain for future reference. WARNING WARNING Risk Nf Eltcorical ShNck ! DiscNnntco pNwtr ao fust Risk Nf Firt ! Supply cNnducoNrs (pNwtr wirts) Nr circuio brtaktr btfNrt insoalling Nr strvicing.
- Página 2 Wall Direction Wall Direction TNp Acctss and Rt-Lampinge: Top access is obtained by loosening the top access thumb screw on the housing platform Figurt 16. Figurt 17. InsoallaoiNn InsorucoiNns – E4 Strits Eltmtnos 704399INS ADI140850 www.eaton.com...
- Página 3 Io is nNo ptrmissiblt oN cNnvtro an Nptn Npoical tltmtno oN tnclNstd by adding a ltns hNldtr and glass ltns in oht fitld, ohis may invalidaot oht prNptr maximum waooagt Figurt 18. givtn. InsoallaoiNn InsorucoiNns – E4 Strits Eltmtnos 704399INS ADI140850 www.eaton.com...
- Página 4 Figurt 8. Figurt 9. Figurt 10. l’élément et renouvelez l’opération. Vérifiez qu’il n’y est pas de débris ou d’élément à l’intérieur pouvant gêner la mise en place. Figurt 11. Figurt 12. InsorucoiNns d’insoallaoiNn pNur lts élémtnos E4 Strits 704399INS ADI140850 www.eaton.com...
- Página 5 à l’intérieur jusqu’à ce qu’il soit en correctement mis en place. Mur direction Enortoitn dts élémtnos avtc ltnoillte: Les éléments optiques série E4, dont le code de commande indique SR Figurt 17. Figurt 18. InsorucoiNns d’insoallaoiNn pNur lts élémtnos E4 Strits 704399INS ADI140850 www.eaton.com...
-
Página 6: Instalación
Compruebe si hay posibles obstrucciones o si la luminaria se orientó de manera incorrecta. Figura 11. Figura 12. InsorucciNnts dt insoalación para lNs tltmtnoNs dt la línta E4 704399INS ADI140850 www.eaton.com... - Página 7 Cambie el Pared Dirección elemento haciendo girar los resortes de retención de modo Figura 17. Figura 18. que se ajusten dentro de la abertura. Empuje con suavidad InsorucciNnts dt insoalación para lNs tltmtnoNs dt la línta E4 704399INS ADI140850 www.eaton.com...
- Página 8 All trademarks are property Eaton’s Cooper Lighting Business of their respective owners. 1121 Highway 74 South Peachtree City, GA 30269 Eaton est une marque de commerce Cooperlighting.com déposée. Toutes les autres marques de commerce sont la propriété de leur © 2014 Eaton propriétaire respectif.