Publicidad
Idiomas disponibles
Idiomas disponibles
Enlaces rápidos
1. Introduction & Characteristics
Thank you for buying the KNS8 ! Read this manual carefully before bringing the KNS8 into use.
• Build a gearbox and learn how automatic transmissions and motors work.
• Easy to build, no glue or soldering required.
• Dislodge the pre-cut pieces when you need them and not before. Sand the jagged edges before use (sandpaper
included)
• The kit is powered by 2 AA-batteries (not included).
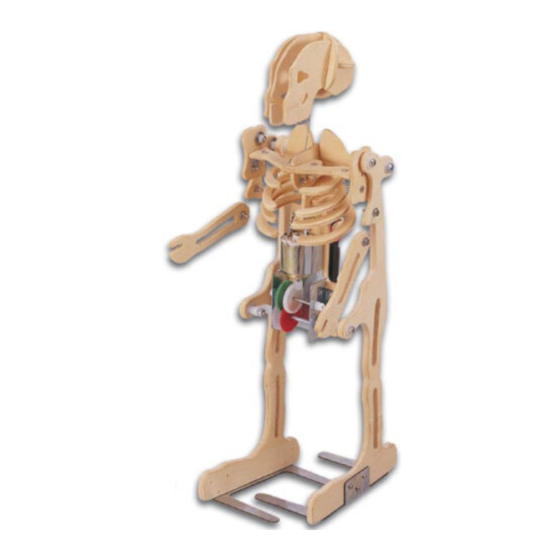
The kits of the KNS-series are supplied with prepunched boards, a gearbox, gears, shafts, a switch, a motor, a
battery holder and all necessary parts.
Note that the figures with the assembly instructions can be found in the second folder "KNS8 – Figures"!!!
2. Parts List (see also KNS8 – Figures)
Part n°
Quant.
1
1
2
1
3
1
4
1
5
1
6
1
7
1
8
1
9
1
10
1
11
1
12
1
13
1
14
2
15
2
nylon connector (N-shaped)
16
2
nylon pad (5.6 x 4.8 x 1.95)
17
2
3. Prepunched Boards (see "KNS8 – Figures
4. Assembly (see also "KNS8 – Figures
Fig. 3 : The gears (n°9/10/11/8) should be placed to the left of the pinion gear. One N-shaped nylon connector
(n°15) should point downward and the other one upward. Insert the motor as depicted in the drawing. Note
that the protruding edge should point towards the metal case.
Fig. 4 : Identify boards 2 & 3. The screw opening in board 3 is located in the middle, while the one in board 2 lies
off to the left. Make sure board 1 is not upside-down.
KNS8
KNS8 – MECHANICAL SKELETON
Description
gearbox
motor 3Vdc
battery holder
slide switch with wire
metal shaft (2 x 40mm)
metal shaft (3 x 52mm)
pinion gear 8T
face gear 36T/10T (white)
gear 40T/0T (white)
gear 40T/10T (red)
gear 40T/10T (green)
wire with terminal (yellow)
wire with terminal (green)
metal foot (U-shaped)
nylon post (H : 6mm)
)
"
Part n°
Quant.
18
6
19
18
20
18
21
4
22
2
23
2
24
2
25
8
26
15
27
3
28
10
29
5
30
4
31
1
32
2
33
6
)
"
1
Description
nylon nut M3
nut M2
screw (2 x 8mm)
self-tapping screw (2 x 4mm)
screw (3 x 14mm)
screw (3 x 18mm)
screw (3 x 22m)
washer (3.2 x 10.0 x 0.5mm)
washer (2.6 x 6.0 x 0.5mm)
PVC tube (15mm)
nylon pad (Ø 8mm)
fixing plate (L-shaped)
nylon post (H : 3mm)
spring (L : 50mm)
spring (L : 20mm)
self-tapping screw (2 x 6mm)
VELLEMAN
Publicidad

Resumen de contenidos para Velleman KNS8
- Página 1 The kits of the KNS-series are supplied with prepunched boards, a gearbox, gears, shafts, a switch, a motor, a battery holder and all necessary parts. Note that the figures with the assembly instructions can be found in the second folder “KNS8 – Figures”!!! 2. Parts List (see also KNS8 – Figures) Part n°...
-
Página 2: Lijst Van Onderdelen
• Make sure the wiring is correct • Adjust the screws on the legs and arms if the KNS8 doesn’t move even though the motor is running. • Bend the U-shaped metal feet slightly (see figure 16) to make the KNS8 move more smoothly. - Página 3 • Controleer of de bedrading juist is • Maak de schroeven van de armen en benen wat losser indien de KNS8 niet beweegt hoewel de motor loopt. • Plooi de U-vormige voeten heel lichtjes (zie figuur 16) om de KNS8 vlotter te doen bewegen.
-
Página 4: Liste Des Pièces
KNS8 – SQUELETTE MECANIQUE 1. Introduction et Caractéristiques Nous vous remercions de votre achat ! Lisez la notice présente attentivement avant la mise en service du KNS8. • Assemblez une boîte d’engrenages et familiarisez-vous avec l’opération de transmissions et de moteurs. - Página 5 • Vérifiez si le câblage est correct • Desserrez les vis des jambes et des bras si le KNS8 ne bouge pas malgré que le moteur soit allumé. • Pliez les pieds en U légèrement afin d’assouplir les mouvements du KNS8 (voir figure 16).
- Página 6 • Kontrollieren Sie ob die Verdrahtung richtig ist • Lockern Sie die Schrauben der Beine und Arme etwas wenn das KNS8 nicht bewegt obwohl der Motor läuft. • Verbiegen Sie die U-förmigen Füße ein bisschen (siehe Abbildung 16) damit das KNS8 geschmeidiger laufen kann..
- Página 7 Los kits de la serie KNS se entregan con : piezas de madera previamente cortadas, una caja de engranajes, piñones, ejes, un conmutador, un motor, portapilas y todas las piezas necesarias. ¡Encuentre las figuras con las instrucciones de montaje en la segunda parte, es decir : “KNS8 – Figuras”! 2. Lista de piezas Pieza Cantidad Descripción...
- Página 8 • Desatornille los tornillos de las patas y los brazos si el esqueleto no se mueve a pesar de que el motor está activado. • Pliegue la base en forma de “U” ligeramente a fin de permitir al KNS8 moverse más suavemente (véase figura 16).


