Sauder Palladia Serie Manual De Instrucciones
Ocultar thumbs
Ver también para Palladia Serie:
- Manual de montaje (28 páginas) ,
- Manual del usuario (40 páginas) ,
- Manual del usuario (36 páginas)
Tabla de contenido
Publicidad
Enlaces rápidos
sauder.com
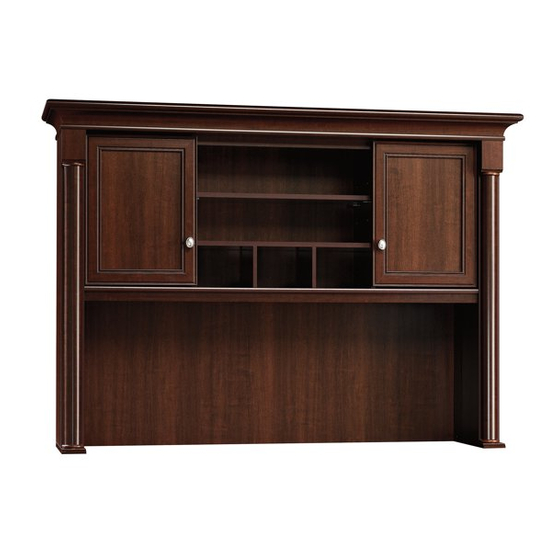
Hutch
Palladia Collection | Model 412308
Need help? Visit Sauder.com to view video assembly tips or chat with a live rep.
Prefer the phone? Call 1-800-523-3987.
Share your journey!
Knick-knack
paddywhack,
give your stuff a home.
NOTE: THIS INSTRUCTION
BOOKLET CONTAINS IMPORTANT
SAFETY INFORMATION.
PLEASE READ AND KEEP FOR
FUTURE REFERENCE.
English pg 1-29
Français pg 30-33
Español pg 34-37
Lot # 390090
04/21/16
Purchased: __________________
Be sure to give us a ring before
making any returns. 1-800-523-3987
Publicidad
Tabla de contenido

Manuales relacionados para Sauder Palladia Serie


Resumen de contenidos para Sauder Palladia Serie
- Página 1 Palladia Collection | Model 412308 NOTE: THIS INSTRUCTION BOOKLET CONTAINS IMPORTANT SAFETY INFORMATION. Need help? Visit Sauder.com to view video assembly tips or chat with a live rep. PLEASE READ AND KEEP FOR FUTURE REFERENCE. Prefer the phone? Call 1-800-523-3987.
- Página 2 LARGE ADJUSTABLE SHELF (1) W TOP MOLDING (1) LEFT UPRIGHT (1) SMALL ADJUSTABLE SHELF (2) MOLDING (2) DIVIDER (2) MOUNTING PLATE (2) PLINTH (2) TOP (1) FRONT VALANCE (1) HALF DISK (4) LONG SHELF (1) RIGHT VALANCE (1) Page 2 412308 www.sauder.com/services...
-
Página 3: Part Identifi Cation
Now you know Part Identifi cation our ABCs. www.sauder.com/services 412308 Page 3... - Página 4 STRIKE PLATE - 1 WASHER - 2 CORD CLIP - 2 NN GROMMET - 2 GROMMET CAP - 2 KNOB - 2 HOLE PLUG - 2 METAL PIN - 24 RUBBER SLEEVE - 12 FELT DISC CARD - 1 Page 4 412308 www.sauder.com/services...
- Página 5 BLACK 1-1/8" MACHINE SCREW - 2 BROWN 1" FLAT HEAD SCREW - 4 SILVER 7/8" PAN HEAD SCREW - 2 BLACK 9/16" LARGE HEAD SCREW - 65 BLACK 1/2" FLAT HEAD SCREW - 9 NAIL - 55 www.sauder.com/services 412308 Page 5...
- Página 6 Assemble your unit on a carpeted fl oor or on the empty å carton to avoid scratching your unit or the fl oor. To begin assembly, push a SAUDER TWIST-LOCK® å FASTENER (AA) into the large holes in the LONG SHELF (I).
- Página 7 The large hole S u r should be here. S u r f a c f e w e r h i t h o l e (4 used) The large hole should be here. www.sauder.com/services 412308 Page 7...
- Página 8 BLACK 1-7/8" FLAT HEAD SCREWS (UU). Remember: Righty tighty. Lefty loosey. Rounded edge BLACK 1-7/8" FLAT HEAD SCREW (4 used in this step) o l e e r h f e w i t h f a c S u r Page 8 412308 www.sauder.com/services...
- Página 9 K ® f a c L O C S u r I S T - E R S T E N F A S (8 used) BLACK 1-7/8" FLAT HEAD SCREW (4 used in this step) www.sauder.com/services 412308 Page 9...
- Página 10 Step 5 Fasten the INNER ENDS (C and D) to the TOP (H). Use å ® How to use the SAUDER TWIST-LOCK FASTENER four BLACK 1-7/8" FLAT HEAD SCREWS (UU). 1. Insert the dowel end of the FASTENER into the hole NOTE: Be sure the dowel end of the TWIST-LOCK®...
- Página 11 PLATES (P) and PLINTHS (Y). Use four BROWN 1" FLAT HEAD SCREWS (XX). The larger hole should be facing up. BROWN 1" FLAT HEAD SCREW (4 used in this step) The larger hole should be facing up. Curved edge www.sauder.com/services 412308 Page 11...
- Página 12 Fasten the PLINTHS (Y) to the OUTER ENDS (A and B). å Use four BLACK 9/16" LARGE HEAD SCREWS (ZZ). BLACK 9/16" LARGE HEAD SCREW (16 used in this step) Use lower holes (12 used) Use lower holes Page 12 412308 www.sauder.com/services...
- Página 13 Use eight BLACK 9/16" LARGE HEAD SCREWS (ZZ). BLACK 9/16" LARGE HEAD SCREW (8 used in this step) The MOLDING (X) should be centered over the HALF DISK (Z). The MOLDING (X) should be centered over the HALF DISK (Z). www.sauder.com/services 412308 Page 13...
- Página 14 Fasten the OUTER ENDS (A and B) to the TOP (H). Use å four BLACK 1-7/8" FLAT HEAD SCREWS (UU). Now might be a good time to refresh your drink. BLACK 1-7/8" FLAT HEAD SCREW (4 used in this step) Page 14 412308 www.sauder.com/services...
- Página 15 OUTER END (A). NOTE: The CORD CLIP is used to manage your cords. å Curved edge Curved edge Surface without HALF DISK Surface without HALF DISK BLACK 1-7/8" FLAT HEAD SCREW (8 used in this step) www.sauder.com/services 412308 Page 15...
- Página 16 MOLDING (T) to the LONG SHELF (I). Use eight BLACK (16 used in this step) 9/16" LARGE HEAD SCREWS (ZZ). NOTE: There are no pre-drilled holes in the MOLDINGS. å The SCREWS will tighten into the groove. (8 used) Page 16 412308 www.sauder.com/services...
- Página 17 BLACK 9/16" LARGE HEAD SCREW (ZZ). Fasten a STRIKE PLATE (KK) to the SMALL DOOR (M). å Use a BLACK 1/2" FLAT HEAD SCREW (AAA). NOTE: The surface of the STRIKE PLATE with "SAUDER" å should be facing up. BLACK 1/2" FLAT HEAD SCREW (1 used for the STRIKE PLATE) BLACK 9/16"...
- Página 18 NOTE: To make adjustments to the DOOR, loosen the SCREW in the å HINGE, make needed adjustments, and tighten the SCREW. Push a MAGNETIC CATCH (JJ) into the hole in the å MOUNTING PLATE (P). BLACK 9/16" LARGE HEAD SCREW (1 used in this step) Page 18 412308 www.sauder.com/services...
- Página 19 Step 14 NOTE: Pay close attention to the positioning of the parts. å Slide two patented* VALANCE CONNECTORS (DD) onto å the FRONT VALANCE (Q) as shown. * U.S. Patent No. 6,179,515B1 å Unfi nished surface www.sauder.com/services 412308 Page 19...
- Página 20 FRONT VALANCE (Q). Fasten the VALANCE BRACKETS to the TOP (H). Use fi ve BLACK 9/16" LARGE HEAD SCREWS (ZZ). Do not completely tighten the SCREWS at this time. (5 used) BLACK 9/16" LARGE HEAD SCREW (7 used in this step) Page 20 412308 www.sauder.com/services...
- Página 21 VALANCES (R and S). Fasten the VALANCE BRACKETS to the TOP (H). Use four BLACK 9/16" LARGE HEAD SCREWS (ZZ). Do not completely tighten the SCREWS at this time. (4 used) BLACK 9/16" LARGE HEAD SCREW (4 used in this step) www.sauder.com/services 412308 Page 21...
- Página 22 Use two BLACK 1-5/8" PAN HEAD SCREWS (VV). Tighten the SCREWS the VALANCE CONNECTOR. å until they begin to turn hard. Do not overtighten. Next, completely tighten the SCREW å in each VALANCE BRACKET. BLACK 1-5/8" PAN HEAD SCREW (2 used in this step) Page 22 412308 www.sauder.com/services...
- Página 23 BACK. Carefully cut out the holes needed. These holes must line up over the UPRIGHTS (E and F). Do not tap NAILS into the holes along this edge. NOTE: The BACK hangs past the bottom of the unit. www.sauder.com/services 412308 Page 23...
- Página 24 Step 19 Fasten the HINGES (HH) to the DOORS (U and V). Use å eight BLACK 1/2" FLAT HEAD SCREWS (AAA). BLACK 1/2" FLAT HEAD SCREW (8 used in this step) Page 24 412308 www.sauder.com/services...
- Página 25 Fasten a KNOB (PP) to the RIGHT DOOR (U). Use a å BLACK 1-1/8" MACHINE SCREW (WW). Repeat this step for the LEFT DOOR (V). å For support, place packing BLACK 1-1/8" MACHINE SCREW foam and magazines here. (2 used for the KNOBS) www.sauder.com/services 412308 Page 25...
- Página 26 (vertical adjustment) after making adjustments. To adjust the DOORS in or out (depth), loosen the å mounting screw one turn and move the DOORS in or out, as needed. Tighten the mounting screw after making adjustments. Page 26 412308 www.sauder.com/services...
- Página 27 LARGE HEAD SCREWS (ZZ). SILVER 7/8" PAN HEAD SCREW 0 7 9 4 1 2 (2 used in this step) d e n C r e BLACK 9/16" LARGE HEAD SCREW (9 used for the LOWER BACK) www.sauder.com/services 412308 Page 27...
- Página 28 Insert the GROMMETS (NN) and GROMMET CAPS (OO) å into the large holes in the UPRIGHTS (E and F). Then, insert two HOLE PLUGS (QQ) into the holes in the å MOUNTING PLATES (P). (12 used) (2 used) Page 28 412308 www.sauder.com/services...
-
Página 29: Important
Wipe dry. And to celebrate, why not share your success story? BLACK 9/16" LARGE HEAD SCREW (1 used into the top of your unit) No load 15 lbs. 20 lbs. 30 lbs. total 15 lbs. 15 lbs. www.sauder.com/services 412308 Page 29... -
Página 30: Liste De Pièces
EXTRÉMITÉ DROITE EXTERNE ......1 CONSOLE À ÉQUERRE ........20 pour future référence. EXTRÉMITÉ GAUCHE EXTERNE ......1 CONNECTEUR DE LAMBREQUINS .....2 Pour contacter Sauder EXTRÉMITÉ DROITE INTERNE ......1 SUPPORT DE LAMBREQUIN ......9 en ce qui concerne cet EXTRÉMITÉ GAUCHE INTERNE .......1 élément, faire référence CLIP DE LAMBREQUIN ..........2... -
Página 31: Remarque : S'assurer Que Les Goupilles En Métal
éviter d'endommager l'élément ou le sol. Pour commencer l'assemblage, enfoncer une FIXATION ÉTAPE 7 TWIST-LOCK® SAUDER (AA) dans les gros trous dans la TABLETTE LONGUE (I). Fixer douze CONSOLES À ÉQUERRE (CC) aux EXTRÉMITÉS EXTERNES (A et B). Utiliser douze VIS NOIRES TÊTE ÉTAPE 2... - Página 32 TÊTE LARGE 14 mm (ZZ). Ne pas complètement serrer les VIS à ce REMARQUE : La surface de la PLAQUE DE BUTÉE comportant stade de l'assemblage. l'inscription « SAUDER » devrait être dirigée vers le haut. ÉTAPE 17 ÉTAPE 13 Insérer les deux CLIPS DE LAMBREQUIN (FF) dans les rainures...
- Página 33 REMARQUE : Prière de lire les informations importantes sur la sécurité fi gurant sur les pages arrière du manuel d’instructions. Ceci complète l'assemblage. Nettoyer à l’ a ide d’une encaustique pour meubles ou d’un chiff on humide. Essuyer. www.sauder.com/services 412308 Page 33...
-
Página 34: Lista De Partes
EXTREMO IZQUIERDO EXTERIOR ....1 SOPORTE DE LA CORNISA .......9 pour future référence. GRAPA DE LA CORNISA ........2 EXTREMO DERECHO INTERIOR .....1 Pour contacter Sauder PLACA DE CONEXIÓN ..........1 en ce qui concerne cet EXTREMO IZQUIERDO INTERIOR ....1 BISAGRA ................4 élément, faire référence PARAL DERECHO ............1... -
Página 35: Sujetadores Twist-Lock® En El Estante Largo (I) Se
Para comenzar el ensamblaje, empuje un SUJETADOR PASO 7 TWIST-LOCK® SAUDER (AA) dentro de los agujeros grandes del ESTANTE LARGO (I). Fije doce SOPORTES ANGULARES (CC) a los EXTREMOS EXTERIORES (A y B). Utilice doce TORNILLOS NEGROS DE PASO 2 CABEZA GRANDE de 14 mm (ZZ). - Página 36 NEGROS DE CABEZA GRANDE de 14 mm (ZZ). No apriete NOTA: La superfi cie de la PLACA DE CONTACTO con la fi rmemente los TORNILLOS por ahora. inscripción "SAUDER" debe mirar hacia arriba. PASO 17 PASO 13 Inserte las dos GRAPAS DE LA CORNISA (FF) en las ranuras de Inserte la BISAGRA DE PIVOTE (II) en la PLACA DE CONEXIÓN...
-
Página 37: Ajuste De La Puerta
NOTA: Por favor, lea las páginas de atrás del folleto de instrucciones en cuanto a importante información de seguridad. Esto completa el ensamblaje. Limpie con su pulimento para muebles preferido o un paño húmedo. Seque con un paño. www.sauder.com/services 412308 Page 37... - Página 38 El peso un televisor. para soportar un televisor. y la ubicación del tubo de imagen tienden a causar la inestabilidad de televisores y por eso tendrán la tendencia a inclinarse hacia adelante. Page 38 412308 www.sauder.com/services...
-
Página 39: Garantie Limitée De 5 Ans
à compter de la date d'achat la première fois et qui sont signalés à Sauder dans les limites de couverture de la contre tout défaut de matériaux ou de fabrication des composantes de mobilier Sauder. - Página 40 Dear Valued Customer: So, how did it go? Thanks so much for choosing Sauder® furniture. I hope the Set a world record for speed? purchase and assembly process was a positive experience Feeling good about yourself? and you feel good about the furniture you just built. If you Nice.