
Manuales relacionados para Oster 3196


Resumen de contenidos para Oster 3196
- Página 1 Instruction Manual Cofeemaker PLEASE READ ALL INTRUCTIONS BEFORE USING THIS APPLIANCE Manual de Instrucciones Cafetera LEA TODAS L AS INSTRUCCIONES ANTES DE USAR ESTE APAR ATO...
-
Página 2: Important Safeguards
Return this appliance only to the nearest Oster® Authorized Service Center for examination, repair or adjustment. • The use of accessory attachments other than Oster® brand may cause hazards or injuries. • Do not use it outdoors. - Página 3 Follow the instructions below to reduce or eliminate the chance of breaking the Decanter: - This Decanter is designed for use with your Oster® Coffeemaker and therefore must never be used on a range top or in any oven, including a microwave oven.
-
Página 4: Coffeemaker Features
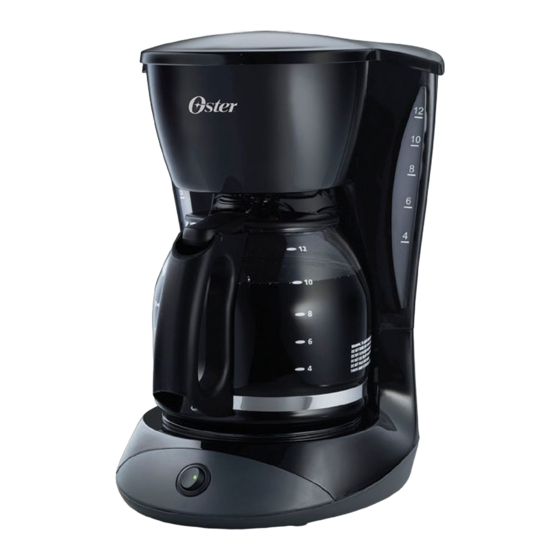
GETTING TO KNOW YOUR COFFEEMAKER Congratulations on the purchase of your new Oster® Coffeemaker! Please read these instructions carefully before using your new Coffeemaker. Proper use, care and maintenance will ensure trouble-free operation and the long life of this appliance. Save these instructions for cleaning and, if necessary, replacement parts information. - Página 5 COFEEMAKER FEATURES 1. ON/OFF Switch 3. Removable Filter Insert (Model 3196 Only) 2. Control Panel 4. Brew Basket (Model 3197 Only) f. On-Off Indicator a. Delay Brew Button 5. Water Reservoir g. On Button b. PM Indicator 6. Power Cord h.
-
Página 6: Adjusting The Power Cord Length
Adjusting the Power Cord Length You can customize the length of the Power Cord so that it is the exact length you desire. To increase the length of the Power Cord: Grasp the Power Cord (not the power plug) and gently lift it out of the slot, then pull it away from the Coffeemaker. -
Página 7: Brewing Coffee
BREWING COFFEE Cleaning the Coffeemaker Before First Use Follow the steps below under "Adding Water and Ground Coffee" and "Brewing Coffee", but do not add coffee grounds. Selecting and Measuring Ground Coffee The amounts shown below are suggested amounts. To Brew Use This Amount of Ground Coffee 12 cups 11 tablespoons or 5-1/2 scoops... -
Página 8: Brewing Coffee Later
Decanter to cool before using it. Do not brew coffee while the Brew Basket lid is open. Brewing Coffee Model 3196 Push the ON/OFF Switch so the light illuminates. This light indicates that the coffeemaker is on and the brew cycle will begin .When the coffee stops flowing, the brew cycle is complete. -
Página 9: Cleaning The Coffeemaker Between Brew Cycles
2) While pressing and holding the Set Delay Button, press and hold the Hour Button until the Clock displays the hour you desire. The PM Indicator will light to indicate a PM time if the PM Indicator is not lit, the time is AM. -
Página 10: Maintaining Your Coffeemaker
3) Place the empty Decanter on the Warming Plate. Make sure to fully place the Decanter on the Warming Plate to avoid the possibility of overflow. 4) Start the brew cycle, See Page 6 for "Brewing Coffee" Model 3196 Push the ON/OFF Switch so the light illuminates (to begin the brew cycle). -
Página 11: Cleaning The Decanter
Do not use harsh abrasive cleansers that may scratch the Decanter; scratches may cause the Decanter to break. Service and Maintenance Repairs If your Coffeemaker requires service, do not return it to the store where you purchased it. All repairs must be made by Oster® Authorized Service Center. - Página 12 Oster® Authorized Service Center. Further, the warranty does not cover Acts of God, such as fire, flood, hurricanes and tornadoes.
-
Página 13: Precauciones Importantes
Centro de Servicio Oster ® Autorizado para ser examinado, reparado o ajustado. • El uso de accesorios o aditamentos que no sean de la marca Oster ® puede causar lesiones o daños. • No use la unidad al exterior. -
Página 14: Cuidado Y Uso De La Jarra
Siga las siguientes instrucciones para reducir o eliminar el riesgo de romper la Jarra: - Esta Jarra esta diseñada para ser utilizada con su Cafetera Oster ®, por lo tanto nunca debe ser usada sobre las hornillas de una estufa, horno y ni tampoco en un horno microondas. -
Página 15: Conociendo Su Cafetera
CONOCIENDO SU CAFETERA ¡Felicitaciones por la compra de su nueva Cafetera Oster ®! Por favor lea estas instrucciones cuidadosamente antes de usar su nueva Cafetera. El uso, cuidado y mantenimiento adecuado asegurarán una operación sin problemas y una larga duración de este aparato. Guarde estas instrucciones para la información de limpieza y si es necesario para la información de partes de repuesto. -
Página 16: Caracteristicas De Su Cafetera
CARACTERISTICAS DE SU CAFETERA 1. Interruptor de Encendido/ Apagado ON/OFF 3. Porta Filtro Removible (Modelo 3196) 2. Panel de Control 4. Canasta de Preparación (Modelo 3197) a. Botón para Retrasar 5. Tanque de Agua f. Indicador de Encendido/ la Preparación 6. -
Página 17: Ajustando La Longitud Del Cable Eléctrico
Ajustando la Longitud del Cable Eléctrico Usted puede ajustar la longitud del Cordón Eléctrico de manera que tenga la longitud exacta que usted desea: Para aumentar la longitud del Cordón Eléctrico: Tome el Cordón Eléctrico (no el enchufe) y jale suavemente sacándolo de la ranura, después jálelo alejándolo de la Cafetera. -
Página 18: Preparando Cafe
PREPARANDO CAFE Limpieza de la Cafetera Antes de Usar por Primera Vez Siga los pasos indicados en la sección "Añadiendo Agua y Café Molido" y en "Preparando Café", pero no agregue los granos de café. Seleccionando y Midiendo el Café Molido Para mejores resultados, use granos de café... -
Página 19: Preparando Café Mas Tarde
Permita que la Jarra se enfríe antes de utilizar. No prepare café mientras que la Canasta de Preparación esté abierta. Preparando Café Modelo 3196 Presione el Interruptor de Encendido/ Apagado ON/ OFF, de manera que la luz se encienda. -
Página 20: Limpieza De La Cafetera Entre Ciclos De Preparación
2) Mientras sigue presionando el Botón para Programar el Retraso de la Preparación de café SET DELAY, presione y detenga el Botón de la Hora HOUR hasta que el Reloj Digital muestre la hora que usted desea. El Indicador PM se iluminará para indicar un tiempo PM, si el Indicador PM no se ilumina, el tiempo es AM. -
Página 21: Mantenimiento De Su Cafetera
4) Inicie el ciclo de preparación. Consulte la Pagina 17, en la sección "Preparando Café" Modelo 3196 Presione el interruptor de encendido/ apagado ON/ OFF de manera que la luz se encienda (para iniciar el ciclo de preparación). -
Página 22: Limpieza De La Jarra
No use limpiadores abrasivos que puedan dejar marcas en la Jarra; las marcas pueden propiciar que la Jarra se rompa. Servicio y Mantenimiento Reparaciones Si su Cafetera requiere servicio, no la envíe al lugar donde la compró. Todas las reparaciones deben ser hechas por un Centro de Servicio Oster ® Autorizado. - Página 23 Sunbeam o por un Centro de Servicio Oster ® Autorizado. Además, la garantía no cubre Actos de Dios tales como incendios, inundaciones, huracanes y tornados.
- Página 24 1150 W CONTENIDO: 1 PIEZA ©2004 Sunbeam Products, Inc. All rights reserved. OSTER® is a registered trademark of Sunbeam Products, Inc. Distributed by Sunbeam Products, Inc., Boca Raton, FL. 33431. ©2004 Sunbeam Products, Inc. Todos los derechos reservados. OSTER® es una marca registrada de Sunbeam Products, Inc.