Tabla de contenido
Publicidad
Idiomas disponibles
Idiomas disponibles
Enlaces rápidos
THIS INSTRUCTION BOOKLET CONTAINS
IMPORTANT SAFETY INFORMATION. PLEASE
READ AND KEEP FOR FUTURE REFERENCE.
WARNING:
To reduce the risk of
injury, the user must read and understand the
operator's manual before using this product.
CE LIVRET D'INSTRUCTIONS CONTIENT DES
CONSIGNES DE SÉCURITÉ IMPORTANTES.
VEUILLEZ LE LIRE ET LE CONSERVER POUR
TOUTE RÉFÉRENCE FUTURE.
AVERTISSEMENT :
réduire les risques de blessures, l'utilisateur
doit lire et veiller à bien comprendre le manuel
d'utilisation avant d'employer ce produit.
HPSV01 20V
Stick Vac
Aspirateur vertical
Aspiradora tipo escoba
OPERATOR'S MANUAL
MANUEL D'UTILISATION
Instructions importantes concernment
Commande de pièces et dépannage
MANUAL DEL OPERADOR
Pedidos de piezas y servicio
ESTE FOLLETO DE INSTRUCCIONES CONTIENE
INFORMACIÓN DE SEGURIDAD IMPORTANTE.
LÉALO Y CONSÉRVELO PARA REFERENCIA
FUTURA.
ADVERTENCIA:
Pour
el riesgo de lesiones, el usuario debe leer y
comprender el manual del operador antes de
usar este producto.
2-3
3-4
Assembly 4
Operation 5-6
7
Illustrations
8-10
Parts/Service
Back page
2-3
la securite
3-4
Utilisation 5-6
7
Illustrations
8-10
Page arrière
2-3
de seguridad
3-4
Armado 4
Funcionamiento 5-6
7
Illustraciones
8-10
Pág. posterior
Para reducir
Publicidad
Tabla de contenido

Manuales relacionados para Hart HPSV01


Resumen de contenidos para Hart HPSV01
-
Página 1: Tabla De Contenido
HPSV01 20V Stick Vac Aspirateur vertical Aspiradora tipo escoba OPERATOR’S MANUAL Important Safety Instructions Symbols Assembly 4 Operation 5-6 Maintenance Illustrations 8-10 Parts/Service Back page MANUEL D’UTILISATION Instructions importantes concernment la securite Symboles Assemblage 4 Utilisation 5-6 Entretien Illustrations 8-10 Commande de pièces et dépannage... -
Página 2: Important Safety Instructions
IMPORTANT SAFETY INSTRUCTIONS SAVE THESE INSTRUCTIONS When using an electrical appliance, basic precautions should always be followed, including the following: WARNING! Do not use to pick up hard objects such as nails, screws, coins, etc. Damage or injury could result. Do not incinerate this appliance even if it is severely Read and understand all instructions. Failure to follow all damaged. The batteries can explode in a fire. instructions listed below, may result in electric shock, fire and/or serious personal injury. Product does not have to be plugged into an electrical outlet, therefore it is always in operating condition. READ ALL INSTRUCTIONS BEFORE USING Be aware of possible hazards when using the product or when changing accessories. -
Página 3: Symbols
IMPORTANT SAFETY INSTRUCTIONS Do not charge battery tool in a damp or wet location. suitable for one product may create a risk of injury when Do not use, store, or charge battery packs or products used on another product. in locations where the temperature is less than 50°F Do not let gasoline, oils, petroleum-based products, or more than 100°F. -
Página 4: Assembly
SYMBOLS Some of the following symbols may be used on this product. Please study them and learn their meaning. Proper interpretation of these symbols will allow you to operate the product better and safer. SYMBOL NAME DESIGNATION/EXPLANATION Safety Alert Indicates a potential personal injury hazard. Read Operator’s To reduce the risk of injury, user must read and understand operator’s manual Manual before using this product. -
Página 5: Operation
OPERATION Accessories can be stored by inserting them from the top WARNING: or the bottom of the accessory holder located on the right Do not allow familiarity with this product to make you side of the wall mount. careless. Remember that a careless fraction of a second STARTING/STOPPING THE VACUUM is sufficient to inflict serious injury. See Figure 3, page 8. WARNING: T o start the vacuum: press the ON/OFF button. Always remove battery pack from the tool when you are T o stop the vacuum: press the ON/OFF button again. assembling parts, making adjustments, cleaning, or when ECO BUTTON not in use. Removing battery pack will prevent accidental... - Página 6 OPERATION To remove: Shake lightly or tap sides to dislodge debris. Switch off unit and remove the battery pack. Close door, pressing firmly until lock button engages. Depress locking tab and pull to remove. To remove: Remove the battery pack. ATTACHING AND REMOVING THE EXTENSION Push the release button located on top of the hand vac. WAND AND ACCESSORY TOOLS Rotate and pull the dust bowl down and out. See Figure 6, page 9. To reattach: The extension wand and accessory tools can be used Position the two sections as shown. Align the slot on the together or separately for a variety of cleaning tasks.
-
Página 7: Maintenance
MAINTENANCE This product contains no serviceable parts. To reattach: Insert the roller brush into the roller bar assembly. GENERAL MAINTENANCE Align the tabs on the cap to the notches on the roller bar Avoid using solvents when cleaning plastic parts. Most assembly and firmly press the cap into place. plastics are susceptible to damage from various types of NOTE: Make sure the opposite end of the roller brush is commercial solvents and may be damaged by their use. Use aligned to the drive spindle when pressing the cap into clean cloths to remove dirt, dust, oil, grease, etc. the assembly housing. WARNING: Turn the end cap 1/4 in. clockwise with coin to lock into place. Do not at any time let brake fluids, gasoline, petroleum- based products, penetrating oils, etc., come in contact CLEANING/REPLACING THE FILTER with plastic parts. Chemicals can damage, weaken or See Figure 13, page 10. -
Página 8: Instructions Importantes Concernant La Sécurité
INSTRUCTIONS IMPORTANTES CONCERNANT LA SÉCURITÉ CONSERVER CES INSTRUCTIONS L’utilisation d’un appareil électrique demande d’observer en tout temps des précautions élémentaires, dont celles-ci : NE JAMAIS utiliser l’aspirateur pour ramasser des AVERTISSEMENT ! charbons ardents, des mégots de cigarettes, des allumettes, des cendres brûlantes ou fumantes, etc. -
Página 9: Symboles
INSTRUCTIONS IMPORTANTES CONCERNANT LA SÉCURITÉ remiser ou charger le bloc-piles ou produits dans des qu’aucun autre problème ne risque d’affecter le bon emplacements où la température est inférieure 10 °C fonctionnement de l’outil. En cas de dommages, faire (50 °F) à ou supérieure à 38 °C (100 °F). Ne pas ranger réparer l’outil avant de l’utiliser de nouveau. -
Página 10: Assemblage
SYMBOLES Certains des symboles ci-dessous peuvent être utilisés sur produit. Veiller à les étudier et à apprendre leur signification. Une interprétation correcte de ces symboles permettra d’utiliser produit plus efficacement et de réduire les risques. SYMBOLE DÉSIGNATION / EXPLICATION Symbole d’alerte de Indique un risque de blessure potentiel. -
Página 11: Utilisation
UTILISATION Assurez-vous toujours que l’aspirateur est verrouillé en AVERTISSEMENT : place de façon sécuritaire. Ne pas laisser la familiarité avec l’outil faire oublier la Ranger les accessoires en les insérant par le haut ou par prudence. Ne pas oublier qu’une fraction de seconde le bas du support pour accessoires situé... - Página 12 UTILISATION Pour raccorder : Pour vider : Mettre l’appareil hors tension et retirer le bloc-pile. Retirer le bloc-pile. Aligner les goupilles de la brosse cylindrique avec la prise Tenir l’appareil au-dessus du contenant à déchets. située sur l’aspirateur-balai ou la rallonge pour lance. ...
-
Página 13: Entretien
ENTRETIEN Aucune pièce de ce produit ne peut être réparée par Aligner les languettes du capuchon sur les encoches de l’utilisateur. la barre à rouleau, puis remettre le capuchon en place en appuyant fermement. ENTRETIEN GÉNÉRAL NOTE : Veiller à ce que le bout opposé de la brosse à Éviter d’utiliser des solvants pour le nettoyage des pièces en rouleau s’aligne sur la broche d’entraînement, au moment plastique. -
Página 14: Importantes Instrucciones
IMPORTANTES INSTRUCCIONES DE SEGURIDAD GUARDE ESTAS INSTRUCCIONES Al utilizar un aparato eléctrico, deben seguirse ciertas precauciones básicas, como las siguientes: NUNCA aspire materiales con brasas calientes, colillas ¡ADVERTENCIA! de cigarrillos, fósforos, cenizas candentes o humeantes, etc. LEA Y COMPRENDA TODAS LAS INSTRUCCIONES. ... -
Página 15: Símbolos
IMPORTANTES INSTRUCCIONES DE SEGURIDAD 38 °C (100 °F). No guarde la herramienta a la intemperie condición que pueda afectar el funcionamiento de ni en el interior de vehículos. la aspiradora. Si se daña la herramienta, llévela a servicio antes de volver a utilizarla. Numerosos Evite un arranque accidental de la unidad. -
Página 16: Armado
SÍMBOLOS Es posible que se empleen en este producto algunos de los siguientes símbolos. Le suplicamos estudiarlos y aprender su significado. Una correcta interpretación de estos símbolos le permitirá utilizar mejor y de manera más segura el producto. SÍMBOLO NOMBRE DENOMINACIÓN/EXPLICACIÓN Alerta de Indica un peligro posible de lesiones personales. -
Página 17: Funcionamiento
FUNCIONAMIENTO INSTALACIÓN DEL MONTAJE EN LA PARED ADVERTENCIA: Vea la figura 2, página 8. No permita que su familarización con las herramientas lo Elija el lugar deseado para el montaje en la pared. vuelva descuidado. Tenga presente que un descuido de un instante es suficiente para causar una lesión grave. -
Página 18: Cómo Usar El Cepillo
FUNCIONAMIENTO CÓMO USAR EL CEPILLO CÓMO VACIAR/QUITAR/VOLVER A COLOCAR Vea las figuras 4 y 5, página 9. EL COLECTOR DE POLVO El cepillo puede conectarse directamente a la aspiradora Vea las figuras 7 a 10, páginas 9 y 10. para limpiar tapizados y escaleras, o conectarse a la vara El colector de polvo debe revisarse, vaciarse y limpiarse de extensión para limpieza regular de pisos. -
Página 19: Mantenimiento
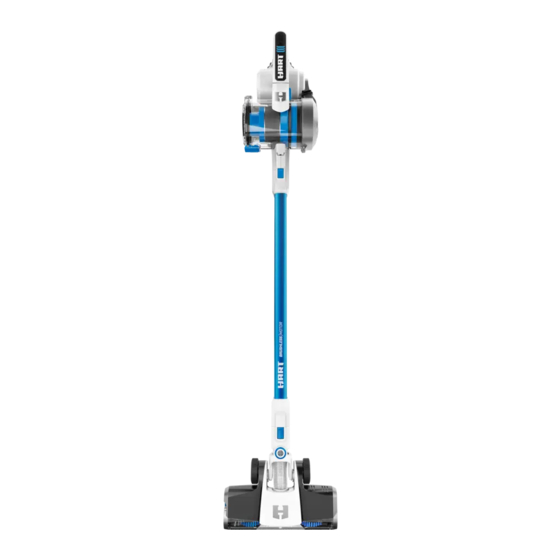
MANTENIMIENTO Este producto no contiene piezas que puedan repararse. Alinee las lengüetas en la tapa con las muescas del conjunto de la barra giratoria y presione con firmeza la MANTENIMIENTO GENERAL tapa para insertarla en su lugar. Evite el empleo de solventes al limpiar piezas de plástico. NOTA: Asegúrese de que el extremo opuesto del cepillo La mayoría de los plásticos son susceptibles a diferentes giratorio esté... - Página 20 HPSV01 A - Stick vacuum (aspirateur-balai sans fil, aspiradora tipo escoba G - Upholstery tool (upholstery tool outil d’habillage, herramienta para inalámbrica) tapicería) B - Dust bowl (récipient à poussière, colector de polvo) H - Micro crevice tool (micro-suceur plat, herramienta de micro C - Extension wand (rallonge pour lance, tubo de extensión)
- Página 21 FIG. 4 FIG. 7 A - Locking tab (languette de verrouillage, orejeta de fijación) B - Dust bowl (récipient à poussière, colector de polvo) C - Release button (bouton de dégagement, botón de liberación) FIG. 8 A - Roller bar (brosse à tapis, barra giratoria) B - Pins (goupilles, clavijas) C - Receptacle (prise, receptáculo) D - Locking tab (languette de verrouillage,...
- Página 22 FIG. 9 FIG. 10 FIG. 12 A - Roller bar (brosse à tapis, barra giratoria) B - End cap (capuchon d’extrémité, tapa del extremo) C - Roller brush (brosse à tapis, cepillo A - Slot (fente, ranura) giratorio) B - Tab (ergot, orejeta) D - Slot (fente, ranura) FIG.
- Página 23 NOTES/NOTAS...
- Página 24 Les détails de la garantie sont disponibles sur www.HARTtools.com Une preuve d’achat est requise pour valider la garantie limitée de 3 ans. HART, le logo HART et le logo H sont des marques de commerce de Techtronic Cordless GP. Servicio/Piezas de repuesto Atención al cliente/Soporte técnico...