Tabla de contenido
Publicidad
Idiomas disponibles
Idiomas disponibles
Enlaces rápidos
THANK YOU for purchasing this high-quality product. Register your microwave oven at www.whirlpool.com.
For future reference, please make a note of your product model and serial numbers. These can be found on the label located on the
microwave oven frame behind the top right side of the microwave oven door.
Model Number __________________________________________
W11412755C
Table of Contents
MICROWAVE OVEN SAFETY ........................................................2
Electrical Requirements ...............................................................4
FEATURES ......................................................................................4
Standby Mode ..............................................................................7
Demo Mode ..................................................................................7
Control Lock .................................................................................7
MICROWAVE OVEN USE ...............................................................7
Food Characteristics ....................................................................7
Cooking Guidelines ......................................................................7
Cookware and Dinnerware...........................................................8
Aluminum Foil and Metal .............................................................8
Microwave Cooking Power ..........................................................8
Popcorn ........................................................................................9
Reheat ..........................................................................................9
Frozen Entrée ...............................................................................9
Defrost ..........................................................................................9
Cook ...........................................................................................10
MICROWAVE OVEN CARE ..........................................................11
General Cleaning ........................................................................11
Replacing The Cavity Light ........................................................12
TROUBLESHOOTING ..................................................................14
ACCESSORIES .............................................................................14
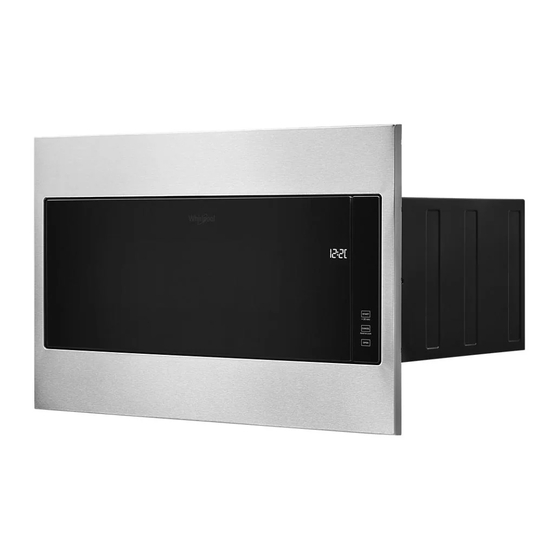
BUILT-IN MICROWAVE
WITH TRIM KIT
OWNER'S MANUAL
Serial Number ___________________________________________
Publicidad
Capítulos
Tabla de contenido
Solución de problemas

Manuales relacionados para Whirlpool WMT55511KS


Resumen de contenidos para Whirlpool WMT55511KS
-
Página 1: Tabla De Contenido
WITH TRIM KIT OWNER’S MANUAL THANK YOU for purchasing this high-quality product. Register your microwave oven at www.whirlpool.com. For future reference, please make a note of your product model and serial numbers. These can be found on the label located on the microwave oven frame behind the top right side of the microwave oven door. -
Página 2: Microwave Oven Safety
MICROWAVE OVEN SAFETY IMPORTANT SAFETY INSTRUCTIONS When using electrical appliances basic safety precautions should be followed, including the following: WARNING: Install or locate the microwave oven only in To reduce the risk of burns, electric shock, fire, injury to persons, or exposure to excessive microwave energy: accordance with the provided Installation Instructions. -
Página 3: Precautions To Avoid Possible Exposure To Excessive Microwave Energy
IMPORTANT SAFETY INSTRUCTIONS Use the microwave oven only for its intended use as Liquids, such as water, coffee, or tea are able to be described in the manual. Do not use corrosive chemicals or overheated beyond the boiling point without appearing to vapors in the microwave oven. -
Página 4: Electrical Requirements
FEATURES Feature Guide This manual covers several models. Your model may have some or all of the items listed. Refer to this manual or the Product Help section of our website at www.whirlpool.com for more detailed instructions. Timer Cook Power... - Página 5 Keypad Feature Instructions Clock Set the Clock This microwave uses a 12 hour clock (1:00 - 12:59). To set the clock, follow the instructions below: 1. Press Clock button, the icon will appear on the display. 2. Use the number keys to set the clock. 3.
- Página 6 Keypad Feature Instructions Popcorn Popcorn To use the popcorn preset, follow the instructions below: 1. Press POPCORN repeatedly to select the bag size. 3.0 oz is the default bag size. Close the door. “Start?” will flash on the display. 2. Press the START button. When the stop time is reached, the microwave oven will shut off automatically, and the end tone will sound.
-
Página 7: Standby Mode
Standby Mode Control Lock When no functions are being used, the microwave oven will switch The Control Lock shuts down the control panel keypad to avoid to Standby Power mode and slightly dim the display brightness unintended use of the microwave oven. after about 2 minutes. -
Página 8: Cookware And Dinnerware
Do Not Use Cookware and Dinnerware Metal cookware and bakeware, gold, silver, pewter, non-approved Cookware and dinnerware must fit on the turntable. Always meat thermometers, skewers, twist ties, foil liners, such as use oven mitts or pot holders when handling because any dish sandwich wrappers, staples, and objects with gold or silver trim or may become hot from heat transferred from the food. -
Página 9: Popcorn
Popcorn Defrost 1.75 or 3.0 or 3.5 oz bags. For optimal results, food should be 0°F (-18°C) or colder when ■ defrosting. Do not use regular paper bags or glassware. ■ Unwrap foods and remove lids (from fruit juice) before Pop only one package of popcorn at a time. -
Página 10: Cook
COOK Item Food Category Quantity Bacon 1-6 slices Average thickness: Follow directions on package. For best results, place bacon on microwave-safe bacon rack. Canned Vegetable 1, 2, 3 or 4 cups (250, 500, 750 mL or 1 L) Place in microwave-safe container. Cover with plastic wrap, and vent. -
Página 11: Microwave Oven Care
MICROWAVE OVEN CARE General Cleaning IMPORTANT: Before cleaning, make sure all controls are off and Cleaning Method: the microwave oven is cool. Always follow label instructions on Average soil cleaning products. Mild, nonabrasive soaps and detergents: ■ Soap, water, and a soft cloth or sponge are suggested first, unless Rinse with clean water and dry with soft, lint-free cloth. -
Página 12: Replacing The Cavity Light
MICROWAVE OVEN CARE Replacing The Cavity Light Cavity Light is located at the top front of the microwave oven, 4. Remove the 4 screws which fasten the trim kit frame to the under the cover and is replaceable. Before replacing lamp, make microwave oven, and set the 4 screws aside. - Página 13 10. Reattach the light cover with the screw removed in step 6. 11. Reattach the trim kit frame that was removed in step 5, to the microwave oven by first aligning the 4 locating slots with the locating pins. 12. Use the 4 screws removed in step 4, to fasten the trim kit frame to the microwave oven. 13.
-
Página 14: Troubleshooting
This moisture should not impact any surrounding surface. Wipe away with towel. ACCESSORIES/REPLACEMENT PARTS For accessories in the U.S.A., you can visit our website at www.whirlpool.com or call us at 1-866-698-2538. Cleaning Supplies Turntable support ■... - Página 15 CON KIT DE MOLDURAS GRACIAS por adquirir este producto de alta calidad. Registre su horno de microondas en www.whirlpool.com. Para referencia en el futuro, anote los números de serie y modelo de su producto. Puede encontrarlos en la etiqueta ubicada en el marco del horno de microondas, detrás del lado superior derecho de la puerta del horno de microondas.
-
Página 16: Seguridad Del Horno De Microondas
SEGURIDAD DEL HORNO DE MICROONDAS Su seguridad y la seguridad de los demás es muy importante. Hemos incluido muchos mensajes importantes de seguridad en este manual y en su electrodoméstico. Lea y obedezca siempre todos los mensajes de seguridad. Este es el símbolo de alerta de seguridad. Este símbolo le llama la atención sobre peligros potenciales que pueden ocasionar la muerte o una lesión a usted y a los demás. -
Página 17: Precauciones Para Evitar La Posible Exposición A Energía Excesiva De Microondas
INSTRUCCIONES IMPORTANTES DE SEGURIDAD No opere el horno de microondas si el cable o el enchufe Los líquidos tales como agua, café o té pueden están dañados, si el horno no funciona correctamente o si recalentarse más allá del punto de hervor, sin que se ha dañado o caído. -
Página 18: Requisitos Eléctricos
Guía de funciones Este manual abarca varios modelos. Su modelo puede contar con algunos o todos los elementos enumerados. Consulte este manual o la sección de Ayuda del producto de nuestro sitio web en www.whirlpool.com para obtener instrucciones más detalladas. Defrost... - Página 19 Tecla Función Instrucciones Clock (Reloj) Ajustar el reloj Este microondas utiliza un reloj de 12 horas (1:00 - 12:59). Para configurar el reloj, siga las instrucciones a continuación: 1. Presione el botón Clock (Reloj), el ícono aparecerá en la pantalla. 2. Use las teclas numéricas para configurar el reloj. 3.
- Página 20 Tecla Función Instrucciones Popcorn Palomitas de Para usar el preajuste de palomitas de maíz, siga las instrucciones a continuación: (Palomitas de maíz) maíz 1. Presione POPCORN (Palomitas de maíz) varias veces para seleccionar el tamaño de la bolsa. 3 oz es el tamaño de bolsa predeterminado. Cierre la puerta. “Start?” (¿Iniciar?) parpadeará...
-
Página 21: Modo Standby (En Espera)
Modo Standby (en espera) Control Lock (Bloqueo de controles) Cuando no haya funciones en uso, el horno de microondas Control Lock (Bloqueo de controles) desactiva las teclas del panel pasará al modo Standby Power (Potencia en espera) y atenuará de control para evitar el uso accidental del horno de microondas. levemente el brillo de la pantalla después de alrededor de Para bloquear el control: Toque CANCEL (Cancelar) durante 2 minutos. -
Página 22: Utensilios De Cocina Y Vajilla
No usar Utensilios de cocina y vajilla No se deben utilizar en el horno de microondas utensilios de Los utensilios de cocina y la vajilla deben encajar en la bandeja cocina y de hornear metálicos, oro, plata, peltre, termómetros giratoria. Siempre use guantes para hornear o agarraderas para para carne no aprobados, pinchos, precintos, forros de papel manipular los utensilios, ya que cualquier plato puede calentarse metálico como envoltorios para emparedados, grapas y objetos... -
Página 23: Popcorn (Palomitas De Maíz)
Popcorn Frozen Entrée (Palomitas de maíz) (Plato principal congelado) Bolsas de 1,75, 3,0 o 3,5 oz. Alimento Cantidad No use bolsas de papel común ni utensilios de vidrio. Plato principal congelado ■ 10, 20, 40 o 60 oz (283, 567, 1134 o 1701 g) Haga reventar un solo paquete de palomitas de maíz a la vez. -
Página 24: Defrost (Descongelar)
Defrost (Descongelar) Cook (Cocinar) Para obtener resultados óptimos, los alimentos deben estar a ■ Artículo Categoría de alimento Cantidad 0 °F (-18 °C) o más fríos al descongelarlos. Tocino 1-6 trozos Quite la envoltura de los alimentos y retire las tapas (de los ■... -
Página 25: Cuidado Del Horno De Microondas
CUIDADO DEL HORNO DE MICROONDAS Limpieza general IMPORTANTE: Antes de la limpieza, asegúrese de que todos los Método de limpieza: controles estén apagados y que el horno de microondas esté frío. Suciedad promedio Siempre siga las instrucciones de las etiquetas de los productos Jabones y detergentes suaves, no abrasivos: de limpieza. -
Página 26: Reemplazo De La Luz De La Cavidad
CUIDADO DEL HORNO DE MICROONDAS Reemplazo de la luz de la cavidad La luz de la cavidad está en la parte superior frontal del horno de 4. Retire los 4 tornillos que sujetan el marco del kit de molduras microondas, debajo de la cubierta, y se puede reemplazar. Antes al horno de microondas y deje los 4 tornillos a un lado. - Página 27 10. Vuelva a colocar la cubierta de la luz con el tornillo que extrajo en el paso 6. 11. Vuelva a colocar el marco del kit de molduras que se retiró en el paso 5 en el horno de microondas alineando primero las 4 ranuras de ubicación con los pasadores de ubicación.
-
Página 28: Solución De Problemas
Esta humedad no debe afectar ninguna superficie circundante. Quítela con una toalla. ACCESORIOS/PIEZAS DE REPUESTO Para obtener accesorios en EE. UU., puede visitar nuestro sitio web en www.whirlpool.com o llamarnos al 1-866-698-2538. Artículos de limpieza Soporte de la bandeja giratoria ■...