Tabla de contenido
Publicidad
Idiomas disponibles
Idiomas disponibles
Enlaces rápidos
OPERATOR'S MANUAL
A Division of Snow Joe
, LLC
®
IMPORTANT!
Safety Instructions
All Operators Must Read These
Instructions Before Use
Any electrical appliance can be dangerous if used incorrectly.
Some of the safety precautions given in this manual apply
generally to many appliances. Other warnings are specific
to the use of this snow thrower. Keep this manual for future
reference.
General Safety WARNINGS!
You and any other operator of this snow thrower must read,
understand, and follow these instructions in their entirety, and
should reread them at the start of each snow season.
Failure to follow these instructions may result in ELECTRIC
SHOCK, FIRE, and/or serious PERSONAL INJURY.
Notice the personal safety alert symbol
manual to draw your attention to a WARNING given along
with the particular operating instruction. This means that
the operation requires special ATTENTION, CAUTION,
and AWARENESS.
1. Keep work area clean and well lit. Cluttered, dark areas
invite accidents.
2. Do not operate the snow thrower in an explosive
atmosphere, such as in the presence of flammable
liquids, gases, or dust. Electrical appliances create sparks
that may ignite the dust or fumes.
3. Keep children, pets, and bystanders away from the
work area. Be aware that the normal noise of the
machine when turned on may make it difficult for you to
hear approaching people. Spectators should wear safety
glasses and be kept a safe distance away from the work
area. Do not let spectators touch the snow thrower or the
extension cord.
4. Electrical plugs must match the outlet. Never modify
the plug in any way. Do not use any adapter plugs with
grounded appliances. Unmodified plugs and matching
outlets will reduce the risk of electric shock.
© 2020 by Snow Joe
, LLC
®
All rights reserved. Original instructions.
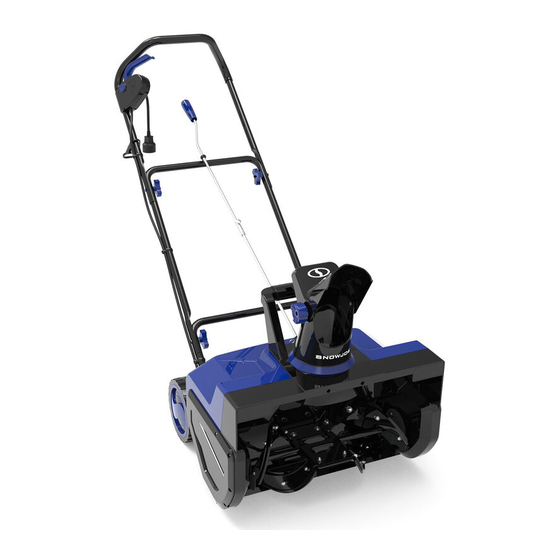
ELECTRIC SNOW THROWER
R
22-INCH | 14.5-AMP
Model SJ626E
m
used in this
5. Avoid body contact with earthed or grounded surfaces
(i.e. upper and lower water pipes, radiators, ranges,
refrigerators, microwave ovens, and outer frames of
heating equipment). Take necessary precautions to avoid
electric shock. There is an increased risk of electric shock
if your body is earthed or grounded.
6. Do not abuse the cord. Keep the cord away from heat,
oil, sharp edges, or moving parts. Never carry the snow
thrower by its cord or yank the cord to disconnect it from
the electrical outlet. Damaged or entangled cords increase
the risk of electric shock.
7. Replace or properly repair damaged cords. If the cord
becomes damaged in any manner while plugged into the
wall receptacle, immediately pull the extension cord plug
from the receptacle.
8. Contact with water while operating the snow thrower
can result in electric shock and serious bodily injury.
Do not use the snow thrower in damp or wet locations or
expose to rain. Do not handle the plug or the appliance
with wet hands or while standing in water.
m
9.
WARNING – Use outdoor extension cords marked
SW-A, SOW-A, STW-A, STOW-A, SJW-A, SJOW-A,
SJTW-A, or SJTOW-A. These cords are rated for outdoor
use and reduce the risk of electric shock.
10. Turn off the power switch and disconnect the power
cable before making any adjustments to the unit and
before inspecting, servicing, changing accessories, or
cleaning the snow thrower. Follow the same procedure
if any other dangerous conditions are present during
operation. Any adjustments to the unit should be
performed after revolving parts inside the snow thrower
stop completely. Such preventative safety measures
reduce the risk of starting the power tool accidentally.
11. If you find the main power cable or the extension cable
damaged, please pull out the plug from the socket and
disconnect the power immediately. Repair the cable or
replace it if necessary.
12. When replacing any parts, you must strictly observe
the instructions and procedures described in this
operator's manual. Special care should be paid to any
rubber parts, since these parts may increase the engine
load and decrease its mechanical power if damaged.
13. Do not move or transport the snow thrower when the
plug is connected to the power socket and the switch
is turned on.
1
Form No. SJ-SJ626E-880E-MR2
SAVE THESE INSTRUCTIONS
EN
Publicidad
Tabla de contenido

Manuales relacionados para SNOWJOE SJ626E


Resumen de contenidos para SNOWJOE SJ626E
- Página 1 OPERATOR’S MANUAL Model SJ626E A Division of Snow Joe , LLC ® Form No. SJ-SJ626E-880E-MR2 IMPORTANT! 5. Avoid body contact with earthed or grounded surfaces (i.e. upper and lower water pipes, radiators, ranges, Safety Instructions refrigerators, microwave ovens, and outer frames of heating equipment).
-
Página 2: Electrical Safety
SW-A, SOW-A, STW-A, with lighted end (Model PJEXT50-B). Visit STOW-A, SJW-A, SJOW-A, SJTW-A, or SJTOW-A. snowjoe.com to purchase this extension cord online Before use, check that the extension cord is in good or, to order by phone, call 1-866-SNOWJOE condition. -
Página 3: Personal Safety
+ Sun Joe customer service ® ® Safety Instructions for Walk-Behind center at 1-866-SNOWJOE (1-866-766-9563). Snow Throwers • Noise control – When using the snow thrower, you must respect local laws and regulations regarding noise control • Read the operator’s manual carefully – Learn your and environmental protection. To avoid noise disturbance, snow thrower’s applications and limitations as well as the... - Página 4 • Store safely – Store the snow thrower indoors in a dry area between uses. Keep it in a locked area, where children and unauthorized users cannot gain access. Do not store the machine while it is still connected to the power source as this may result in damage and injury.
-
Página 5: Safety Symbols
Safety Symbols The following table describes safety symbols that may appear on this product. Read, understand, and follow all instructions on the machine before attempting to assemble and operate. Symbols Descriptions Symbols Descriptions READ THE OPERATOR'S Disconnect the plug before MANUAL(S) –... -
Página 6: Technical Data
Know Your Electric Snow Thrower Read the owner’s manual and safety rules carefully before operating your electric snow thrower. Compare the illustration below to the actual unit in order to familiarize yourself with the location of the various controls and adjustments. Save this manual for future reference. -
Página 7: Carton Contents
+ Sun Joe customer service ® ® center at 1-866-SNOWJOE (1-866-766-9563) for assistance. Handle with care during assembly so that electrical wiring does not become damaged. 3. Before securing the upper frame, slide the extension cord restraint hook up the upper frame (Fig. 3). - Página 8 Chute Crank Assembly Fig. 3 1. Remove the cotter pin from the lower chute crank (Fig. 6). Fig. 6 Cotter Pin Lower chute crank Extension cord restraint hook Upper frame 4. Secure the connection of the upper frame to the middle frame by fastening the second set of knob and bolt on 2.
- Página 9 Fig. 9 Fig. 12 Crank Thumbscrew connector Thumbscrew Lower chute crank 5. Slide the upper chute crank through the rubber ring located on the middle frame (Fig. 10). Operation Fig. 10 NOTE: Before using this machine, make sure that the power source you will use complies with the specifications detailed Upper chute crank in this manual.
- Página 10 ® ® ® 3. When moving the snow thrower, use the wheels on one service center at 1-866-SNOWJOE (1-866-766-9563). side as the pivot point. Slightly tilt the snow thrower on Powering On + Off this pivot point to move it forward or backward.
- Página 11 Pattern A: Throw the snow to the right or left side where it is possible. For areas such as a long driveway, it is Fig. 17 advantageous to start in the middle. Plow from one end to Chute the other, throwing snow to both sides. crank Pattern B: If the snow can only be thrown to one side of the area to be cleared, start on the opposite side.
- Página 12 5. Do not use detergent or solvents as these could cause Fig. 19 irreparable damage to the snow thrower. Chemicals can destroy the plastic parts. 6. To protect the snow thrower from corrosion when storing for long periods, lightly oil the metal parts. Deflector 7.
- Página 13 Replacing the Belt + Pulley Fig. 22 NOTE: Determine the left and right hand side of the snow thrower by standing behind the unit in the normal operating position. 1. Remove the screws from the left panel of the snow thrower and remove the left panel (Fig.
-
Página 14: Automatic Reset
Snow Joe universal 24-inch electric snow ® Belt tension thrower cover (Model SJCVR-24) for added protection. pulley Visit snowjoe.com to purchase the cover online. Belt Service + Support If your Snow Joe SJ626E electric snow thrower requires ®... - Página 15 NOTE: Accessories are subject to change without any obligation on the part of Snow Joe + Sun Joe to provide notice of such ® ® changes. Accessories can be ordered online at snowjoe.com or via phone by contacting the Snow Joe + Sun Joe customer ® ®...
- Página 16 This Warranty gives you specific legal rights, and you may also have other rights which vary from State to State. PRODUCT REGISTRATION: Snow Joe strongly encourages you to register your Product. You can register online at snowjoe.com/register, or by printing and mailing in a registration card available online from our website, or calling our Customer Service Department at 1-866-SNOWJOE (1-866-766-9563), or by e-mailing us at help@snowjoe.com.
- Página 19 55.9 CM | 14.5 A MANUAL DEL OPERADOR Modelo SJ626E Una división de Snow Joe , LLC ® Forma No. SJ-SJ626E-880S-MR2 ¡IMPORTANTE! conexión a tierra. El uso de enchufes no modificados y tomacorrientes equivalentes reducirá el riesgo de un Instrucciones de seguridad choque eléctrico.
-
Página 20: Seguridad Eléctrica
® servicio Snow Joe + Sun Joe ® ® PJEXT50-B). Visite snowjoe.com para comprar Seguridad eléctrica este cable de extensión, o pídalo llamando al 1-866-SNOWJOE (1-866-766-9563). 1. Un interruptor de circuito de falla de conexión a • No use un cable de extensión de más de 100 pies tierra (GFCI) deberá... -
Página 21: Seguridad Personal
Seguridad personal Instrucciones de seguridad para quitanieves de rodadura 1. Manténgase alerta: vea lo que está haciendo y utilice su sentido común al operar este quitanieve. No use el • Lea cuidadosamente el manual del operador: entérese quitanieve cuando se encuentre cansado, enfermo, o de las aplicaciones y limitaciones de su quitanieve; así bajo la influencia de drogas, alcohol o medicamentos. - Página 22 Snow Joe + Sun Joe ® ® 1-866-SNOWJOE (1-866-766-9563). • Control de ruido: al usar el quitanieve, usted debe respetar las leyes y normas locales con respecto al control de ruido y la protección del medio ambiente. Para evitar perturbaciones de ruido, usted debe elegir a conciencia una hora de operación apropiada y tomar en cuenta las...
-
Página 23: Símbolos De Seguridad
Símbolos de seguridad La siguiente tabla describe los símbolos de seguridad que pueden aparecer en este producto. Lea, comprenda y siga todas las instrucciones relacionadas a esta máquina antes de intentar ensamblarla y operarla. Símbolo Descripción Símbolo Descripción LEA EL(LOS) MANUAL(ES) DEL Desconecte el enchufe antes de OPERADOR: lea, comprenda y llevar a cabo cualquier reparación... -
Página 24: Conozca Su Quitanieve
Conozca su quitanieve Lea cuidadosamente el manual del operador y las reglas de seguridad antes de operar su quitanieve eléctrico. Compare la ilustración debajo con la unidad real para familiarizarse con las ubicaciones de los diversos controles y ajustes. Guarde este manual para referencias futuras. -
Página 25: Desembalaje
Snow Joe + Sun Joe ® ® llamando al 1-866-SNOWJOE (1-866-766-9563). NOTA: no se deshaga de la caja de transporte ni del material de embalaje hasta que usted esté listo para usar su quitanieve eléctrico. El empaquetado está hecho de 2. -
Página 26: Ensamblado De La Manivela De Conducto
Ensamblado de la manivela de conducto Fig. 3 1. Retire el pasador de la manivela inferior del conducto (Fig. 6). Fig. 6 Pasador Manivela inferior Gancho de de conducto sujeción para cable de Marco extensión superior 4. Asegure la conexión del marco superior con el marco intermedio ajustando el segundo juego de tuercas de mariposa y pernos en ambos lados (Fig. -
Página 27: Operación
4. Con su mano, retire el tornillo de ajuste manual del Fig. 12 conector de manivela (Fig. 9). Fig. 9 Tornillo de ajuste Conector de manual manivela Tornillo de ajuste manual Manivela inferior de conducto Operación 5. Deslice la manivela superior de conducto a través del anillo de goma ubicado en el marco intermedio (Fig. -
Página 28: Encendido Y Apagado
+ Sun Joe ® ® 3. Al mover el quitanieve, use las ruedas en un lado como 1-866-SNOWJOE (1-866-766-9563). punto de pivote. Incline ligeramente el quitanieve sobre dicho punto de pivote para moverlo hacia adelante o Encendido y apagado hacia atrás. -
Página 29: Cambio De Dirección Y Altura De Lanzado
10. Al trabajar sobre piedras, grava o superficies sin 1. El conducto de descarga puede ser ajustado 180 grados pavimentar, evite lanzar materiales sueltos de superficie girando la manivela del conducto. Gire la manivela de junto con la nieve empujando hacia abajo en el mango control de conducto en sentido horario para mover el para levantar la barra raspadora en la base de la unidad conducto de descarga hacia la izquierda (Fig. -
Página 30: Lubricación De Por Vida (Motor Y Barrena)
4. Use un paño empapado con agua caliente y un cepillo suave para limpiar el quitanieve. ¡Nunca moje la máquina Fig. 19 ni la rocíe con agua! 5. No use detergentes o solventes ya que pueden causar daños irreparables al quitanieve. Los agentes químicos Perilla de pueden dañar las partes de plástico. -
Página 31: Reemplazo De Correa Y Polea
3. Instale la nueva barra raspadora y ajústela de forma Fig. 22 segura al quitanieve con los tres tornillos (Fig. 24). Reemplazo de correa y polea NOTA: determine los lados de la mano izquierda y derecha del quitanieve poniéndose de pie detrás de la unidad, en posición normal de operación. -
Página 32: Servicio Y Soporte
Visite snowjoe.com para adquirir la cubierta. Polea Servicio y soporte pequeña Polea grande Si su quitanieve SJ626E de Snow Joe requiere reparaciones ® 5. Vuelva a colocar el panel izquierdo del quitanieve, usando o mantenimiento, llame al 1-866-SNOWJOE (1-866-766-9563) todos los tornillos. - Página 33 NOTA: los accesorios están sujetos a cambios sin obligación alguna por parte de Snow Joe + Sun Joe de notificar sobre ® ® dichos cambios. Los accesorios pueden ser pedidos en línea en snowjoe.com o vía telefónica llamando a la central de servicio al cliente Snow Joe + Sun Joe al 1-866-SNOWJOE (1-866-766-9563). ®...
- Página 34 Web, llamando a nuestra central de servicio al cliente al 1-866-SNOWJOE (1-866-766-9563), o enviándonos un e-mail a help@snowjoe.com. Si usted no registra su Producto sus derechos de garantía no disminuirán; sin embargo, registrar su Producto permitirá que Snow Joe le pueda atender mejor si usted tiene alguna necesidad como cliente.
-
Página 37: Consignes De Sécurité
55.9 cm | 14,5 A MANUEL D'UTILISATION Modèle SJ626E Une division de Snow Joe , LLC ® Formulaire n° SJ-SJ626E-880F-MR2 IMPORTANT! 4. Les fiches électriques doivent correspondre à la prise. N'apportez aucune modification, quelle qu'elle soit, à la Consignes de sécurité fiche. N'utilisez pas de fiche d'adaptation avec les outils ou machines mis à... -
Página 38: Sécurité Électrique
14. Si, pendant l'utilisation, vous notez que le moteur s’éclairent quand elle est sous tension (modèle de la machine tourne de façon irrégulière ou si vous PJEXT50-B). Se rendre sur le site snowjoe.com entendez des bruits anormaux provenant du moteur, pour acheter en ligne cette rallonge électrique, ou arrêtez la machine, débranchez-la immédiatement... -
Página 39: Sécurité Personnelle
Consignes de sécurité pour les 5. N'utilisez pas le cordon à mauvais escient. Ne jamais tirer la souffleuse à neige par le cordon et ne pas tirer souffleuses à neige poussées brusquement sur le cordon pour le retirer de la prise. • Lire attentivement le manuel d’utilisation – Apprenez Maintenez le cordon éloigné... - Página 40 à la clientèle Snow Joe + Sun Joe ® ® 1-866-SNOWJOE (1-866-766-9563). • Lutte contre le bruit – Quand vous utilisez la souffleuse à neige, vous devez respecter les lois et réglementations locales antibruits ainsi que celles concernant la protection de l'environnement. Pour éviter toute agression sonore, vous devez soigneusement choisir l'heure appropriée à...
-
Página 41: Symboles De Sécurité
Symboles de sécurité Le tableau suivant décrit et explique les symboles de sécurité pouvant être marqués sur cette machine. Avant d'essayer de procéder à son assemblage et de l'utiliser, lisez, comprenez et suivez toutes les instructions sur cette machine. Symboles Descriptions Symboles Descriptions... -
Página 42: Données Techniques
Apprenez à mieux connaître votre souffleuse à neige électrique Avant d’utiliser votre souffleuse à neige électrique, lisez attentivement le manuel de l'utilisateur et les consignes de sécurité. Comparez l’illustration ci-dessous avec votre machine afin de vous familiariser avec l’emplacement des différents réglages et commandes. Conservez ce manuel pour pouvoir le consulter dans le futur. 1. -
Página 43: Contenu De La Caisse
Appeler plutôt le service clientèle Snow Joe ® crochet de retenue de rallonge électrique vers le haut du Sun Joe au 1-866-SNOWJOE (1-866-766-9563) pour ® cadre supérieur (Fig. 3). de l'aide. Procéder à l'assemblage avec précautions pour ne pas... -
Página 44: Assemblage De La Manivelle De Commande De Goulotte
Assemblage de la manivelle de Fig. 3 commande de goulotte 1. Retirez la goupille fendue de la manivelle de commande de goulotte inférieure (Fig. 6). Fig. 6 Goupille fendue Manivelle de Crochet de commande de retenue de goulotte inférieure Cadre rallonge supérieur électrique... -
Página 45: Attache De La Rallonge Électrique
4. Retirez à la main la vis de serrage sur le raccord de tige de 7. Alignez les trous de vis et serrez la vis de serrage à la main manivelle (Fig. 9). (Fig. 12). Fig. 9 Fig. 12 Raccord de tige de Vis de serrage manivelle... -
Página 46: Mise En Marche Et Arrêt
Snow Joe ® ® Souvenez-vous que le volume sonore normal de la Sun Joe au 1-866-SNOWJOE (1-866-766-9563). ® machine en marche peut vous empêcher d'entendre facilement des personnes s’approchant. Mise en marche et arrêt 3. Quand vous déplacez la souffleuse à neige, utilisez les AVERTISSEMENT! roues sur un côté... - Página 47 toutes les pièces se déplacent librement. Ne forcez pas 1. La goulotte d'éjection peut pivoter à 180 degrés en les commandes quand elles sont gelées. tournant la manivelle de commande de goulotte. Faites tourner le levier de commande dans le sens des aiguilles 10.
- Página 48 5. N'utilisez ni détergents ni solvants, car ils pourraient Fig. 19 endommager irrémédiablement la souffleuse à neige. Les produits chimiques peuvent détruire les pièces en plastique. 6. Pour protéger la souffleuse à neige de la corrosion quand Bouton de vous la remisez pendant de longues périodes, huilez déflecteur légèrement les pièces en métal.
-
Página 49: Remplacement De La Lame De Raclage
3. Posez la nouvelle lame de raclage et attachez-la solidement à la souffleuse à neige à l'aide des trois vis Fig. 22 (Fig. 24). Remplacement de la courroie et de la poulie REMARQUE : déterminez le côté droit et le côté gauche de la souffleuse à... -
Página 50: Remise En Marche Automatique
® Petite poulie (modèle SJCVR-24). Pour acheter la housse en ligne, Grosse poulie veuillez vous rendre sur le site www.snowjoe.com. Entretien, réparations et 5. Replacez le panneau gauche de la souffleuse à neige à assistance technique l’aide toutes les vis. -
Página 51: Accessoires En Option
+ Sun Joe soit pour autant tenue de ® ® donner un préavis desdits changements. Les accessoires peuvent être commandés en ligne sur le site snowjoe.com ou par téléphone en appelant le service clientèle Snow Joe + Sun Joe au 1-866-SNOWJOE (1-866-766-9563). - Página 52 Snow Joe vous recommande vivement d’enregistrer votre Produit. Vous pouvez l’enregistrer en ligne sur le site snowjoe.com/register, ou en imprimant et en envoyant par courrier une carte d’enregistrement offerte en ligne sur notre site Web, ou par téléphone en appelant notre Service à la clientèle au 1-866-SNOWJOE (1-866-766-9563), ou encore en nous envoyant un courriel à...