Tabla de contenido
Publicidad
Idiomas disponibles
Idiomas disponibles
Enlaces rápidos
Low ambient kit para
E
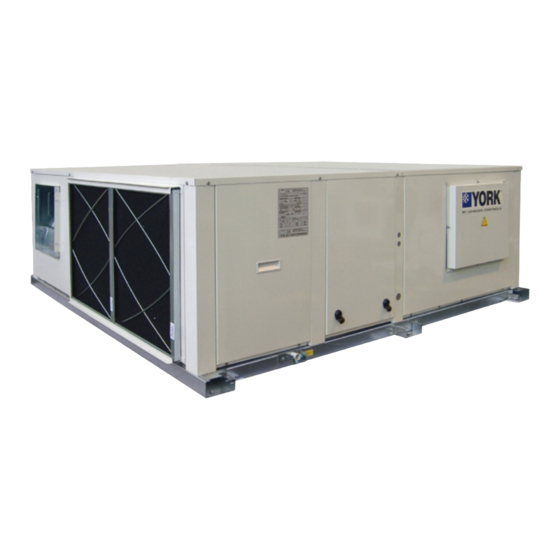
RTC, RTH-7L, 10L y 15L
Instrucciones de Instalación
Low Ambient kit for
GB
RTC, RTH-7L, 10L and 15L
Installation Instructions
Low ambient kit pour
F
RTC, RTH-7L, 10L et 15L
Instructions d'installation
Low ambient kit para
P
RTC, RTH-7L, 10L e 15L
Instruções de Instalação
Kit Low Ambient per
I
RTC, RTH-7L, 10L e 15L
Istruzioni per l'installazione
Low-Ambient-Bausatz für
D
RTC, RTH-7L, 10L und 15L
Hinweise zum Einbau
Low ambient kit voor
NL
RTC, RTH-7L, 10L en 15L
Installatie-instructies
Low ambient kit for
N
RTC, RTH-7L, 10L og 15L
Installasjonsinstrukser
������������
����������
Johnson Controls Manufacturing España, S.L. participa en el Programa de Certificación EUROVENT.
Los productos se corresponden con los relacionados en el Directorio EUROVENT de Productos
Certificados, en el programa AC1, AC2, AC3, LCP y FC.
El LCP, abarca plantas enfriadoras condensadas por aire y bombas de calor hasta 600 kW.
Johnson Controls Manufacturing España, S.L. is participating in the EUROVENT Certification Programme.
Products are as listed in the EUROVENT Directory of Certified Products, in the program AC1, AC2,
AC3, LCP and FC.
The LCP program covers air condensed water chillers and heat pumps of up to 600 kW
Johnson Controls Manufacturing España, S.L. participe au Programme de Certification EUROVENT.
Les produits figurent dans l'Annuaire EUROVENT des Produits Certifiés, dans le programme AC1,
AC2, AC3, LCP et FC.
Le programme LCP recouvre les groupes refroidisseurs de liquides froid seul et réversible, à con-
densation par air jusqu'à 600 kW.
Johnson Controls Manufacturing España, S.L. participa no Programa de Certificação EUROVENT.
Os produtos correspondem aos referidos no Directório EUROVENT de Produtos Certificados, no
programa AC1, AC2, AC3, LCP e FC.
O programa LCP abrange instalações arrefecedoras condensadas por ar e bombas de calor até
600 kW.
� � � � � � � �
���������������������
Johnson Controls Manufacturing España, S.L. partecipa al Programma di Certificazione EUROVENT.
I prodotti interessati figurano nell'Annuario EUROVENT dei Prodotti Certificati, nel programma AC1,
AC2, AC3, LCP e FC.
Il programma LCP è valido per refrigeratori d'acqua raffreddati ad aria e pompe di calore sino a 600 kW.
Johnson Controls Manufacturing España, S.L. ist am Zertifikationsprogramm EUROVENT beteiligt.
Die entsprechend gekennzeichneten Produkte sind im EUROVENT-Jahrbuch im Programm AC1,
AC2, AC3, LCP und FC. enthalten.
Das LCP- Programm umfasst luftgekühlte Kühlanlagen und Wärmepumpen bis 600 kW.
Johnson Controls Manufacturing España, S.L. neemt deel aan het EUROVENT-certificatieprogramma.
De produkten zijn opgenomen in het EUROVENT-jaarboek van de gecertificeerde produkten, in de
programma AC1, AC2, AC3, LCP en FC.
Het LCP programma omvat door lucht gecondenseerde koelaggregaten en warmtepompen tot 600
kW.
Johnson Controls Manufacturing España, S.L. deltar i EUROVENT sertifiseringsprogram.
Produktene er oppført i EUROVENT's katalog over sertifiserte produkt, i kategoriene AC1, AC2,
AC3, LCP og FC.
LCP-programmet omfatter luftkondenserte kjøleanlegg og varmepumper opptil 600 kW.
Ref: N-40240 0508
3 - 7
8 - 9
10 - 11
12 - 13
14 - 15
16 - 17
18 - 19
20 - 21
Publicidad
Tabla de contenido

Manuales relacionados para Johnson Controls YORK RTC


Resumen de contenidos para Johnson Controls YORK RTC
- Página 1 ��������������������� ������������ ���������� Johnson Controls Manufacturing España, S.L. participa en el Programa de Certificación EUROVENT. Johnson Controls Manufacturing España, S.L. partecipa al Programma di Certificazione EUROVENT. Los productos se corresponden con los relacionados en el Directorio EUROVENT de Productos I prodotti interessati figurano nell'Annuario EUROVENT dei Prodotti Certificati, nel programma AC1, Certificados, en el programa AC1, AC2, AC3, LCP y FC.
- Página 3 Situación de los componentes/Location of components/Emplacement des composants/Situação dos componentes/Ubicazione dei componenti/Lage der einzelnen Bauteile/Plaats van de onderdelen/Plas- sering av komponentene Fig.1 � � � � � ��� Conexión mangueras en caja eléctrica/Connection of hoses in electric box/Connexion du câblage dans le boîtier électrique/Ligação das mangueiras na caixa eléctrica/Collegamento dei cavi nella scatola elettrica/Verkabelung/Aansluiting kabels op schakelkast/Kobling av ledningene i koblingsboksen Fig.2...
- Página 4 Fig.3 �� ���� ���� �� �� �� � � � � � � �� �� �� �� �� �� � � � � � � � � � � � � � � �� ��� ��� ��� ��� ��� �� ��...
- Página 5 Fig.5 �������� �������� �������� ����������� �������� ��������� ��������� �������� �� �� �� ������ �� ��� �� �� �� ������ ��� ��� ���� Cable/Cable/Fil/Cabo/Cavo/Kabel/ Esquema/Diagram/Schéma/Esquema/Schema/ Longitud Kabel/Ledning Schematische Darstellung/ Schema/Skjema cable/Cable Nº cable/Cable length/Longueur No./Nº fil/Nº de du fil/Com- Sección/Sec- cabo/Nº cavo/ primento do Color/Colour/ tion/Section/...
-
Página 6: Generalidades
Instrucciones de instala- (RRV1) en la regleta X3. que el ventilador exterior M3 gira al 100%. ción 3. Conectar los cables en el interior de la Desactivar la etapa. caja eléctrica según el diagrama eléc- Generalidades trico. 10. Conectar el magnetotérmico del com- El accesorio de control de condensación presor (F1). -
Página 7: Diagrama Eléctrico
Diagrama eléctrico ����������������� ���������������� � ��� � � � ���� �� � � � ���� �� ������ ��� � �� �� ������������ ������������������������� ����������� ����������������������������� ������������������������������ ����������������������������������� �� �� � � � �� �� ���� � �� � �� � � �������... -
Página 8: Installation Instructions
Installation Instructions 3. Connect cables inside the electric box in 10. Connect the magneto thermal switch to accordance with the wiring diagram. the compressor (F1). General information The condensation control accessory (Low 11. Replace the top cover and the access 4. -
Página 9: Wiring Diagram
Wiring diagram ����������������� ���������������� � ��� � � � ��� �� � � � ���� �� ����� ��� � �� �� ������������ ����������������������� ����������� ��������������������� ���������������������� ��������������������������� �� �� � � � �� �� ���� � �� � �� � � �������... -
Página 10: Caractéristiques Techniques
Instructions d’installation 24VAC (RRV1) dans le bornier X3. le ventilateur extérieur M3 tourne à 100%. Généralités 3. Connecter les fils à l’intérieur du boîtier Désactiver l’étage. L’accessoire de contrôle de condensation électrique en suivant les indications du (Low Ambient Kit) est installé comme option schéma électrique. -
Página 11: Schéma Électrique
Schéma électrique ����������������������� ���������������� � ��� � � � ����� �� � � � ���� �� ����� ��� � �� �� ������������ �������������������������� ����������� ������������������������������ ������������������������������������ ����������������������������������������� �� �� � � � �� �� ���� � �� � �� � � �������... -
Página 12: Especificações Técnicas
Instruções de Instalação 10. Ligar o magnetotérmico do compressor 3. Ligar os cabos no interior da caixa (F1). Generalidades eléctrica de acordo com o diagrama O acessório de controlo de condensação eléctrico. 11. Voltar a montar o tecto e o painel de (Low ambient kit) instala-se como opção acesso ao ventilador exterior. - Página 13 Diagrama eléctrico ������������������ ���������������� � �������� ��� � � � �� � � � ���� �� ������ ��� � �� �� ������������ ������������������������������� ����������� ����������������������������� ��������������������������������� ���������������������������������������������������� �� �� � � � �� �� ���� � �� � �� � � �������...
-
Página 14: Caratteristiche Tecniche
Istruzioni per l’installazio- Nei modelli a pompa di calore (RTH), 10. Collegare l’interruttore termomagnetico montare il relè a 24 V c.a. (RRV1) nella del compressore (F1). morsettiera X3. 11. Rimontare il soffitto e il pannello d’ac- Generalità 3. Collegare i cavi all’interno del quadro cesso al ventilatore esterno. -
Página 15: Schema Elettrico
Schema elettrico ���������������������� ���������������� � ��� � � � ����� �� � � � ���� �� ������ ��� � �� �� ������������ �������������������������� ����������� ������������������������������������������������ ����������������������������������� ���������������������������������������� �� �� � � � �� �� ���� � �� � �� � � �������... -
Página 16: Technische Angaben
Hinweise zum Einbau 3. Kabel im Schaltkasten gemäß dem ent- und darauf geachtet werden, dass der sprechenden Schaltbild anschließen. Außenventilator M3 zu 100% arbeitet. Allgemeine Angaben Heizstufe wieder ausschalten. Der Kondensationsdruckzusatz (Low-Am- 4. Kabelstrang des Außenventilators (M3) bient-Bausatz) wird als Option im Werk auf der Seite von Schaltschütz KM3 ab- 10. - Página 17 Schaltbild ������������������������� ���������������� � ��� � � � ��� �� � � � ���� �� ���� ��� � �� �� ������������ ����������������������������� ����������� ���������������������������� �������������������������� ���������������������������������� �� �� � � � �� �� ���� � �� � �� � � �������...
-
Página 18: Installatie-Instructies
Installatie-instructies tepomp (RTH) het relais van 24 VAC of de buitenventilator uitschakelt. (RRV1) op de contactstrip X3 monte- 9. Betreft het een warmtepomp (RTH) Algemene beschrijving ren. verwarmingstrap 1 activeren en contro- Het toebehoren voor de condensatierege- leren of de buitenventilator M· op 100% ling (Low Ambient Kit) wordt als optie in de 3. - Página 19 Schakelschema ������������ ������������������������� � ��� � � � ���� �� � � � ���� �� ��� ��� � �� �� ������������ ���������������������� ����������� ������������������������� ��������������������������� ���������������������������������������� �� �� � � � �� �� ���� � �� � �� � � �������...
-
Página 20: Tekniske Spesifikasjoner
Installasjonsinstrukser koblingsboksen i henhold til det elek- 10.Koble kompressorens (F1) magneto- triske skjemaet. termikk. Generelt Tilbehøret kondenskontroll (low ambient kit) 4. Frakoble den eksterne viftens ledning 11. Sett det øvre dekslet og aksesspanelene installeres som alternativ på fabrikken. (M3) på KM3 kontaktorens side, og koble tilbake på... -
Página 21: Elektrisk Skjema
Elektrisk skjema Montere i modeller RTH07L, 10L, 15L Rød RRV1 Hvit Reg. Cut off RRV1- Relé fireveisventil P215DP-9102 LAK - Kondenskontroll M3 - Motor ekstern vifte KM3 - Kontaktor ekstern vifte RRV1 I-2563a EKSTERN VIFTE TILBEHØR LAK RTC07L, 10L, 15L RTH07L, 10L, 15L Data og mål kan endres uten forhåndsvarsel. - Página 23 DECLARACION CE DE CONFORMIDAD SOBRE MAQUINAS JOHNSON CONTROLS MANUFACTURING ESPAÑA, S.L. FABRICANTE: DIRECCIÓN: Paseo Espronceda, 278, 08204 SABADELL Certificamos que el equipo descrito, ha sido diseñado, fabricado y probado de conformidad con los requisitos básicos de la Directiva de Equipos a presión 97/23/CEE y sus correspondientes módulos de aplicación.
- Página 24 www.johnsoncontrols.com...