Riello 40 Instrucciones De Instalación, Montaje Y Funcionamiento
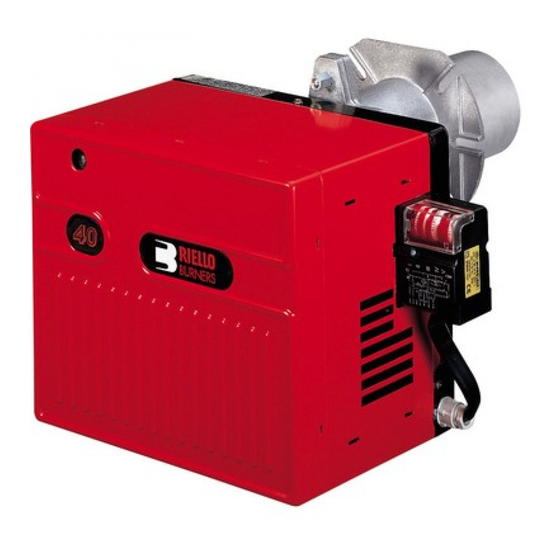
Quemador de gasóleo
Ocultar thumbs
Ver también para 40:
- Manual de usuario (64 páginas) ,
- Instrucciones de instalación, montaje y funcionamiento (53 páginas) ,
- Instrucciones de instalación, uso y mantenimiento (52 páginas)
Tabla de contenido
Publicidad
Idiomas disponibles
Idiomas disponibles
Enlaces rápidos
Publicidad
Tabla de contenido

Manuales relacionados para Riello 40


Resumen de contenidos para Riello 40
- Página 1 Installation, use and maintenance instructions Instrucciones de instalación, montaje y funcionamiento Light oil burner Quemador de gasóleo One stage operation Funcionamiento de una llama CODE - CÓDIGO MODEL - MODELO TYPE - TIPO 3747459 474T58 2902404 (5) - 05/2011...
-
Página 3: Technical Data
Absorbed electrical power 0.4 kW Burner with CE marking in conformity with EEC Directives: Electromagnetic Compatibility 2004/108/EC, Low Voltage 2006/95/EC, Machines 2006/42/EC. The burner meets protection level of IP 40, EN 60529. Fig. 1 D8067 1 – Return line HYDRAULIC JACK OPERATION 7)(Fig. -
Página 4: Burner Equipment
BURNER EQUIPMENT Quantity Description Flexible pipes with nipples Flange with insulating gasket Screws and nuts for flange Maintenance assembly Screw with two nuts for flange Cable grommet WORKING FIELD Fuel output - kg/h 230 Thermal power - kW D5282 OVERALL DIMENSIONS Flange Burner D5283... -
Página 5: Maintenance Position
INSTALLATION BOILER FIXING Put on the flange (1) the screw and two nuts, (see fig. 2). Widen, if necessary, the insulating gasket holes (5), (see fig. 3). Fix the flange (1) to the boiler door (4) using screws (2) and (if necessary) the nuts (3) interposing the ... -
Página 6: Hydraulic Systems
HYDRAULIC SYSTEMS Warning: before starting the burner make sure that the return pipe-line is not clogged: any obstruc- tion would cause the pump seals to break. WARNING The pump is supplied for use with a two pipe system. For use on a one pipe system, it is necessary to remove the by-pass screw (A), (see figure). -
Página 7: Electrical Wiring
ELECTRICAL WIRING 220V 60Hz DO NOT EXCHANGE THE WARNING NEUTRAL WITH THE PHASE. Main switch 6A max. Limit thermostat Safety thermostat Remote lock-out signal (220V - 0.5A max.) Terminal board of control-box 530SE Valve Black Capacitor Motor D5228 NOTES: – Wires of min. 1 mm section. -
Página 8: Combustion Adjustment
COMBUSTION ADJUSTMENT In conformity with Efficiency Directive 92/42/EEC the application of the burner on the boiler, adjust- ment and testing must be carried out observing the instruction manual of the boiler, including verifica- tion of the CO and CO concentration in the flue gases, their temperatures and the average temperature of the water in the boiler. - Página 9 Combustion head settings indicated in the schedule are valid for most cases. The setting of the fan output according to the installation should normally be done only through the air damper. Should one subsequently want to retouch also the setting of the combustion head, with the burner running, operate on the rod (1) with a 6 mm spanner (2) as follows: TURN TO THE RIGHT: (sign In order to increase the volume of air entering the combustion chamber and thus diminishing its pres-...
-
Página 10: Burner Start-Up Cycle
It is important to take account of the fact that the air output of the fan differs according to whether the PANEL burner has its metal cover fitted or not. Therefore we recommended to proceed as follows: – adjust the air damper as indicated in the schedule (4, page 6);... - Página 11 ADJUSTMENTS, TO AVOID FLAME - DETACHMENT, AT BURNER - IGNITION CORRECT POSITIONING OF THE ELECTRODES MOVE ELEC- TRODE HOLDER BACK- 4 ± 0.3 mm WARDS TO THE END D6313 6.5 ± 0.5 mm NOZZLE: ATOMIZING ANGLE Choose 60° nozzle. PUMP - SETTING The pump is factory set, at a pressure of 12 bar.
-
Página 13: Datos Técnicos
Potencia eléctrica absorbida 0,4 kW Quemador con marca CE conformes con las Directivas CEE: Compatibilidad Electromagnetíca 2004/ 108/CE, Baja tensión 2006/95/EC, Máquinas 2006/42/EC. Nivel de protección del quemador IP 40 según EN 60529. Fig. 1 D8067 1 – Retorno FUNCIONAMIENTO HIDRÁULICO DEL AIRE 7)(Fig. -
Página 14: Material Suministrado
MATERIAL SUMINISTRADO Cantidad Descripción Tubos flexibles con racords Brida con junta aislante Tornillos y tuercas para brida Conjunto mantenimiento Tornillo con dos tuercas para brida Anillo pasacable CAMPO DE TRABAJO Caudal de gasóleo - kg/h 230 Potencia térmica - kW D5282 DIMENSIONES Brida... -
Página 15: Instalación
INSTALACIÓN FIJACIÓN A LA CALDERA • Introduzca en la brida (1) el tornillo y las dos tuercas, (ver fig. 2). • Ensanche, si es necesario, los agujeros de la protección aislante (5), (ver fig. 3). • Fije a la portezuela de la caldera (4) la brida (1) mediante los tornillos (2) y (si es necesario) las tuercas (3) interponiendo la protección aislante (5), (ver Fig. -
Página 16: Instalación Hidráulica
INSTALACIÓN HIDRÁULICA Atención: antes de poner en funcionamiento el quemador hay que asegurarse de que el tubo de retorno del combustible no esté obstruido. Una contrapresión excesiva causaría la rotura del órgano de estanquidad de la bomba. ATENCIÓN La bomba está prevista para funcionar en bitubo. Para el funcionamiento monotubo se debe quitar el tornillo de by- pass (A), (ver la figura). -
Página 17: Instalación Eléctrica
INSTALACIÓN ELÉCTRICA 220V 60Hz ATENCIÓN NO INTERCAMBIE EL NEUTRO CON LA FASE Interruptor general máx Termóstato de regulación Termóstato de seguridad Señalización de bloqueo a distancia (220V - 0,5A máx.) Regleta de conexión caja de control 530SE Negro Condensador Motor Negro D5228 NOTAS:... -
Página 18: Regulación De La Combustión
REGULACIÓN DE LA COMBUSTIÓN Conforme a la Directiva de rendimiento 92/42/CEE, la aplicación del quemador en la caldera, la regu- lación y el ensayo tienen que ser efectuados como indicado en el manual de instrucciones de la misma caldera, incluido el control de la concentración de CO y CO en los humos, su temperatura y la tem- peratura media del agua de la caldera. -
Página 19: Regulación Registro Del Aire
Las regulaciones del cabezal indicadas en la tabla son adecuadas para la mayoría de los casos. Generalmente, la adaptación del caudal del ventilador a la instalación se debe efectuar sólo con el registro de aire. Si desea modificar también la regulación del cabezal, con el quemador en funcionamiento, regule la varilla (1) con una llave 6 mm (2) de la siguiente manera: GIRE HACIA LA DERECHA: (signo +) Para aumentar la cantidad de aire introducido en la cámara de combustión y disminuir su presión. -
Página 20: Posicionamiento De Los Electrodos
Es importante tener en cuenta que el caudal de aire del ventilador es diferente según si el quema- dor tiene montado o no el envolvente. PANEL Por lo tanto, es oportuno proceder de la siguiente manera: – regule el registro como indicado en la tabla (4, pág. 6) –... -
Página 21: Regulación Para Evitar El Desprendimiento De La Llama Durante El Encendido Del Quemador
REGULACIÓN PARA EVITAR EL DESPRENDIMIENTO DE LA LLAMA DURANTE EL ENCENDIDO DEL QUEMADOR 1) POSICIÓN CORRECTA DE LOS ELECTRODOS RETROCEDER EL PORTAELECTRODOS 4 ± HASTA EL TOPE 0,3 mm D6313 6,5 ± 0,5 mm 2) BOQUILLA: ÁNGULO DE PULVERIZACIÓN Es preferible el ángulo 60°. 3) REGULACIÓN DE LA BOMBA La bomba se regula en fábrica a una presión de 12 bar. - Página 24 RIELLO S.p.A. I-37045 Legnago (VR) Tel.: +39.0442.630111 http:// www.riello.it http:// www.rielloburners.com Subject to modifications - Con la posibilidad de modificación...