Tabla de contenido
Publicidad
Idiomas disponibles
Idiomas disponibles
Enlaces rápidos
Publicidad
Tabla de contenido
Solución de problemas

Manuales relacionados para Pur Line MISTY 2


Resumen de contenidos para Pur Line MISTY 2
- Página 1 MISTY 2 VENTILADOR NEBULIZADOR CON MANDO A DISTANCIA STAND FAN WITH HUMIDIFIER WITH REMOTE CONTROL VENTILATEUR BRUMISATEUR AVEC TÉLÉCOMMANDE VENTILATORE NEBULIZZATORE CON TELECOMANDO VENTILADOR COM NEBULIZAÇÃO COM CONTROLE REMOTO STEHVENTILATOR MIT RAUMBEFEUCHTER MIT FERNBEDIENUNG...
-
Página 2: Ventilador Nebulizador
Por favor, lea este manual detenidamente antes de usar el producto y guárdelo para futuras consultas. Por favor, apague el ventilador y desenchúfelo cuando no esté en funcionamiento, como medida de ahorro energético y para aumentar su vida útil. ESPECIFICACIONES Modelo: MISTY 2 Alimentación: Volumen niebla <300 ml/h 220 - 240 V 50Hz... -
Página 3: Partes Del Aparato
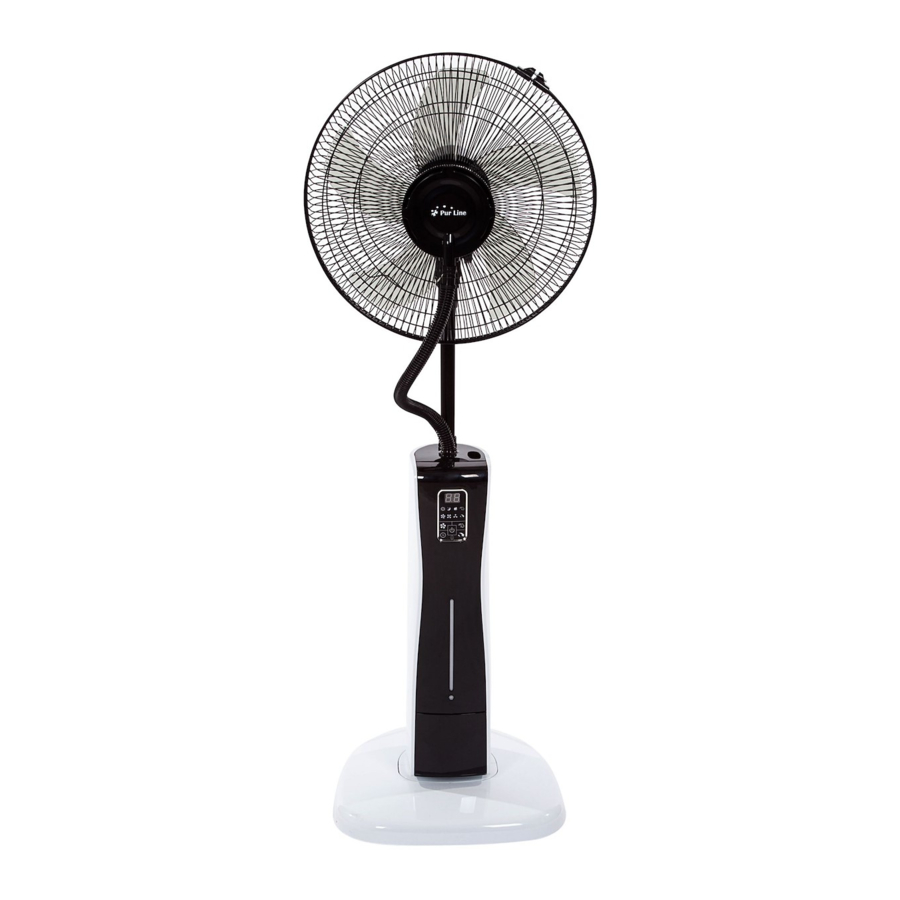
PARTES DEL APARATO Antes de comenzar el montaje del ventilador nebulizador, por favor, compruebe que todas las piezas se encuentran disponibles. 1. Junta de las rejillas 2. Boquilla de salida del nebulizador 3. Rejilla frontal 4. Tapón del aspa 5. Aspas 6. -
Página 4: Funcionamiento
FUNCIONAMIENTO Panel de control y mando a distancia 1. Pantalla tiempo 2. Indicador modo 3. Indicador velocidad 4. Botón encendido/ velocidad 5. Botón temporizador 6. Botón apagado 7. Botón oscilación 8. Botón nebulización 9. Indicador oscilación 10. Indicador nebulización 11. Botón modo Botón de velocidad: Para encender el ventilador. -
Página 5: Limpieza Y Mantenimiento
LIMPIEZA Y MANTENIMIENTO · Desconecte el aparato antes de su limpieza. · La grasa o suciedad del ventilador y las aspas, deben limpiarse con un poco de detergente neutro y un paño suave. · Limpiar la suciedad y la grasa del ventilador a fin de evitar cambios en el color u otros daños: - Utilice un detergente neutro y un paño suave - Evite el lavado directo con agua. -
Página 6: Condiciones De Garantía
Problema Posible Causa Posible Solución (es) La luz indicadora del Demasiada agua en el tanque Reduzca la cantidad de agua y vuelva a humidificador se enciende. ajustar bien la cubierta del depósito No hay ventilación, ni rociada de agua La cantidad de rocío es muy 1. -
Página 7: Useful Information
Please turn off the power and unplug when it isn’t working, this can save power consumption and extend the lifespan of the appliance. SPECIFICATIONS Model: MISTY 2 Power supply: Mist volume <300 ml/h 220 - 240 V... - Página 8 COMPONENTS Before installation, please check that all parts have been supplied 1. Grid joint 2. Mist vent 3. Front grid 4. Blade spinner 5. Blades 6. Grid nut 7. Rear grid 8. Motor spindle 9. Head 10. Flexible hose 11. Screw 12.
- Página 9 OPERATION Control panel and remote control 1. Time display 2. Mode indicator light 3. Speed indicator light 4. ON / Speed button 5. Timer button 6. OFF button 7. Oscillation button 8. Mist button 9. Oscillation indicator light 10. Mist indicator light 11.
-
Página 10: Cleaning And Maintenance
CLEANING AND MAINTENANCE · Unplug the unit before cleaning. ·Any greasy dirt on the fan and fan blade should be cleaned with clean and mild detergent and soft cloth. · First, disassemble the fan (diagram 2). · Clean the greasy dirt on the fan so as not to change the colour or cause damages: - Clean with detergent and soft cloth. -
Página 11: Warranty Conditions
Problems Possible Reasons Solution (s) The amount of mist is very 1. Transducer is clogged with dirt 1. Clean the transducer small 2. Dirty water or water has been 2. Add clean water too long in the water tank Evident vibration 1. -
Página 12: Information Importante
Lisez ces instructions attentivement avant l’utilisation, et conservez-les pour de futures consultations. S’il vous plait, éteignez et débranchez le ventilateur lorsque vous ne l’utilisez pas, afin d’économiser de l’énergie et d’augmenter sa durée de vie utile CARACTÉRISTIQUES Modèle: MISTY 2 Alimentation: Capacité pulvérisation <300 ml/h 220 - 240 V 50Hz... - Página 13 COMPOSANTS Ouvrez l’emballage du ventilateur et vérifier que l’intégralité des pièces s’y trouve. 1. Joint de grille 2. Sortie du pulvérisateur 3. Grille frontale 4. Casserole d’hélice 5. Hélice 6. Écrou pour grille 7. Grille arrière 8. Broche moteur 9. Tête 10.
- Página 14 OPÉRATION Panneau de contrôle et télécommande 1. Écran temps 2. Indicateur de mode 3. Indicateur de vitesse 4. Bouton alimentation ed vitesse 5. Minuteur 6. Bouton Off 7. Bouton oscillation 8. Bouton nébulisation 9. Indicateur oscillation 10. Indicateur nébulisation 11. Bouton Mode Bouton de vitesse du ventilateur: Pour allumer le ventilateur.
-
Página 15: Nettoyage Et Entretien
NETTOYAGE ET ENTRETIEN · Débranchez l’appareil avant de le nettoyer. · La graisse ou la saleté du ventilateur et des hélices doivent être nettoyées avec un peu de détergent neutre et un chiffon doux. · Pour nettoyer la saleté et la graisse du ventilateur et afin d’éviter d’endommager les couleurs ou autres éléments : - Utilisez un détergent neutre et un chiffon doux. -
Página 16: Conditions De Garantie
Problème Possible Cause Possible Solution Le témoin lumineux de Il y a trop d’eau dans le réservoir Réduisez la quantité d’eau et placez l’humidificateur s’allume. La correctement le couvercle du réservoir ventilation et la pulvérisation d’eau ne fonctionne pas La quantité de brume est très 1. -
Página 17: Informazione Importante
Legga attentamente queste istruzioni prima dell’uso, e le conservi per future consultazioni. Per favore, spenga il ventilatore e lo disinnesti quando non è in funzionamento, come misura di risparmio energetico e per aumentare la sua vita utile. SPECIFICHE Modello: MISTY 2 Alimentazione: Volume nebbia <300 ml/h 220 - 240 V... -
Página 18: Parti Dell'apparecchio
PARTI DELL’APPARECCHIO Prima di cominciare il montaggio del ventilatore nebulizzatore, per favore, verificare che tutti i pezzi siano disponibili. 1. Guarnizione delle griglie 2. Bocchetta uscita nebbia 3. Griglia frontale 4. Fermo pale 5. Pale 6. Dado griglia 7. Griglia posteriore 8. - Página 19 FUNZIONAMENTO Panello di controllo e telecomando 1. Display tempo 2. Indicatore modo 3. Indicatore velocità 4. Pulsante accensione/ velocità 5. Timer 6. Pulsante Off 7. Pulsante oscillazione 8. Pulsante nebulizacione 9. Indicatore oscillazione 10. Indicatore nebulizacione 11. Pulsante modo Pulsante velocità: Per accendere il ventilatore.
-
Página 20: Pulizia E Manutenzione
PULIZIA E MANUTENZIONE · Scollegare l’apparecchio prima della sua pulizia. · Il grasso o sporcizia del ventilatore e la ventola, devono pulirsi con un po’ di detergente neutro ed un panno soave. · Pulire lo sporco e il grasso dal ventilatore, per evitare cambiamenti di colore o altri danni: - Utilizzi un detergente neutro ed un panno soave. -
Página 21: Condizioni Della Garanzia
Problema Possibile Causa Possibile Soluzione La luce indicativa Troppa acqua nel serbatoio Riduca la quantità di acqua e torni a dell’umidificatore si accende regolare bene il coperchio del deposito Non c’è ventilazione, né spruzzata di acqua La quantità della 1. Il trasduttore è ostruito dalla 1. -
Página 22: Especificações
Por favor, desligue o ventilador e desligue da tomada quando não estiver em operação, como uma medida de poupança de energia e aumentar sua vida útil. ESPECIFICAÇÕES Modelo: MISTY 2 Alimentação: Volume vaporização <300 ml/h 220 - 240 V 50Hz Potência:... -
Página 23: Enchimento Do Deposito De Água
PARTES DO APARELHO Antes de começar o montagem do ventilador nebulizador, por favor, verifique que todas as peças estão disponíveis. 1. Junta de grelhas 2. Bocal de saída de nebulização 3. Grelha frontal 4. Roleta do hélice 5. Hélice 6. Porca do grelha 7. - Página 24 OPERAÇÃO Painel de controle e controle remoto 1. Indicador de tempo 2. Indicador modo 3. Indicador velocidade 4. Botão ligar e velocidade 5. Temporizador 6. Botão desligar 7. Botão oscilação 8. Botão nebulização 9. Indicador oscilação 10. Indicador nebulização 11. Botão modo Botão de velocidade: Para ligar o ventilador.
-
Página 25: Limpeza E Manutenção
LIMPEZA E MANUTENÇÃO · Desligue o aparelho antes de limpar. · Graxa ou sujeira do ventilador e pás, deve ser limpo com um pouco de detergente neutro e um pano macio. · Limpe a sujeira e graxa do ventilador para evitar alterações na cor ou outros danos: - Use um pano macio e detergente neutro - Evite limpeza direta com água. -
Página 26: Termos De Garantia
Problema Causa possível Solução possível A quantidade de orvalho é 1. O transdutor está entupido com 1. Limpe o transdutor muito pequena poeira 2. A água está suja ou passou 2. Substituir a água com água limpa muito tempo no tanque Vibração evidente 1. -
Página 27: Technische Daten
Lesen sie diese wichtigen anweisungen sorgfältig durch und bewahren sie sie gut auf. Wenn Sie den Ventilator nicht benutzen, drehen und stecken Sie diesen bitte aus. Dass ist eine Produktlebensverlängerungs- sowie eine Energiesparmassnahme. TECHNISCHE DATEN Modell: MISTY 2 Elekt. Spannung: Zerstäubungsleistung <300 ml/h 220 - 240 V... - Página 28 GERÄTEKOMPONENTEN Vor dem Zusammenbau des ventilator vergewissern Sie sich bitte, dass alle Teile vorhanden sind. 1. Gitter Verbindung 2. Nebelentlüftung 3. Frontgitter 4. Lüfterflügel spinner 5. Lüfterflügel 6. Gitter Nuss 7. Hinteres Gitter 8. Motorspindel 9. Kopf 10. Flexschlauch 11. Schrauben 12.
-
Página 29: Bedienfeld Und Fernbedienung
BETRIEB Bedienfeld und Fernbedienung 1. Zeitanzeige 2. Modus Indikator 3. Geschwindigkeit Indikator 4. ON / Speed-Taste 5. Timer-Taste 6. AUS-Taste 7. Oszillationstaste 8. Nebeltaste 9. Oszillation Indikator 10. Nebel Indikator 11. Modus Taste Lüftergeschwindigkeit Taste: So schalten Sie den Ventilator. Während der Lüfter eingeschaltet ist, wählen Sie die Windgeschwindigkeit: niedrig (1), mittel (2) und hoch (3). -
Página 30: Reinigung Und Wartung
REINIGUNG UND WARTUNG · Schalten Sie das Gerät vor der Pflege aus. · Mit ein bisschen neutralen Spülmittel und ein sanftes Tuch können Sie Fett und Schmutz am Ventilator und an den Ventilatorklingen reinigen. · Reinigen Sie den Ventilator von Schmutz und Fett um Farbänderungen oder andere Schäden zu vermeiden: - Verwenden Sie ein neutrales Spülmittel und ein sanftes Tuch. -
Página 31: Garantiebedingungen
Problem Mögliche Ursache Mögliche Lösung Die Kontrollleuchte leuchtet Zuviel Wasser im Behälter Reduzieren Sie die Wassermenge und Es gibt keine Lüftung und befestigen Sie erneuert die Dichtung keinen Wasserspray des Behälters Die Menge an Wasserspay ist 1. Die Sensorik ist verstaubt 1.