Tabla de contenido
Publicidad
Idiomas disponibles
Idiomas disponibles
Enlaces rápidos
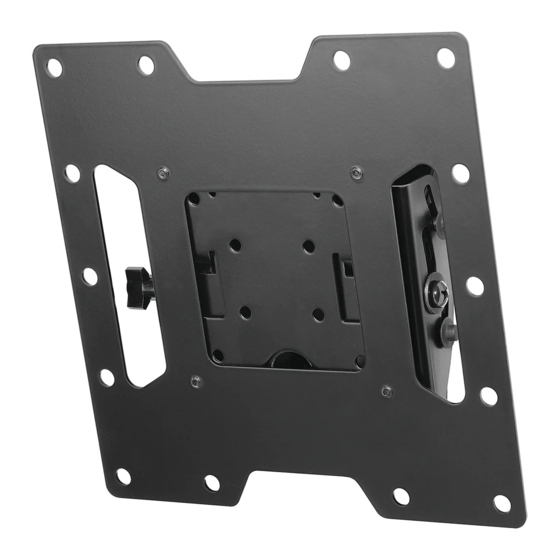
Installation and Assembly:
SmartMount™ Universal Tilt Wall Mount
for 22" - 40" (56 - 102 cm) LCD Flat Panel Screens
Models: ST632P, ST632P-S, ST632, ST632-S, RTFPT 632, RTFPT 632-S,
SWV220/BK, SWV220/SI
Features:
• Fits 22" - 40" (56 - 102 cm) flat panel screens
• One-touch tilt for effortless positioning and adjustment of the screen
• Integrated security features provide effective theft deterrence
U L
C
©
Max Load Capacity: 115 lb (52.2 kg)
ISSUED: 05-11-05 SHEET #: 201-9476-9 05-22-09
US
Publicidad
Capítulos
Tabla de contenido

Manuales relacionados para PEERLESS SmartMount ST632P


Resumen de contenidos para PEERLESS SmartMount ST632P
- Página 1 Installation and Assembly: SmartMount™ Universal Tilt Wall Mount for 22" - 40" (56 - 102 cm) LCD Flat Panel Screens Models: ST632P, ST632P-S, ST632, ST632-S, RTFPT 632, RTFPT 632-S, SWV220/BK, SWV220/SI Features: • Fits 22" - 40" (56 - 102 cm) flat panel screens •...
-
Página 2: Tabla De Contenido
NOTE: Read entire instruction sheet before you start installation and assembly. WARNING • Do not begin to install your Peerless product until you have read and understood the instructions and warnings contained in this Installation Sheet. If you have any questions regarding any of the instructions or warnings, for US customers please call Peerless customer care at 1-800-865-2112, for all international customers, please contact your local distributor. -
Página 3: Parts List
Before you begin, make sure all parts shown are included with your product. SWV220/BK SWV220/SI Parts List ST 632P, ST 632P-S, ST 632 ST 632-S RTFPT 632 RTFPT 632-S Part # Part # Description Qty Part # Part # A hook bracket 095-1346 095-4346 095-1346... -
Página 4: Installation To Single Wood Stud Wall
Installation to Single Wood Stud Wall WARNING • Installer must verify that the supporting surface will safely support the combined load of the equipment and all attached hardware and components. • Tighten wood screws so that wall plate is firmly attached, but do not overtighten. Overtightening can damage the screws, greatly reducing their holding power. -
Página 5: Installation To Solid Concrete Or Cinder Block
WARNING • When installing Peerless wall mounts on cinder block, verify that you have a minimum of 1-3/8" (35 mm) of actual concrete thickness in the hole to be used for the concrete anchors. Do not drill into mortar joints! Be sure to mount in a solid part of the block, generally 1"... -
Página 6: Attaching Adapter Plate To Screen With Vesa 200 Or 200 X 200 Mounting Pattern
Attaching Adapter Plate to Screen with VESA 200 or 200 x 200 Mounting Pattern Note: For VESA 75 mm and 100 mm patterns, see following page. Attach hook bracket (A) to adapter plate (C) using four M5 x 6 mm screws (J) and #10 washers (K) as shown. -
Página 7: Attaching Hook Bracket To Screen With Vesa 75 Or 100 Mounting Pattern
Attaching Hook Bracket to Screen with VESA 75 or 100 Mounting Pattern WARNING • If screws don't get three complete turns in the screen inserts or if screws bottom out and bracket is still not tightly secured, damage may occur to screen or product may fail. FOR VESA 75 MOUNTING PATTERN: FOR VESA 100 MOUNTING PATTERN:... -
Página 8: Installing And Removing Flat Panel Screen
Installing and Removing Flat Panel Screen Attach screen to tilt assembly (B). Tighten M5 x 6 mm SCREEN screw (J or N) to lock screen to tilt assemby. J or N For security installation tighten M5 x 6 mm socket pin screw (N) using 4 mm security driver (O) to lock screen to tilt assemby. -
Página 9: Installation Et Assemblage
Installation et assemblage: Soporte universal de pared SmartMount™ con capacidad de inclinación para pantallas planas LCD de 22" a 40" (56 - 102 cm) Modelos: ST632P, ST632P-S, ST632, ST632-S, RTFPT 632, RTFPT 632-S, SWV220/BK, SWV220/SI Características: • Sostiene pantallas planas de 22" a 40" (56 - 102 cm) •... -
Página 10: Herramientas Necesarias Para El Ensamblaje
Hoja de Instalación. Si tiene alguna pregunta acerca de cualquiera de las instrucciones o las ad- vertencias, por favor, llame a Servicio al Cliente de Peerless al 1-800-865-2112 si está en EE. UU. Si es un cliente internacional, por favor, comuníquese con su distribuidor local. -
Página 11: Lista De Piezas
Español Español Antes de comenzar, asegúrese de que su producto contiene todas las piezas que se muestran. SWV220/BK SWV220/SI Lista de Piezas ST 632P, ST 632P-S, ST 632 ST 632-S RTFPT 632 RTFPT 632-S Descripción Cant. N.° de pieza N.° de pieza N.° de pieza N.° de pieza A soporte de gancho 095-1346 095-4346 095-1346... -
Página 12: Instalación En Una Pared Con Montantes De Madera
Español Español Instalación en una pared con montantes de madera ADVERTENCIA • El instalador debe verificar que la superficie de apoyo sea capaz de soportar firmemente la carga combinada del equipo y todos los herrajes y componentes. • Apriete los tornillos para madera de tal modo que la placa de apoyo quede firmemente sujeta, pero no apriete en exceso. -
Página 13: Instalación En Una Pared De Concreto Macizo O De Bloques De Hormigón De Escorias
ADVERTENCIA • Cuando instale soportes de pared Peerless en bloques de hormigón de escorias, verifique que tengan un mínimo de 1-3/8" (35 mm) de superficie efectiva de concreto en el agujero que va a utilizar para los anclajes de concreto. ¡No perfore en las juntas de mortero! Asegúrese de instalar el soporte en una parte sólida del bloque, generalmente a un... -
Página 14: Fijación De La Placa Adaptadora A Pantallas Con Configuraciones De Montaje Vesa® 200 Ó 200 X 200
Español Español Fijación de la placa adaptadora a pantallas con configuraciones de montaje VESA® 200 ó 200 x 200 NOTA: En el caso de las configuraciones de montaje VESA® 75 mm y 100 mm, pase a la próxima página. Fije el soporte de gancho (A) a la placa adaptadora (C) usando cuatro tornillos de M5 x 6 mm (J) y cua- tro arandelas N.o 10 (K), como se muestra. -
Página 15: Fijación Del Soporte De Gancho A Pantallas Con Configuraciones De Montaje Vesa® 75 Ó 100
Español Español Fijación del soporte de gancho a pantallas con configuraciones de montaje VESA® 75 ó 100 ADVERTENCIA • Si no se les da tres vueltas completas a los tornillos en los insertos de la pantalla o si los tornillos topan fondo y el soporte todavía no está firme, se podría dañar la pantalla o el producto podría no funcionar bien. EN EL CASO DE LA CONFIGURACIÓN DE MON- EN EL CASO DE LA CONFIGURACIÓN DE MON- TAJE VESA®... -
Página 16: Instalación Y Desinstalación De La Pantalla Plana
Español Español Instalación y desinstalación de la pantalla plana Fije la pantalla en la unidad de inclinación (B). Apriete el PANTALLA SCREEN tornillo de M5 x 6 mm (J o N) para fijar la pantalla en la J o N unidad de inclinación. -
Página 17: Installation Et Montage
Installation et Montage: Support mural inclinable universel SmartMount™ pour écrans plats ACL de 22 à 40 po (56 - 102 cm) Modèles: ST632P, ST632P-S, ST632, ST632-S, RTFPT 632, RTFPT 632-S, SWV220/BK, SWV220/SI Caractéristiques: • Convient aux écrans plats de 22 à 40 po (56 - 102 cm) •... -
Página 18: Outils Nécessaires Au Montage
REMARQUE: lisez entièrement la fiche d’instructions avant de commencer l’installation et l’assemblage. AVERTISSEMENT • Ne commencez pas à installer votre produit Peerless avant d’avoir lu et assimilé les instructions et les avertisse- ments contenus dans cette fiche d’installation. Pour toute question concernant les instructions ou les avertissements, veuillez appeler le service à... -
Página 19: Liste Des Pièces
Français Avant de commencer, veillez à ce que toutes les pièces énumérées soient incluses. SWV220/BK SWV220/SI Liste des pièces ST 632P, ST 632P-S, ST 632 ST 632-S RTFPT 632 RTFPT 632-S Description Qté pièces no pièces no pièces no pièces no A Crochet de support 095-1346 095-4346... -
Página 20: Installation Sur Un Mur A Simple Montant En Bois
Français Installation sur un mur à montant en bois AVERTISSEMENT • L’installateur doit s’assurer que la surface de support pourra soutenir sans danger la charge combinée de l’équipement, de toute sa visserie et de tous ses composants. • Serrez les vis à bois de manière que la plaque murale soit fermement fixée, mais sans excès. Un serrage excessif peut endommager les vis et en réduire considérablement le pouvoir de maintien. -
Página 21: Installation Sur Du Béton Plein Ou Un Bloc De Béton De Mâchefer
AVERTISSEMENT • Si vous installez des montures murales Peerless sur un bloc de béton de mâchefer, vérifiez que vous disposez d’une épaisseur de béton d’au moins 35 mm (1 3/8 po) dans le trou destiné aux ancrages de béton. Ne percez pas dans les joints de mortier ! Veillez à... -
Página 22: Fixation D'une Plaque Adaptatrice Sur Un Écran À Configuration De Montage Vesa 200 Ou 200 X 200
Français Fixation d’une plaque adaptatrice sur un écran à configuration de montage VESA 200 ou 200 x 200 Remarque : Pour les configurations VESA 75 mm et 100 mm, consultez la page suivante. Fixez le crochet de support (A) sur la plaque ad- aptatrice (C) à l’aide de quatre vis M5 x 6 mm (J) et de rondelles nº... -
Página 23: Fixation D'un Crochet De Support Sur Un Écran À Configuration De Montage Vesa 75 Ou 100
Français Fixation d’un crochet de support sur un écran à configuration de montage VESA 75 ou 100 ADVERTISSEMENT • Si les vis ne sont pas enfoncées de trois tours complets dans les inserts ou si elles sont serrées au maximum sans parvenir à fixer solidement la plaque adaptatrice, l’écran peut être abîmé ou le produit détérioré. CONFIGURATION DE MONTAGE VESA®... -
Página 24: Montage Et Démontage D'un Écran Plat
Français Montage et démontage d’un écran plat Fixez l’écran sur l’ensemble d’inclinaison (B). Serrez SCREEN ÉCRAN la vis M5 x 6 mm (J ou N) pour fixer l’écran sur J ou N l’ensemble d’inclinaison. Pour consolider le tout, serrez la vis à tête creuse M5 x 6 mm (N) à... - Página 25 Anbringung und Zusammenbau: SmartMount™-Universal-Wandkipphalter für LCD-Flachbild- schirme von 22 - 40 Zoll (56 - 102 cm) Modelle: ST632P, ST632P-S, ST632, ST632-S, RTFPT 632, RTFPT 632-S, SWV220/BK, SWV220/SI Merkmale: • Für Flachbildschirme von 22 - 40 Zoll (56 - 102 cm) •...
- Página 26 HINWEIS: Lesen Sie die gesamte Anleitung, bevor Sie mit der Anbringung und dem Zusammenbau beginnen. ACHTUNG • Beginnen Sie mit der Anbringung Ihres Peerless-Produkts erst, nachdem Sie die in dieser Montageanleitung enthaltenen Anleitungen und Achtungshinweise gelesen und sich gründlich mit ihnen vertraut gemacht haben. Falls Sie Fragen hinsichtlich irgendeiner der Anleitungen oder Achtungshinweise haben, wenden Sie sich in den USA bitte an den Peerless-Kundendienst unter der Rufnummer 1-800-865-2112.
-
Página 27: Teileliste
Deutsch Vergewissern Sie sich vor Beginn der Arbeiten, dass alle dargestellten Teile mit Ihrem Produkt mitgeliefert wurden. Teileliste SWV220/BK SWV220/SI ST632P, ST632P-S, ST632-S RTFPT632 RTFPT632-S ST632 Teile Nr. Teile Nr. Beschreibung Anz. Teile Nr. Teile Nr. A Hakenhalterung 095-4346 095-4346 095-1346 095-1346 B Kippeinheit 095-0359 095-0360 095-0359... -
Página 28: Anbringung An Wand Mit Einer Holzständerreihe
Deutsch Anbringung an Wand mit einer Holzständerreihe ACHTUNG • Bei der Anbringung muss darauf geachtet werden, dass die Wand die kombinierte Last von Bildschirm und allen Befestigungsteilen und -komponenten tragen kann. • Ziehen Sie die Schrauben fest genug an, dass die Wandplatte sicher befestigt ist, doch ohne sie zu überdrehen. Durch Überdrehen können die Schrauben beschädigt werden, wodurch ihr Haltevermögen stark reduziert wird. -
Página 29: Anbringung An Massivbeton Oder Porenbetonstein
Installation zu massivbeton oder porenbetonstein ACHTUNG • Bei der Anbringung von Peerless-Wandhaltern an Porenbetonstein muss sichergestellt werden, dass die tatsächliche Stärke des Betons, in den das Loch für die Betondübel gebohrt wird, mindestens 35 mm (1 3/8 Zoll) beträgt. Bohren Sie nicht in Mörtelfugen! Achten Sie darauf, dass die Anbringung an einem massiven Teil des Blocks erfolgt, im Allge- meinen mindestens 25 mm (1 Zoll) von der Blockseite entfernt. -
Página 30: Befestigung Von Adapterplatte An Bildschirm Unter Verwendung Von Vesa-Montagemuster 200 Oder 200 X 200
Deutsch Befestigung von Adapterplatte an Bildschirm unter Verwendung von VESA- Montagemuster 200 oder 200 x 200 HINWEIS: Die VESA-Muster 75 mm und 100 mm sind auf der folgenden Seite aufgeführt. Bringen Sie die Hakenhalterung (A) mit vier M5 x 6 mm Schrauben (J) und Scheiben Nr. 10 (K) wie dargestellt an der Adapterplatte (C) an. -
Página 31: Befestigung Der Hakenhalterung Am Bildschirm Unter Verwendung Von Vesa-Montagemuster 75 Oder 100
Deutsch Befestigung der Hakenhalterung am Bildschirm unter Verwendung von VESA- Montagemuster 75 oder 100 ACHTUNG • Sind die Schrauben nicht um drei volle Umdrehungen in die Löcher des Bildschirms eingeschraubt oder stoßen sie unten an und die Halterung ist noch immer nicht sicher befestigt, kann der Bildschirm beschädigt werden oder das Produkt kann versagen. -
Página 32: Anbringung Und Abnahme Des Flachbildschirms
Deutsch Anbringung und Abnahme des Flachbildschirms Bringen Sie den Bildschirm an der Kippeinheit (B) an. Ziehen Sie die M5 x 6 mm Schraube (J oder N) fest, BILDSCHIRM um den Bildschirm an der Kippeinheit zu befestigen. Ziehen Sie die M5 x 6 mm Schraube (N) mit Hilfe des J oder N 4 mm Sicherheitstreibers (O) fest, um den Bildschirm unter Anwendung der Sicherheitsfunktion an der... -
Página 33: Garantía Limitada De Cinco Años
Limited Five-Year Warranty. This warranty does not cover damage caused by (a) service or repairs by the customer or a person who is not authorized for such service or repairs by Peerless Industries, Inc., (b) the failure to utilize proper packing when returning the product, (c) incorrect installation or the failure to follow Peerless’ instructions or warnings when installing, using or storing the product, or (d) misuse or accident, in transit or otherwise, including in cases of third party actions and force majeure. -
Página 34: Garantie De Cinq Ans
Peerless ne saura en aucun cas être tenue pour responsable de tout préjudice accidentel ou induit, ou de tout préjudice dû au vol d’un produit, qu’il soit ou non protégé...