Publicidad
Enlaces rápidos
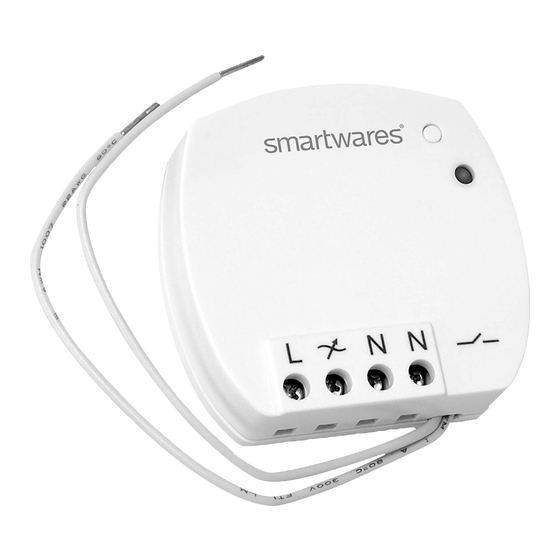
10.037.36
EN Mini built-in switch
NL Mini-inbouwschakelaar
DE Mini-Einbauschalter
FR Mini-interrupteur intégré
ES Miniconmutador integrado
IT Mini-interrittore integrato
SV Mini-inbyggd brytare
PL Mini-wyłącznik wbudowan
EN
1
PREPARATION BEFORE USE
In your electrical circuit panel, locate the circuit breaker control for the
wall switch you will be working on.
Switch the circuit off.
CONNECTING THE BUILT-IN SWITCH
The built-in switch is designed to be placed behind an existing wall
switch.
Remove and disconnect the wall switch behind which you want to
place the built-in switch (1).
NOTE: The built-in switch only works on single pole switches, it does
not work on multiway switching.
Connect the built-in switch to the power supply (2):
2
Connect the phase wire (brown) to L.
Connect the neutral wire (blue) to N.
Connect the built-in switch to the lamp (3):
Connect the neutral wire (blue) of the lamp to N.
Connect the hot wire (black) to χ.
NOTE: The neutral wire may not always be present in the wall junction
box and needs to be installed in order for the product to work.
Connect the built-in switch to the wall switch (4):
Connect the two white wires of the built-in switch to the wall switch.
220-240 VAC
Attention!
50/60Hz
- The wall switch itself should not be connected to the mains power,
the walls witch should only be connected to the white wires of the built-
in switch.
Switch on the mains power in your electric circuit panel.
3
PAIRING/DISCONNECTING
Pairing the receiver with a sender
A. Press and hold the "LEARN" button (5) on the built-in switch for 3
B. Press the "ON" button on the sender that you want to pair.
C. Repeat these steps for any other sender. You can pair a maximum
Disconnecting a link
Follow above procedure, but during step B press the "OFF" button on
the sender.
4
Disconnecting all links
A. Press and hold the "LEARN" button (5) for 7 seconds until the LED
OPERATING SENDERS
A. Press the "I" / "ON" button on the sender to turn on the receiver.
B. Press the "0" / "OFF" button on the sender to turn off the receiver.
FR
5
PRÉPARATION AVANT UTILISATION.
Dans votre panneau de circuit électrique, localisez la commande du
disjoncteur pour l'interrupteur mural sur lequel vous allez travailler.
Coupez le circuit.
CONNEXION DE L'INTERRUPTEUR INTÉGRÉ
L'interrupteur intégré est conçu pour être placé derrière un interrupteur
mural existant.
Retirez et déconnectez l'interrupteur mural derrière lequel vous voulez
placer l'interrupteur intégré (1).
Instruction manual
second to put it in pairing mode. The LED on the built-in switch will
blink.
ð The lamp you have connected will turn on.
of 6 senders to the receiver.
starts to blink.
ð All links are disconnected.
Manuel d'instructions
Specifications:
Max. switch output: 400W
Frequency: 433.92MHz
Input AC Voltage: 220V ~ 240V, 50/60Hz
REMARQUE : L'interrupteur intégré ne fonctionne que sur les
interrupteurs unipolaires, il ne fonctionne pas sur les interrupteurs
multidirectionnels.
Raccordez l'interrupteur intégré à l'alimentation (2) :
Connectez le fil de phase (marron) à L.
Connectez le fil neutre (bleu) à N.
Connectez l'interrupteur intégré à la lampe (3) :
Connectez le fil neutre (bleu) de la lampe à N.
Connectez le fil chaud (noir) à χ.
REMARQUE : Le fil neutre peut ne pas être toujours présent dans la
boîte de jonction murale et doit être installé pour que le produit
fonctionne.
Connectez l'interrupteur intégré à l'interrupteur mural (4) :
Connectez les deux fils blancs de l'interrupteur intégré à l'interrupteur
mural.
Attention !
- L'interrupteur mural lui-même ne doit pas être connecté au secteur,
les interrupteurs muraux ne doivent être connectés qu'aux fils blancs
de l'interrupteur intégré.
Branchez le courant sur votre panneau de circuit électrique.
COUPLAGE / DÉCONNEXION
Couplage du récepteur à un émetteur
A. Appuyez sur la touche « LEARN » et maintenez-la enfoncée (5)
sur l'interrupteur intégré pendant 3 secondes pour le mettre en
mode couplage. La LED sur l'interrupteur intégré clignote.
B. Appuyez sur le bouton « ON » de l'émetteur que vous voulez
coupler.
ð La lampe que vous avez connectée s'allume.
C. Répétez la procédure pour tout autre émetteur. Vous pouvez
coupler un maximum de 6 émetteurs au récepteur.
Déconnexion d'une liaison
Suivez la procédure ci-dessus, mais pendant l'étape B, appuyez sur le
bouton « OFF » de l'émetteur.
Dissociation de tous les liens
A. Appuyez sur la touche « LEARN » et maintenez-la enfoncée (5)
pendant 7 secondes jusqu'à ce que la LED commence à clignoter.
ð Tous les couplages sont annulés.
FONCTIONNEMENT DES ÉMETTEURS
A. Appuyez sur la touche « I » /« ON » de l'émetteur pour allumer le
récepteur.
B. Appuyez sur la touche « 0 » / « OFF » de l'émetteur pour
désactiver le récepteur.
Gebruiksaanwijzing
NL
VOORBEREIDING VOOR GEBRUIK
Zoek in uw stoppenkast de stroomonderbreker voor de
wandschakelaar waaraan u gaat werken.
Schakel de stroom uit.
DE INGEBOUWDE SCHAKELAAR AANSLUITEN
De ingebouwde schakelaar is ontworpen om achter een bestaande
wandschakelaar te worden geplaatst.
Verwijder de wandschakelaar waarachter u de ingebouwde schakelaar
wilt plaatsen, en koppel de wandschakelaar los. (1).
OPMERKING: De ingebouwde schakelaar werkt alleen met eenpolige
schakelaars, niet met wisselschakelaars.
De ingebouwde schakelaar aansluiten op de voeding (2):
Sluit de fasedraad (bruin) aan op L.
Sluit de neutrale draad (blauw) aan op N.
De ingebouwde schakelaar aansluiten op de lamp (3):
Sluit de neutrale draad (blauw) van de lamp aan op N.
Sluit de fasedraad (zwart) aan op χ.
Publicidad

Manuales relacionados para Smartwares 10.037.36


Resumen de contenidos para Smartwares 10.037.36
- Página 1 Specifications: Max. switch output: 400W Frequency: 433.92MHz 10.037.36 Input AC Voltage: 220V ~ 240V, 50/60Hz EN Mini built-in switch NL Mini-inbouwschakelaar DE Mini-Einbauschalter FR Mini-interrupteur intégré ES Miniconmutador integrado IT Mini-interrittore integrato SV Mini-inbyggd brytare PL Mini-wyłącznik wbudowan Instruction manual REMARQUE : L'interrupteur intégré...
- Página 2 OPMERKING: De neutrale draad is mogelijk niet altijd Schalten Sie die Netzspannung im Sicherungskasten Siga el procedimiento anterior, pero en el paso B, pulse aanwezig in de wandaansluitdoos en moet worden wieder ein. el botón “OFF” en el emisor. geïnstalleerd om het product te laten werken. Desconectar todas las conexiones De ingebouwde schakelaar aansluiten op de A.
- Página 3 Specifications: Max. switch output: 400W Frequency: 433.92MHz 10.037.36 Input AC Voltage: 220V ~ 240V, 50/60Hz EN Mini built-in switch NL Mini-inbouwschakelaar DE Mini-Einbauschalter FR Mini-interrupteur intégré ES Miniconmutador integrado IT Mini-interrittore integrato SV Mini-inbyggd brytare PL Mini-wyłącznik wbudowan B. Premere il pulsante "0" / "OFF" sul trasmettitore per spegnere PODŁĄCZANIE WBUDOWANEGO PRZEŁĄCZNIKA...