Tabla de contenido
Publicidad
Idiomas disponibles
Idiomas disponibles
Enlaces rápidos
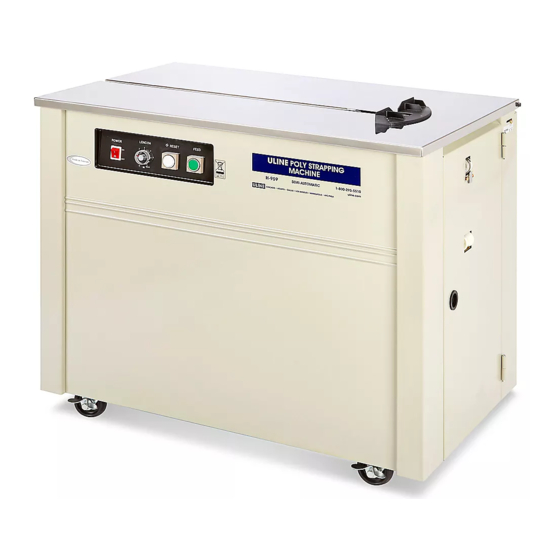
h-959
pOLYpROpYLene
stRappinG machine
TECHNICAL DATA
Strapping Speed: 2.5 Seconds/Strap
Dimensions: 35½" L x 23" W x 30½" H
Net Weight: 220 lbs.
Max. Tension: 100 lbs.
Strap Width: ¼" –
5
⁄
"
8
Core Capacity: Uses 8 x 8", 9 x 8" or 11 x 8"
(Core Dia. x Width)
Safety Switch: Stops machine when top is lifted.
Power: 110 VAC, 50/60 Hz, Single phase.
Open lid and remove contents from tray. Install package guide on lid.
L
O
A
D
R
E
L E
Right Side
1.
Remove plastic reel from machine. It comes preset
for 9" core. Remove outer ring adapter for 8" core. For
11" strapping core, the H-959-TC075 adapter can be
purchased.
2.
Load Strapping onto reel. DO NOT REMOVE BANDING UNTIL
LOADED. Make sure strap is going in correct direction
indicated by red arrow.
PAGE 1 OF 8
machine setup
R
O
Remove adapter
before installing
reel.
1.
POW ER
LEN GTH
RES ET
3
2
ON
FEE D
4
5
OFF
0
M
MAX
U
E T
S
R T
A
P P
N I
G
SLIDE ROLLER
BAND GUIDE
Pull slide roller bar down and thread strapping over (1)
and under (2). Thread strap through guide (Ref 10) until it
reaches top of machine.
For Spanish, see pages 5-8.
Para Español, vea páginas 5-8.
1
2
ROLLER
1112 IH-959
Publicidad
Tabla de contenido

Manuales relacionados para Uline H-959


Resumen de contenidos para Uline H-959
- Página 1 Pull slide roller bar down and thread strapping over (1) for 9" core. Remove outer ring adapter for 8" core. For and under (2). Thread strap through guide (Ref 10) until it 11" strapping core, the H-959-TC075 adapter can be reaches top of machine. purchased.
- Página 2 OpeRatiOn instRuctiOns Set strap feed length: Determine the length of strap needed. Set control for 0-6. Lengths listed in meters. 1 = 3 ft. of strap. Example: for 6 ft. of strapping, set the FEED RESET control at "2". (See Figure 1) Turn power ON.
- Página 3 (See Figure 8) Lift blade assembly Air and up and forward to release. DO NOT LOOSEN SET SCREWS. Oiling Points Reverse to reassemble. Use Air Gun or ULINE Air In A Can (S-6771) to clean parts of plastic residue. (See Figure 9) Clean Blade Screws...
- Página 4 (See Figure 14) If faulty, replace with Strap Outlet Phillips Head 10-amp fuse only. Close top and turn power switch ON. Socket Head Bolts Screws For additional information see uline.com for instructional video. Guide Assembly Figure 12 Middle Plate Figure 13...
-
Página 5: Instalación De La Máquina
8". Se puede guía (Ref 10) hasta que llegue arriba de la máquina. comprar el adaptador H-959-TC075 para el núcleo de 11" del fleje. 2. Cargue el Fleje en el rollo. NO REMUEVA LA CINTA HASTA QUE ESTÉ... - Página 6 instRucciOnes De funciOnamientO Para establecer la longitud del fleje: Determine la longitud del fleje que necesita. Ajuste el control de 0-6. Los largos se muestran en metros. 1 = 3 pies de fleje. FEED RESET Ejemplo: para 6 pies de fleje, ajuste el control a "2". (Vea Diagrama 1) Presione el botón ON para encender.
-
Página 7: Limpieza
AFLOJE LOS TORNILLOS DE AJUSTE. Para reinstalar proceda Puntos de Aire y Lubricación de manera inversa. Use una Pistola de Aire o ULINE Aire Comprimido (S-6771) para limpiar las partes de residuos de plástico. (Vea Diagrama 9) Limpieza de Navaja... -
Página 8: Solución De Problemas
10-amp solamente. Cierre la tapa y presione ON en el interruptor para encender. Guía del Ensamble Placa Diagrama 12 Intermedia Diagrama 13 Para más información vea uline.mx para video de instrucciones en Inglés. Fusible de 10 Amp Temporizador del Motor Diagrama 14 π...