Publicidad
Enlaces rápidos
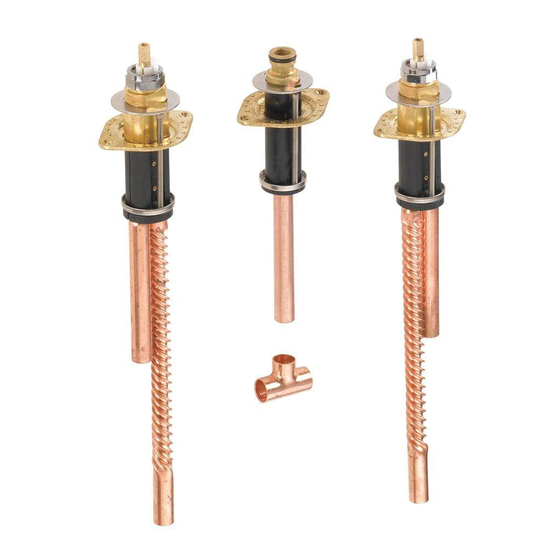
• * PX models have connections that are
designed for use with ASTM F1807 crimp
rings (installed using proper PEX crimp tool)
and ASTM F876/F877 PEX tubing.
• ** MF models have connections that are
designed for use with ASTM F1960 cold
expansion fittings (installed using proper PEX
expansion tool) and ASTM F876/F877 PEX
tubing.
R3707
R3716
• * Les modèles -PX sont conçus avec un
raccord compatible avec les anneaux de
sertissage conformes à la norme ASTM
F1807 (installés avec un outil de sertissage
adéquat) et avec les tuyaux de PEX
conformes à la norme ASTM F876/F877.
• ** Les modèles MF ont des raccords conçus
pour une utilisation avec les raccords
d'expansion à froid ASTM F1960 (installés
en utilisant le bon outil d'expansion PEX) et
Tuyaux PEX ASTM F876/F877.
DECKMOUNT SINGLE HANDLE ROMAN
TUB WITH HAND HELD SHOWER
DIVERTER ROUGH-IN KIT
BAIGNOIRE ROMAINE À MITIGEUR
MONTÉE SUR SURFACE AVEC
ENSEMBLE D'INVERSEUR DE
ROBINETTERIE BRUTE DE DOUCHETTE
JUEGO DE DERIVADOR PARA LLAVE
DE UNA SOLA MANIJA PARA BAÑERA
ESTILO ROMANO CON DUCHA DE MANO
R3707-PX*
R3716-PX*
212170 Rev. A
• * Los modelos -PX tienen conexiones
diseñadas para usar con los anillos
compresores ASTM F1807 (instalados con
la herramienta PEX adecuada) y tubos PEX
ASTM F876/F877.
• ** Los modelos MX tienen conexiones
diseñadas para usar con acoples de
expansión en frío ASTM F 1960 (instalados
con la correspondiente herramienta PEX
de expansión) y tuberías ASTM F876/
F877 PEX.
R3707-MF**
R3716-MF**
Publicidad

Resumen de contenidos para Delta R3707
- Página 1 BAIGNOIRE ROMAINE À MITIGEUR MONTÉE SUR SURFACE AVEC ENSEMBLE D’INVERSEUR DE ROBINETTERIE BRUTE DE DOUCHETTE JUEGO DE DERIVADOR PARA LLAVE DE UNA SOLA MANIJA PARA BAÑERA ESTILO ROMANO CON DUCHA DE MANO R3707 R3707-PX* R3707-MF** R3716 R3716-PX* R3716-MF** ...
- Página 2 • L’alignement de la manette est essentielle pour l’alignement de la garniture de poignée finie. • Il faut percer tous les trous à un angle de 90° sur la surface d’installation. Para instalación fácil de su llave Delta usted necesitará: ®...
- Página 3 Hole Hole Diameter (min. to wall) (min. to wall) * Handle (1) Ø 45mm (1.75”) R3707 - Refer to Trim spec 127 to 203mm (5 to 8”) sheet for spout Tub Spout (2) 127 mm (5”) 127 to 203mm (5 to 8”) 127 mm (5”)
- Página 4 1. Install lower nut (1) and thin washer (2) onto handle body (5). 2. Loosen the 2 jack screws (3) until cardboard tube (4) is free. 3. Rotate top washer (6) 90° and remove (save for use in “R3707 Models - Rough- in Install (see Figure 3)” on page 5).
- Página 5 R3707 Models - Rough-in Install (see Figure 3) 90˚ • When installing rough-in, ensure to leave enough space below deck for hose return. • Remove handle alignment tool (8) from cardboard box insert. • Ensure cartridge is fully turned counter-clockwise to the “closed” position.
- Página 6 Modèles R3707 Installation de robinetterie brute (voir la Figure 3) • Lors de l’installation de la robinetterie brute, veillez à laisser suffisamment d’espace sous la surface d’installation pour le tuyau de retour. • Retirez l’outil d’alignement des manettes (8) de l’insert de boîte en carton.
- Página 7 R3716 Models - Rough-in Install (see Figure 4) 90˚ • When installing rough-in, ensure to leave enough space below deck for hose return. • Silicone under flange (1) if deck is uneven. 1. Install the flange (1) and foam gasket (2) onto handle body (3). 2.
- Página 8 Modelos R3716 - Instalación del mecanismo (ver Figura 4) • Al instalar el mecanismo, asegúrese de dejar suficiente espacio debajo de la base para guardar la manguera. • Coloque silicona debajo del reborde (1) si la superficie no es pareja. 1.
-
Página 9: Check For Leaks
Check for Leaks (see Figure 6) 1. Turn on water supplies and check for leaks. 2. Turn off water supplies. R3707 Now you are ready for the trim kit. Please see installation instructions. Vérifiez pour des fuites (voir la Figure 6) 1. -
Página 10: Repair Parts / Pièces De Réparation/ Partes De Reparación
Spout Adapter Assembly (R3707) Ensemble d’adaptateur de bec (R3707-PX) Mecanismo adaptador del pico (R3707) RP78944 Spout Adapter Assembly (R3707-PX) Ensemble d’adaptateur de bec (R3707-PX) Mecanismo adaptador del pico (R3707-PX) RP78943 Spout Adapter Assembly (R3707-MF) Ensemble d’adaptateur de bec (R3707-PX Mecanismo adaptador del pico (R3707-MF... - Página 11 R3716 / R3716-PX/ R3716-MF Repair Part No. / Item No. / n° de pièce de Description Description Descripción n° d’article / rechange / Artículo No. No. de parte de reparación RP100354 Bonnet Nut Écrou de chapeau Capuchón RP100355 Cartridge Cartouche Cartucho RP100352 Flange, O-Ring, Nut &...
- Página 12 Maintenance / Entretien / Mantenimiento If rough-in leaks from top of cartridge body assembly 1. Shut off water supplies. 2. Tighten bonnet nut (1). If leak persists (Replace Cartridge Assembly) 1. Shut off water supplies. 2. Remove bonnet nut (1). 3.
- Página 13 Any labor charges incurred by the purchaser to repair, replace, install or remove this REASONABLE WEAR AND TEAR, MISUSE, ABUSE, NEGLECT OR IMPROPER product are not covered by this warranty. Delta Faucet Company shall not be liable for OR INCORRECTLY PERFORMED INSTALLATION, MAINTENANCE OR REPAIR,...
- Página 14 MANTENIMIENTO O REPARACIÓN INCORRECTA, INCLUYENDO EL NO SEGUIR Delta Faucet Company no será responsable por ningún daño a la llave causado por LAS INSTRUCCIONES CORRESPONDIENTES DE CUIDADO Y LIMPIEZA. Algunos desgaste normal, uso inadecuado, abuso, negligencia o instalación, mantenimiento o...


