Publicidad
Idiomas disponibles
Idiomas disponibles
Enlaces rápidos
FINALLY – A
COMPANY THAT
LOVES BIKES AS
MUCH AS YOU DO.
Chances are, your bikes are just
like ours - your most valued
possessions. And if it has the
Saris name on it, nothing we
build goes out the door unless
it's worth putting those posses-
sions on. Call it obsessive. Call it
eccentric. We just chalk it up to
caring a hell of a lot about creat-
ing the last rack you'll ever need.
ADJUST CARRIER TO VEHICLE:
1
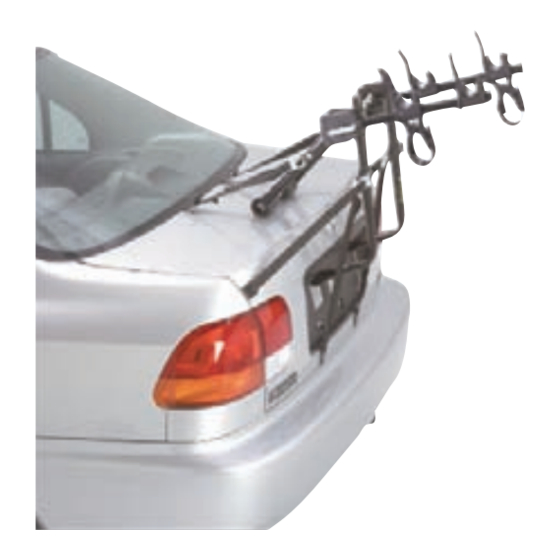
GUARDIAN 2-
Following the illustration below that most resembles your vehicle, adjust the top leg such that the lower leg
rests on or above liscense plate and the rack assumes the position that most resembles the illustration.
Lower leg must rest on or above license plate (not on bumper).
Top Leg
Position 1 or 2
1
GUARDIAN 3-
Following the illustration below that most resembles your vehicle, adjust the top leg such that the lower leg
rests on the bumper and is positioned vertically. Lower leg must rest on bumper.
Top Leg
Position 1 or 2
T
G
HE
UARDIAN
Please READ and FOLLOW all instructions carefully.
1045P-Guardian 2 bike
Lower Leg
Position 3 or 4
Lower Leg
Position 3 or 4
S
ERIES
Check Fit Guide for compatibility.
1047P-Guardian 3 bike
Top Leg
Lower Leg
Top Leg
Lower Leg
INSTALLATION MANUAL
Note: Before installing
carrier, clean all surfaces
of vehicle which may
come in contact with the
carrier or its straps. Make
sure foam pads are free of
debris as it could scratch
vehicle's finish.
Top Leg
Lower
Leg
Position 4 or 5
Top Leg
Position 4 or 5
Lower
Leg
Publicidad

Resumen de contenidos para Saris GUARDIAN Serie
- Página 1 - your most valued vehicle's finish. possessions. And if it has the Saris name on it, nothing we build goes out the door unless 1045P-Guardian 2 bike 1047P-Guardian 3 bike it’s worth putting those posses- sions on.
- Página 2 Inside Strap Hook and Hatch Hugger special application: Unless otherwise specified in current fit chart, ONLY IF SPECIFIED IN CURRENT FIT CHART www.saris.com attach inside strap hooks (Fig. 6) (available at www.saris.com) to bottom edge of trunk at position C1 (ideally) Some vehicles require placing the Inside Strap Hooks in the trunk.
- Página 3 Place bikes on carrier arms, alternating direction of handlebars (Fig. 8).Rest the bicycle’s top tube in hold-down saddles. Cover inner pedal of first bike to avoid scratching vehicle finish (Fig. 8). The purchase of Saris Protect-O-Pads(#2060) is rec- ommended to protect potential contact areas. Make sure foam pads are free of debris as it could scratch vehicle's finish.
- Página 4 At its option, Saris will repair or replace, or refund the purchase price of, any Saris product which is defective or fails to conform with this warranty under normal use and service.
- Página 5 - your most valued que pudiesen rayar el possessions. And if it has the acabado del vehículo. Saris name on it, nothing we build goes out the door unless 1047P: Guardian 3 1045P: Guardian 2 it’s worth putting those posses-...
- Página 6 Aplicación especial de gancho de correa interior y adaptador Salvo que se especifique de otra forma en la guía Hatch Hugger: de ajuste vigente en www.saris.com, monte los SÓLO SI SE ESPECIFICA EN LA GUÍA DE AJUSTE VIGENTE (disponible ganchos de la correa interior (Fig. 6) al borde en www.saris.com).
- Página 7 Cubra la parte interior del pedal de la primera bicicleta para que no raye el acabado del vehículo (Fig. 8). Se recomienda la compra de Protect-O-Pads (No. 2060) de Saris para proteger áreas de contacto posi- bles.
-
Página 8: Garantía
Este portador ha sido diseñado para transportar bicicletas en vehículos específicos. Antes de instalarlo, el usuario debe leer y seguir las recomendaciones de la Guía de compatibilidad y medidas vigente de Saris (disponible a través de un distribuidor de Saris o el sitio web www.sarisproducts.com), así como las instrucciones que se adjuntan. Las recomendaciones de ajuste se basan en elementos estándares de los vehículos, por lo que cualquier elemento opcional podría afectar tales recomenda-... - Página 9 - your most valued Assurez-vous que les possessions. And if it has the Saris name on it, nothing we manchons en mousse build goes out the door unless ne contiennent pas de it’s worth putting those posses- débris qui ris-...
- Página 10 ADAPTATION DU PORTE-VÉLOS AU VÉHICULE (suite) : Position 4 ou 5 pour Position 3 ou 4 pour les fourgonnettes les voitures à hayon Position 1 ou 2 pour les berlines Poussez Appuyez simultanément sur les leviers de réglage et soulevez l'arceau supérieur, puis relâchez les leviers pour permettre l'en- cliquetage des ergots (fig.
- Página 11 (côté voiture) afin d'éviter d'endommager la peinture de la carrosserie (fig. 8). Nous vous recommandons les pro- tections Protect-O-Pads de Saris (réf. 2060) pour toutes les zones de contact potentiel. Assurez-vous que les manchons en mousse ne conti- ennent pas de débris qui risqueraient de rayer la peinture du véhicule.
- Página 12 Ce porte-vélos a été conçu pour le transport de vélos sur certains véhicules. Avant l'installation, l'utilisateur doit lire et suivre les recommandations du plus récent Guide de compatibilité Saris (disponible auprès des distributeurs Saris ou sur le web à l'adresse www.sarisproducts.com), ainsi que les instructions ci-jointes. Ces recommandations sont basées sur l'équipement standard des véhicules;...


