Tabla de contenido
Publicidad
Idiomas disponibles
Idiomas disponibles
Enlaces rápidos
Publicidad
Tabla de contenido

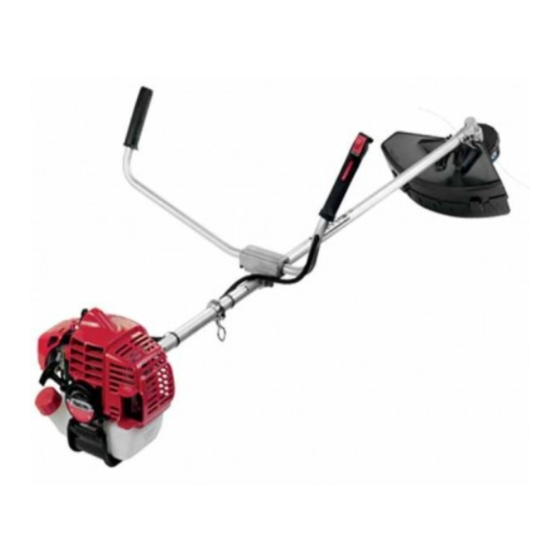
Resumen de contenidos para Shindaiwa C242
- Página 1 SHINDAIWA OWNER’S/OPERATOR’S MANUAL C242 BRUSHCUTTER C242 WARNING! Minimize the risk of injury to yourself and others! Read this manual and familiarize yourself with the contents. Always wear eye and hearing protection when operating this unit. Part Number 81359 Rev 8/06...
-
Página 2: Tabla De Contenido
Maintenance ..........14 242 series hand held power equipment, or if you do not understand something in Long Term Storage........17 this manual, your Shindaiwa dealer will be Blade Sharpening........17 glad to assist you. You may also contact Troubleshooting Guide ......18 Shindaiwa Inc. - Página 3 Safety Instructions The Properly Equipped Operator WARNING! Wear hearing protection devices Use Good Judgment and a broad-brimmed hat or Wear close-fitting clothing to pro- ALWAYS wear eye protection to shield helmet. tect legs and arms. Gloves offer against thrown objects. added protection and are strongly Always wear eye protection such as NEVER run the engine when recommended.
-
Página 4: Safety Labels
Figure 2 Safety Labels This label indicates the minimum distance between front handle and rear grip per ANSI B175.3. C242 IMPORTANT! Safety and Operation Information Labels: Make sure all informa- tion labels are undamaged and readable. Immediately replace damaged or missing information labels. -
Página 5: Product Description
Fuel tank capacity ..........22.3 oz./670 ml Ignition ............One-piece electronic, meets or exceeds these specifications and is transistor-controlled recommended for all Shindaiwa products. Spark plug...............NGK BPMR6A Specifications are subject to change without notice. This unit comes fully assembled with the... -
Página 6: Assembly
Plate Sub-shield with Shield Line Cutter Figure 5A Figure 5 Install the Cutting Attachment Shield C242 Cutting Attachment Shield 1. Insert the cutting attachment shield WARNING! between the outer tube and the cutting NEVER operate the unit without the attachment mounting plate. See Figure 5. -
Página 7: Adjustments
Assembly (Continued) Handle Bar C242 Ignition Switch Handle Positioning Label Install the handlebar: 1. Use the 4 mm hex wrench to remove POSITION HANDLE Hanger the lower cap retaining screws from the FORWARD OF THIS LINE handlebar bracket. Remove the cap from Shoulder Strap the bracket. -
Página 8: Installing A Trimmer Head
Installing a Trimmer Head NOTE: Hand-tighten Trimmer Head (coun- ter-clockwise to install) The C242 is shipped with Holder A, Holder B, Shaft Bolt shaft bolt, and bolt guard installed. The shaft (not used) bolt is a LEFT-HAND thread. Remove it by turn-... -
Página 9: Installing A Blade
Installing a Blade CAUTION! Turn the C242 upside down so the gear Shaft Bolt case output shaft is facing UP and Install the blade so its printed surface remove the shaft bolt, bolt guard and is visible to the operator when the holder B from the gear case shaft. -
Página 10: Mixing Fuel
ISO-L-EGD and/or JASO FC classified ISO-L-EGD performance requirements. your Shindaiwa engine. oils at 50:1 gasoline/oil ratio. Shindaiwa One is recommended for use in all Shindaiwa low emissions engines and also includes a fuel stabilizer. Filling the Fuel Tank 1. Place the trimmer on a flat, level surface. -
Página 11: Stopping The Engine
If the idle speed Idle Adjusting in the field. cannot be adjusted by the procedure Screw Figure 20 described here, return the trimmer to your Shindaiwa dealer for inspection. -
Página 12: Checking Unit Condition
Do not make modifications to this unit with- ALWAYS stop the engine immediately ting attachment shield or other protective out written approval from Shindaiwa, Inc. and check for damage if you strike a for- devices removed! eign object or if the unit becomes tangled. -
Página 13: Using A Blade
When operating a C242 with a blade, make handlebar or barrier bar as well sure both the handle and shoulder strap as a harness or shoulder strap. -
Página 14: Maintenance
General Maintenance IMPORTANT! NOTE: Using non-standard replacement MAINTENANCE, REPLACEMENT OR WARNING! parts could invalidate your Shindaiwa REPAIR OF EMISSION CONTROL warranty. DEVICES AND SYSTEMS MAY BE Before performing any maintenance, PERFORMED BY ANY REPAIR ESTAB- repair or cleaning work on the unit, Muffler LISHMENT OR INDIVIDUAL;... - Página 15 Grease out. Use only lithium-base grease such as Shindaiwa Gear Case Lubricant or equivalent. See Figure 28. n Lubricate main shaft splines. n Use a hooked wire to extract the fuel Gear Shaft filter from inside the fuel tank.
- Página 16 6. Inspect the cylinder exhaust port for any and engine cover in the reverse order of carbon buildup. If you note excessive carbon buildup, consult disassembly. with an authorized Shindaiwa servicing 7. Gently tap the muffler on a wood surface dealer. to dislodge any loose carbon.
-
Página 17: Long Term Storage
30° Shindaiwa Tornado™ Blade Figure 31 Round To sharpen the cutters on a Shindaiwa Tor- File nado Blade, use a 7/32-inch round file. File the leading edge of each tooth to a razor WARNING! edge. The top plate of each tooth should angle back 30°. -
Página 18: Troubleshooting Guide
Troubleshooting Guide ENGINE DOES NOT START What To Check Possible Cause Remedy Faulty recoil starter. Does the engine crank? Consult with an authorized servicing dealer. Fluid in the crankcase. Internal damage. Loose spark plug. Tighten and re-test. Good compression? Excess wear on cylinder, piston, rings. Consult with an authorized servicing dealer. - Página 19 Troubleshooting Guide (continued) ADDITIONAL PROBLEMS Symptom Possible Cause Remedy Clean the air filter. Clogged air filter. Poor acceleration. Replace the fuel filter. Clogged fuel filter. Consult with an authorized servicing dealer. Lean fuel/air mixture. Idle speed set too low. Adjust: 3,000 ( 250) RPM (min ) Switch turned off.
-
Página 20: Emission System Warranty
You are responsible for presenting your small off-road engine Your engine emission control system includes parts such as to an authorized Shindaiwa Dealer as soon as a problem exists. the carburetor, the ignition system and, if equipped, the catalytic The warranty repairs should be completed in a reasonable amount converter.


