Tabla de contenido
Publicidad
Idiomas disponibles
Idiomas disponibles
Enlaces rápidos
H-2272
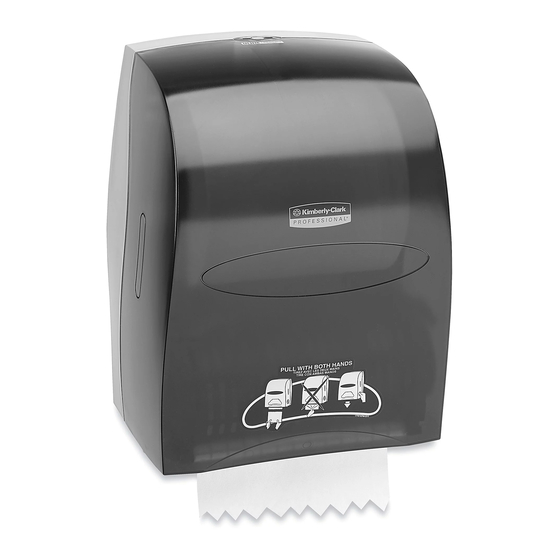
8" HANDS-FREE
TOWEL DISPENSER
TOOLS NEEDED
Electric Drill
1/4" Drill Bit
Dispenser x 1
USING THE PUSH BUTTON LOCK FEATURE
1. Open dispenser and raise end of lock spring just
enough to pop out the gray decorative hole plug.
(See Figure 1)
NOTE: Do not overstress the lock spring.
Lock Spring
Figure 1
Decorative
Hole Plug
2. Remove push button from back of dispenser.
(See Figure 2)
Figure 2
PAGE 1 OF 9
1-800-295-5510
uline.com
Phillips Screwdriver
Tape Measure
Dispenser Key x 1
OPTIONAL PUSH BUTTON LOCK INSTALLATION
Push Buttons
Level
PARTS
Wall Anchor x 4
3. Slide push button under lock spring at the top of the
dispenser and insert button through hole in door.
(See Figure 3)
Figure 3
4. Release lock spring and close dispenser. (See Figure 4)
Figure 4
Para Español, vea páginas 4-6.
Pour le français, consulter les pages 7-9.
Screw x 4
Push Button
0721 IH-2272
Publicidad
Tabla de contenido

Resumen de contenidos para Uline H-2272
- Página 1 Para Español, vea páginas 4-6. Pour le français, consulter les pages 7-9. H-2272 1-800-295-5510 uline.com 8" HANDS-FREE TOWEL DISPENSER TOOLS NEEDED Electric Drill 1/4" Drill Bit Phillips Screwdriver Tape Measure Level PARTS Dispenser x 1 Dispenser Key x 1 Wall Anchor x 4...
- Página 2 DECORATOR STRIP INSTALLATION 1. Open cover to expose inside of decorator strip Figure 5 window. 2. Slide decorator strip into place, making sure the decorator strip is held by the plastic guides. (See Figure 5) Decorator Strip Decorator Strip Window 3.
- Página 3 Close cover and begin (See Figure 12) dispensing. (See Figure 13) Figure 13 Figure 12 1-800-295-5510 uline.com PAGE 3 OF 9 0721 IH-2272...
-
Página 4: Herramientas Necesarias
H-2272 800-295-5510 uline.mx 20.3 CM (8") DESPACHADOR DE TOALLAS MANOS LIBRES HERRAMIENTAS NECESARIAS Taladro Broca Desarmador Cinta Nivel de Cruz de Medir PARTES 1 Despachador 1 Llave de Despachador 4 Taquetes 4 Tornillos INSTALACIÓN DEL BOTÓN PULSADOR DE BLOQUEO PARA USAR LA FUNCIÓN DE BLOQUEO Deslice el botón pulsador por debajo del resorte de... -
Página 5: Instalación De La Tira Decorativa
INSTALACIÓN DE LA TIRA DECORATIVA Abra la cubierta para dejar a la vista la parte interior de Diagrama 5 la ventana para la tira decorativa. Deslice la tira decorativa hasta colocarla en posición, asegurándose de que quede sujeta por las guías de plástico. -
Página 6: Carga Del Rollo Auxiliar
Cierre la cubierta y auxiliar en la parte posterior del despachador. comience a suministrar. (Vea Diagrama 13) (Vea Diagrama 12) Diagrama 13 Diagrama 12 800-295-5510 uline.mx PAGE 6 OF 9 0721 IH-2272... -
Página 7: Outils Requis
H-2272 1-800-295-5510 uline.ca Distributeur De Serviettes Mains Libres De 20,3 Cm (8 Po) OUTILS REQUIS Perceuse Mèche Tournevis Ruban à Niveau à de perceuse cruciforme mesurer bulles PIÈCES Distributeur x 1 Clé de distributeur x 1 Dispositif d'ancrage x 4 Vis x 4... -
Página 8: Installation De La Bande Décorative
INSTALLATION DE LA BANDE DÉCORATIVE Ouvrez le couvercle pour exposer l'intérieur de la fenêtre Figure 5 pour bande décorative. Faites glisser la bande décorative en place en veillant à ce qu'elle soit retenue par les guides en plastique. (Voir Figure 5) Fermez solidement le couvercle et verrouillez-le. Fenêtre pour bande Bande décorative décorative... -
Página 9: Instructions De Chargement
à l'arrière du distributeur. d'alimentation fixe. Fermez le couvercle et amorcez la (Voir Figure 12) distribution. (Voir Figure 13) Figure 13 Figure 12 1-800-295-5510 uline.ca PAGE 9 OF 9 0721 IH-2272...


