Tabla de contenido
Publicidad
Idiomas disponibles
Idiomas disponibles
Enlaces rápidos
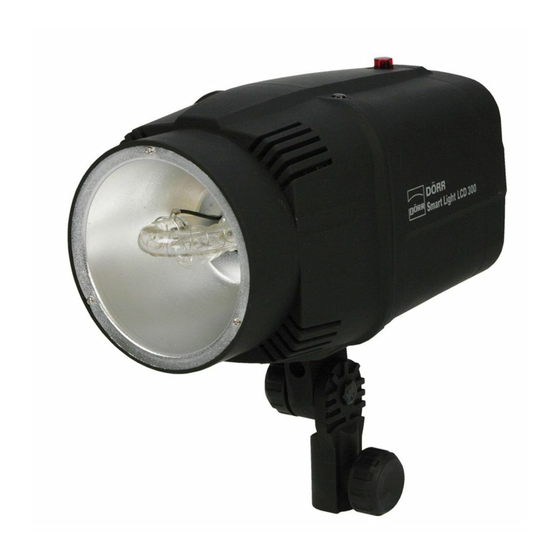
DÖRR
Blitzkopf Smart Light LCD 300 / 200
Gebrauchsanleitung
Vielen Dank, dass Sie sich für ein DÖRR Produkt entschieden haben. Bitte lesen Sie die Gebrauchsanleitung vor der Inbetriebnahme aufmerksam durch.
Bei weiteren Fragen wenden Sie sich an Ihr Fachgeschäft oder an uns direkt (+49 731 97037-0)
1.
Technische Daten
1.
2.
Technische Daten
Blitzkopf Smart Light LCD 300
Leistung
300 Ws
Leitzahl
52
Leistungsregulierung
variabel: voll bis 1/32
Blitzfolgezeit
3
Blitzdauer
1/500
Einstelllicht
50W
Testauslöser, Fotosensor oder
Auslösung durch
Synchronkabel. Sync. Abstand ≤ 10m
Farbtemperatur
5600K
Stromversorgung
AC 200 - 240V / 50 Hz
Gewicht
1.8 kg
Maße
16 x 16 x 22cm
Netzkabel, Blitzbirne (eingesetzt),
Lieferumfang
Einstelllichtbirne (eingesetzt)
Sicherung
6,3 Ah / 250V
Beschreibung Blitzkopf
1.
Ein- / Aus- Schalter
2.
Synchronanschluss
3.
Netzanschluss
4.
Sicherung
5.
Leistungsregler / Auswahltaste
(dreh- und drückbar)
6.
Testauslöser
7.
Funktionswahltaste
8.
Digitalanzeige (siehe extra Beschreibung)
9.
Fotozelle (Sensor)
10.
Blitzbereitschaftsanzeige (grüne LED)
www.doerrfoto.de
9.
8.
7.
6.
10.
5.
4.
3.
Blitzkopf Smart Light LCD 200
200 Ws
42
variabel: voll bis 1/32
3
1/500
50W
Testauslöser, Fotosensor oder
Synchronkabel. Sync. Abstand ≤ 10m
5600 K
AC 200 - 240V / 50 Hz
1.65 kg
16 x 16 x 22cm
Netzkabel, Blitzbirne (eingesetzt),
Einstelllichtbirne (eingesetzt)
6,35 Ah / 250V
Beschreibung Anzeige
a.
Akustisches Bereitschaftssignal
b.
Auslösung durch Fotozelle
c.
d.
Anzeige Einstelllicht-Modus
e.
f.
Ladestatus Blitz
g.
Blitzzähler (zählt die abgegebenen Blitze)
h.
Leistungseinstellung Blitz
i.
Leistungseinstellung Einstelllicht
j.
Angewählter Modus Auslösung durch Fotozelle
Einstellicht
Blitzbirne
1
Publicidad
Tabla de contenido

Manuales relacionados para Dörr Smart Light LCD 300


Resumen de contenidos para Dörr Smart Light LCD 300
- Página 1 DÖRR Blitzkopf Smart Light LCD 300 / 200 Gebrauchsanleitung Vielen Dank, dass Sie sich für ein DÖRR Produkt entschieden haben. Bitte lesen Sie die Gebrauchsanleitung vor der Inbetriebnahme aufmerksam durch. Bei weiteren Fragen wenden Sie sich an Ihr Fachgeschäft oder an uns direkt (+49 731 97037-0)
- Página 2 • bei deaktiviertem Signal ist dieser Rahmen erloschen c) Auslösung durch Fotozelle (Sensor) (9) Der Blitz Smart Light LCD 300/ LCD 200 lässt sich durch einen vorhandenen Blitz (z.B. Systemblitz, eingebauter Kamerablitz, Infrarotblitz, weiterer Blitzkopf) auslösen. • Blitzen mit mehreren Blitzköpfen In der Regel wird nur ein Blitzkopf mit der Kamera verbunden und ausgelöst.
- Página 3 Die Blinkfrequenz verlangsamt sich deutlich. Sobald das Blinken stoppt und ein weisser Rahmen sichtbar ist, ist die Funktion aktiviert. 5. Arbeiten mit dem Smart Light LCD 300/ LCD 200 Blitzkopf Nachdem Sie den Blitzkopf mit der Kamera verbunden haben (Synchronkabel / Auslösung durch Fotozelle (9) / optional durch Funkfernauslöse-Sets und die ideale Einstellung vorgenommen haben, können Sie durch den Drehregler (5) die gewünschte Leistung stufenlos einstellen.
- Página 4 DÖRR Blitzkopf Smart Light LCD 300 / 200 Gebrauchsanleitung Anschluss der Kamera z. B. durch Synchronkabel Verbinden Sie Kamera, Synchronkabel und Blitzkopf wie oben beschrieben. Der zweite Blitzkopf wird in der Regel durch den eingebauten Fotosensor mit ausgelöst. • Stellen Sie die Programmwahl Ihrer Kamera (Analog-/Digital- Spiegelreflex oder Systemkamera) auf M für manuell (siehe Kameraanleitung) ein.
- Página 5 DÖRR Studio Flash Smart Light LCD 300 / 200 Instruction Manual Thank you for purchasing a DÖRR Studio Flash. Please read the following instructions carefully before starting to operate the flash. If you require additional information, please contact your local DÖRR representative or mail to export@doerrfoto.de.
-
Página 6: Operation And Functions
• no frame if the signal is not activated c) Triggering via Photo Sensor (9) The Smart Light LCD 300/ LCD 200 Flash Head can be released by an incorporated camera flash, infrared flash or another flash head. • Flash with various Flash Heads Usually, one flash head is related to the camera and released by the camera’s flash. -
Página 7: Modelling Light
Triggering via Syn Cord The Smart Light LCD 300/ LCD 200 Flash Head can be released via the supplied sync cord. When you plug the sync cord into the socket (2) make sure that both the flash head and your camera are switched off. Then connect the sync cord to your camera (see camera’s manual). If your camera does not boast of a sync socket, check with your DÖRR representative for an optional adapter. - Página 8 DÖRR Studio Flash Smart Light LCD 300 / 200 Instruction Manual 6. Flash Failure • The flash may fail to work for various reasons: - Flash bulb defective ---> please replace it. (Availble from your specializing dealer.) - Modelling light bulb defective --->...
- Página 9 DÖRR Tête de flash Smart Light LCD 300 / 200 Notice d‘utilisation Nous vous remercions d’avoir porté votre choix sur un produit de la société DÖRR. Nous vous incitons à lire cette notice d’utilisation conscienceusement dans son intégralité. Pour plus d'informations, veuillez prendre contact avec un revendeur local DÖRR ou prenez contact avec nous sous export@doerrfoto.de.
-
Página 10: Fonctions Disponibles / Options De Réglage
• lorsque le signal est désactivé, ce cadre disparaît. c) Déclenchement par cellule photo (capteur) (9) Le flash Smart Light LCD 300/LCD 200 est déclenché par un flash existant (par exemple: système de flash, flash intégré à l‘appareil photo, flash infrarouge, têtes de flash supplémentaires). - Página 11 Déclenchement par cordon de synchronisation Vous pouvez également déclencher le flash Smart Light LCD 300 / LCD 200 par l‘intermédiaire du cordon de synchronisation (accessoire fourni). Veillez à ce que la tête de flash et l‘appareil photo soient éteints. Branchez le cordon dans le port de synchronisation (2) de la tête de flash.
- Página 12 DÖRR Tête de flash Smart Light LCD 300 / 200 Notice d‘utilisation Raccordement de l‘appareil photo par un cordon de synchronisation Relier l‘appareil photo, le cordon de synchronisation et la tête de flash comme décrit précédemment. En règle générale, la seconde tête de flash est déclenchée par la cellule photo intégrée.
-
Página 13: Descripción Del Cabezal De Flash
DÖRR Flash de estudio DÖRR Smart Light LCD 300/200 Manual de instrucciones Gracias por adquirir un flash de estudio DÖRR. Le rogamos que lea las instrucciones detenidamente antes de utilizarlo. Si necesita más información, póngase en contacto con su representante de DÖRR local o envíenos un correo electrónico a export@doerrfoto.de. - Página 14 - ningún cuadro si la señal no está activada c) Disparo mediante sensor fotográfico (9) El cabezal de flash Smart Light LCD 300 / LCD 200 puede disparase mediante un flash de cámara incorporado, un flash de infrarrojos, o mediante otro cabezal de flash.
-
Página 15: Lámpara De Ajuste
Funcionamiento del cabezal de flash Smart Light LCD 300 / LCD 200 Una vez que haya contectado la cámara al cabezal de flash Smart Light LCD 300 / LCD 200 y haya activado el modo de disparo deseado, puede seleccionar varaciones de la potencia de flash utilizando el botón de confirmación (5). Puede añadir valores en incrementos de 1/10 desde 1 (mínimo) hasta potencia máxima 6 (LCD 300: 300W / LCD 200: 200W). -
Página 16: Fallo Del Flash
DÖRR Flash de estudio DÖRR Smart Light LCD 300/200 Manual de instrucciones Conexión de la cámara p.ej. con un cable de sincronización Conecte la cámara, el cable de sincronización y el cabezal del flash tal como se ha descrito anteriormente. El segundo cabezal de flash normalmente lo dispara el primer cabezal mediante el sensor fotógrafico. -
Página 17: Технические Характеристики
DÖRR Студийная вспышка Flash Smart Light LCD 300/ 200 Руководство по эксплуатации Благодарим вас за покупку студийной вспышки DÖRR Пожалуйста, прочитайте внимательно данное руководство пользовател� перед началом работы с этой вспышкой. Если вам потребуетс� кака��то дополнительна� информаци�, пожалуйста, обратитесь к представител�м компании... -
Página 18: Перед Началом Работы
• белую рамку вокруг знака (a), если сигнал активирован • отсутствие рамки, если сигнал не активирован Пуск через фотоэлемент (9) Вспышка Smart Light LCD 300/ LCD 200 может приводитьс� в действие вспышкой встроенной в камеру, инфракрасной вспышкой или другой вспышкой. • Освещение несколькими вспышками... - Página 19 подключени� синхрокабел�, уточните у представител� DÖRR в вашем регионе наличие не вход�щего в комплект адаптера. e) Вспышка Smart Light LCD 300/ LCD 200 также может быть приведена в действие посредством не входящего в базовую комплектацию комплектом дистанционного управления RF Remote Flash Trigger Kit.
-
Página 20: Замена Ламп
DÖRR Студийная вспышка Flash Smart Light LCD 300/ 200 Руководство по эксплуатации Подключение к камере, например с помощью синхрокабеля Подключите вашу камеру, синхрокабель и вспышку, как было описано выше. Втора� вспышка обычно приводитс� в действие первой вспышкой с помощью фотоэлемента. - Página 21 Studio Flash Smart Light LCD 300/200 Vi ringraziamo per aver acquistato il Dorr Studio Flash Smart Light LCD 300/200. Per favore leggete attentamente le istruzioni prima di utilizzare il flash. Se necessitate di ulteriori informazioni, contattate il vostro rivenditore DORR locale o inviate un e-mail a export@doerrfoto.de Specifiche Lampada “Modeling”...
- Página 22 • Nessuna cornice quando il segnale acustico non è attivo c) Scatto tramite fotosensore (9) Il Flash Smart Light LCD 300/ LCD 200 può essere attivato tramite il flash della fotocamera, un flash infrarossi o un’altra testa flash • Utilizzo con più di una testa Flash Normalmente, un solo flash extra è...
- Página 23 Emissione lampo tramite il cavo sincro Il Flash Smart Light LCD 300/ LCD 200 può essere attivato tramite il cavo sincro in dotazione. Quando collegate il cavo sincro alla presa (2) assicuratevi che sia il flash che la fotocamera siano spenti. Poi collegate il cavo sincro alla fotocamera (vedi manuale d’istruzioni della fotocamera).
-
Página 24: Problemi Con Il Flash
DÖRR Studio Flash Smart Light LCD 300/200 Collegare la fotocamera es. con il cavo sincro Collega la fotocamera al cavo sincro come sopra riportato. Il secondo flash normalmente viene attivato dal primo flash tramite il sensore fotografico. • Posizionate la vostra fotocamera sulla modalità “mode” M (per le fotocamere digitali analogiche o SLR). Per ulteriori dettagli consultare il manuale d’istruzione della fotocamera.