Tabla de contenido
Publicidad
Idiomas disponibles
Idiomas disponibles
Enlaces rápidos
Publicidad
Capítulos
Tabla de contenido

Manuales relacionados para Yamaha YST-SW325


Resumen de contenidos para Yamaha YST-SW325
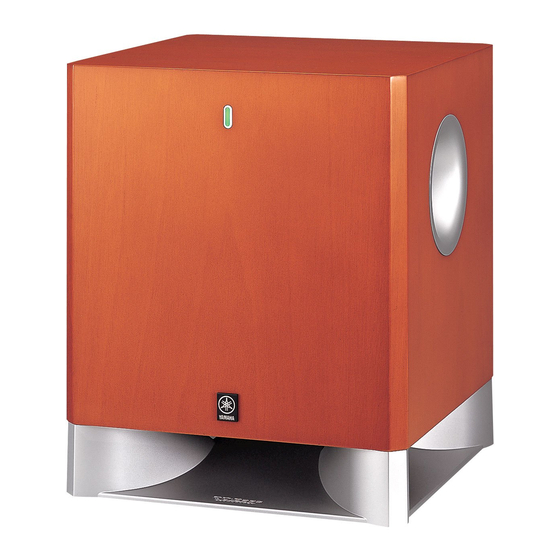
- Página 1 YST-SW325 Subwoofer System OWNER’S MANUAL MANUAL DE INSTRUCCIONES...
- Página 2 Thank you for selecting this YAMAHA subwoofer system. CAUTION: Read this before operating your unit Please read the following operating precautions • Do not place this unit where foreign objects such as before use. YAMAHA will not be held responsible water drips might fall.
-
Página 3: Tabla De Contenido
Frequency characteristics .........13 plug supplied with this appliance, it should be cut off and an appropriate 3 pin plug fitted. For details, refer to the ADVANCED YAMAHA ACTIVE SERVO instructions described below. TECHNOLOGY II ............14 Note: The plug severed from the mains lead must be destroyed, as a plug with bared flexible cord is hazardous TROUBLESHOOTING .......... -
Página 4: Features
• You can select bass effect suitable for the source by using the B.A.S.S. button. • This subwoofer system is equipped with a linear port unique to Yamaha that provides smooth bass response during playback, minimizing extraneous noise not included in the original input signal. -
Página 5: Placement
PLACEMENT The position of the subwoofer is not so critical since low bass sounds are not highly directional. For a sonorous sound field, although you can obtain a good effect with one subwoofer, the use of two subwoofers is recommended. If using one subwoofer, we recommend that you place it on the outside of either the right or the left front speaker. -
Página 6: Connections
CONNECTIONS Choose one of the following two connecting methods that is more suitable for your audio system. Choose (pages 4-5) if your amplifier has line output (pin jack) terminal(s) Choose (pages 6-7) if your amplifier has no line output (pin jack) terminal Caution: Do not connect the power cord of the subwoofer and other components into an AC outlet until all connections between components are completed. -
Página 7: Using One Subwoofer
CONNECTIONS ■ Using one subwoofer Subwoofer Mono pin cable (not included) OUTPUT INPUT TO SPEAKERS AUTO STANDBY HI G H OUTPUT INPUT PHASE TO SPEAKERS /MONO /MONO NORM REV INPUT 1 FROM AMPLIFIER VOLTAGE SELECTOR POWER 220V-240V 110V-120V INPUT 1 FROM AMPLIFIER Audio pin To AC outlet... -
Página 8: Connecting To Speaker Output Terminals Of The Amplifier
CONNECTIONS Connecting to speaker output terminals of the amplifier Select this method if your amplifier has no line output (pin jack) terminal. If your amplifier has two sets of front speaker output terminals and both terminals can output sound signals simultaneously. •... - Página 9 CONNECTIONS If your amplifier has only one set of front speaker output terminals. Connect the speaker output terminals of the amplifier to the INPUT1 terminals of the subwoofer, and connect the OUTPUT terminals of the subwoofer to the front speakers. ■...
-
Página 10: Connecting To The Input1/ Output Terminals Of The Subwoofer
CONNECTIONS Connecting to the INPUT1/OUTPUT Plug in the subwoofer to the AC outlet terminals of the subwoofer After all connections are completed, plug in the subwoofer and other audio/video components to the AC outlet. ■ Before connecting Remove the insulation coating at the extremity of each speaker cable by twisting the coating off. -
Página 11: Controls And Their Functions
CONTROLS AND THEIR FUNCTIONS Advanced Control panel Front panel AUTO STANDBY HI G H OUTPUT INPUT PHASE TO SPEAKERS /MONO NORM REV INPUT 1 AUTO STANDBY FROM AMPLIFIER HI G H OUTPUT INPUT PHASE TO SPEAKERS /MONO NORM REV INPUT 1 FROM AMPLIFIER VOLTAGE VOLTAGE... - Página 12 CONTROLS AND THEIR FUNCTIONS WARNING HIGH CUT control Adjusts the high frequency cut off point. Be sure to unplug the subwoofer before setting the Frequencies higher than the frequency selected by this VOLTAGE SELECTOR switch correctly. control are all cut off (and no output). Note * One graduation of this control represents 10 Hz.
-
Página 13: Auto Standby Function
AUTO STANDBY FUNCTION The subwoofer automatically places itself in the standby mode if it does not receive an input signal for 7 or 8 minutes. (The power indicator lights in red.) This is called AUTO STANDBY function. When the subwoofer detects a bass signal input of below 200 Hz, it automatically places itself on. (The power indicator lights in green.) Activate the AUTO STANDBY function Press the STANDBY/ON button to set the subwoofer in the standby mode. -
Página 14: Adjusting The Subwoofer Before Use
ADJUSTING THE SUBWOOFER BEFORE USE Before using the subwoofer, adjust the subwoofer to obtain the optimum volume and tone balance between the subwoofer and the front speakers by following the procedures described below. POWER NORM REV Set the VOLUME control to minimum (0). Select “MOVIE”... -
Página 15: Frequency Characteristics
EX.1 When combined with a 4” or 5” (10 cm or 13 cm) acoustic suspension, 2 way system front speakers If you are using NS-325F speakers as front speakers, use the following example as a reference when adjusting settings. PHASE NORM YST-SW325 (90Hz) (REV) Front speaker... -
Página 16: Advanced Yamaha Active Servo Technology Ii
ADVANCED YAMAHA ACTIVE SERVO TECHNOLOGY II In 1988, Yamaha brought to the marketplace speaker Yamaha’s newly developed Advanced YST II adds many systems utilizing YST (Yamaha Active Servo Technology) refinements to Yamaha Active Servo Technology, to give powerful, high quality bass reproduction. This... -
Página 17: Troubleshooting
Refer to the chart below when this unit does not function properly. If the problem you are experiencing is not listed below or if the instructions given below do not help, disconnect the power cord and contact your authorized YAMAHA dealer or service center. -
Página 18: Specifications
SPECIFICATIONS Type..Advanced Yamaha Active Servo Technology II Power Consumption..........70 W Driver ..........20 cm (8”) cone woofer Standby Power Consumption .......0.5 W Magnetic shielding type Dimensions (W x H x D) Amplifier Output (100 Hz, 5 ohms, 10% THD) ..........315 mm x 380 mm x 374 mm ................ - Página 19 Gracias por haber seleccionado un sistema de altavoces de subgraves YAMAHA. PRECAUCIÓN: Leer este manual de instrucciones antes de poner la unidad en funcionamiento Lea las siguientes precauciones de funcionamiento antes • No coloque esta unidad donde puedan caer objetos de iniciar el uso del aparato.
- Página 20 Características de las frecuencias ......13 aparato de TV, el color de la imagen pueda verse afectado. En este caso, aleje el sistema del televisor. ADVANCED YAMAHA ACTIVE SERVO TECHNOLOGY II ............14 LOCALIZACIÓN DE AVERÍAS ........15 ESPECIFICACIONES ..........16...
-
Página 21: Características
QD-Bass Technology La tecnología de bajos QD-Bass (Quatre Dispersion Bass) es una tecnología única de Yamaha que permite radiar el sonido de forma eficiente en las cuatro direcciones horizontales. -
Página 22: Ubicación
UBICACIÓN La posición del altavoz de subgraves no es crítica porque los sonidos graves bajos no son altamente direccionales. Para obtener un campo de sonido amplio, aunque podrá obtener un buen efecto con un altavoz de subgraves, se recomienda utilizar dos altavoces de subgraves. Al usar un altavoz de subgraves, se recomienda colocarlo en el lado exterior del altavoz delantero derecho o izquierdo. -
Página 23: Conexiones
CONEXIONES Elija uno de los dos métodos de conexión siguientes que sea más conveniente para su sistema de audio. Elija el (páginas 4-5) si su amplificador tiene terminal(es) de salida (toma para clavija) de línea Elija el (páginas 6-7) si su amplificador no tiene terminal(es) de salida (toma para clavija) de línea Precaución: No conecte los cables de alimentación del altavoz de subgraves y de otros componentes a la toma de CA hasta después de finalizar todas las conexiones entre los... - Página 24 CONEXIONES ■ Utilización de un altavoz de subgraves Altavoz de subgraves Cable de clavijas mono (no incluido) OUTPUT INPUT TO SPEAKERS AUTO STANDBY HI G H OUTPUT INPUT PHASE TO SPEAKERS /MONO /MONO NORM REV INPUT 1 FROM AMPLIFIER VOLTAGE SELECTOR 220V-240V POWER...
-
Página 25: Conexión A Los Terminales De Salida De Los Altavoces Del Amplificador
CONEXIONES Conexión a los terminales de salida de los altavoces del amplificador Seleccione este método si su amplificador no tiene terminal de salida (toma para clavija) de línea. Si su amplificador dispone de dos conjuntos de terminales de salida de altavoces delanteros y ambos terminales pueden emitir señales de sonido simultáneamente. - Página 26 CONEXIONES Si su amplificador sólo tiene un conjunto de terminales de salida de altavoces delanteros. Conecte los terminales de salida de altavoces del amplificador a los terminales INPUT1 del altavoz de subgraves y conecte los terminales OUTPUT del altavoz de subgraves a los altavoces delanteros. ■...
-
Página 27: Conexión A Los Terminales Input1/Output Del Altavoz De Subgraves
CONEXIONES Conexión a los terminales INPUT1/ Enchufe el altavoz de subgraves al OUTPUT del altavoz de subgraves tomacorriente de CA ■ Antes de conectar el aparato Una vez realizadas todas las conexiones, enchufé el altavoz de subgraves y el resto de componentes de audio/vídeo al Retire la capa aislante que cubre las extremidades de cada tomacorriente de CA. -
Página 28: Controles Y Sus Funciones
CONTROLES Y SUS FUNCIONES Advanced Panel de control Panel frontal Parte superior AUTO STANDBY HI G H OUTPUT INPUT PHASE TO SPEAKERS /MONO NORM REV INPUT 1 AUTO STANDBY FROM AMPLIFIER HI G H OUTPUT INPUT PHASE TO SPEAKERS /MONO NORM REV INPUT 1 FROM AMPLIFIER... - Página 29 CONTROLES Y SUS FUNCIONES Control HIGH CUT Interruptor VOLTAGE SELECTOR Ajusta la el punto de corte de alta frecuencia. (solamente en modelos para Asia y modelos Aquellas frecuencias superiores a la frecuencia generales) seleccionada por este control se cortarán (y no habrá Si la presente configuración de tensión no es correcta, salida).
-
Página 30: Función Auto Standby
FUNCIÓN AUTO STANDBY El altavoz de subgraves se pone automáticamente en modo de espera si no recibe una señal de entrada durante 7 u 8 minutos. (El indicador de alimentación se enciende en rojo). A esto se le llama función AUTO STANDBY. Cuando el altavoz de subgraves detecta una entrada de señal de graves inferior a 200 Hz, pasa automáticamente al modo de encendido. -
Página 31: Ajuste Del Altavoz De Subgraves Antes De Utilizarlo
AJUSTE DEL ALTAVOZ DE SUBGRAVES ANTES DE UTILIZARLO Antes de utilizar el altavoz de subgraves, ajuste el altavoz de subgraves para obtener el balance de volumen y tono óptimos entre el altavoz de subgraves y los altavoces principales, siguiendo el procedimiento a continuación. POWER NORM REV Ajuste el control VOLUME al mínimo (0). -
Página 32: Características De Las Frecuencias
EJ.1 Cuando se usa en combinación con un sistema de altavoces principales de 2 vías de suspensión acústica de 10 cm o 13 cm Si está utilizando altavoces NS-325F como altavoces delanteros, utilice el siguiente ejemplo como referencia cuando realice los ajustes. PHASE NORM YST-SW325 (REV) (90Hz) Altavoz delantero 500Hz Gráfico de respuesta de frecuencia*... -
Página 33: Advanced Yamaha Active Servo Technology Ii
ADVANCED YAMAHA ACTIVE SERVO TECHNOLOGY II En 1988, Yamaha comercializó unos sistemas de altavoces La tecnología Advanced YST II de Yamaha, recientemente que utilizaban la tecnología YST (Yamaha Active Servo desarrollada, añade numerosos perfeccionamientos a la Technology) para posibilitar una reproducción de graves tecnología de Yamaha Active Servo Technology, lo que... -
Página 34: Localización De Averías
Consulte el siguiente cuadro cuando el aparato no funcione bien. Si el problema no es uno de los que aparecen en la siguiente lista o si las instrucciones de abajo no ayudan a solucionar el problema, desenchufe el cable eléctrico y llame a un distribuidor o centro de servicio autorizado de YAMAHA. Problema Causa Qué... -
Página 35: Especificaciones
ESPECIFICACIONES Tipo ..Advanced Yamaha Active Servo Technology II Consumo eléctrico ..........70 W (Tecnología avanzada de servo activo de Yamaha) Consumo eléctrico en modo de espera ....0,5 W Unidad...........Bafle cónico de 20 cm Tipo de protección magnética Dimensiones (Ancho x Alto x Profundidad) ..........315 mm x 380 mm x 374 mm... - Página 36 感谢您选用雅马哈超低音扬声器系统。 注意事项:操作本装置前敬请阅读 请在使用前阅读以下操作需知。对于不遵守以下 • 如果某一声音以高音量持续输出,可能会损坏本装 操作需知而造成的损坏和 / 或伤害,雅马哈公司 置,例如,如果试碟产生 20 Hz 至 50 Hz 正弦波, 概不负责。 电子设备持续输出低音或可转动唱针接触到唱片表 • 为了确保获得最佳性能,请仔细阅读本使用说明 面时,请降低音量,以防止本装置损坏。 书,并妥善保管,以备将来参考。 • 如果从本装置中听到失真 (如不自然、间断的敲击 • 请在凉爽、干燥、清洁的地方安装本装置。应远离 或击打声) ,请降低音量水平。电影声轨的低频、 窗口、热源,避免在振动过大、灰尘过多、湿气过 超低音或类似的流行音乐播放音量过大,可能会损 重和温度过低的地方使用,以及应远离嗡声声源 坏此扬声器系统。 (变压器及马达) 。 • 超低音频率产生的振动可能令电视机图像失真。在 • 切勿开启箱体,如果异物落入本装置内,请与经销 此情况,请将本机搬离电视机。 商联系。 •...
- Página 37 与放大器的扬声器输出端子的连接 ....6 虽然本机采用磁屏蔽设计, 但若摆放位置与电视机 与超低音扬声器 INPUT1/OUTPUT 过于接近,则仍可能影响电视的画面色彩。在此情 (输入 1/ 输出)端子的连接 ........8 况下,把本机搬离电视机。 将超低音扬声器连接到交流电插座上 ....8 控制器及其功能 ............9 AUTO STANDBY 功能..........11 开启 AUTO STANDBY 功能 .........11 使用前超低音扬声器的调整 ........12 频率特征 ..............13 ADVANCED YAMAHA ACTIVE SERVO TECHNOLOGY II ............14 故障检修 ..............15 规格 ................16...
-
Página 38: 电压选择器位于本装置的后面板,把本装置插入交 流主电源前,必须把电压设定于适合当地的主电 特点介绍
特点介绍 提供附件 • 此超低音扬声系统使用 Advanced Yamaha Active Servo 拆开包装后,检查以下部件是否在内。 Technology II,可以用于复制较高质量的超低音。 (有 关 Advanced Yamaha Active Servo Technology II 的详 情,请参阅第 14 页)能为您的音响系统添加更逼真 的家庭影院效果。 • 您可以轻易地在现有的音频系统中,添加本超低音 扬声器,只需把本装置连接至扬声器端子,或连接 防滑垫 至放大器的线路输出 (管脚插口)端子便可。 • 为有效运用本机,本机的超低音必须与您的主置扬 声器的声音相符,您的可利用 HIGH CUT 控制和 PHASE 开关在不同收听环境中选择最优质的音色。 • AUTO STANDBY 功能可以使您得以从按压... -
Página 39: 按控制面板上的 Standby/On (待用/开)按钮 摆放位置
摆放位置 超低音扬声器的位置不是非常挑剔,这是因为低音没有很强的方向性。对于洪亮的音场,虽然使用一只超低音 扬声器就可以得到不错的效果,但是,建议您使用两只超低音扬声器。 如采用一个超低音扬声器,请摆放在右边或左边前扬声器的外侧 ( 如图 ) 。如采用两个超低音扬声器,请分 别摆放在右边及左边前扬声器的外侧 (如图 )。如图 所示的摆放方式也是可以的。但是,如果超低音扬声 器直接面对墙壁放置,发出的声音及墙壁反射的声音会相互抵消,因而会消除低音音效。为了防止出现这种情 况,应按图 或 所示角度放置,使超低音扬声器斜对墙壁放置。 : 超低音扬声器 , : 前扬声器 ) 注意 在房子中间位置收听时,也许会无法从超低音扬声器中获得足够的低音。这是因为两个平行墙壁之间形成的 “驻波”抵消了低音。 在这种情况下,将超低音扬声器斜对墙壁放置即可,也许有必要靠墙壁放置书架等以便隔开平行表面。 使用防滑垫 请将配备的防滑垫放于超低音扬声器的底部四个角处,以防止由于震动引起本设置的移位。... -
Página 40: 与放大器的线路输出 ( 管脚插口 )
连接 从以下两种连接方法里选择适合您的音频系统的连接方法。 如果您的放大器有线路输出 ( 管脚插口 ) 端子,选择 (4-5 页) 。 如果您的放大器没有线路输出 ( 管脚插口 ) 端子,选择 (6-7 页) 。 注意事项:在所有装置之间的连接完成之前,请不要将超低音扬声器或其他装置的电源线插入交流 电源插座。 注意 必须进行正确连接,即 L (左)连接至 L, R (右)至 R, “+”至 “+” , “-”至 “-” 。请参阅用户手 册进行超低音扬声器的连接。 与放大器的线路输出 (管脚插口)端子的连接 • 与雅马哈放大器 (或 AV 收音扩音机)连接时,将放大器 (或 AV 收音扩音机)后面的 SUBWOOFER (或 LOW PASS 等)端子连接至超低音扬声器上的... - Página 41 连接 ■ 使用一个超低扬声器 超低扬声器 单针式电缆 (不包括) OUTPUT INPUT TO SPEAKERS AUTO STANDBY HI G H OUTPUT INPUT PHASE TO SPEAKERS /MONO /MONO NORM REV INPUT 1 FROM AMPLIFIER VOLTAGE SELECTOR POWER 220V-240V 110V-120V INPUT 1 FROM AMPLIFIER 音频针式电缆 至交流电插座 (不包括) 放大器...
-
Página 42: 与放大器的扬声器输出端子的连接
连接 与放大器的扬声器输出端子的连接 如果您的放大器没有线路输出 ( 管脚插口 ) 端子,请选择这种方法。 如果您的放大器有两套前扬声器输出端子并且两端子可以同时输出声音信号。 • 把一套放大器前扬声器输出端子连接到超低音扬声器的 INPUT1 端子上,另一套放大器前扬声器输出端子连 接到前扬声器上。 • 设定放大器以便两套前扬声器输出端子可以同时输出声音信号。 注意 如果您的放大器仅有一套前扬声器输出端子,参见第 7 页。 ■ 使用一个超低音扬声器 (附扬声器电缆) 右前扬声器 超低音扬声器 左前扬声器 OUTPUT INPUT TO SPEAKERS AUTO STANDBY HI G H OUTPUT INPUT PHASE TO SPEAKERS /MONO /MONO NORM REV INPUT 1... - Página 43 连接 如果放大器只有一套前扬声器输出端子。 将放大器的扬声器输出端子连接至超低音扬声器的 INPUT 1 端子上,将超低音扬声器的 OUTPUT 端子连接至 前扬声器。 ■ 使用一个超低音扬声器 (附扬声器电缆) 右前扬声器 左前扬声器 OUTPUT INPUT TO SPEAKERS /MONO 超低音扬声器 INPUT 1 FROM AMPLIFIER AUTO STANDBY HI G H OUTPUT INPUT PHASE TO SPEAKERS /MONO NORM REV INPUT 1 FROM AMPLIFIER 放大器...
-
Página 44: 与超低音扬声器 Input1/Output (输入 1/ 输出)端子的连接
连接 与超低音扬声器 INPUT1/OUTPUT 将超低音扬声器连接到交流电插座上 (输入 1 /输出)端子的连接 所有连接完成后,将超低音扬声器和其他音频或视频 ■ 接口插入交流电插座。 连接前 从扬声器电缆末端去除绝缘部分。 好 不好 AUTO STANDBY HI G H 10mm OUTPUT INPUT PHASE TO SPEAKERS /MONO NORM REV INPUT 1 FROM AMPLIFIER VOLTAGE SELECTOR POWER 220V-240V 110V-120V ■ 如何连接 如图所示,按住端子上的接片。 插入裸线。... -
Página 45: 控制器及其功能
控制器及其功能 Advanced 控制面板 前面板 顶部 AUTO STANDBY HI G H OUTPUT INPUT PHASE TO SPEAKERS /MONO NORM REV INPUT 1 AUTO STANDBY FROM AMPLIFIER HI G H OUTPUT INPUT PHASE TO SPEAKERS /MONO NORM REV INPUT 1 FROM AMPLIFIER VOLTAGE VOLTAGE SELECTOR 220V-240V... - Página 46 控制器及其功能 HIGH CUT 控制 警告 调整高频率断开点。 在正确设定 VOLTAGE SELECTOR (电压选择器) 所有超过本机控制旋钮选定范围的高频率声音将 开关前,切勿连接超低音扬声器。 会被切断 (亦不会播放) 。 注意 * 此控制每刻度代表 10 Hz。 如果超低音扬声器的 INPUT 1 和 INPUT 2 双方 VOLUME (音量)控制 同时与放大器相连接,您也许会听到混合的音响,这 调整音量水平。顺时针方向旋转增大声音,逆时针 是因为超低音扬声器同时接受两个端子的输入信号造 方向旋转减小声音。 成的影响。 POWER (电源) 开关 如果发生这样的现象,请将放大器仅与 INPUT 1 通常将开关设置于...
-
Página 47: Auto Standby 功能
AUTO STANDBY 功能 当超低音扬声器有 7 至 8 分钟没有接收到输入信号时,会自动进入待用模式。 (电源指示灯以红色点亮。 ) 这就是所谓的 AUTO STANDBY 功能。 当超低音扬声器检测到低于 200 Hz 的低音信号输入时,会自动进入开机模式。 (电源指示灯以绿色点亮。 ) 开启 AUTO STANDBY 功能 按下 STANDBY/ON 按钮,将超低音扬声器设置为待用模式。 (电源指示灯熄灭。 ) 从下列选择 AUTO STANDBY 开关的位置。 - LOW:通常选择本位置以激活此功能。 - HIGH:如果当 AUTO STANDBY 开关设置为 LOW 位置时此功能不能运行,选择本位置可以让超低音扬声 器检测到更低水平的输入信号并自动打开电源。... -
Página 48: 使用前超低音扬声器的调整
使用前超低音扬声器的调整 使用超低音扬声器前,请遵循下述步骤,调整超低音扬声器,以获得超低音扬声器与主置扬声器之间的最佳音 量和音调平衡。 POWER NORM REV 将 VOLUME 控制器设置于最小 (0) 。 根据所播放的音源, 选择 “MOVIE” 或 “MUSIC” 。 MOVIE: 打开所有其他装置的电源。 当播放电影类型的音源时,低频效果被适当加强, 确认 POWER 开关设定到 ON 位置,然后按下 听众可以感觉到强烈的音响效果。 STANDBY/ON 按钮,打开超低音扬声器。 * 电源指示灯以绿色点亮。 MUSIC: 当播放一般的音乐音源时,极低频的成分被过滤, 播放含有低频成分的音源,调节放大器的音量控 音响清晰。 制,达到期望的收听水平。 调整HIGH CUT控制至能获得期望的响应的位置, 注意 然后按 HIGH CUT FILTER 按钮至 ON 位置。 •... -
Página 49: 频率特征
500Hz 频率响应曲线图 * 以下图示显示各控制旋钮的最佳设定和当超低音扬声器与标准型主置扬声器系统连接时的频率特征。 ■ 1. 当与一套 10 cm 或 13 cm 悬吊式 2 声道主置扬声器连接时。 如果您在使用 NS-325F 扬声器作为前扬声器,调整设定时请使用下述示例作为参考。 PHASE NORM YST-SW325 (90 Hz) (REV) 前扬声器 500Hz 频率响应曲线图 * ■ 2. 当与一套 20 cm 或 25 cm 悬吊式 2 声道主置扬声器连接时。 PHASE... -
Página 50: Advanced Yamaha Active Servo Technology Ii
ADVANCED YAMAHA ACTIVE SERVO TECHNOLOGY II 1988 年, Yamaha 开始在市场上销售使用 YST (Yamaha Yamaha 新开发的 Advanced YST II 技术在 Yamaha Active Servo Technology) 实现强劲、高品质低音再现 Active Servo Technology 的基础上追加了众多改进, 可 的扬声器系统。本技术在放大器和扬声器之间采用了 以更好地控制驱动放大器和扬声器的驱动力。从放大 直接连接方式,可实现精密的信号传输和精确的扬声 器的角度来看,扬声器阻抗随着声音频率而变化。 器控制。 Yamaha 开发了新型电路设计, 将负阻抗和持续电流驱 动相结合,可实现更安定的性能和鲜明清晰的低音再 由于本技术使用的扬声器装置由放大器的负阻抗驱动 现。 和扬声器箱与开口间产生的共鸣加以控制,因此可以... -
Página 51: 故障检修
故障检修 如果本装置功能不良,请检查下列各项,如果无法解决问题或故障在症状栏中未列出或以下给出的说明无法提 供帮助,请切断电源,与授权的雅马哈经销商或维修中心联系,寻求帮助。 症状 原因 纠正方法 即使 STANDBY/ON (待用 / 开)开 电源插头未接紧。 将插头接紧。 关设定为 ON (开)时,仍然无电源。 POWER (电 源)开 关 设 置 在 设置 POWER (电源) 开关到 ON (开) (关)位。 位。 无声音。 音量设置到最小。 调高音量。 扬声器接线未接好。 将其接好。 声音电平太低。 扬声器接线连接不当。 进行正确连接,即 L( 左 ) 连接至 L, R( 右... - Página 52 规格 种类 ..Advanced Yamaha Active Servo Technology II 耗电量...............70 W 驱动器 ........20 cm 圆锥低音扬声器 待用模式下耗电量..........0.5 W 磁屏蔽型 尺寸 ( 宽 × 高 × 深 ) 放大器输出 (100 Hz, 5 欧姆 , 10% THD) ......... 315 mm × 380 mm × 374 mm ................150 W...
- Página 53 YAMAHA ELECTRONICS (UK) LTD. YAMAHA HOUSE, 200 RICKMANSWORTH ROAD WATFORD, HERTS WD18 7GQ, ENGLAND YAMAHA SCANDINAVIA A.B. J A WETTERGRENS GATA 1, BOX 30053, 400 43 VÄSTRA FRÖLUNDA, SWEDEN YAMAHA MUSIC AUSTRALIA PTY, LTD. 17-33 MARKET ST., SOUTH MELBOURNE, 3205 VIC., AUSTRALIA...