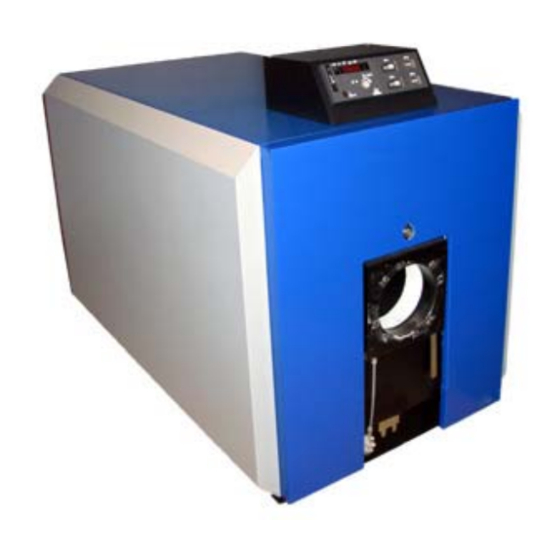
Resumen de contenidos para Ygnis Pyronox LRP
- Página 1 Pyronox LRP, LRP NT Plus Montageanleitungen Instruction de montage Assembly guide Montaggio guida Montaje Montageaanwijzing ZUS aller Montageanleitungen Pyronox LRP, LRP-NT Plus Edition 15.06.2005 Artikelnummer: 409084, Zchg. 21732_m-a.pfd...
- Página 2 Pyronox Inhaltsverzeichnis / Sommaire Table of contents / Indice Ìndice / Inhoud Standard / standard standard / standard estàndar / norm Turbulatoren / Turbulateurs 409085 21733 Turbulators / Turbulatori Turbuladores / Turbulators Ausstopfen der Türöffnung beim Brenneranbau 408537 21720 Bouchage de l’ouverture de la porte lors du montage du brûleur Filling the door opening during burner installation Tamponare il vano sportello durante il montaggio del bruciatore Tapamiento de la apertura de puerta en la parte del quemador...
- Página 3 Pyronox LRP, LRP-NT Plus, LRP-E Turbulatoren Turbulateurs Turbulators Turbulatori Turbuladores Turbulators 21733_m--.pdf Art.-Nr. : 409085 Version: 01.06.2005...
- Página 4 Montageanleitung Instruction de montage Assembly guide Istruzioni al montaggio Instrucciones de montaje Montagehandleiding Rauchrohr mit Turbulator Rauchrohr ohne Turbulator Tube de fumée avec turbulateur Tube de fumée sans turbulateur Flue gas pipe with turbulator Flue gas pipe without turbulator Tubo di fumo con turbolatore Tubo di fumo senza turbolatore Tubo de humos con turbulador Tubo de humos sin turbulador...
- Página 5 Pyronox LRP, LRP-NT Plus, LRP-E Ausstopfen der Türöffnung beim Brenneranbau Bouchage de l’ouverture de la porte lors du montage du brû- leur Filling the door opening during burner installation Tamponare il vano sportello durante il montaggio del bruciato- Tapamiento de la apertura de puerta en la parte del quemador Opvullen van de deuropening bij de montage van de brander 21720_m--.pdf Art.-Nr.
- Página 6 Montageanleitung Instruction de montage Assembly guide Istruzioni al montaggio Instrucciones de montaje Montagehandleiding Keramikfaser-Wolle Laine de fibre céramique Ceramic fibre Lana di fibra ceramica Fibra cerámica Keramische wol Vor Inbetriebnahme des Heizkessels muss der Raum zwischen Brennerrohr und Türisolation mit der im Lie- ferumfang enthaltenen Keramikfaser-Wolle satt ausgestopft werden.
- Página 7 Pyronox LRP, LRP-NT Plus Montage des Kesselschaltfeldes und der Verschalung Montage du tableau de commande de la chaudière et de la jaquette Boiler control panel and casing assembly Montaggio del pannello di comando caldaia e del rivestimento Montaje del panel de mando caldera y del revestimiento Montage van het ketelschakelpaneel en de bekleding 21549_m-a.pdf...
- Página 8 Pyronox LRP, LRP-NT Plus Achtung: Die Verschalung ist zu montieren, bevor der Kessel an den Kamin angeschlossen wird! Inhalt: Überprüfen Sie den Inhalt der Verpackung auf Ihre Vollständigkeit und auf eventuelle Transportschäden. Deckblech 1 Seitenbleche 2 Plastiktüte mit Schrauben Rückwand 3...
- Página 9 Pyronox LRP, LRP-NT Plus Attention: Monter la jaquette avant de raccorder la chaudière au conduit d'évacuation des fumées! Fournitures: Vérifier le contenu de l’emballage pour vous assurer qu’il est complet et intact. Panneau supérieur 1 Jaquette latérale 2 Sachet avec vis Panneau arrière 3...
- Página 10 Pyronox LRP, LRP-NT Plus Attention: Mount the casing prior to connecting the unit to the flue! Contents: Check the contents of the package against the list below and inspect for damaged items. Lid 1 Side panel 2 Bag containing screws...
- Página 11 Pyronox LRP, LRP-NT Plus Attenzione: Il rivestimento si deve montare prima che la caldaia è connessa al camino. Contenuto: Verificare il contenuto dell'imballo per stabilire se è completo ed integro. Coperchio 1 Copertura laterale 2 Sacchetto con viti Parete posteriore 3...
- Página 12 Pyronox LRP, LRP-NT, LRP-NT plus ¡Atención: El revestimiento debe montarse antes de conectar la caldera a la chimenea! Contenido: Verificar el contenido del embalaje para establecer si está completo e íntegro. Tapa 1 Cobertura lateral 2 Bolsa con tornillos Pared posterior 3 Cobertura frontal 4 (opción, embalado por...
- Página 13 Pyronox LRP, LRP-NT Plus Belangrijk: De bekleding moet gemonteerd worden, vóór dat de ketel aan de schoorsteen aangesloten wordt. Inhoud: Controleer de inhoud van de verpakking op volledigheid en op eventuele transportschade. Dekplaat 1 Zijplaten 2 Plastic zak met schroeven...
- Página 14 Pyronox LRP, LRP-NT Plus, LRP-E Schwingungsdämpfer Plots antivibratiles Vibration dampers Antivibranti Elementos antivibrantes Trillingsdempers 21734_m--.pdf Art.-Nr. : 409086 Version: 01.06.2005...
- Página 15 Montageanleitung Instruction de montage Assembly guide Isturzioni al montaggio Instrucciones de montaje Montagehandleiding...
- Página 16 Montageanleitung Instruction de montage Assembly guide Isturzioni al montaggio Instrucciones de montaje Montagehandleiding Ist der Heizkessel richtig plaziert, werden die Schwingungsdämpfer unterlegt. Dazu wird der Kessel mit einem Hebezeug einseitig ca. 5 cm angehoben. Anschliessend wird die eine Hälfte der Schwingungsdämpfer- Elemente unterlegt, wobei die Elemente stirnseitig bündig mit dem Grundrahmen abschliessen müssen.
- Página 17 Montageanleitung Instruction de montage Assembly guide Isturzioni al montaggio Instrucciones de montaje Montagehandleiding Una vez emplazada correctamente la unidad, se colocan debajo los elementos antivibrantes. A tal efecto se levanta la unidad en un lado aprox. 5 cm, utilizando un equipo elevador. A continuación se coloca debajo una mitad de los elementos antivibrantes, donde los elementos del lado frontal deben terminar a ras con el bastidor de base.
- Página 18 Pyronox LRP, LRP-NT Plus, LRP-E Türschwenkrichtung ändern Modification du sens de rotation de la porte Changing the door opening Cambiare il lato di apertura dello sportello Cambiar dirección de giro de la puerta Draairichting van de deur veranderen 21735_m--.pdf Art.-Nr. : 409087 Version: 01.06.2005...
- Página 19 Montageanleitung Instruction de montage Assembly guide Istruzioni al montaggio Instrucciones de montaje Montagehandleiding 1. Türverschraubung (1) leicht lösen 2. Türbolzen oben (2) herausschrauben und auf der gegenüber liegenden Seite einschrauben. 3. Türbolzen unten (3) mit U-Scheibe herausschrauben und auf der gegenüber liegenden Seite einschrauben. 4.
- Página 20 Montageanleitung Instruction de montage Assembly guide Istruzioni al montaggio Instrucciones de montaje Montagehandleiding Slightly loosen the door screw connection (1). Unscrew the upper door bolt (2) and refit it at the opposing side. 3. Unscrew the lower door bolt (3) with the U washer and refit them at the opposing side. Completely loosen the door screw connection (1) and open the boiler door.


