Tabla de contenido
Publicidad
Idiomas disponibles
Idiomas disponibles
Enlaces rápidos
Publicidad
Tabla de contenido

Manuales relacionados para Kohler Lyntier K-T10339-4


Resumen de contenidos para Kohler Lyntier K-T10339-4
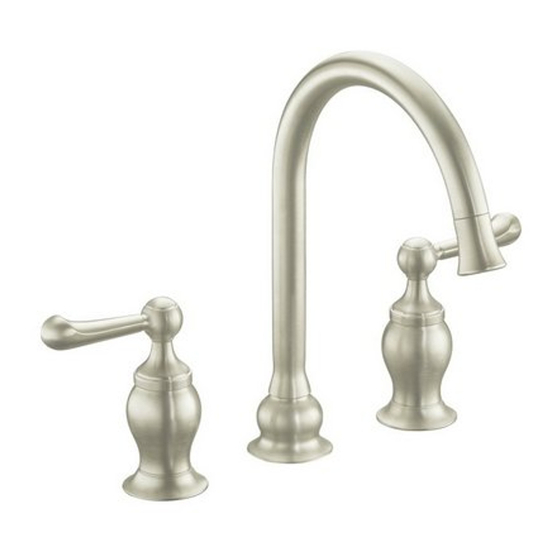
- Página 1 Installation Guide Bath Faucet Trim K-T10339-4 M product numbers are for Mexico (i.e. K-12345M) Los números de productos seguidos de M corresponden a México (Ej. K-12345M) Français, page “Français-1” Español, página “Español-1” 1057840-2-A...
-
Página 2: Tools And Materials
Before installation, unpack the new bath faucet trim and inspect it for damage. Return it to the carton until installation. Kohler Co. reserves the right to make revisions in the design of faucets without notice, as specified in the Price Book. - Página 3 = fully clockwise). Turn off the main water supply. Wrap a rag around the pipe plug to prevent water spray. IMPORTANT! Water may purge from the supply tube when you remove the plug. Carefully remove the pipe plug. Kohler Co. 1057840-2-A...
- Página 4 O-ring seal on the spout sleeve assembly. NOTE: The washer is not needed for rim/finished deck installation. If the installation includes a tile covered rough deck, slide the washer, flat side facing forward, onto the spout supply tube. 1057840-2-A Kohler Co.
- Página 5 Place the gasket over the sleeve and against the finished deck. Position the spout on the sleeve, and carefully press down until the spout contacts the finished deck. Align the spout as desired, and tighten the setscrew. Kohler Co. 1057840-2-A...
-
Página 6: Install The Handles
= counterclockwise). Turn on the main water supply and check for leaks. Turn on the hot and cold valves and run water through the spout to remove debris. Check for leaks. Turn off the hot and cold valves. 1057840-2-A Kohler Co. -
Página 7: Outils Et Matériels
Merci d’avoir choisi la compagnie Kohler Nous apprécions votre engagement envers la qualité Kohler. Veuillez prendre s’il vous plaît quelques minutes pour lire ce manuel avant de commencer l’installation. Ne pas hésiter à nous contacter en cas de problème d’installation ou de performance. - Página 8 Avant de commencer (cont.) Kohler Co. se réserve le droit d’apporter toutes modifications au design des robinets et ceci sans préavis, comme spécifié dans le catalogue des prix. 1057840-2-A Français-2 Kohler Co.
- Página 9 Fermer l’alimentation d’eau principale. Enrouler une serviette autour du bouchon du tube pour empêcher l’eau de gicler. IMPORTANT ! L’eau pourrait s’écouler du tube d’alimentation d’eau lorsque le bouchon est retiré. Retirer le bouchon de tuyau avec précaution. Kohler Co. Français-3 1057840-2-A...
- Página 10 REMARQUE : La rondelle est inutile dans le cas d’une installation sur rebord/comptoir fini. Si l’installation comprend un comptoir brut carrelé, glisser la rondelle, côté plat dirigé vers l’avant, sur le tube d’alimentation du bec. 1057840-2-A Français-4 Kohler Co.
- Página 11 Placer le joint sur le manchon et contre le comptoir fini. Positionner le bec sur le manchon, et presser délicatement vers le bas jusqu’à ce que le bec touche le comptoir fini. Aligner le bec selon le désir et serrer la vis de retenue. Kohler Co. Français-5 1057840-2-A...
-
Página 12: Compléter L'installation
Ouvrir l’alimentation d’eau principale et vérifier s’il y a des fuites. Ouvrir les valves d’eau chaude et froide et faire couler l’eau à travers le bec pour chasser tous les débris. Vérifier s’il y a des fuites. Fermer les valves d’eau chaude et froide. 1057840-2-A Français-6 Kohler Co. -
Página 13: Herramientas Y Materiales
Gracias por elegir los productos de Kohler Le agradecemos que haya elegido la calidad de Kohler. Dedique unos minutos para leer este manual antes de comenzar la instalación. En caso de problemas de instalación o de funcionamiento, no dude en contactarnos. - Página 14 Antes de comenzar (cont.) Kohler Co. se reserva el derecho de modificar el diseño de la grifería sin previo aviso, tal como se especifica en la lista de precios. 1057840-2-A Español-2 Kohler Co.
- Página 15 Cierre el suministro de agua. Envuelva el tapón de tubo en un trapo para evitar que el agua salpique. ¡IMPORTANTE! Puede que salga agua del tubo de suministro cuando se quite el tapón. Quite el tapón de tubo con cuidado. Kohler Co. Español-3 1057840-2-A...
- Página 16 NOTA: La arandela no es necesaria para las instalaciones en cubierta acabada/borde. Si la instalación incluye una cubierta no acabada revestida de azulejos, deslice una arandela, lado plano hacia el frente, en el tubo de suministro del surtidor. 1057840-2-A Español-4 Kohler Co.
- Página 17 Coloque el surtidor en la manga y presione hacia abajo con cuidado hasta que el surtidor esté en contacto con la cubierta acabada. Alinee el surtidor a la posición deseada y apriete el tornillo de fijación. Kohler Co. Español-5 1057840-2-A...
-
Página 18: Instale Las Manijas
Abra el suministro principal de agua y verifique que no haya fugas. Abra las válvulas del agua fría y caliente y deje correr el agua por el surtidor para eliminar los residuos. Verifique que no haya fugas. Cierre las válvulas del agua fría y caliente. 1057840-2-A Español-6 Kohler Co. - Página 19 1057840-2-...
- Página 20 USA: 1-800-4-KOHLER Canada: 1-800-964-5590 México: 001-877-680-1310 kohler.com ©2006 Kohler Co. 1057840-2-A...