Publicidad
Idiomas disponibles
Idiomas disponibles
Tabla de contenido
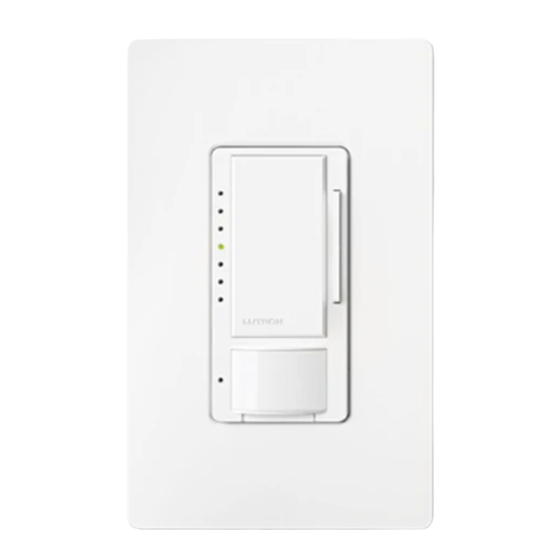
Vive Sensor Dimmer / Switch
Part of the Vive System
032515
Please read before installing
Rev. C
03/2019
Maestro 0–10 V- RF Sensor Dimmer
MRF2S-8SD010
Occupancy / Vacancy
MRF2S-8SDV010
Vacancy Only
Maestro RF Sensor Switch
MRF2S-8SS
Occupancy / Vacancy
MRF2S-8SSV
Vacancy Only
For set-up, programming, and troubleshooting
with a Vive system, please refer to the installation
instructions included with the Vive hub or at
www.lutron.com/vive
Lighting
Sensor Dimmer
0-10 V- electronic fluorescent ballast or LED driver
Sensor Switch
All lighting loads and up to 4.4 A fan loads
USA: 120/277 V~ 50/60 Hz 8 A
Canada: 120 V~ 50/60 Hz 8 A
Compatible Devices for Sensor Dimmer
• Works with all ballasts and drivers that provide a current source
compliant to IEC 60929 Annex E.2.
• Supports Electronic Off functionality for voltages less than 0.5 V
0–10 V- Load Rating (sink only)
• One sensor dimmer can sink up to 50 mA of current.
• Controls up to 25 drivers or ballasts.
• IEC 60929 Annex E.2 requires the driver / ballast to limit the current draw
to 2.0 mA maximum.
Motion Coverage
• Major: 30 ft × 30 ft (9 m × 9 m) [900 ft
2
(81 m
2
)]
• Minor: 20 ft × 20 ft (6 m × 6 m) [400 ft
2
(36 m
2
)]
Wireless Communication
• Range of wireless communication is 60 ft (18 m) line-of-sight or 30 ft
(9 m) through walls.
• Keep all wireless devices visible within the space. Do not place behind
large furniture or appliances.
Important Notes:
• Neutral is required for product to function. If a neutral wire is not present,
consult a licensed electrician.
• When controlling light and fan loads simultaneously on a single circuit,
the maximum load capacity per circuit is 4.4 A at 120 V~. Only the
sensor switch can be used to control fan loads.
• When power is applied, the sensor dimmer / switch can be manually
turned On / Off after the first 10 seconds and the sensor will
automatically control the load after 2 minutes.
• The sensor requires an unobstructed view of the room and line-of-sight
to detect motion.
• Hot objects or moving air currents can affect the performance of the
sensor and may cause it to turn on unexpectedly or not function as
desired.
• CAUTION: To reduce the risk of overheating and possible damage to
other equipment, do NOT use to control receptacles.
• Class 2 / Class 1 wiring: Install in accordance with all national and local
electrical codes.
• For indoor use only. Operate between 32 °F – 104 °F (0 °C – 40 °C),
ambient. 0% to 90% humidity, non-condensing.
• Clean only with soft, damp cloth, no chemical cleaners.
Lutron Electronics Co., Inc. 7200 Suter Road
Coopersburg, PA 18036-1299 USA
Start Here
Wiring
For more information and additional wiring instructions, visit: www.lutron.com/TechnicalDocumentLibrary/048687.pdf and/or
www.lutron.com/TechnicalDocumentLibrary/3691097.pdf
1. Turn off power
WARNING: Electric Shock Hazard. May result in Serious Injury or Death.
Turn OFF power at circuit breaker or fuse before installing or servicing the unit.
2. Connect Wires
Up to 25 drivers total
a. Sensor Dimmer - Single Pole Wiring
Line / Hot
Black
Black
120/277 V~ 50/60 Hz 8 A
USA
Gray (–)
120 V~ 50/60 Hz 8 A
Violet (+)
Canada
Green
White
Ground
Neutral
b. Sensor Switch - Single Pole Wiring
Line / Hot
Black
Black
120/277 V~ 50/60 Hz 8 A
USA
120 V~ 50/60 Hz 8 A
Canada
Green
White
Ground
Neutral
3. Turn on power
WARNING: Electric Shock Hazard. Could result in minor or moderate personal injury.
Ground connection required before connecting power.
4. Wait two minutes
• The sensor dimmer / switch will manually control the load after the first 10 seconds.
• Once power has been restored, the sensor dimmer / switch will automatically control the load after the first two minutes.
5. Program all desired settings before installing the wallplate
• See other side of sheet for details on how to select custom settings.
FCC Supplier Declaration to Conformity / IC Information
This device complies with part 15 of the FCC Rules and Industry Canada license-exempt RSS standard(s). Operation is subject to the following two conditions: (1) This device may not
cause interference and (2) This device must accept any interference, including interference that may cause undesired operation. Modification not expressly approved by Lutron Electronics
Co., Inc. could void the user's authority to operate this equipment.
NOTE: This equipment has been tested and found to comply with the limits for a Class B digital device, pursuant to part 15 of the FCC Rules. These limits are designed to provide
reasonable protection against harmful interference in a residential installation. This equipment generates, uses and can radiate radio frequency energy and, if not installed and used in
accordance with the instructions, may cause harmful interference to radio communications. However, there is no guarantee that interference will not occur in a particular installation. If this
equipment does cause harmful interference to radio or television reception, which can be determined by turning the equipment off and on, the user is encouraged to try to correct the
interference by one or more of the following measures:
• Re-orient or relocate the receiving antenna.
• Increase the separation between the equipment and receiver.
• Connect the equipment into an outlet on a circuit different from that to which the receiver is connected.
Customer Assistance | 1.844.LUTRON1 U.S.A. / Canada | +1.888.235.2910 Mexico | +1.610.282.3800 Others | www.lutron.com/support
Programming with a Vive Hub
1. Use an iOS
compatible device.
Up to 25 drivers total
Gray (–)
White
Ballast or
Violet (+)
Black
Driver
Gray (–)
White
Ballast or
Violet (+)
Black
Driver
Note: For further information on set up, programming, and troubleshooting with a Vive system, please refer to the
installation instructions included with the Vive hub or visit www.lutron.com/vive
Programming without a Vive hub or in optional multi-location
applications by using a Pico wireless control
(associating wireless devices to sensor dimmer / switch)
1. Press and hold
flash (about 7 seconds).
White
Ballast or
Black
Driver
White
Ballast or
Black
Driver
Note: To associate multiple wireless devices, repeat steps 1 and 2 above for each wireless device.
Un-associating a wireless device from a sensor dimmer/switch
1. Triple-tap the wireless device button hold on
the until the lights begin to flash rapidly. Within
1 second of flashing, release and triple-tap the
button again.
2. Download the Lutron Vive app.
or Android
®
®
X
until the lights
2. Press and hold the wireless device button shown below until the lights
T
stop flashing (about 6 seconds).
Pico wireless
Radio Powr Savr
control
daylight sensor
T
(up to 10)
(1 maximum)
Link
Test
2. To test that the wireless device has been successfully
un-associated, press "Test" or
wireless device no longer controls the load.
Link
Test
3. Open the app and follow
the instructions.
Vive
X
Radio Powr Savr
occupancy / vacancy sensor
(up to 10)
d
and verify that the
Link
Test
Publicidad
Tabla de contenido

Manuales relacionados para Lutron MRF2S-8SD010


Resumen de contenidos para Lutron MRF2S-8SD010
- Página 1 This device complies with part 15 of the FCC Rules and Industry Canada license-exempt RSS standard(s). Operation is subject to the following two conditions: (1) This device may not cause interference and (2) This device must accept any interference, including interference that may cause undesired operation. Modification not expressly approved by Lutron Electronics ambient.
-
Página 2: Default Settings
Mode Lutron Electronics Co., Inc. 7200 Suter Road Lutron, Radio Powr Savr, Pico, Maestro, and Vive are trademarks or registered trademarks of Lutron Electronics Co., Inc. in the U.S. and other countries. Coopersburg, PA 18036-1299 USA App Store is a service mark of Apple, Inc. Android and Google Play are registered trademarks of Google LLC. iOS is a trademark or registered trademark of Cisco in the U.S. and other countries and is used under license. -
Página 3: Programmation Avec Un Hub Vive
• Câblage de classe 2 / classe 1 : Effectuez l’installation en conformité fonctionnement indésirable. Les modifications qui n’ont pas été expressément approuvées par Lutron Electronics Co., Inc. peuvent annuler le pouvoir de l’utilisateur d’utiliser cet avec les codes électriques en vigueur. -
Página 4: Mode Test
Radio Powr Savr. Lutron Electronics Co., Inc. 7200 Suter Road, Lutron, Radio Powr Savr, Pico, Maestro et Vive sont des marques commerciales ou des marques déposées de Lutron Electronics Co., Inc., aux États-Unis et dans d’autres pays. Coopersburg, PA 18036-1299, États-Unis App Store est une marque de service de Apple Inc. -
Página 5: Sensor Atenuador / Interruptor Vive
(1) Este dispositivo no debe causar interferencias y (2) este dispositivo debe aceptar cualquier interferencia, incluida la interferencia que pudiera ocasionar una operación no deseada. Las modificaciones no aprobadas expresamente por Lutron Electronics Co., Inc. podrían invalidar la autorización del usuario para utilizar este equipo. -
Página 6: Solución De Problemas
Fixd Lutron Electronics Co., Inc. 7200 Suter Road Lutron, Radio Powr Savr, Pico, Maestro y Vive son marcas comerciales o marcas comerciales registradas de Lutron Electronics Co., Inc. en E.U.A. y otros países. Coopersburg, PA 18036-1299, E.U.A. App Store es una marca de servicio de Apple Inc. Android y Google Play son marcas comerciales registradas de Google LLC. iOS es una marca comercial o una marca comercial registrada de Cisco en E.U.A. y en otros países y se utiliza bajo licencia.