mabe MMI12CABWCA6M8 Instructivo
Ocultar thumbs
Ver también para MMI12CABWCA6M8:
- Manual de servicio (56 páginas) ,
- Instructivo (96 páginas)
Tabla de contenido
Publicidad
Idiomas disponibles
Idiomas disponibles
for the English version, go to page 47
modelos/models
MMI12CABWCA6M8
MMI12HABWCA6M8
MMI12CDBWCA6M8
MMI12HDBWCA6M8
MMI18CDBWCA6M8
MMI18HDBWCA6M8
MMI24CDBWCA6M8
MMI24HDBWCA6M8
PM01
PM01
instructivo
aire acondicionado tipo mini-split
owner's manual
mini-split type air conditioner
lea este instructivo antes de instalar su aire acondicionado
read this manual before installing your new air conditioner
MMT12CABWCAM1
MMT12HABWCAM1
MMT12CDBWCAM1
MMT12HDBWCAM1
MMT18CDBWCAM1
MMT18HDBWCAM1
MMT24CDBWCAM1
MMT24HDBWCAM1
MMI12CABWCA6MC8
MMI12HABWCA6MC8
MMI12CDBWCA6MC8
MMI12HDBWCA6MC8
MMI18CDBWCA6MC8
MMI18HDBWCA6MC8
MMI24CDBWCA6MC8
MMI24HDBWCA6MC8
1
Publicidad
Capítulos
Tabla de contenido
Solución de problemas

Manuales relacionados para mabe MMI12CABWCA6M8


Resumen de contenidos para mabe MMI12CABWCA6M8
- Página 1 English version, go to page 47 lea este instructivo antes de instalar su aire acondicionado read this manual before installing your new air conditioner modelos/models MMI12CABWCA6M8 MMT12CABWCAM1 MMI12CABWCA6MC8 MMI12HABWCA6M8 MMT12HABWCAM1 MMI12HABWCA6MC8 MMI12CDBWCA6M8...
-
Página 3: Tabla De Contenido
contenido Instrucciones importantes de seguridad ..........4 Partes y funciones .................. 5 Operación ....................7 Control remoto ..................7 Operación de emergencia y prueba ........... 14 Ajuste de la dirección de flujo de aire ..........15 Función DORMIR .................. 16 Flujo de aire saludable ................ -
Página 4: Instrucciones Importantes De Seguridad
bienvenido Todo lo que desee saber para el correcto funcionamiento de su pro- ducto se encuentra aquí y en nuestros sitios web. Lo invitamos a conocer su producto, a leer el instructivo y obtener el máximo provecho de él. instrucciones importantes de seguridad •... -
Página 5: Partes Y Funciones
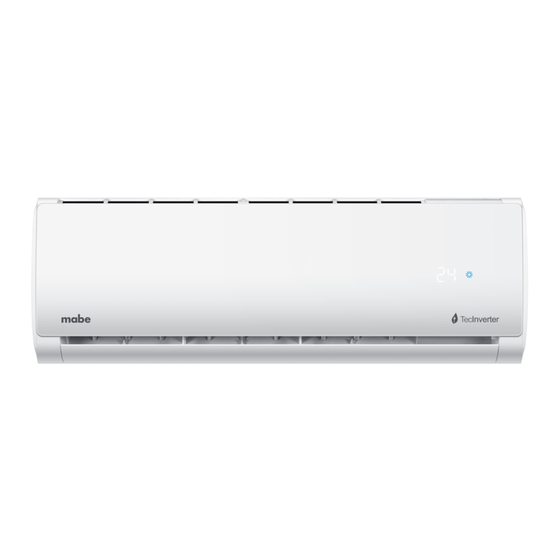
unidad interna pantalla B 1. Agujero de recepción de señal. 2. Indicador de temperatura ambiental. Cuando recibe la señal del control remoto, muestra la temperatura programada. 3. Modo de operación (Se enciende cuando el compresor está encen- dido). pantalla C (para modelos con indicadores LED solamente) 1. - Página 6 pantalla A 1. Agujero de recepción de señal. 2. Temperatura ambiental. Cuando recibe la señal del control remo- to, muestra también la temperatura programada. 3. Ícono de operación ENFRIAR. 4. Ícono de operación CALENTAR. 5. Ícono de operación SALUD (no incluida en estos modelos). 6.
-
Página 7: Operación
instrucciones de operación control remoto para modelos que solamente enfrían y no están equipados con la función MY TEMP 1. Pantalla de MODO 2. Ícono de emisión de señal 3. Iconos de OSCILACIÓN 4. Pantalla VELOCIDAD DEL VENTILADOR 5. Ícono de BLOQUEO 6. - Página 8 Pantalla de funciones adicionales Botón TURBO 10. Botón VENTILADOR (FAN) 11. Botón ENFRIAR (COOL) 12. Botón F/C. (grados Fahrenheit/grados Celsius) 13. Botón VELOCIDAD DEL VENTILADOR 14. Botón SILENCIO (QUIET) 15. Botón DORMIR (SLEEP) 16. Botón BLOQUEAR (LOCK) 17. Botón LUZ (LIGHT). Controla la iluminación y el apagado de la pantalla LED de la unidad interna.
- Página 9 control remoto para modelos que enfrían y calientan, y no están equipados con la función MY TEMP 1. Pantalla de MODO 2. Ícono de emisión de señal 3. Iconos de OSCILACIÓN 4. Pantalla VELOCIDAD DEL VENTILADOR 5. Ícono de BLOQUEO 6.
- Página 10 Pantalla de funciones adicionales Botón TURBO 10. Botón CALENTAR (HEAT) 11. Botón ENFRIAR (COOL) 12. Botón F/C. (grados Fahrenheit/grados Celsius) 13. Botón VELOCIDAD DEL VENTILADOR 14. Botón VENTILADOR (FAN) 15. Botón DORMIR (SLEEP) 16. Botón BLOQUEAR (LOCK) 17. Botón LUZ (LIGHT). Controla la iluminación y el apagado de la pantalla LED de la unidad interna.
- Página 11 control remoto para modelos que solamente enfrían y están equipados con la función MY TEMP Botón Auto Botón Mode Botón MY TEMP Botón ECO Al activar la función MYTEMP, el control remoto censará y mostrara la temperatura alrededor del mismo para lograr la temperatura de- seada.
- Página 12 operación básica 1. Encendiendo la unidad. Presione el botón ENCENDER/APAGAR en el control remoto. La unidad se enciende. 2. Seleccione una posición de temperatura. Presione el botón TEMP+ o el botón TEMP- TEMP+: Cada vez que presiona este botón, la posición de tempe- ratura aumenta 1°C;...
- Página 13 Modo de Control Nota operación remoto AUTOMÁTICO El aire acondicionado seleccionará au- (AUTO) tomáticamente la operación de enfriar o calentar de acuerdo con la tempera- tura de la habitación. Cuando el venti- lador se coloca en la posición automáti- ca, el aire acondicionado ajusta auto- máticamente la velocidad de acuerdo con la temperatura de la habitación.
-
Página 14: Operación De Emergencia Y Prueba
operación de emergencia y de prueba operación de emergencia • Use este modo de operación solamente cuando el control remoto falle, no funcione, o se ha perdido. Con la operación de emergen- cia, el aire acondicionado trabajará automáticamente por un tiem- •... -
Página 15: Ajuste De La Dirección De Flujo De Aire
ajuste de la dirección del flujo de aire flujo de aire vertical Pos. 1: Pos. 2: No se muestra estado inicial en el control remoto. Las persia- nas verticales quedarán fijas en la posición actual. PRECAUCIONES: • Apague la unidad ANTES de ajustar a mano las persianas de flujo de aire. -
Página 16: Función Dormir
función DORMIR (SLEEP) Presione el botón DORMIR (SLEEP). El control remoto muestra hay, e inicia la función DORMIR. Presione de nuevo el botón DORMIR (SLEEP) para cancelar esta función. operación 1. Durante los modos ENFRIAR (COOL) o DESHUMIDIFICAR (DRY). 1 hora después de que inicia el modo DORMIR, la temperatura se hace 1 °C más alta que la programada. -
Página 17: Flujo De Aire Saludable
3. Durante el modo AUTOMÁTICO (AUTO). La unidad trabaja correspondiendo al modo DORMIR adaptado al modo de operación seleccionado automáticamente. 4. Durante el modo VENTILADOR (FAN). La función DORMIR (SLEEP) no estará disponible bajo el modo VENTILADOR (FAN) 5. Cuando se programa la función DORMIR (SLEEP) por 8 horas, el tiempo no puede ajustarse. -
Página 18: Timer De Encendido Y Timer De Apagado
hasta llegar a 24 horas. -
Página 19: Turbo
operación del modo TURBO (en algunos modelos solamente) Cuando usted necesita un enfriamiento o calentamiento rápido, en- tonces puede seleccionar la función. Presione el botón TURBO, el control remoto muestra y comienza con la función. Para cancelar la función, presione de nuevo el botón TURBO. Nota: Durante la función TURBO (en enfriamiento), la temperatura de la habitación podría no ser distribuida de manera uniforme. -
Página 20: Mantenimiento
mantenimiento Elija la temperatura apropiada No bloquee las entradas ni las sa- para la habitación. lidas de aire del aparato. Use la función TIMER apropiada- mente. Cierre puertas y ventanas duran- te la operación. Use las persianas del aparato de Si no va a usar la unidad por un manera efectiva. - Página 21 no use lo siguiente para la limpieza Gasolina, benceno, thiner o limpiadores abrasivos ya que dañarán el acabado del producto. El agua caliente por encima de 40 °C (104 °F) causará decoloración o deformación. limpieza del filtro de aire 1. Abra la rejilla de entrada de aire jalándola hacia arriba. 2.
- Página 22 reemplazo del filtro purificador de aire NOTA: El filtro purificador de aire es una parte opcional. 1. Abra la rejilla de entrada de aire. Fije la rejilla de entrada usando el soporte para rejilla que se loca- liza en el lado derecho de la unidad interna. 2.
-
Página 23: Precauciones
NOTAS: • El filtro purificador de aire tipo fotocatálisis se solarizará después de un tiempo. Durante un uso normal, se solarizará cada 6 meses. • El filtro purificador de aire con medio eliminador de bacterias pue- de usarse durante un periodo largo de tiempo sin que se necesite reemplazar. - Página 24 • No use cordones eléctricos de • NO dirija el flujo de aire direc- extensión, ni corte el cordón tamente hacia las personas, es- eléctrico. pecialmente niños y personas mayores. • No instale en un sitio en donde existe la posibilidad de fugas de gas inflamable.
- Página 25 PRECAUCIONES • No use el aparato con propósi- • Permita la circulación de aire tos de almacenaje de alimentos, fresco ocasionalmente, especial- de obras de arte, de equipo de mente si hay aparatos que ope- precisión, ni para crianza de ran con gas en la misma habita- animales o cultivo de plantas.
-
Página 26: Solución De Problemas
características eléctricas nominales solución de posibles problemas Antes de contactar al centro de servicio autorizado, lea y revise la si- Modelo MMI12CABWCA6MC8 MMI12HABWCA6MC8 guiente información: Tensión de alimentación 115 V ~ 115 V ~ Consumo de potencia 1 200 W 1 200 W Problema Posible causa y puntos a revisar... - Página 27 Problema Posible causa y puntos a revisar La unidad no en- • El enchufe no está conectado al suministro de ciende. energía. • Hay un apagón en su área. • Un fusible de su casa está quemado. El enfriamiento es •...
- Página 28 precauciones La máquina es adaptiva en la siguiente situación • Rango aplicable de temperatura ambiental: • Si el cordón de alimentación es dañado, éste debe sustituirse por el fabricante, por su agente de servicio autorizado o por personal calificado con el fin de evitar un peligro. El tipo de cable de co- nexión es H05RN-F o H07RN-F.
-
Página 29: Instrucciones De Instalación
instrucciones de instalación preparación Herramienta necesaria para la instalación • Destornillador • Torquímetro (17, 22 y 26 mm) • Pinzas • Cortador de tubo • Sierra • Avellanador de tubos • Broca circular • Navaja • Llaves de tuercas (17, 19 y 26 •... -
Página 30: Diagrama De Instalación Unidades Interna Y Externa
• Elija un sitio en donde el viento y ruido producidos por la unidad externa no molesten a los vecinos. • El sitio debe cumplir con los claros mínimos como lo indica la si- guiente ilustración. diagrama de instalación de las unidades interna y externa Estos modelos de aires acondicionados usan refrigerante R410A libre de HFC... - Página 31 partes opcionales para la tubería A. Cinta no adhesiva E. Manguera de desagüe B. Cinta adhesiva F. Material aislante de calor. C. Abrazadera (con tornillos). G. Cubierta para el agujero de la tubería. D. Cable eléctrico para conectar las unidades interna y externa. •...
- Página 32 Sistemas de 18 000 BTU/h y algunas 12 000 BTU/h de capacidad Algunas sistemas de 12 000 BTU/h de capacidad 114.2 114.2 Sistemas de 24 000 BTU/h de capacidad seleccionando la tubería correcta Unidades de 18000 y Unidades algunas 24 000 y algunas de 12000 BTU/h de 12000 BTU/h Tubería para...
-
Página 33: Instalación De La Unidad Interna
instalación de la unidad interna 1. Instalación de la placa de montaje y ubicación del agujero en el muro. Cuando se fija por primera vez la placa de montaje 1. Elija el lugar para la instalación basándose en la ubicación de los pilares y linteles. - Página 34 fijando la placa de montaje contra una barra lateral y un din- • Fije una barra de montaje, que se adquiere por separado, y enton- ces fije la placa de montaje contra la barra lateral ya fija. • Refiérase a la sección anterior para encontrar la ubicación para el agujero en la pared.
- Página 35 • Los cables eléctricos de las unidades interna y externa así como la manguera de desagüe deben juntarse con la tubería que transpor- ta el refrigerante, recubriéndose con gas refrigerante. Guiando la tubería por otra dirección • Remueva con unas pinzas la placa que se usa para dirigir la tubería por la dirección que usted desea.
- Página 36 conexión de los cables de las unidades interna y externa 1. Retire la cubierta de la caja de terminales que se encuentra en la esquina derecha inferior de la unidad interna. Retire la cubierta del cableado removiendo los tornillos que la fijan. 2.
-
Página 37: Unidad Externa
3G2.5mm 4G1.0mm Unidad interna Unidad externa En algunos sistemas de sólo refrigeración de 24 000 BTU/h 3G2.5mm 3 0.75mm 3 1.0mm Unidad interna Unidad externa En algunos sistemas de refrigeración/calefacción de 24 000 BTU/h... - Página 39 conexión • Use el mismo método que para la unidad interna. Afloje los torni- llos en el bloque de terminales e inserte los conectores por comple- to, después apriete los tornillos. • Conecte los cables de acuerdo con los números de las terminales, de la misma forma que en la unidad interna.
- Página 40 Si la fuga no se detiene, descargue todo el refrigerante desde el puerto de servicio. Revise de nuevo las conexiones acampanadas y aplique vacío. Llene de nuevo el sistema con el refrigerante pres- crito desde el cilindro de gas. 6. Desconecte la manguera de carga del puerto de servicio. Abra la válvula de 2 vías y haga girar la varilla de la válvula hasta el tope.
- Página 41 PRECAUCIÓN • Si el aire acondicionado fuga refrigerante, es necesario descar- gar todo el refrigerante. Aplicar vacío y después cargar refrige- rante líquido al sistema del aire acondicionado de acuerdo con la cantidad marcada en la placa de características. • No use ningún otro medio de enfriamiento diferente al especi- ficado.
- Página 42 desagüe • Instale la manguera de desagüe con un declive hacia afuera. • NO instale el desagüe como se muestra a continuación: • Vierta agua sobre la charola de desagüe de la unidad interna y confirme que ésta sea drenada hacia el exterior. •...
-
Página 43: Lista De Verificación De La Instalación Y Corrida De Prueba
B. Carga de refrigerante hecha en la fábrica. Consulte la placa de ca- racterísticas. C. Cantidad adicional de refrigerante cargada en campo. D. Carga total de refrigerante. E. Unidad externa. F. Cilindro con refrigerante y múltiple para llevar a cabo la carga. lista de verificación de la instalación y corrida de prueba No hay fugas de gas en la tubería. -
Página 44: Características Eléctricas Nominales
Modelo MMI12CABWCA6M8 MMI12HABWCA6M8 Tensión de alimentación 115 V ~ 115 V ~ Consumo de potencia 1 200 W 1 200 W Consumo de corriente 10,5 A 10,5 A Frecuencia 60 Hz 60 Hz Capacidad 12 331 BTU/h 12 331 BTU/h Grado de protección unidad externa... - Página 45 Modelo MMT12CABWCAM1 MMT12HABWCAM1 Tensión de alimentación 115 V ~ 115 V ~ Consumo de potencia 1 300 W 1 300 W Consumo de corriente 12 A 12 A Frecuencia 60 Hz 60 Hz Capacidad 12 000 BTU/h 12 000 BTU/h Grado de protección unidad externa IPX4 IPX4...
- Página 46 características eléctricas nominales Modelo MMI12CABWCA6MC8 MMI12HABWCA6MC8 Tensión de alimentación 115 V ~ 115 V ~ Consumo de potencia 1 200 W 1 200 W Consumo de corriente 10,5 A 10,5 A Frecuencia 60 Hz 60 Hz Capacidad 12 331 BTU/h 12 331 BTU/h Grado de protección unidad externa IPX4...
- Página 47 contents Important Safety Instructions .............. 48 Parts and features ................49 Operation instructions ................. 51 Remote control ..................51 Emergency and Test operation ............58 Air flow direction adjustment ............59 SLEEP function ..................60 Healthy Airflow ..................61 Timer On/Off operation ............... 62 TURBO operation .................
-
Página 48: Important Safety Instructions
welcome Everything you need to know for the proper operation of your product can be found here and in our web sites. We invite you to get to know your product, read this manual and get the most out of it. Important Safety Instructions •... -
Página 49: Parts And Features
indoor unit display board B 1. Signal receiver hole. 2. Ambient temp. display. When receiving the remote control signal, display the set temperature. 3. Operation mode indicator (lights up when the compressor is on.) display board C (on models having only LED indicators) 1. - Página 50 display board display board A 1. Signal receiver hole. 2. Ambient temp. display. When receiving the remote control signal, display the set temperature. 3. COOL display 4. HEAT display 5. HEALTH display 6. DRY display outdoor unit 1. Outlet 2. Inlet 3.
-
Página 51: Operation Instructions
operation Instructions remote control 1. Mode display 2. Signal sending display 3. SWING display 4. FAN SPEED display 5. LOCK display 6. TIMER OFF display TIMER ON display 7. TEMP display... - Página 52 Aditional functions display TURBO button 10. FAN button 11. COOL button 12. F/C button (Fahrenheit dgrees/Celsius degrees) 13. FAN SPEED button 14. QUIET button 15. SLEEP button 16. LOCK button 17. LIGHT button. Turns ON and OFF the indoor unit LED display. 18.
- Página 53 remote control 1. Mode display 2. Signal sending display 3. SWING display 4. FAN SPEED display 5. LOCK display 6. TIMER OFF display TIMER ON display 7. TEMP display...
- Página 54 8. Additional functions display 9. TURBO button 10. HEAT button 11. COOL button 12. F/C button (Fahrenheit degrees/Celsius degrees) 13. FAN SPEED button 14. FAN button 15. SLEEP button 16. LOCK button 17. LIGHT button. Turns ON and OFF the indoor unit LED display. 18.
- Página 55 remote control for cool-only models equipped with the MY TEMP feature Auto button Mode button MY TEMP pad ECO button When the MYTEMP function is activated, the remote control will sense and display the temperature around it in order to achieve the desired temperature.
- Página 56 basic operation 1. Unit start Press ON/OFF on the remote controller, unit starts. 2. Select a temperature setting Press the TEMP+ or TEMP- button TEMP+ Every time the button is pressed, the temperature setting increases 1 °C, if kept depressed, it will increase rapidly. TEMP- Every time the pad is pressed, the temperature setting de- creases 1 °C, if kept depressed, it will decrease rapidly.
- Página 57 Operation Remote control Note mode tion, air conditioner will auto- matically select Cool or Heat op- eration according to room tem- perature. When FAN is set to AUTO, the air conditioner automatically adjusts the fan speed according to room temperature. COOL Cooling only units do not have displays and functions related...
-
Página 58: Emergency And Test Operation
emergency and test operation emergency operation • Use this operation only when the remote control is defective or lost, and with function of Emergency running air conditioner can run automatically for a while. • When the emergency operation switch is pressed, a "Pi" sound is heard once, which means the start of this operation. -
Página 59: Air Flow Direction Adjustment
air flow direction adjustment vertical air flow Pos. 1: Pos. 2: No initial state displayed on remote control. The vertical lou- vers will be fixed on the current position. CAUTIONS: • Before adjusting the louvers manually, turn off the unit. •... -
Página 60: Sleep Function
SLEEP function Press the SLEEP button, the remote control will show non, and then achieve to the sleep function. Press again the SLEEP pad, the sleep function will be cancelled. Operation mode 1. In COOL or DRY mode 1 hour after SLEEP mode starts, the temperature will become 1 °C higher than temperature setting. -
Página 61: Healthy Airflow
3. In AUTO mode The unit operates in corresponding sleep mode adapted to the automatically selected operation mode. 4. In FAN mode The SLEEP function will not be available under the FAN mode. 5. When quiet sleeping function is set to 8 hours the quiet sleeping time can not be adjusted. -
Página 62: Timer On/Off Operation
until reaching 24 hours. -
Página 63: Installing The Batteries
installing the batteries 1. Remove the battery cover. 2. Insert 2 "AAA" batteries as illustrated noting battery polarity. 3. Reinstall the battery cover. Notes: • The distance from the remote control to the receiver should be less than 7 meters with no obstructions. •... -
Página 64: Maintenance
maintenance Set a proper room temperature. Do not block air inlets and out- lets. Close doors and windows during Use the timer effectively. operation. If the unit is not to be used for a Use the louvers effectively. long time, turn off the power supply main switch. - Página 65 do not use the following for cleaning Gasoline, benzine, thinner or cleanser may damage the finish of the unit. Hot water over 40 °C (104 °F) may cause discoloration or deforma- tion. air filter cleaning 1. Open the inlet grille by pulling it upwards. 2.
- Página 66 replacing the air purifying filter NOTE: The air purifying filter is an optional part. 1. Open the inlet grille. Prop up the inlet grille by using a small de- vice named grille-support which is located in the right side of the indoor unit.
-
Página 67: Warnings
Notes: • The photocatalyst air purifying filter will be solarized in fixed time. In normal family, it will be solarized every 6 months. • The bacteria-killing medium air purifying filter will be used for a long time, no need for replacement. But in the period of using them, you should remove the dust frequently using a vacuum cleaner or flapping them lightly, otherwise its performance will be affected. - Página 68 • Do not use an extension power • Do not try to repair or recon- supply cord or connected half- struct the system by yourself. way. • Do not install in a place where there is a possibility of inflam- mable gas leakage around the unit.
- Página 69 CAUTION • Do not use for the purpose of • Do not install the unit near a storage of food, art work, pre- fireplace or other heating ap- cise equipment, breeding, or pliance. cultivation. • Do not pour water onto the unit for cleaning.
-
Página 70: Troubleshooting
troubleshooting Before calling for service, check the following: Problem Possible cause and points to check The system does • After stopping the unit, it won’t restart im- not restart imme- mediately until 3 minutes have elapsed to diately. protect the system. •... - Página 71 Problem Possible cause and points to check Unit won't start. • Is power plug inserted? • Is there a power failure? • Is fuse blown out? Poor cooling. • Is the air filter dirty? Normally it should be cleaned every 15 days. •...
- Página 72 CAUTIONS The machine is adaptive in following situation • Applicable ambient temperature range: • If the supply cord is damaged, it must be replaced by the manufacturer or its service agent or a similar qualified person. The type of connecting wire is H05RN-F or H07RN-F •...
-
Página 73: Installation Instructions
installation instructions preparation Necessary tools for installation • Driver • Torque wrench (17 mm, 22 mm, 26 mm) • Nipper • Pipe cutter • Hacksaw • Flaring tool • Hole core drill • Knife • Spanner (17, 19 and 26 mm) •... -
Página 74: Installation Of Indoor And Outdoor Units
installation of indoor and outdoor units These models adopt HFC free refrigerant R410A. optional parts for piping A. Nonadhesive tape B. Adhesive tape C. Saddle (L. S) with screws D. Connecting electric cable for indoor and outdoor E. Drain hose F. - Página 75 Please refer to the actual product purchased, the above picture is just for reference. Read this manual before installation. Explain sufficiently the operating means to the user according to this manual. accessories 1.COOLING only units do not include the drain elbow. 2.Some units do not include the stail nail.
- Página 76 For 18 000 BTU/h and some 12 000 BTU/h system For some 12 000 BTU/h 114.2 114.2 For some 24 000 BTU/h selection of pipes some 12000 BTU 18000,24000 and systems some 12000 BTU systems Liquid pipe 6,35 mm (1/4") 6,35 mm (1/4") (diameter) Gas pipe...
-
Página 77: Indoor Unit
indoor unit 1. Fitting of the mounting plate and positioning of the wall hole. When the mounting plate is first fixed 1. Carry out based on the neighboring pillars or lintels, a proper lev- eling for the plate to be fixed against the wall, then temporarily fasten the plate with one steel nail. - Página 78 When the mounting plate is fixed side bar and lintel 1. Fix to side bar and lintel a mounting bar, which is separately sold, and then fasten the plate to the fixed mounting bar. 2. Refer to the previous section, "When the mounting plate is first fixed"...
- Página 79 • Indoor/outdoor electric cable and drain hose must be bound with refrigerant piping by protecting tape. Other direction piping • Cut with a nipper, the lid for piping according to the piping direc- tion and then bend the pipe according to the position of wall hole. When bending, be careful not to crash pipes.
- Página 80 connecting the indoor/outdoor electric cable 1. Remove terminal cover at right bottom corner of indoor unit, then take off wiring cover by removing its screws. 2. Insert from outside the room cable into left side of the wall hole, in which the pipe has already existed. 3.
-
Página 81: Outdoor Unit
Power cable: 3G2.5mm 4G1.0mm Indoor unit POWER SUPPLY Outdoor unit In some 24 000 BTU/h cooling only systems Power cable: 3G2.5mm 3 0.75mm 3 1.0mm Indoor unit Power Outdoor unit In some 24 000 BTU/h heating systems NOTE: Consult the electrical wiring diagram for each particular model. - Página 83 connection • Use the same method on indoor unit. Loosen the screws on termi- nal block and insert the plugs fully into terminal block, then tighten the screws. • Insert the cable according to terminal number in the same manner as the indoor unit.
- Página 84 7. To prevent gas leakage, turn the service port's cap. The valve rod's cap for 2-way valve and 3 way's a little more than the point where the torque increases suddenly. 8. After attaching each cap, check for gas leakage around the caps. Step 1 Step 6 Step 2...
- Página 85 power source • The power source must be exclusively used for air conditioner (over 10 A). • In case of installing an air conditioner in a moist place, please in- stall a ground leakage breaker. • For installation in other places, use a circuit breaker as far as pos- sible.
- Página 86 drainage • Install the drain hose so as to be downward slope without fail. • Do not install the drainage as shown below. • Pour water in the drain pan of the indoor unit and confirm that drainage is carried out securely outdoors. •...
-
Página 87: Installation Checklist And Test Run
C. Additional refrigerant amount charged in the field. D. Total refrigerant charge. E. Outdoor unit. F. Refrigerant cylinder and manifold for charging. installation check and test run Gas leak from pipe connections? Heat insulation of pipe connecting? Are the connecting wirings of indoor and outdoor firmly inserted to the terminal block? Is the connecting wiring of indoor and outdoor firmly fixed? Is drainage securely carried out? -
Página 88: Rated Electrical Specifications
MMI12CABWCA6M8 MMI12HABWCA6M8 Model 115 V ~ 115 V ~ Supply voltage 1 200 W 1 200 W Power consumption 10,5 A 10,5 A Current consumption 60 Hz 60 Hz Frequency 12 331 BTU/h 12 331 BTU/h Capacity... - Página 89 MMT12CABWCAM1 MMT12HABWCAM1 Model 115 V ~ 115 V ~ Supply voltage 1 300 W 1 300 W Power consumption 12 A 12 A Current consumption 60 Hz 60 Hz Frequency 12 000 BTU/h 12 000 BTU/h Capacity IPX4 IPX4 Protection rating outdoor unit IPX0 IPX0 Protection rating indoor unit...
- Página 90 rated electrical specifications Model MMI12CABWCA6MC8 MMI12HABWCA6MC8 115 V ~ 115 V ~ Supply voltage 1 200 W 1 200 W Power consumption 10,5 A 10,5 A Current consumption 60 Hz 60 Hz Frequency 12 331 BTU/h 12 331 BTU/h Capacity IPX4 IPX4 Protection rating outdoor unit...
- Página 91 notas/notes...
- Página 92 notas/notes...
-
Página 93: Garantía
• Mabe S.A. de C.V. se obliga a reparar o cambiar el producto si no es reparable, así como reemplazar cualquier pieza o componente defectuoso sin costo adicional para el consumidor, incluyendo mano de obra y gastos de transportación que deriven de su cumplimiento dentro de... - Página 94 Nota: Así mismo el consumidor podrá solicitar que se haga efectiva la garantía ante la propia casa co- mercial donde adquirió su producto, en el caso de que Mabe S.A. de C.V. no cuente con una red de ta- lleres de servicio en esa localidad.
-
Página 95: Servicio
Importado y/o comercializado por: México Perú México Mabe S.A. de C.V. Mabe Perú S.A. COPPEL S.A. de C.V. Av Paseo de Las Palmas 100 Calle Los Antares No. 320 Torre Calle Republica Pte. 2855 Col. Lomas de Chapultepec "A"... - Página 96 Fecha en la que el consumidor recibe el producto Mabe, garantiza este producto en todas sus piezas, componentes y mano de obra por el tiempo de 1 año en su producto final —contado a partir de la fecha de recepción de conformidad del consumidor final— contra cualquier defecto de fabricación y funcionamiento durante el uso normal...
- Página 97 Información aplica a Argentina exclusivamente Certificado de garantía Durante el plazo de 12 meses a partir de la fecha de compra de este aparato, KRONEN INTERNACIONAL S.A. fabricante y/o importador de este producto, garantiza y se compromete frente al comprador original a reparar o reponer la pieza cuya defectuosidad obedezca a causas de fabricación.
- Página 98 • El término de la garantía contará a partir de la fecha de entrega del producto al consumidor final y por el tiempo indicado en la figura 1 de este Certificado. • Mabe garantiza la disponibilidad de repuestos por cinco (5) años luego del cese de producción del modelo en fábrica.