
Manuales relacionados para Abbott FreeStyle Freedom Lite


Resumen de contenidos para Abbott FreeStyle Freedom Lite
- Página 1 Owner’s Booklet Manual del Usuario Blood Glucose Monitoring System Sistema de Control de Glucosa en la Sangre...
-
Página 2: The Freestyle Freedom Lite® Meter And How It Works
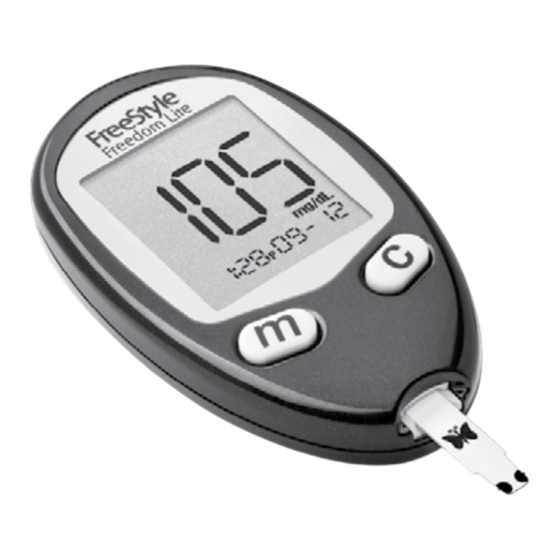
The FreeStyle Freedom Lite® Meter and How It Works System Check Screen Data Port This display always appears when the meter is Downloads test results. Requires turned on. You should check that your meter a compatible data management matches the example exactly every time system. -
Página 3: Tabla De Contenido
The FreeStyle Freedom Lite® Meter and How It Works . . . . . . . . . . . . . . . . - Página 4 FreeStyle® Control Solution . . . . . . . . . . . . . . . . . . . . . . . . . . . . . . . . . . . . . . . . . . . . . . . . . 23 Purpose .
-
Página 5: Important Information About Your Blood Glucose Monitoring System
. The FreeStyle Freedom Lite Blood Glucose Monitoring System should not be used for the diagnosis of or screening of diabetes or for neonatal use . It is intended to be used by a single person and should not be shared . - Página 6 This system contains small parts that may be dangerous if swallowed . Caution: Please read all the instructions provided in this owner’s booklet and practice the testing procedures before using the FreeStyle Freedom Lite® system . Blood glucose monitoring should be done with the guidance of a healthcare professional .
- Página 7 Limitations: • For in-vitro diagnostic use only (external use only) . • Not for diagnosis of or screening for diabetes . • Not for testing of neonates . • The test strips are for single use only . Do not reuse test strips . •...
-
Página 8: Setting Up The Meter
Setting Up the Meter Purpose The purpose of this section is to set the meter sound volume, time and date . With the meter off, press and hold for 3 seconds until appears . Press to bypass setting the optional reminder alarms . You may choose to set these later (see Setting Reminder Alarms section) . -
Página 9: Set Sound Volume
Set Sound Volume With the sound volume on, your meter will beep when: • The test strip is full of blood • The test result appears on the display • An error occurs You may also choose to silence your meter . Set sound volume If you prefer: Press... -
Página 10: Set Time
Set Time Note: Your meter can display either the 12-hour (1:24P) or the 24-hour (13:24) time formats . If you prefer the 12-hour format, there is no “A” for AM . If setting a PM time, continue to press until you see the “P” displayed for PM . Time Format Set hour •... -
Página 11: Set Date
Set Date Note: The date format can display either: Year Month Day Year Day Month The month will flash first Set month • Press to display correct month • Press to save Month Set day • Press to display correct day •... - Página 12 Set date format • Press to accept date format or • Press to change • Press to save Date Format Set year • Press to accept year or • Press to change • Press to save Year Press and hold for 3 seconds until meter turns off .
-
Página 13: Testing Your Blood Glucose
Testing Your Blood Glucose Purpose The purpose of this section is to produce an accurate blood glucose test result . Prepare to Test Select your test site . Note: Avoid moles, veins, bones, and tendons . Bruising may occur at the test site . If bruising occurs, consider selecting another site . - Página 14 IMPORTANT: Wash your hands and the test site with warm water and soap to ensure accurate results . • Thoroughly dry your hands and the test site . • Do not use lotion or cream on the test site . Check test strip expiration date .
-
Página 15: Important Test Strip Information
Important Test Strip Information Please read the FreeStyle Lite® test strip package insert for more information. • Use the test strips within the meter’s operating range: 40° – 104° F (4° – 40° C) . • Store test strips in a cool, dry place between 40° – 86° F (4° – 30° C) . •... -
Página 16: Performing A Blood Glucose Test
Contact Customer Care. • See The FreeStyle Freedom Lite® Meter and How It Works section for more information . • If the system check screen does not appear, go to Troubleshooting section . - Página 17 Apply and hold blood to 1 sample area of the test strip until: • You see short lines moving clockwise on the display or • You hear a beep This indicates the test strip obtained enough blood and the meter is checking your glucose level .
-
Página 18: Understanding Blood Glucose Test Results
Understanding Blood Glucose Test Results The meter displays results in mg/dL . The unit of measurement is preset . You cannot change this setting . IMPORTANT: The meter displays results from 20 – 500 mg/dL . Low or high blood glucose results can indicate a potentially serious medical condition . -
Página 19: Low And High Blood Glucose Results
Low and High Blood Glucose Results Result What It Means What To Do lower than Low (hypoglycemic) Repeat the test with a new test strip, even if you do 60 mg/dL not feel that you have low blood glucose . If your blood glucose result is still not consistent with your symptoms, contact your healthcare professional and follow his or her treatment advice . - Página 20 Display What It Means Symptoms What To Do Severe low blood Weakness Follow your healthcare professional’s glucose Sweating advice to treat low blood glucose . Shakiness If your blood glucose result does not Appears when Headache match how you feel, perform a result is: Confusion control solution test to confirm that...
- Página 21 Display What It Means Symptoms What To Do Severe high blood Fatigue Follow your healthcare professional’s glucose Thirst advice to treat high blood glucose . Excess Urination If your blood glucose result does Appears when Blurry Vision not match how you feel, perform a result is: control solution test to confirm that higher than...
-
Página 22: Error Codes
Error Codes Message What It Means What To Do • The sample is too small 1 . Follow your healthcare professional’s advice to • treat low blood glucose if you have symptoms There may be a problem such as: with the test strip •... - Página 23 Message What It Means What To Do • There may be a problem 1 . Follow your healthcare professional’s advice to with the test strip treat high blood glucose if you have symptoms • such as: Meter error • • •...
- Página 24 Message What It Means What To Do • Incorrect test procedure . 1 . Wait for to appear before applying For example, putting blood or control solution . blood on the test strip 2 . Perform a control solution test using a new before inserting it into test strip .
-
Página 25: Troubleshooting
Troubleshooting What It Means What To Do • 1. The meter Test strip is inserted 1 . Insert test strip print side up, top end in . does not upside down, or bottom enter test end in, or not fully mode after inserted into the meter inserting a... - Página 26 What It Means What To Do • Blood drop is too small 1 . Add blood to the same sample area within 2. The test 60 seconds, or repeat the test using a new does not test strip and a larger blood drop . start after applying the blood...
-
Página 27: Freestyle® Control Solution
FreeStyle® Control Solution Purpose FreeStyle control solution is a red liquid that contains a fixed amount of glucose . The purpose of doing a control solution test is: • To practice testing without using your own blood • To confirm that the meter and test strips work together properly •... -
Página 28: Out Of Range Control Solution Results
Out of Range Control Solution Results • Repeat the test if control solution results are outside the range printed on the test strip vial . • Stop using the meter if control solution results are consistently outside the range printed on the test strip vial . Contact Customer Care . Causes of out-of-range results include: •... -
Página 29: Performing A Control Solution Test
Performing a Control Solution Test Check control solution expiration date . IMPORTANT: Do not use control solution past expiration date . Discard control solution 3 months after opening or on the expiration date printed on the bottle whichever comes first . (Example: open April 15, discard July 15;... - Página 30 Contact Customer Care. • See The FreeStyle Freedom Lite® Meter and How It Works section for more information . • If the system check screen does not appear, go to Troubleshooting section .
- Página 31 View result . The result appears on the display when the test is complete . (Example only) Compare the control solution result to the range printed on the test strip vial . The result should fall within the range . Note: If you see an “Er1, Er2, Er3, or Er4”...
-
Página 32: Using Your Meter Memory
Using Your Meter Memory Purpose The purpose of this section is to review your stored test results and 7-, 14-, and 30-day averages . Viewing Blood Glucose Averages in Memory Start with the meter off (no test strip inserted) . Press . -
Página 33: Viewing Test Results In Memory
Viewing Test Results in Memory Meter memory stores the last 400 test results with time and date . Press to scroll through the results . The most recent result appears first . on the display indicates that you are viewing stored test results . shows the average value of glucose readings from the last 7-, 14-, or 30-days . -
Página 34: Setting Reminder Alarms (Optional)
Setting Reminder Alarms (optional) Purpose The purpose of this section is to set up to four reminder alarms to prompt you to test throughout the day . With the meter off, press and hold for 3 seconds until appears and 0 is flashing . . -
Página 35: Transferring Test Results To A Computer
Set alarm sound volume If you prefer: Press until you see: Then No sound • A low beep Press to save A louder beep Press and repeat 2, 3, 4 and 5 to set remaining reminder alarms or Press and hold for 3 seconds until meter turns off . -
Página 36: Maintaining The Meter
Maintaining the Meter Replacing the Battery The meter comes with a #2032, 3-volt, lithium battery installed . It provides power for about 1000 tests . • When appears on the display, the battery is low . • When appears, the meter may fail to turn on . •... - Página 37 Slide the battery door to the right to open . To remove the battery, pull the plastic tab up to release the battery . Insert a new battery: (+) facing up . To close, slide the battery door in until it snaps into place . Note: The battery in this product should be removed and disposed in accordance with local regulations for separate collection of spent batteries.
-
Página 38: Cleaning And Disinfecting The Meter And Lancing Device
Cleaning and Disinfecting the Meter and Lancing Device This section describes the cleaning and disinfection tasks for the FreeStyle Freedom Lite Meter and the FreeStyle Lancing Device II . Cleaning and disinfecting your meter and lancing device is important to prevent the spread of infectious diseases . - Página 39 • Cleaning and disinfection should be performed using Clorox Healthcare Bleach Germicidal Wipes at least once per week . • The meter has a use life of 5 years and has been validated for 522 cleaning and 522 disinfection cycles (the equivalent of 2 cycles per week for 5 years) . •...
- Página 40 IMPORTANT: If you require assistance or if you notice any signs of deterioration on the meter or lancing device (such as clouding or crazing on the display of the meter, corroding or eroding of the plastic housing, or cracking of plastic housing or display) or if the meter does not turn on or if the lancing device does not work after cleaning and disinfection, discontinue use of the meter or lancing device and contact Customer Care (1-888-522-5226) .
- Página 41 Disinfection Step 1 For disinfection, wipe all outside surfaces of the meter and lancing device thoroughly with the bleach wipe until they are wet in order to disinfect the meter and lancing device . Clean the strip port, data port and battery compartment with caution and do not force liquids into sensitive meter electronic openings .
- Página 42 Additional information about the risks for transmitting bloodborne pathogens to persons undergoing fingerstick procedures for blood sampling can be found in the following references: 1 . “FDA Public Health Notification: Use of Fingerstick Devices on More than One Person Poses Risk for Transmitting Bloodborne Pathogens: Initial Communication”...
-
Página 43: Specifications
Specifications Assay method Coulometric electrochemical sensor Automatic shutoff 2 minutes of inactivity Battery life 1000 tests Calibration Plasma equivalent Hematocrit 15% to 65% Measurement units mg/dL Meter storage – 4° to 140° F (–20° to 60° C) temperature Memory 400 blood glucose and control solution tests with date and time Operating relative 5% to 90% (non-condensing) humidity... - Página 44 Operating 40° to 104° F (4° to 40° C) temperature Power source One CR 2032, 3V lithium battery, replaceable Result range 20 to 500 mg/dL Sample Fresh capillary and venous whole blood samples Sample size 0 .3 microliter (300 nanoliters) Size 2 .0 in (w) x 3 .3 in (l) x 0 .63 in (d) 5 .1 cm (w) x 8 .4 cm (l) x 1 .6 cm (d) Weight...
-
Página 45: Definition Of Symbols
Definition of Symbols Consult instructions for use For in vitro diagnostic medical device Temperature limitation Catalog number Manufacturer Recycle Batch code Serial number Use by Do not reuse The battery in this product should be removed and disposed in accordance with local regulations for separate collection of spent batteries . -
Página 46: El Medidor Freestyle Freedom Lite® Y Su Funcionamiento
El Medidor FreeStyle Freedom Lite® y su Funcionamiento Pantalla de verificación del sistema Puerto de datos Esta pantalla aparece siempre cuando se Descarga los resultados de las pruebas. enciende el medidor. Compruebe que la Requiere un sistema de administración pantalla de su medidor se vea tal como la de datos compatible. - Página 47 El Medidor FreeStyle Freedom Lite® y su Funcionamiento . . . . . . . . . . . . . . . .
- Página 48 Solución de Control FreeStyle® . . . . . . . . . . . . . . . . . . . . . . . . . . . . . . . . . . . . . . . . . . . . . 23 Propósito .
-
Página 49: Información Importante Sobre El Sistema De Control
. El sistema de control de glucosa en sangre FreeStyle Freedom Lite no debe ser usado para el diagnóstico ni para la detección de la diabetes ni se debe usar en neonatos . Está diseñado para ser usado solamente por una persona y no debe ser compartido . - Página 50 Precaución: Lea todas las instrucciones provistas en este manual del usuario y practique el procedimiento para realizar la prueba antes de usar el sistema FreeStyle Freedom Lite® . El control de la glucosa en sangre debe llevarse a cabo con la orientación de un profesional de la salud .
- Página 51 Limitaciones • Solamente para uso diagnóstico in vitro (solamente para uso externo) . • No son para diagnosticar o detectar diabetes . • No son para uso en neonatos . • Las tiras de prueba son para un solo uso . No vuelva a utilizarlas . •...
-
Página 52: Configuración Del Medidor
Configuración del Medidor Propósito El propósito de esta sección es configurar el volumen de sonido, la fecha y la hora del medidor . Con el medidor apagado, oprima sin soltar durante 3 segundos hasta que aparezca Oprima para saltarse la configuración de las alarmas de recordatorio opcionales . Puede decidir configurarlas después (vea la sección “Configuración de las Alarmas de Recordatorio”) . -
Página 53: Configuración Del Volumen De Sonido
Configuración del Volumen de Sonido Si el volumen del sonido está encendido, el medidor emite un pitido cuando: • La tira de prueba está llena de sangre • El resultado de la prueba aparece en la pantalla • Ocurre un error Si lo prefiere, puede optar por silenciar el medidor . -
Página 54: Configuración De La Hora
Configuración de la Hora Nota: El medidor puede mostrar la hora en el formato de 12 horas (1:24P) o en el de 24 horas (13:24) . Si elige el formato de 12 horas, verá que no hay una “ A ” para las horas antes del mediodía (AM) . -
Página 55: Configuración De La Fecha
Configuración de la Fecha Nota: El formato de la fecha puede mostrarse de una de las siguientes maneras: Año Mes Día Año Día Mes El mes parpadea en primer lugar Configure el mes • Oprima para mostrar el mes correcto •... - Página 56 Configure el formato de la fecha • Oprima para aceptar el formato de la fecha u • Oprima para cambiarlo • Oprima para guardar Formato de la fecha Configure el año • Oprima para aceptar el año u • Oprima para cambiarlo •...
-
Página 57: Realización De Pruebas De Glucosa En La Sangre
Realización de Pruebas de Glucosa en la Sangre Propósito El propósito de esta sección es producir un resultado exacto de la prueba de glucosa en la sangre . Preparación para la Prueba Elija su zona donde se va a hacer la prueba . Nota: Evite los lunares, las venas, los huesos y los tendones . - Página 58 IMPORTANTE: Lávese las manos y la zona de prueba con agua tibia y jabón para asegurarse de obtener resultados exactos . • Séquese bien las manos y la zona de prueba . • No use loción ni crema en la zona de prueba . Verifique la fecha de vencimiento de la tira de prueba .
-
Página 59: Información Importante Sobre La Tira De Prueba
Información Importante sobre la Tira de Prueba Lea el prospecto de las tiras de prueba FreeStyle Lite® para obtener más información. • Use las tiras de prueba dentro del rango de funcionamiento del medidor: 40 °F a 104 °F (4 °C a 40 °C) . -
Página 60: Cómo Realizar Una Prueba De Glucosa En La Sangre
Comuníquese con el departamento de Atención al Cliente. • Consulte la sección “El Medidor FreeStyle Freedom Lite® y su Funcionamiento” para obtener más información . • Si no aparece la pantalla de verificación, consulte la sección “Resolución de Problemas”... - Página 61 Ponga y mantenga en contacto con la sangre un área de la muestra de la tira de prueba hasta que: • Vea unas rayas que se mueven en la pantalla en el sentido de las agujas del reloj o • Escuche un pitido Eso significa que aplicó...
-
Página 62: Significado De Los Resultados De Las Pruebas De Glucosa En La Sangre
Significado de los Resultados de las Pruebas de Glucosa en la Sangre El medidor muestra los resultados en mg/dL . La unidad de medida está preconfigurada y esa configuración no se puede cambiar . IMPORTANTE: El medidor muestra los resultados entre 20 y 500 mg/dL . -
Página 63: Resultados De Glucosa En La Sangre Alta Y Baja
Resultados de Glucosa en la Sangre Alta y Baja Resultado Qué Significa Qué Hacer Más bajo que Baja (hipoglucemia) Repita la prueba con una tira de prueba nueva, 60 mg/dL aunque no sienta que tiene baja la glucosa en la sangre . - Página 64 Qué Muestra la Qué Significa Síntomas Qué Hacer Pantalla Nivel bajo de Debilidad Siga el consejo de su profesional de glucosa en la sangre Sudor la salud para tratar la glucosa baja grave Temblores en la sangre . Aparece Dolor de cabeza Si su resultado de glucosa en sangre cuando el Confusión...
- Página 65 Qué Muestra la Qué Significa Síntomas Qué Hacer Pantalla Nivel alto de glucosa Cansancio Siga el consejo de su profesional en la sangre grave de la salud para tratar la glucosa en Orina en exceso sangre alta . Aparece Visión borrosa Si su resultado de glucosa en sangre cuando el no concuerda con el modo en que...
-
Página 66: Códigos De Error
Códigos de Error Mensaje Qué Significa Qué Hacer • La muestra es demasiado 1 . Siga el consejo de su profesional de la salud para pequeña tratar la glucosa en sangre baja si tiene síntomas • tales como: Es posible que haya un •... - Página 67 Mensaje Qué Significa Qué Hacer • Es posible que haya un 1 . Siga el consejo de su profesional de la salud para problema con la tira de tratar la glucosa en sangre alta si tiene síntomas prueba tales como: •...
- Página 68 Mensaje Qué Significa Qué Hacer • Procedimiento de prueba 1 . Espere a que aparezcan los símbolos incorrecto . Por ejemplo, antes de aplicar la sangre o la solución de se aplicó sangre en la control . tira de prueba antes de introducirla en el 2 .
-
Página 69: Resolución De Problemas
Resolución de Problemas Qué Significa Qué Hacer • 1. El medidor La tira de prueba se 1 . Introduzca la tira de prueba por el extremo no ingresa introdujo al revés, por superior y con el lado impreso hacia arriba . en el modo el extremo equivocado, de prueba... - Página 70 Qué Significa Qué Hacer • La gota de sangre es 1 . Agregue sangre en la misma área de la 2. La prueba demasiado pequeña muestra antes de que transcurran 60 segundos, o repita la prueba con una tira comienza de prueba nueva y una gota de sangre más después grande .
-
Página 71: Solución De Control Freestyle
Solución de Control FreeStyle® Propósito La solución de control FreeStyle es un líquido de color rojo que contiene una cantidad determinada de glucosa . La prueba de la solución de control se realiza con los siguientes fines: • Practicar la prueba sin tener que usar sangre •... -
Página 72: Resultados De La Solución De Control Fuera De Rango
Resultados de la Solución de Control Fuera de Rango • Repita la prueba si los resultados de la solución de control se encuentran fuera del rango impreso en el vial de las tiras de prueba . • Deje de usar el medidor si los resultados de la solución de control se encuentran sistemáticamente fuera del rango impreso en el vial de las tiras de prueba . -
Página 73: Cómo Realizar Una Prueba De La Solución De Control
Cómo Realizar una Prueba de la Solución de Control Verifique la fecha de caducidad de la solución de control . IMPORTANTE: No use la solución de control después de su fecha de caducidad . Deseche la solución de control 3 meses después de abrirla o en la fecha de caducidad impresa en el frasco, lo que tenga lugar primero . - Página 74 Comuníquese con el departamento de Atención al Cliente. • Consulte la sección “El Medidor FreeStyle Freedom Lite® y su Funcionamiento” para obtener más información . • Si no aparece la pantalla de verificación, consulte la sección “Resolución de Problemas”...
- Página 75 Vea el resultado . El resultado aparece en la pantalla cuando ha finalizado la prueba . (Sólo como ejemplo) Compare el resultado de la prueba de la solución de control con el rango impreso en el vial de las tiras de prueba . El resultado debe encontrarse dentro del rango .
-
Página 76: Uso De La Memoria Del Medidor
Uso de la Memoria del Medidor Propósito El propósito de esta sección es revisar los resultados de prueba guardados y los promedios de 7, 14 y 30 días . Repaso de los Promedios de las Pruebas de Glucosa en la Sangre en la Memoria Comience con el medidor apagado (sin introducir una tira de prueba) . -
Página 77: Repaso De Los Resultados De Las Pruebas En La Memoria
Repaso de los Resultados de las Pruebas en la Memoria El medidor almacena en su memoria los últimos 400 resultados de pruebas con fecha y hora . Oprima para revisar los resultados . En primer lugar se muestra el resultado más reciente . en la pantalla indica que está... -
Página 78: Configuración De Las Alarmas De Recordatorio (Opcional)
Configuración de las Alarmas de Recordatorio (opcional) Propósito El propósito de esta sección es configurar hasta cuatro alarmas de recordatorio para avisarle que realice las pruebas durante el día . Con el medidor apagado, oprima sin soltar durante 3 segundos hasta y el 0 parpadee . -
Página 79: Transferencia De Los Resultados De Las Pruebas A Una Computadora
Configure el volumen del sonido de la alarma Si prefiere: Oprima hasta que vea: Después Sin sonido • Un sonido bajo Oprima para guardar Un sonido más alto Oprima y repita los pasos 2, 3, 4 y 5 para configurar las demás alarmas de recordatorio u Oprima sin soltar durante 3 segundos hasta que el medidor se apague . -
Página 80: Mantenimiento Del Medidor
Mantenimiento del Medidor Cambio de la Pila El medidor viene con una pila de litio numero 2032, de 3 voltios, previamente instalada . Suministra energía para realizar 1000 pruebas aproximadamente . • Cuando aparece en la pantalla, la pila se está agotando . •... - Página 81 Deslice la tapa de la pila hacia la derecha para abrirla . Para retirar la pila, jale la lengüeta de plástico hacia arriba para que se libere la pila . Coloque una pila nueva con el signo (+) hacia arriba . Para cerrar la tapa de la pila, deslícela hacia adentro hasta que se cierre con un clic .
-
Página 82: Limpieza Y Desinfección Del Medidor Y Del Dispositivo De Punción
Limpieza y Desinfección del Medidor y del Dispositivo de Punción En esta sección se describen las tareas de limpieza y desinfección del medidor FreeStyle Freedom Lite y del dispositivo de punción FreeStye Lancing Device II . Es importante que limpie y desinfecte el medidor y el dispositivo de punción para prevenir el contagio de enfermedades infecciosas . - Página 83 • La limpieza y desinfección deben ser realizadas usando toallitas germicidas con blanqueador Clorox Healthcare al menos una vez a la semana . • El medidor tiene una vida útil de 5 años y ha sido validado para 522 ciclos de limpieza y 522 ciclos de desinfección (el equivalente de 2 ciclos por semana por 5 años) .
- Página 84 IMPORTANTE: Si requiere asistencia o si observa signos de deterioro en el medidor o el dispositivo de punción (si la pantalla del medidor se empaña, se agrieta, o si la caja protectora de plástico se corroe, agrieta, erosiona o resquebraja), si el medidor no se enciende o si el dispositivo de punción no funciona después de la limpieza y desinfección, suspenda el uso del medidor o del dispositivo de punción y llame al departamento de Atención al cliente (1-888-522-5226) .
- Página 85 Desinfección Paso 1 Para realizar la desinfección, limpie bien todas las superficies externas del medidor y del dispositivo de punción con la toallita con blanqueador hasta que estén húmedas, para desinfectar el medidor y el dispositivo de punción . Limpie el puerto de la tira, el puerto de datos y el compartimiento de las pilas con precaución y no introduzca líquidos en sensibles orificios para conexiones electrónicas del medidor .
- Página 86 Puede encontrar más información acerca de los riesgos de transmitir patógenos presentes en la sangre a personas que se someten a procedimientos de punción dactilar para obtener muestras de sangre en las siguientes referencias: 1 . “FDA Public Health Notification: Use of Fingerstick Devices on More than One Person Poses Risk for Transmitting Bloodborne Pathogens: Initial Communication”...
-
Página 87: Especificaciones
Especificaciones Método de ensayo Sensor electroquímico coulométrico Apagado automático 2 minutos de inactividad Duración de la pila 1000 pruebas Calibración Equivalente a plasma Hematocrito Del 15% al 65% Unidades de medida mg/dL Temperatura de Entre –4 °F y 140 °F (–20 °C y 60 °C) conservación del medidor 400 pruebas de glucosa en sangre y solución de control con fecha Memoria... - Página 88 Temperatura de Entre 40 °F y 104 °F (4 °C y 40 °C) funcionamiento Fuente de energía Una pila de litio CR 2032, de 3 voltios, que se puede cambiar Rango de resultados De 20 a 500 mg/dL Muestra Muestras de sangre entera venosa o capilar reciente Tamaño de la muestra 0 .3 microlitros (300 nanolitros) 2 .0 pulg .
-
Página 89: Definición De Los Símbolos
Definición de los Símbolos Consultar las instrucciones Dispositivo médico para diagnóstico de uso in vitro Limitación de temperatura Número de catálogo Fabricante Reciclar Código de partida Número de serie Usar antes del No volver a utilizar La pila de este producto debe retirarse y desecharse de acuerdo con la normativa local para la recolección separada de pilas agotadas. - Página 90 Contact Customer Care Toll Free at Llame sin cargo al departamento de Atención al Cliente al 1-888-522-5226 FreeStyle® and related brand marks are trademarks of Abbott Diabetes Care Inc. in various jurisdictions. Patent | Patente: https://www.abbott.com/patents ©2010-2016 Abbott For in vitro diagnostic medical device ART22812-003 Rev.