Tabla de contenido
Publicidad
Idiomas disponibles
Idiomas disponibles
Enlaces rápidos
OWNER'S MANUAL
AIR CONDITIONER
Please read this manual carefully before operating
your set and retain it for future reference.
TYPE:WALL MOUNTED
MODELS
SP121CM
SP121CM
NY0
SP122HM
SP122HM
NY0
SP182HM
SP182HM
N50
SP242HM
SP242HM
N51
P/NO:MFL67445105
SP122CM
US0
NT0
SP182CM
US0
N51
SP242CM
US0
N52
US1
SP122CM
US0
SP182CM
US1
SP242CM
US2
www.lg.com
Publicidad
Capítulos
Tabla de contenido

Manuales relacionados para LG SP121CM


Resumen de contenidos para LG SP121CM
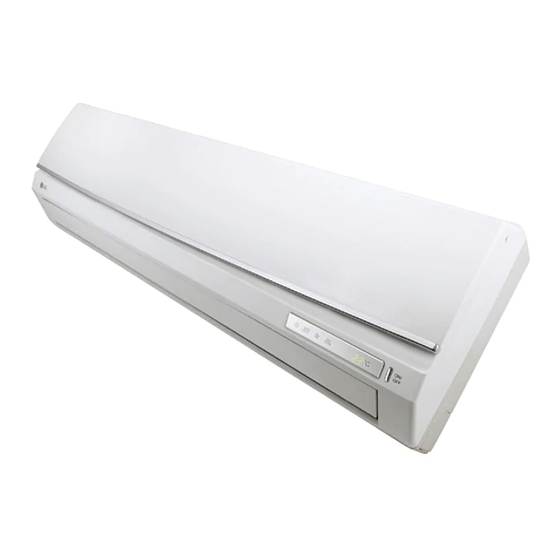
- Página 1 OWNER’S MANUAL AIR CONDITIONER Please read this manual carefully before operating your set and retain it for future reference. TYPE:WALL MOUNTED MODELS SP121CM SP121CM SP122CM SP122CM SP122HM SP122HM SP182CM SP182CM SP182HM SP182HM SP242CM SP242CM SP242HM SP242HM www.lg.com P/NO:MFL67445105...
-
Página 2: Tabla De Contenido
Room Air Conditioner Owner’s Manual TABLE OF CONTENTS FOR YOUR RECORDS A. Safety Precautions ......3 B. Electrical Safety........6 Write the model and serial numbers here: Temporary Use of an Adapter ....6 Model # Temporary Use of an Extension Cord ...6 Serial # Symbols used in this Manual....6 You can find them on a label on the side of each unit. - Página 3 Plug in the power plug properly. Otherwise, it will cause electric shock or fire due to heat generation or electric shock. Do not operate or stop the unit by inserting or pulling out the power plug. It will cause electric shock or fire due to heat generation. Do not damage or use an unspecified power cord.
- Página 4 Indoor/outdoor wiring connections must be secured tightly and the cable should be routed properly so that there is no force pulling the cable from the connection terminals. Improper or loose connections can cause heat generation or fire. Safely dispose off the packing materials. Like screws, nails, batteries, broken things etc after installation or svc and then tear away and thraw away the plastic packaging bags.
- Página 5 It may cause a problem for your neighbors and hence dispute. Always check for gas (refrigerant) leakage after installation or repair of product. Low refrigerant levels may cause failure of product. Do not use the product for special purposes, such as preserving foods, works of art, etc. It is a consumer air conditioner, not a precision refrigeration system.
-
Página 6: Electrical Safety
Electrical Safety Electrical Safety • This appliance must be properly grounded. To minimize the risk of electric shock, you must alway plug into a grounded oulet. • Do not cut or remove the grounding prong from the power plug. • Attaching the adapter ground terminal to the wall receptacle cover screw does not ground the appliance unless the cover screw is metal and not insulated, and the wall receptacle is grounded through the house wiring. -
Página 7: Product Introduction
Product Introduction Product Introduction Here is a brief introduction of the indoor and outdoor units. Please see the information specific to your indoor unit type. Indoor Units Standard Split Type Display panel LED indicators Air inlet Grille tab Plasma filter (Optional) Front grille ON/OFF button Air filter... -
Página 8: Operation Indication Lamps
Product Introduction Art Cool Deluxe(Type 1) Art Cool Deluxe(Type 2) Display panel LED indicators Display panel LCD indicators Air inlet Air inlet Air filter Plasma filter Plasma filter Air filter Air discharge Air discharge Front panel Power cord Signal receiver Front panel ON/OFF button Power cord... -
Página 9: Operating Instructions
Operating Instructions Operating Instructions How to insert the Batteries 1. Remove the battery cover by pulling it according to the arrow direction. 2. Insert new batteries making sure that the (+) and (-) of battery are installed correctly. 3. Reattach the cover by sliding it back into position. NOTE 1. -
Página 10: Wireless Remote Controller Cooling Only Model
Operating Instructions Wireless Remote Controller (Cooling Only Model) The controls will look like the following. ON/OFF BUTTON Signal transmitter Used to turn off/on the unit. OPERATION MODE SELECTION BUTTON Used to select the operation mode. ROOM TEMPERATURE SETTING BUTTONS Used to select the room temperature. INDOOR FAN SPEED SELECTION BUTTON Used to select fan speed in four steps low, medium, high and natural wind. -
Página 11: Wireless Remote Controller Heat Pump Model
Operating Instructions Wireless Remote Controller (Heat Pump Model) The controls will look like the following. ON/OFF BUTTON Signal transmitter Used to turn off/on the unit. OPERATION MODE SELECTION BUTTON Used to select the operation mode. ROOM TEMPERATURE SETTING BUTTONS Used to select the room temperature. INDOOR FAN SPEED SELECTION BUTTON Used to select fan speed in four steps low, medium, high and natural wind. - Página 12 Operating Instructions Operation Mode Press the ON/OFF BUTTON to Turn on the unit The unit will respond with a beep. Open the cover of the remote controller and press the operation mode button. Each time the button is pressed, the operation mode is shifted in the direction of the arrow. (For Heating Model) Heating Cooling...
-
Página 13: Auto Operation
Operating Instructions Auto Operation <For Cooling Model> The temperature and fan speed are automatically set by the electronic controls based on the actual room temperature. If you feel hot or cold, press TEMPERATURE SETTING buttons for more cooling or heating effect. You cannot switch the indoor fan speed. -
Página 14: Air Circulation Operation
Operating Instructions Air Circulation Operation This operation circulates the air without cooling or heating. It can be activated by pressing the AIR CIRCULATION BUTTON. Once the air circulation is activated you can select the fan speed by pressing the INDOOR FAN SPEED SELECTION BUTTON. Auto Clean Operation During Auto Clean Operation, moistures left in indoor units after cooling operation or healthy dehumidification operation can be removed. -
Página 15: Timer Setting Operation
Operating Instructions Timer Setting Operation Button on the Description Remote Controller Make sure to set current time correctly on the display of the remote controller.. Press 2nd F button. Press the ON/OFF TIMER BUTTONS to turn timer on or off. Press the TIME SETTING BUTTONS until the desired time is set. - Página 16 Operating Instructions Vertical / Horizontal Airflow Direction Control (Optional) The up/down airflow (Vertical airflow) can be adjusted by using the remote controller. 1. Press the START/STOP BUTTON to start the unit. 2. Press CHAOS SWING BUTTON. 3. The louvers will swing up & down automatically. 4.
-
Página 17: Jet Cool
Operating Instructions Jet Cool Jet cool function can be used to cool the room quickly in hot summer. When this function is turned on, the air conditioner runs in cooling operation mode with super high fan speed and 18°C setting temperature for 30 minutes for fast and effective cooling. -
Página 18: Maintenance And Service
Maintenance and Service Maintenance and Service Before performing any maintenance, turn off the main power to the system, disconnect the circuit breaker and unplug the power cord. Indoor Unit Clean the unit with a soft dry cloth. Do not use bleach or abrasives. Never use any of these •... - Página 19 Maintenance and Service 3. Deluxe (Type 1): Open the upside of the panel and lift it up as shown. The hooks of the panel will come off. Remove the air filters. Then pull out the plasma filter Plasma filter Front panel Panel hook After cleaning and drying well reinstall the filters in their original position.
-
Página 20: Outdoor Unit
Maintenance and Service Type 2: Pull the front panel from both sides as shown. Then pull the filter tab slightly forward to remove the filter. After removing the air filter remove the plasma and triple deodorizer filter by slightly pulling forward. Deodorizer filter Plasma filter... -
Página 21: Troubleshooting Tips! Save Time And Money
Maintenance and Service Troubleshooting Tips! Save time and money! The air conditioner may be operating abnormally when: Problem Possible Causes What To Do The air conditioner is • Make sure the air conditioner plug is unplugged. pushed completely into the outlet. The fuse is blown/circuit •... -
Página 22: Spec Sheet
Maintenance and Service SPEC SHEET : COOLING HEATING MODEL VOLTAGE INPUT CURRENT INPUT CURRENT SP121CM NY0 115 V~ 1 230W 11,0 A SP121CM US0 115 V~ 1 230W 11,0 A SP122CM NT0 220 V~ 1 192W 5,2 A SP122CM US0... - Página 23 SP121CM SP121CM SP122CM SP122CM SP122HM SP122HM SP182CM SP182CM SP182HM SP182HM SP242CM SP242CM SP242HM SP242HM www.lg.com...
- Página 24 Manual del propietario del aire acondicionado CONTENIDO PARA SUS ARCHIVOS A. Precauciones de seguridad ......3 B. Seguridad eléctrica........6 Escriba el número de modelo y el de serie aquí: Uso temporal de un adaptador......6 Nº de modelo Uso temporal de un alargador de alimentación ..........6 Nº...
-
Página 28: Seguridad Eléctrica
Seguridad eléctrica Seguridad eléctrica • Este pequeño electrodoméstico debe estar correctamente puesto a tierra. Para reducir al mínimo el riesgo de descargas eléctricas, siempre deberá enchufar la unidad en una toma con puesta a tierra. • No corte ni quite la clavija de puesta a tierra del enchufe de alimentación. •... -
Página 29: Presentación Del Producto
Presentación del producto Presentación del producto A continuación encontrará una breve presentación de las unidades de interior y exterior. Por favor, consulte la información específica relativa al tipo de su unidad interior. Unidades interiores Tipo Split estándar (unidad separada) Indicadores LED en el panel de visualización Entrada de aire Lengüeta de la rejilla Filtro de plasma (opcional) -
Página 30: Indicadores Luminosos De Funcionamiento
Presentación del producto Art Cool Delux (Tipo 1) Art Cool Delux (Tipo 2) Indicadores LED en el panel de visualización Indicadores LCD en el panel de visualización Entrada de aire Entrada de aire Filtro de aire Filtro de plasma Filtro de plasma Filtro de aire Salida de aire Salida de aire... -
Página 31: Instrucciones De Funcionamiento
Instrucciones de funcionamiento Instrucciones de funcionamiento Inserción de pilas 1. Desmonte la tapa de la batería tirando de ella en la dirección de la flecha. 2. Inserte las nuevas pilas asegurándose de que los signos (+) y (-) de la pila están instalados correctamente. 3. -
Página 32: Mando A Distancia Inalámbrico
Instrucciones de funcionamiento Mando a distancia inalámbrico ( Modelo sólo enfriamiento) Los controles serán idénticos a los siguientes. BOTÓN ON/OFF Utilizado para encender/apagar la unidad. Transmisor de señal BOTÓN DE SELECCIÓN DEL MODO DE FUNCIONAMIENTO Utilizado para seleccionar el modo de funcionamiento. BOTONES DE AJUSTE DE LA TEMPERATURA AMBIENTE Utilizados para configurar la temperatura ambiente. -
Página 33: (Modelo Sólo Enfriamiento)
Instrucciones de funcionamiento Mando a distancia inalámbrico (Sólo modelo bomba de calor ) Los controles serán idénticos a los siguientes. BOTÓN ON/OFF Utilizado para encender/apagar la unidad. Transmisor de señal BOTÓN DE SELECCIÓN DEL MODO DE FUNCIONAMIENTO Utilizado para seleccionar el modo de funcionamiento. BOTONES DE AJUSTE DE LA TEMPERATURA AMBIENTE Utilizados para configurar la temperatura ambiente. -
Página 34: Modo Funcionamiento
Instrucciones de funcionamiento Modo funcionamiento Modo funcionamiento Presione el botón Start/Stop para encender la unidad. La unidad responderá con una señal sonora Abra la puerta del mando a distancia y presione el botón modo de funcionamiento. Cada vez que presione el botón, el modo de funcionamiento cambiará en la dirección de la flecha. -
Página 35: Funcionamiento Automático
Instrucciones de funcionamiento Funcionamiento automático <Para modelos de refrigeración> La temperatura y la velocidad del ventilador se configura automáticamente con los controles electrónicos basándose en la temperatura real de la sala. Si tiene calor o frío, pulse los botones de CONFIGURACIÓN DE TEMPERATURA para aumentar el efecto de calor o frío. -
Página 36: Operación Circulación De Aire
Instrucciones de funcionamiento Operación circulación de aire Esta operación hace circular el aire del cuarto sin enfriarlo ni calentarlo. Puede ser activado presionando el BOTÓN CIRCULACIÓN DE AIRE. Una vez activada la circulación de aire, usted podrá seleccionar la velocidad del aire presionando el BOTÓN SELECTOR DE VELOCIDAD DEL VENTILADOR INTERIOR. -
Página 37: Operación Ajuste Del Temporizador
Instrucciones de funcionamiento Operación ajuste del temporizador Button on the Description Remote Controller Asegúrese de ajustar correctamente la hora actual en la pantalla del mando a distancia. Presione el botón 2 F. Presione los BOTONES DE TEMPORIZADOR ENCENDIDO/APAGADO para encender o apagar el temporizador. Presione los BOTONES DE CONFIGURACIÓN HORARIA hasta establecer la hora deseada. -
Página 38: Control De Dirección Vertical/Horizontal Del Flujo De Aire (Opcional)
Instrucciones de funcionamiento Control de dirección vertical/horizontal del flujo de aire (Opcional) El flujo de aire arriba/abajo (flujo de aire vertical) puede ajustarse mediante el mando a distancia. 1. Presione el BOTÓN START/STOP para iniciar la unidad. 2. Presione el BOTÓN CHAOS SWING. 3. -
Página 39: Del Enfriamiento Por Chorro De Aire Frio
Instrucciones de funcionamiento Del enfriamiento por chorro de aire frío La función de chorro de aire frío puede ser empleada para enfriar rápidamente un cuarto en un día caluroso. Cuando esta función esté activa, el aire acondicionado funcionará en modo operación de enfriamiento, con una velocidad ultrarrápida del ventilador y una temperatura de 18ºC durante 30 minutos a fin de lograr un enfriamiento rápido y eficaz. -
Página 40: Mantenimiento Y Servicio
Mantenimiento y servicio Mantenimiento y servicio Antes de realizar labores de mantenimiento, desconecte la alimentación del sistema, cierre el interruptor y desenchufe el cable de alimentación. Unidad interior Limpie la unidad con un paño seco y suave. No utilice lejía o sustancias abrasivas. No utilice nunca los siguientes elementos: •... - Página 41 Mantenimiento y servicio 3. Tipo Deluxe (Tipo 1): Abra la parte superior del panel e inclínelo como se muestra. Los ganchos del panel se desprenderán. Desmonte los filtros de aire. A continuación, extraiga el filtro de plasma. Filtro de plasma Panel frontal Gancho de panel...
-
Página 42: Unidad Exterior
Mantenimiento y servicio Tipo 2: Extraiga el panel delantero de ambos lados, como se muestra. A continuación, tire levemente hacia delante de la lengüeta del filtro a fin de extraerlo. Una vez extraído el filtro de aire, retire el de plasma y el triple desodorante tirando con cuidado hacia delante. Filtro! desodorante Filtro de plasma... -
Página 43: Ahorre Tiempo Y Dinero
Mantenimiento y servicio Consejos de solución de averías ¡Ahorre tiempo y dinero! El aire acondicionado puede funcionar de forma poco normal cuando: Problema Causas probables Qué hacer El aire acondicionado está • Asegúrese que el aire acondicionado esté desenchufado. enchufado completamente en la salida. El fusible está... -
Página 44: Especificaciones
Mantenimiento y servicio ESPECIFICACIONES: REFRIGERACION CALEFACCION MODELO VOLTAJE CONSUMO CORRIENTE CONSUMO CORRIENTE SP121CM NY0 115 V~ 1 230W 11,0 A SP121CM US0 115 V~ 1 230W 11,0 A SP122CM NT0 220 V~ 1 192W 5,2 A SP122CM US0 220 V~... - Página 45 LG ELECTRONICS MEXICO,S.A. DE C.V. Sor Juana Ines de la Cruz No. 555 Col.San Lorenzo Tlalnepantla Estado de Mexico C.P. 54033 Telefono:(55)5321-1919 Sin Costo:01800-3471919 Pagina Web:http://www.lg.com.mx/...