Publicidad
Enlaces rápidos
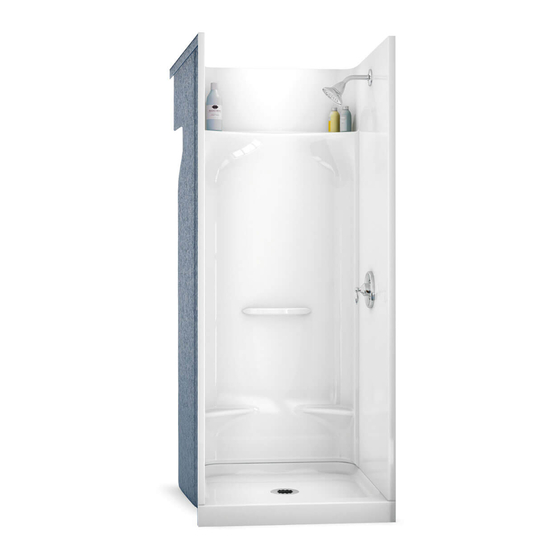
InsTAllATIon guIde
INSTRUCCIONES DE INSTALACIÓN
KDS 3232 / 3636
142018 / 142019 / 142024 / 142025
Base only | Base seulement | Base solamente
142020 / 142021 / 142026 / 142027
KDTS 2954 / 3060 / 3260
142000 142001 / 142006 142007 / 142012 142013
Bathtub only | Baignoire seulement | Bañera solamente
142002 142003 / 142008 142009 / 142014 142015
These guidelines are recommended by MAAX Bath Inc. (here-
after "MAAX") for the proper installation of their products.
A careful review of these procedures (and any referenced publica-
tions) before starting is important in avoiding unnecessary problems
resulting in an improper assembly or installation.
KDS 3448 / 3060 / 3460
142030 142031/ 142036 142037 / 142042 142043
Base only | Base seulement | Base solamente
142032 142033 / 142038 142039 / 142044 142045
MAAX Bath Inc. (en adelante "MAAX") recomienda las siguientes
instrucciones para la correcta instalación de su producto. Antes de
comenzar, es importante leer detenidamente estos procedimientos
(y todas las publicaciones a las que se haga referencia), para evi-
tar problemas innecesarios que puedan resultar en un montaje o
instalación incorrectos.
10024651
Publicidad

Manuales relacionados para MAAX AKER KDS 3232


Resumen de contenidos para MAAX AKER KDS 3232
- Página 1 142002 142003 / 142008 142009 / 142014 142015 These guidelines are recommended by MAAX Bath Inc. (here- MAAX Bath Inc. (en adelante “MAAX”) recomienda las siguientes after “MAAX”) for the proper installation of their products. instrucciones para la correcta instalación de su producto. Antes de A careful review of these procedures (and any referenced publica-...
- Página 3 InsTAllATIon guIde INSTRUCCIONES DE INSTALACIÓN special notes to Installer Notas Especiales para el Instalador I t is the sole responsibility of the installer to determine, prior to E s responsabilidad exclusiva del instalador, antes de realizar la insta- the installation, the requirements necessary for compliance with lación, determinar cuáles son los requisitos necesarios para cumplir all codes involving the unit or the installation. con todos los códigos aplicables a la unidad o a la instalación. A ll paperwork packaged with the unit and any associated options T oda la documentación que se incluya en el paquete de la unidad or accessories should be saved and presented to the homeowner...
- Página 4 InsTAllATIon guIde INSTRUCCIONES DE INSTALACIÓN Figure 1 - unit data and dimensional guidelines Figura 1 - Datos de la Unidad y Guía de Dimensiones (Tolerance: +0/ -3/8 inch) (Tolerancia : +0/ -3 /8 de pulgada) Drain Cut-Out Abertura para Desagüe 5" Fixture Blocks Drain Center Bloques Centrado del Desagüe de Fijación Alcove Length / Unit Length Largo del Recinto / Largo de la Unidad Finished Unit Depth...
- Página 5 InsTAllATIon guIde INSTRUCCIONES DE INSTALACIÓN 12 3/4’’ KDS 3232 KDS 3636 KDS 3060 1’’ 31 7/8” 31 7/8" 35 7/8’’ 14 3/4” 14 3/4" 17 1/4’’ 59 3/4” 21 5/8” 4 1/4” 7 5/8” 4 1/4" 7 5/8" 11 5/8’’ 6 3/8” 80 1/2’’ 4 7/8’’ 10 1/4” ABFLR 33” 33" 77’’ 24 3/8” 37’’...
- Página 6 InsTAllATIon guIde INSTRUCCIONES DE INSTALACIÓN KDS 3448 KDS 3460 KDTS 2954 47 11/16’ ’ 59 3/4’’ 19’’ 19 5/8’’ 21 5/8’’ 9 1/8’’ 10 1/4’ ’ ’ 10 1/8’’ 5 3/4’ ’ ’ 5’’ 6 3/8’’ 30 1/8’’ 21’’ 34 1/2’’ 34 5/8’ ’ ’ 23 3/8’ ’ ’ 24 3/8’’ 1’’ 1’’ 2 3/4’’ 50 1/2’’ 2 3/4’’...
- Página 7 InsTAllATIon guIde INSTRUCCIONES DE INSTALACIÓN note: some units are assembled at the factory for shipping Nota : Algunas unidades se montan en fábrica sólo para su trans- purposes only. The unit must be taken apart and porte y expedición. Se deberá desmontar y reensamblar la uni- dad, tal como se explica en este manual de instalación. reassembled as described in this installation manual. Framing Requirements Requisitos de la Estructura due to individual site variations, exact guidelines for every situation Es imposible proporcionar instrucciones exactas para cada situación...
- Página 8 InsTAllATIon guIde INSTRUCCIONES DE INSTALACIÓN sTeP 2 - BAse InsTAllATIon / ETAPA 2 - INSTALACIÓN DE LA BASE 1 1/4" screw Tornillo de 1 1/4” Shims Cuñas Important: Hand tighten only! 1 1/4" screw Inspect the flange Tornillo de 1 1/4” Importante : ¡Ajustar a mano únicamente! Revisar el reborde Shims Cuñas...
- Página 9 InsTAllATIon guIde Positioning pins and INSTRUCCIONES DE INSTALACIÓN bolt holes Clavija de fijación y agujeros del pernos sTeP 3 - AsseMBlY oF WAlls / ETAPA 3 - MONTAJE DE LAS PAREDES Positioning pins and bolt holes Clavija de fijación y agujeros del pernos Wall Pared Positioning pin Clavija de Fijación (10024650) Wall...
- Página 10 InsTAllATIon guIde INSTRUCCIONES DE INSTALACIÓN Start from the bottom going up and around. Empezar desde la parte inferior y continuar hacia arriba y alrededor. 1 1/4" screw Tornillo de 1 1/4” Shims Wall Pared Cuñas Level the flange Nivel el reborde Base sTeP 5 - FInIsHIng guIdelInes / ETAPA 5 - DIRECTRICES DE ACABADO Water resistant underlayment...
- Página 11 InsTAllATIon guIde INSTRUCCIONES DE INSTALACIÓN oPTIonAl TIle AdAPToR / ADAPTADOR PARA AZULEJOS OPCIONAL * drill and screw the tile adaptor. Tile adaptor: 10024636 Adaptador para azulejos: 10024636 * Taladrar y atornillar el adaptador para azulejos. Shims Wall Cuñas Pared Level the flange Wall Nivel el reborde Pared Base Silicone Silicona Top view Vista superior Dry wall Pared de Yeso...
- Página 12 InsTAllATIon guIde INSTRUCCIONES DE INSTALACIÓN TIPs on InsTAllIng dooRs / CONSEJOS PARA LA INSTALACIÓN DE LAS PUERTAS Before choosing a door measure the opening at the top Antes de elegir una puerta, mida la apertura en la parte and the bottom of the shower or tub shower opening. de arriba y en la parte de abajo del frente de la ducha. every shower door has an adjustment mechanism. use Cada puerta de ducha tiene un mecanismo de ajuste. the adjusting mechanism to fit the door against the shower Utilice el mecanismo de ajuste para asentar la puerta wall once the door is closed.
- Página 13 InsTAllATIon guIde INSTRUCCIONES DE INSTALACIÓN unit surface Care Cuidado y Limpieza de la Superficie de la Unidad WARnIng! ¡ADVERTENCIA! : neVeR use ABRAsIVe MATeRIAls oR ABRAsIVe NUNCA UTILIZAR MATERIALES NI LIMPIADORES CleAneRs on THe unIT suRFACe! ABRASIVOS EN LA SUPERFICIE DE LA UNIDAD. LEER Y RESPETAR TODAS LAS ETIQUETAS E INSTRUCCIO- NES INCLUIDAS CON EL EMBALAJE ReAd And FolloW All PACKAge lABels And InsTRuCTIons! Como resultado del uso normal, la superficie de la unidad puede acu-...
- Página 15 Certain types of therapeutic products when added to bath water, or if ap- Algunos tipo de productos terapéuticos, cuando añadidos al agua de la ba- plied non-diluted directly in the bath, may damage the unit finish. Test the ñera o cuando aplicados no diluidos directamente en el baño, pueden causar product on a small inconspicuous surface prior to use. manchas o una pérdida de lustre (brillo) de la unidad. Probar el producto en una superficie discreta pequeña antes de uso. The owner/end-user of the product covered by this warranty is entirely responsible for its proper installation and electrical wiring. Maax neither el propietario/usuario final del producto cubierto por la presente garantía se installs nor supervises the installation, nor hires a contractor for this hace totalmente responsable de la correcta instalación y cableado eléctrico purpose, and consequently cannot be held responsible for any defect, del mismo. Maax no efectúa ni supervisa la instalación, y tampoco contrata breakage or damage caused thereby or resulting thereof, either directly a nadie con ese fin; por lo tanto, no se le podrá considerar responsable de or indirectly. The owner/end-user must provide access to the components defecto, rotura o daño alguno causado directa o indirectamente por la insta- of the product as described in the installation guide, so that Maax can lación del producto o que resulten de la misma. Para que Maax pueda cumplir...
-
Página 16: Warranty & Service
In any case, Maax cannot be liable for any amount over and above the supere el precio de compra del producto abonado por el propietario/usuario purchase price paid for the product by the owner/end-user, contractor or final, contratista o constructor. builder. Restricciones Comerciales Commercial limitations Además de las condiciones y restricciones antes mencionadas, el período de In addition to the above conditions and limitations, the warranty period garantía de cualquier producto instalado para fines comerciales o utilizado for products installed for commercial applications or used in commercial en empresas comerciales será de un (1) año a partir de la fecha de compra ventures is of one (1) year from the initial date of purchase by the owner/ ori-ginal por parte del propietario/usuario final, contratista o constructor en un end-user, contractor or builder from an authorized dealer. Maax is not distribuidor autorizado. Maax no se hace responsable de la pérdida del uso o responsible for loss of use or profit under any circumstances. lucro cesante bajo ninguna circunstancia. If the product is used as a display, Maax standard warranty applies and the si el producto se utilizara para exhibición, se aplicará la garantía estándar warranty period begins when the product is placed on display. This war- de Maax y el período de garantía comenzará en el momento en el que el ranty gives the owner/end-user specific legal rights. The owner/end-user producto se coloque en exhibición. la presente garantía otorga derechos es- may also have other rights which vary from one state and/or province to pecíficos al propietario/usuario final del producto; éste podrá además gozar de another. otros derechos que pueden variar de un estado y/o provincia a otro. Warranty service servicio de garantía...