Publicidad
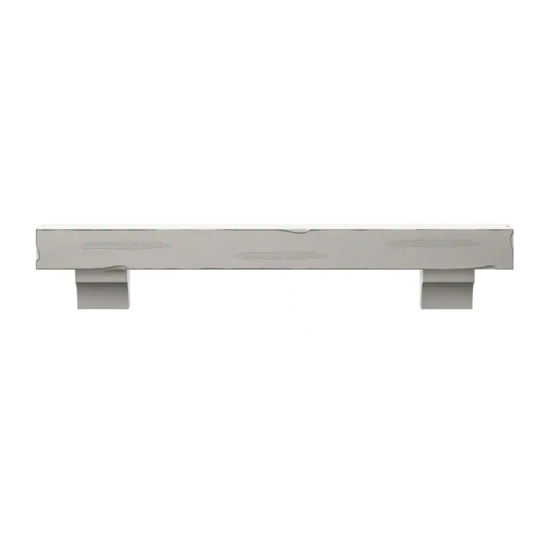
MS60-6210
Wood is considered a combustible material. Heat clearances must be
adhered to. If installing over a fireplace, check your local building codes
and the manufacturer's instructions for your specific fireplace insert or
stove.
La madera se considera un material combustible. Se debe observar la
brecha de disipación de calor. Si se instala en una chimenea, revise los
códigos de construcción locales y las instrucciones del fabricante para
específicos insertos o estufas de chimenea.
Le bois est réputé comme le matériau combustible. Les dégagements
thermiques doivent être observés. Si vous installez sur un foyer, vérifiez les
codes du bâtiment locaux et les instructions du fabricant sur votre insert
de cheminée ou votre poêle.
Publicidad
Tabla de contenido

Resumen de contenidos para Twin Star Home MS60-6210
- Página 1 MS60-6210 Wood is considered a combustible material. Heat clearances must be adhered to. If installing over a fireplace, check your local building codes and the manufacturer’s instructions for your specific fireplace insert or stove. La madera se considera un material combustible. Se debe observar la brecha de disipación de calor.
- Página 2 REGISTER YOUR NEW PURCHASE online! I NSCRIRE VOTRE NOUVEL ACHAT • REGISTRAR SU NUEVA COMPRA Thank you for purchasing our product. Please take a moment to visit tsicustomerservice.com to register your new purchase: Merci d’avoir acheté ce produit. Veuillez prendre un court instant pour vous rendre sur tsicustomerservice.com et enregistrer votre nouvel achat : Gracias por adquirir nuestro producto.
- Página 3 PRODUCT DETAILS AND NOTES DÉTAILS ET NOTES DU PRODUIT/DETALLES DEL PRODUCTO Y NOTAS Place of purchase/Lieu de l’achat/Lugar de compra: Date of purchase/Date de l’achat/Fecha de compra: Model #/No de modèle/Número de modelo: Notes/Remarque/Notas: MS60-6210REV1.0...
-
Página 4: Safety Information
SAFETY INFORMATION INFORMACIÓN DE INFORMATION DE SÉCURITÉ SEGURIDAD Please read and understand this Assurez-vous de lire et de comprendre Lea y comprenda completamente entire manual before attempting l’intégralité du présent manuel avant este manual antes de intentar to assemble, operate or install the de tenter d’assembler, d’utiliser ou ensamblar, usar o instalar el product. - Página 5 MS60-6210REV1.0...
- Página 6 MAXIMUM LOAD 27.3 kg /60 lb CHARGE MAXIMALE DE 27.3 kg /60 lb CARGA MÁXIMA 27.3 kg /60 lb MS60-6210REV1.0...
- Página 7 HARDWARE/QUINCAILLERIE/FERRETERÍA [x4] [x4] [x5] [x5] Ø6.3x28mm Ø19mm Ø4x38mm Bolt PH-WSRZNC001 PH-WLRZNC001 SCREW [x1] Allen wrench MS60-6210REV1.0...
- Página 8 TOOLS NOT INCLUDED / OUTILLAGE NON INCLUS / HERRAMIENTAS NO INCLUIDAS tools you will need outillage nécessaire herramientas que se necesitan Drill Bit: For wood: 6 mm / 1/4 in Phillips Screwdriver Foret: Tournevis à tête Phillips Pour bois : 6 mm / 1/4 po Destornillador de punta Phillips Broca: de 6 mm para madera o...
- Página 9 ATTENTION: Follow instructions in the order they are given below. This will ensure that your product is properly assembled. ATTENTION : Suivre les instructions dans l’ordre donné ci-dessous. Cela vous assurera d’assembler correctement le produit. ATENCIÓN: Siga las instrucciones en el orden que se indica a continuación. Esto asegurará que su producto se ensamble correctamente.
- Página 10 2. Using a stud finder, FIND the exact location of the studs to which you want to attach the unit. MARK the right and left side to determine the center of each stud. 2. À l’aide d’un détecteur de montant, TROUVER l’emplacement exact des montants sur lesquels doit être attaché.
- Página 11 51 mm 2 in 3.2 mm 2 po 1/8 in 1/8 po INSTALLING THE WALL BRACKET INTO A WOOD STUD: . DRILL 1/8 in pilot holes 2 in deep into the wood stud. INSTALLATION DU SUPPORT MURAL DANS UN POTEAU EN BOIS : .
- Página 12 [x5] INSTALLING THE WALL BRACKET INTO DRYWALL ONLY: 4. Drill 1/4” holes, insert the plastic wall anchor until flush, attache the bracket using the included screws shown. INSTALLATION DU SUPPORT MURAL DANS LA CLOISON SÈCHE SEULEMENT: 4. Percez les trous de 1/4 “, insérez l’ancrage mural de plastique jusqu’à affleurement, fixez le support avec les vis fournies. SÓLO INSTALE EL SOPORTE DE PARED SOLO EN LA PARED SECA: 4. Perfore orificios de 1/4 “, inserte el anclaje de pared de plástico hasta que quede al ras, fije el soporte usando los tornillos incluidos que se muestran. note: FOR ALL OTHER WALL TYPES, PLEASE VISIT YOUR LOCAL HARDWARE STORE TO OBTAIN THE PROPER HARDWARE.
- Página 13 [x5] MS60-6210REV1.0...
- Página 14 NOTE: WITH THE HELP OF AN ASSISTANT. NOTE: AVEC L’AIDE D’UNE AUTRE PERSONNE. NOTA: CON LA AYUDA DE UN ASISTENTE. MS60-6210REV1.0...
-
Página 15: Cuidado / Mantenimiento
CARE / SOIN / CUIDADO / MAINTENANCE ENTRETIEN MANTENIMIENTO Care and Maintenance Soin / Entretien Cuidado / Mantenimiento • Use a soft, clean cloth that will not • Lors de l’époussetage, utilisez • Use un paño suave y limpio que no scratch the surface when dusting. - Página 16 INSTALLED REPLACEMENT PARTS MS60-6210 PIÈCES DE REMPLACEMENT INSTALLÉES MS60-6210 PIEZAS DE REPUESTO INSTALADAS MS60-6210 [x4] PH-THRZNC001 MS60-6210REV1.0...
- Página 17 NOTES REMARQUES NOTAS MS60-6210REV1.0...
- Página 18 NOTES REMARQUES NOTAS MS60-6210REV1.0...
- Página 19 NOTES REMARQUES NOTAS MS60-6210REV1.0...
- Página 20 1-866-661-1218 1-866-661-1218 tsicustomerservice.com When registering your product, be When registering your product, be Lorsque vous enregistrez votre Lorsque vous enregistrez votre Cuando registre su producto, Cuando registre su producto, sure to sign up for our updates to sure to sign up for our updates to produit, assurez-vous de vous produit, assurez-vous de vous asegúrese de suscribirse para recibir...


