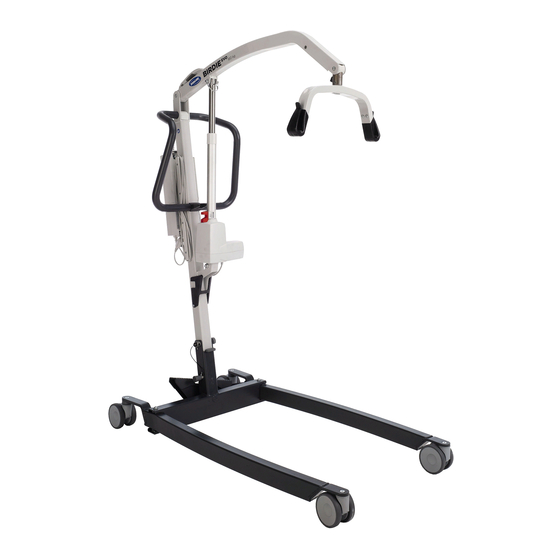
Invacare Birdie EVO Manual Del Usuario
Grua de elevacion
Ocultar thumbs
Ver también para Birdie EVO:
- Manual del usuario (200 páginas) ,
- Manual del usuario (36 páginas)
Publicidad
Idiomas disponibles
Idiomas disponibles
Enlaces rápidos
This manual MUST be given to the user of the product.
BEFORE using this product, this manual MUST be read and saved
for future reference.
Invacare® Birdie® EVO
Birdie® EVO, Birdie® EVO COMPACT, Birdie® EVO PLUS,
Birdie® EVO XPLUS
en Mobile Patient Lift
User Manual . . . . . . . . . . . . . . . . . . . . . . . . . . . . . . . . . . . 3
de Mobiler Patientenlifter
Gebrauchsanweisung . . . . . . . . . . . . . . . . . . . . . . . . . . . 35
es
Grúa de elevación
Manual del usuario. . . . . . . . . . . . . . . . . . . . . . . . . . . . . 71
fr
Lève-personne mobile
Manuel d'utilisation . . . . . . . . . . . . . . . . . . . . . . . . . . . .103
it
Sollevatore mobile
Manuale d'uso . . . . . . . . . . . . . . . . . . . . . . . . . . . . . . . . .137
nl
Mobiele patiëntenlift
Gebruiksaanwijzing . . . . . . . . . . . . . . . . . . . . . . . . . . . . .169
pt
Elevador de transferência móvel
Manual de utilização . . . . . . . . . . . . . . . . . . . . . . . . . . .201
Publicidad
Capítulos
Solución de problemas

Manuales relacionados para Invacare Birdie EVO


Resumen de contenidos para Invacare Birdie EVO
-
Página 1: Tabla De Contenido
Invacare® Birdie® EVO Birdie® EVO, Birdie® EVO COMPACT, Birdie® EVO PLUS, Birdie® EVO XPLUS en Mobile Patient Lift User Manual ........3 de Mobiler Patientenlifter Gebrauchsanweisung . - Página 2 Tutti i diritti riservati. È proibita la riproduzione, la duplicazione o la modifica parziale o completa, salvo previa autorizzazione scritta da parte di Invacare. I marchi sono contrassegnati da ™ e ®. Tutti i marchi sono di proprietà o licenza di Invacare Corporation o di sue affiliate, salvo indicazione contraria.
- Página 34 Notes...
- Página 70 Notes...
-
Página 71: Manual Del Usuario
Contenido 6.8 Elevación de un paciente que está en el suelo ..92 7 Transporte y almacenamiento ......93 Este manual DEBE ser entregado al usuario final. -
Página 72: Generalidades
1.3 Limitación de responsabilidad modelos del producto. Invacare no se hace responsable de los daños surgidos por: Los modelos y las configuraciones disponibles en su país pueden encontrarse en los documentos de venta específicos •... -
Página 73: Seguridad
– Si la grúa se utiliza en un entorno húmedo, profesional sanitario, el proveedor de Invacare o asegúrese de eliminar cualquier resto de un técnico cualificado antes de intentar utilizar humedad tras utilizarla. -
Página 74: Puntos De Pinzamiento
Compatibilidad de las eslingas con el sistema de suciedad puede dañar el producto. fijación – Mantenga limpio el producto. Invacare utiliza un sistema de fijación de uso frecuente que emplea ganchos y anillas. Las anillas de las eslingas se conectan a los ganchos 2.1.1 Puntos de pinzamiento de las perchas (tipo perchero). -
Página 75: Etiquetas Y Símbolos En El Producto
(solo mástil fijo) No utilice el pistón como una barra de 2.4.2 Etiqueta de identificación empuje Invacare Portugal, Lda Rua Estrada V elha 949 ISO 10535 4465- 7 84 Leça do Balio, Port ugal No lo retire... - Página 76 Invacare® Birdie® EVO Condiciones de transporte y almacenamiento Condiciones de funcionamiento 1650023-D...
-
Página 77: Descripción Del Producto
Dadas las diferencias regionales existentes, consulte Todos los cambios de posición son posibles sin la ayuda del su catálogo o sitio web de Invacare local para paciente. informarse sobre los accesorios disponibles o póngase No existen contraindicaciones conocidas para este producto. -
Página 78: Instalación
4.3.1 Desplegado del mástil de elevación. (solo mástiles plegables) Si tiene algún problema o duda durante el montaje, póngase en contacto con el proveedor de Invacare. ¡ADVERTENCIA! – El mástil puede plegarse para guardarlo o transportarlo. Siempre que se vaya a plegar el 4.2 Contenido de la entrega... -
Página 79: Montaje Del Mástil En La Base
Instalación 1. Bloquee las dos ruedas traseras B. Quite el pasador de bloqueo A. 2. Levante el conjunto del mástil C hasta dejarlo en posición vertical pisando con un pie la pata D y tirando de la barra de empuje E hacia arriba hasta que el tope de seguridad F encaje en su sitio. -
Página 80: Instalación Del Pistón En El Brazo
(solo en la unidad de control CBJ Care) IMPORTANTE Si la luz de servicio parpadea en color amarillo durante el uso diario o después de una operación de montaje, es necesario reparar la grúa. – Póngase en contacto con el proveedor de Invacare para obtener asistencia. 1650023-D... - Página 81 Instalación Cuando se monta por primera vez la grúa, el indicador de 1. Localice el mando. servicio parpadea en amarillo y debe restablecerse antes de 2. Mantenga pulsados al mismo tiempo los botones ARRIBA poder utilizar la grúa. y ABAJO durante cinco segundos. 3.
-
Página 82: Utilización
La grúa podría volcar y poner en peligro al mantenga pulsado el botón paciente y a los cuidadores. de patas cerradas A. – Invacare recomienda que las ruedas traseras 2. Para abrir las patas, permanezcan desbloqueadas durante los mantenga pulsado el botón procedimientos de elevación para que la grúa... -
Página 83: Funciones De Emergencia
Utilización ¡ADVERTENCIA! Riesgo de lesiones – Utilice únicamente las perchas diseñadas para esta grúa. – Asegúrese de que la percha es adecuada para el paciente y la grúa o el traslado que se va a realizar. – Compruebe que la percha está bien fijada al conector del brazo y que no puede extraerse 1. -
Página 84: Carga De La Batería
Invacare® Birdie® EVO 5.7 Carga de la batería ¡ADVERTENCIA! Riesgo de daños o lesiones IMPORTANTE Si se utiliza repetidamente la bajada de – Asegúrese de que la parada de emergencia no emergencia mecánica, se produce un aumento de esté activada durante la carga de la batería. -
Página 85: Indicador De La Batería
Utilización posible bajar al paciente. Se recomienda cargar las baterías Tipo de Estado Descripción en cuanto se escuche la señal acústica. indicador de de la la batería batería 1. Enchufe el cable de alimentación A en una toma eléctrica. Carga La batería debe cargarse (25 %). - Página 86 Invacare® Birdie® EVO 1. Levante el asidero A situado en la parte posterior de 1. Coloque la batería B la batería B. en la unidad de control 2. Levante la batería para sacarla de la unidad de control o el cargador como se o del cargador.
-
Página 87: Traslado De Pacientes
– Evite utilizar la grúa en superficies inclinadas. describen a continuación pueden realizarse con Invacare recomienda utilizar el producto un (1) único asistente. Sin embargo, Invacare únicamente en superficies planas. recomienda que, siempre que sea posible, estos – Durante el traslado, mientras el paciente esté... -
Página 88: Acoplamiento De La Eslinga A La Grúa
1. Coloque la anilla deseada de la correa A sobre el – Utilice una eslinga Invacare aprobada que saliente del gancho B. cuente con la recomendación del médico, 2. -
Página 89: Traslado De Un Paciente A La Cama
Traslado de pacientes Baje la cama lo máximo posible. Con ayuda de las asas de la eslinga, gire al paciente hasta que quede de frente al auxiliar que maneja la grúa de elevación. Levante al paciente lo suficiente como para que quede Baje al paciente de forma que sus pies descansen sobre separado de la superficie de descanso y que la grúa la base de la grúa, con una pierna a cada lado del mástil. -
Página 90: Traslado De Un Paciente Desde Una Silla De Ruedas
Invacare® Birdie® EVO Baje al paciente hasta que quede sobre la superficie fija. 4. Asegúrese de que la superficie a la que va a trasladar el Levante el brazo hasta que haya tensión en las correas paciente soporta totalmente su peso. -
Página 91: Traslado De Un Paciente Al Inodoro
6.7 Traslado de un paciente al inodoro La grúa de elevación de Invacare NO ha sido diseñada como dispositivo de transporte. Si el cuarto de baño Baje al paciente hasta el inodoro y deje la eslinga fijada NO se encuentra próximo a la cama o si la grúa no... -
Página 92: Elevación De Un Paciente Que Está En El Suelo
Invacare® Birdie® EVO 6.8 Elevación de un paciente que está en el suelo ¡ADVERTENCIA! Riesgo de lesiones La grúa puede lesionar a un paciente que esté en el suelo o a un auxiliar que esté haciendo algo en el suelo. -
Página 93: Transporte Y Almacenamiento
4.3.1 Desplegado del mástil, página 78 y, antes de plegar el mástil, tire del pestillo de seguridad F y manténgalo La grúa plegada podrá colocarse ahora en posición en esa posición. vertical. 7.4 Extensión del mástil para colocar la grúa en posición vertical (solo Birdie EVO) 1650023-D... -
Página 94: Mantenimiento
– Asegúrese de que no salpique agua en el ser realizados por un técnico cualificado. Invacare puede enchufe o la toma de pared. facilitarle los manuales de servicio. – No toque la toma de corriente con las manos mojadas. -
Página 95: Instrucciones De Limpieza
Consulte las instrucciones de lavado en la eslinga y en su – Póngase en contacto con el proveedor de manual para obtener información sobre cómo limpiarla. Invacare para obtener asistencia. 8.3.4 Instrucciones de desinfección A menos que las normativas locales establezcan lo contrario, las tareas de mantenimiento deben realizarse como mínimo... -
Página 96: Después Del Uso
Invacare® Birdie® EVO Proteja el medio ambiente y recicle este producto a través 9 Después del uso de la planta de reciclaje más próxima cuando llegue al final de su vida útil. 9.1 Eliminación Desmonte el producto y sus componentes para separar y reciclar individualmente los diferentes materiales. -
Página 97: Solución De Problemas
La unidad de control emite un pitido La carga máxima es excesiva. Reduzca la carga (y la grúa funcionará durante la elevación y el motor se para. con normalidad). Póngase en contacto con el proveedor de Invacare si las instrucciones descritas no solucionan el problema. 1650023-D... -
Página 98: Datos Técnicos
Invacare® Birdie® EVO 11 Datos Técnicos 11.1 Carga máxima de utilización segura Birdie® EVO Birdie® EVO Birdie® EVO Birdie® EVO COMPACT PLUS XPLUS Carga máxima de utilización segura (paciente + percha + eslinga) 180 kg 150 kg 180 kg 210 kg 11.2 Dimensiones y pesos... -
Página 99: Sistema Eléctrico
Datos Técnicos Dimensiones [mm] Birdie® EVO Birdie® EVO Birdie® EVO COMPACT PLUS / XPLUS Anchura total (con las patas abiertas) medida desde el interior 1040 1020 1020 Anchura total (con las patas cerradas) medida desde el exterior Anchura interna mín. (i) Anchura interna con máximo alcance (k) 1400 1400... -
Página 100: Condiciones Ambientales
Invacare® Birdie® EVO Birdie® EVO Birdie® EVO Birdie® EVO COMPACT PLUS / XPLUS Clase de aislamiento Equipo de clase II Pieza aplicada que cumple los requisitos especificados para la Pieza aplicada de tipo B protección contra descargas eléctricas según IEC60601-1. -
Página 101: Compatibilidad Electromagnética (Emc)
Compatibilidad electromagnética (EMC) 12 Compatibilidad electromagnética (EMC) 12.1 Información general sobre EMC Los equipos eléctricos médicos deben instalarse y utilizarse de acuerdo con la información sobre EMC de este manual. Este equipo se ha probado y cumple con los límites de EMC establecidos por IEC/EN 60601-1-2 para equipos de Clase B. Los equipos de comunicaciones por radiofrecuencia portátiles y móviles pueden afectar al funcionamiento de este producto. - Página 102 Invacare® Birdie® EVO Prueba de Nivel de Entorno electromagnético: guía inmunidad prueba/cumplimiento < 0 % U durante 0,5 Caídas de tensión, La calidad de la red de suministro eléctrico debería ser la habitual de un ciclo en pasos de 45°...
- Página 136 Notes...
- Página 234 Notes...
- Página 235 Notes...
- Página 236 Notes...
- Página 237 Notes...