Tabla de contenido
Publicidad
Idiomas disponibles
Idiomas disponibles
Enlaces rápidos
MANUAL DE INSTRUCCIONES
INSTRUCTION MANUAL
UFCOMBI185BL-18 / UFCOMBI185INOX-18
Frigorifico Combi No Frost 185 cm / Frigorifico Combi No Frost
185 cm inox
Total No frost fridge 185 cm / Total No frost fridge 185 cm inox
www.universalblue.es
P.I. Media Legua C/Decenio,1 30565
Las Torres de Cotillas (Murcia)
Publicidad
Tabla de contenido

Manuales relacionados para universalblue UFCOMBI185BL-18


Resumen de contenidos para universalblue UFCOMBI185BL-18
- Página 1 MANUAL DE INSTRUCCIONES INSTRUCTION MANUAL UFCOMBI185BL-18 / UFCOMBI185INOX-18 Frigorifico Combi No Frost 185 cm / Frigorifico Combi No Frost 185 cm inox Total No frost fridge 185 cm / Total No frost fridge 185 cm inox www.universalblue.es P.I. Media Legua C/Decenio,1 30565...
-
Página 2: Tabla De Contenido
Frigorifico Combi No Frost 185 cm / Frigorifico Combi No Frost 185 cm inox Total No frost fridge 185 cm / Total No frost fridge 185 cm inox ÍNDICE ESPAÑOL INSTRUCCIONES DE SEGURIDAD ................3 PARTES DEL PRODUCTO Y CARACTERISTICAS ............5 EMBALAJE Y MOVIMIENTO .................. -
Página 3: Español
ESPAÑOL Felicidades por haber adquirido este producto. Le recomendamos que dedique algún tiempo a leer cuidadosamente este Manual de Instrucciones / Instalación con el fin de hacer un buen uso del mismo. Lea cuidadosamente todas las instrucciones de seguridad antes de utilizar el aparato y conserve este Manual de Instrucciones / Instalación para poder consultarlo en el futuro. -
Página 4: Cable De Alimentación Y Otros Cables
CABLE DE ALIMENTACIÓN Y OTROS CABLES Los circuitos del refrigerador deben estar aislados. El área de la sección transversal del cable debe ser mayor que 0,75 mm. El enchufe de alimentación debe tener su propio enchufe y debe estar conectado a tierra. Desconecte su aparato siempre que no lo vaya a utilizar. -
Página 5: Partes Del Producto Y Caracteristicas
• No coloque bebidas embotelladas en el congelador para evitar que se rompan. • No coloque objetos en la parte superior del aparato. • El refrigerante de este producto es R600a, que es inflamable. Por lo tanto, asegúrese de no dañar el sistema de refrigeración durante el transporte y la instalación. -
Página 6: Embalaje Y Movimiento
UFCOMBI185BL-18 Capacidad total 320 litros Capacidad del congelador: 92 litros Total No frost Control electrónico tanto en el congelador como en el frigorifico Clase energética A+ Peso : 75 kg /72 Kg Luz LED encendido Dimensiones (A x A x F): 1852 x 590 x 660 mm Color: Blanco Consumo Kw/24horas: 0.79... -
Página 7: Instalación
podrían afectar al funcionamiento del mismo. Nunca coloque el aparato en horizontal o al revés, colóquelo sobre su base y muévalo al lugar deseado gracias a sus ruedas. 4. INSTALACIÓN • El refrigerador debe ubicarse en una superficie completamente plana, dejar entre 5 y 10 cm entre cada lado del aparato, 7’5 cm de la parte trasera y la pared, y dejar 10 cm entre la parte superior del aparato y el techo. - Página 8 Partes que necesitará: Cubierta de la Tapón Freno izquierdo de bisagra superior izquierdo de la la puerta izquierda puerta Nota: antes de comenzar apoye el refrigerador sobre la parte trasera del mismo para tener un mejor acceso a la base. Debe poner algo esponjoso en la parte trasera para evitar daños.
- Página 9 4. Retire la Puerta y coloquela en una superficie lisa y esponjosa con el panel hacia arriba. Suelte los tornillos (3), separe las partes (2) y (1). 5. Suelte los tornillos de la bisagra y quítela. Entonces puede quitar la Puerta inferior. 6.
- Página 10 7. Cambie la cubierta de los tornillos del lado izquierdo al derecho (como se muestra en la imagen). 8. Coloque el refrigerador en una superficie recta y lisa, quite la parte (2) y afloje los tornillos (4). Quite la parte (1) y (3). 9.
- Página 11 Volviendo al paso 9, cambie la parte (1) y (2) a la izquierda y fíjela con los tornillos (4). Cambie la parte (3) hacia la derecho e instálela. Coloque la Puerta inferior y ajúste la posición para alinearla con los huecos inferior y superior.
- Página 12 y entonces insale la parte (1), posteriormente fije la parte (2) con los tornillos (4). Finalmente, monte la parte (5). (Por favor sujete la Puerta superior con la mano para que no se caiga mientras se instala). Coloque el conector eléctrico (1) de acuerdo el paso 1. Gire la parte (1) 180º...
-
Página 13: Display
5. DISPLAY Antes de comenzar a utilizar este aparato y con el objetivo de sacar el mayor partido, rogamos lea las instrucciones sobre el display. Cuando encienda el aparato por primera vez, la luz de los iconos del panel empezará a funcionar. Si no ha presionado ningún botón y las puertas están cerradas, las luces se apagarán. -
Página 14: Super Freeze O Super Congelación
• Congelador Presione “Freezer” para seleccionar la temperatura entre -16ºC y - 24ºC según lo desee y el panel de control indicará lo marcado según lo seleccione. MODO Presione durante 3 segundos para establecer al función ‘super freeze’ o super congelación o bien la función ‘holiday’ para el frigorífico. •... -
Página 15: Alarma De La Puerta
ALARMA DE LA PUERTA Cuando la puerta de la nevera o el congelador esté abierta durante más de 2 minutos, la alarma emitirá un sonido. En este caso, la alarma sonará 1 vez cada 1 minuto y dejará de sonar automáticamente después de 10 minutos. La alarma también dejará de sonar cuando la puerta se cierre. -
Página 16: Limpieza Y Mantenimiento
7. LIMPIEZA Y MANTENIMIENTO El aparato debe mantenerse y limpiarse con frecuencia. Para su seguridad, saque el enchufe de la toma de corriente antes de la limpieza. Para limpiar interiormente el aparato, considere las siguientes notas: • Limpie el interior del aparato con agua limpia o con un limpiador neutro. Seque a continuación con un paño seco. - Página 17 Problema Solución Certifíquese de que el aparato está correctamente El aparato no funciona enchufado, de que el fusible no está quemado o de que no se ha producido un fallo en el suministro eléctrico. El regulador de temperatura podrá estar colocado en la aparato enfría posición máxima.
-
Página 18: Informacion Inherente Al Medioambiente
• Para hacer uso de la garantía acuda al centro donde compró este producto o bien contacte con nosotros de cualquiera de las siguientes formas: A través del email sat@universalblue.es, adjuntando la factura de compra e indicando sus datos de contacto y brevemente qué... - Página 19 Puedes descargar este manual en nuestra página web: www.universalblue.es...
-
Página 20: English
ENGLISH Congratulations on the purchase of your product. We recommend you to spend some time to read this Instruction Manual in order to fully understand how to use it correctly. Read all the safety instructions carefully before use and keep this Instruction / Installation Manual for future reference. -
Página 21: Humidity And Water
Do not twist or pull the cable to unplug the appliance or use it to wrap. Keep the cable away from hot surfaces. Never use this appliance if the cable or plug is damaged, or does not work properly. In the event that the power cable is damaged do not use your device, take it to an authorized service center to proceed to their replacement. -
Página 22: Product Parts & Features
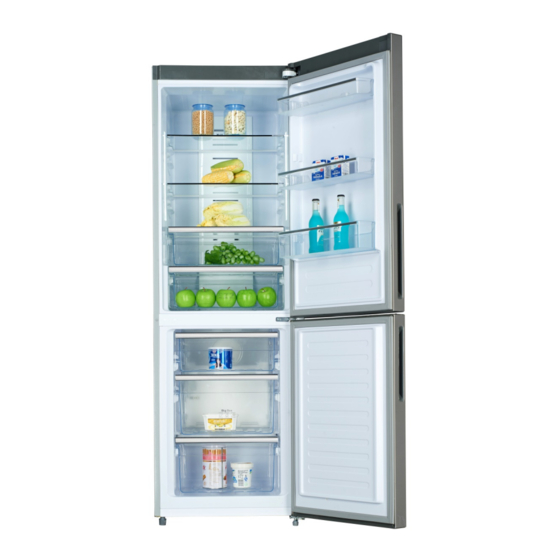
13. Upper rack 14. Lower rack 15. Door fridge 16. Gasket (freezer) 17. Freezer door 18. Front leg (Right) UFCOMBI185BL-18 Total capacity 320 litres Freezer capacity: 92 litres Total No frost Electronic control (refrigerator and freezer ) Energy class A+... -
Página 23: Packing And Moving
UFCOMBI185INOX-18 Total capacity 320 litres Freezer capacity: 92 litres Total No frost Electronic control (refrigerator and freezer ) Energy class A+ Weight : 75 kg /72 Kg Led light Product dimensions (H x W x D): 1852 x 590 x 660 mm Colour: Inox Energy consumption Kw/24hoours: 0.79 2 refrigerator’s drawers and 3 freezers’drawers included... -
Página 24: Reversible Doors
REVERSIBLE DOORS The side to which the refrigerator door opens can be altered on the right side to the left, if the place of installation so requires. WARNING: In case of changing the door, make sure that the appliance is completely turned off and disconnected from the power supply. - Página 25 3. Remove 1 and 2 parts and keep them on the plastic bag. 4. Remove the Door and place it on a smooth, fluffy surface with the panel facing up. Loosen the screws (3), separate the parts (2) and (1). 5.
- Página 26 6. Place the Bottom Door on a smooth, fluffy surface with the panel facing up. Loosen the screws (3) and separate the parts (2) and (1). Turn the part (1) 180º and then install the parts (1) and (2) in the left position with the screws. 7.
- Página 27 Going back to step 9, change the part (1) and (2) to the left and fix it with the screws (4). Change the part (3) to the right and install it. Place the lower door and adjust the position to align it with the lower and upper holes.
- Página 28 Move the Upper Door to a suitable position and adjust the part (2) with the Door. Move the connecting cable (3) to the groove of the upper hinge (left), and then insert the part (1), then fix the part (2) with the screws (4). Finally, mount the part (5).
-
Página 29: Display
DISPLAY Before starting to use this device and for the best performance, please read the instructions regarding the display. When you turn on the device for the first time, the light of the panel icons will start to work. If you have not pressed any buttons and the doors are closed, the lights will turn off. -
Página 30: Super Freeze Mode
• Freezer side Press “Freezer” to set the temperature from -16º to -24º C. The control panel will show the temperature selected. MODES Press during 3 seconds to select ‘super freeze’ or ‘holiday’ fucntions. • SUPER FREEZE MODE With this function the freezer’s temperature will be reduced quickly. As a result the food freezes quickly without losing the vitamins and nutrients. -
Página 31: Using Your Appliance
ALARM DOOR When the refrigerator or freezer door is open for more than 2 minutes, the alarm will sound. In this case, the alarm will sound once every 1 minute and stop automatically after 10 minutes. The alarm will also stop sounding when the door closes. To save energy, avoid holding the door open for a long time when using the appliance. -
Página 32: After Sales Service
LED light cannot be replaced by final user. If the light is damaged or does not switch on, please contact the supplier. Electronic components, such as the on / off button, should be cleaned dry. Do not use cleaning products such as washing powder, cleaning poder abrasive, alkaline cleaning products, chemical cloths, thinners, alcohol, petroleum products and hot water to clean the refrigerator, as they can damage the painted cover and plastics. - Página 33 • To make use of the guarantee go to the store where you purchased this product or contact us by: • By email, sat@universalblue.es. Please, attach the invoice, add your contact details and explain briefly what the issue is.
-
Página 34: Environmental Information
The packaging materials are recyclable product. These materials can be deposited in a public collection point for recycling. Dowload this manual in our web site: www.universalblue.es... - Página 35 www.universalblue.es...