Tabla de contenido
Publicidad
Idiomas disponibles
Idiomas disponibles
Enlaces rápidos
Publicidad
Tabla de contenido

Manuales relacionados para Oster OS-WDA633


Resumen de contenidos para Oster OS-WDA633
- Página 1 MODELO / MODEL OGMAF2903 OS-WDA633 Manual de Instrucciones HORNO MICROONDAS LEA TODOS LAS INSTRUCCIONES ANTES DE USAR ESTE APARATO Instruction Manual MICROWAVE OVEN PLEASE READ ALL INSTRUCTIONS BEFORE USING THIS APPLIANCE...
-
Página 2: Tabla De Contenido
ÍNDICE PRECAUCIONES PARA EVITAR UNA POSIBLE EXPOSICIÓN A UN EXCESO DE ENERGÍA DE MICROONDAS..................P2 INSTRUCCIONES IMPORTANTES DE SEGURIDAD..........P3 INSTRUCCIONES DE CONEXIÓN A TIERRA............P4 INTERFERENCIAS DE RADIO................... P5 UTENSILIOS....................... P6 INSTALACIÓN DE SU HORNO...................P8 INSTALACIÓN EN LA ENCIMERA................P9 FUNCIONAMIENTO....................P10 MANTENIMIENTO.................... -
Página 3: Energía De Microondas
PRECAUCIONES PARA EVITAR UNA POSIBLE EXPOSICIÓN A UN EXCESO DE ENERGÍA DE MICROONDAS Lea atentamente estas instrucciones antes de utilizar su horno microondas y guárdelas cuidadosamente. Si sigue las instrucciones, su horno le proporcionará muchos años de buen servicio. (a) No intente utilizar este horno con la puerta abierta, ya que la operación puede resultar en una exposición dañina a la energía de microondas. -
Página 4: Instrucciones Importantes De Seguridad
INSTRUCCIONES IMPORTANTES DE SEGURIDAD Cuando se utilicen aparatos eléctricos deben seguirse las precauciones básicas de seguridad, entre ellas las siguientes: Cuando se utilicen aparatos eléctricos deben seguirse las precauciones básicas de seguridad, entre ellas las siguientes: ADVERTENCIA - Para reducir el riesgo de quemaduras, descargas eléctricas, incendios, ADVERTENCIA - Para reducir el riesgo de quemaduras, descargas eléctricas, incendios, lesiones a personas o exposición a un exceso de energía de microondas: lesiones a personas o exposición a un exceso de energía de microondas:... -
Página 5: Instrucciones De Conexión A Tierra
2). Retire las bridas de alambre de la bolsa de papel o plástico antes de colocar la bolsa en 2). Retire las bridas de alambre de la bolsa de papel o plástico antes de colocar la bolsa en el horno. 3). Si el material dentro del horno se enciende, mantenga la puerta del horno el horno. -
Página 6: Interferencias De Radio
instrucciones de conexión a tierra, o si tiene dudas sobre si el aparato está correctamente conectado a tierra. Si es necesario utilizar un cable alargador, utilice únicamente un cable instrucciones de conexión a tierra, o si tiene dudas sobre si el aparato está correctamente alargador de 3 hilos que tenga un enchufe de 3 clavijas con toma de tierra, y de 3 hojas conectado a tierra. -
Página 7: Utensilios
UTENSILIOS PRECAUCIÓN - Peligro de lesiones personales Los utensilios bien cerrados podrían explotar. Los recipientes cerrados deben abrirse y las bolsas de plástico deben perforarse antes de cocinar. Consulte las instrucciones sobre "Materiales que puede utilizar en el horno de microondas o que debe evitar en el horno de microondas". -
Página 8: Materiales Que Deben Evitarse En El Horno De Microondas
Materiales que deben evitarse en el horno de microondas Utensilios Comentarios Bandeja de aluminio Puede producirse un arco eléctrico. Transfiera los alimentos a un plato apto para microondas. Puede producirse un arco eléctrico. Transfiera los alimentos a un plato Caja de cartón para apto para microondas. -
Página 9: Instalación De Su Horno
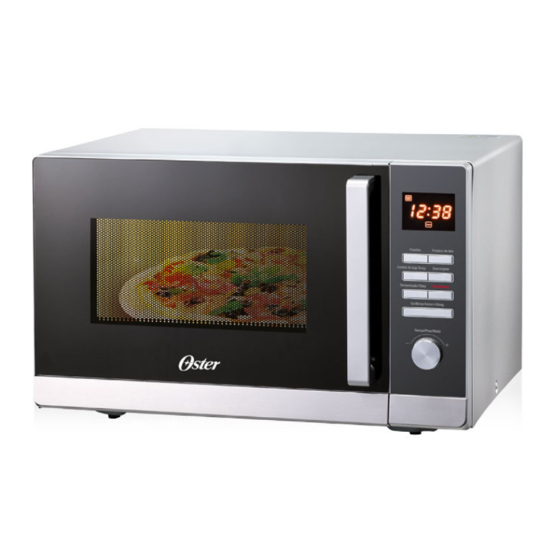
INSTALACIÓN DE SU HORNO Nombres de las piezas y accesorios del horno Saque el horno y todos los materiales de la caja de cartón y de la cavidad del horno. Su horno viene con los siguientes accesorios: Bandeja de vidrio Conjunto de anillo giratorio Manual de instrucciones A) Panel de control... -
Página 10: Instalación En La Encimera
INSTALACIÓN EN LA ENCIMERA Retire todo el material de embalaje y los accesorios. Examine el horno para ver si tiene algún daño, como abolladuras o una puerta rota. No instale el horno si está dañado. Gabinete: Retire cualquier película protectora que se encuentre en la superficie del gabinete del horno de microondas. -
Página 11: Funcionamiento
FUNCIONAMIENTO Este horno microondas utiliza un moderno control electrónico para ajustar los parámetros de cocción y así satisfacer mejor sus necesidades para cocinar. Este horno microondas utiliza un moderno control electrónico para ajustar los parámetros de cocción y así satisfacer mejor sus necesidades para cocinar. 1. - Página 12 3) Pulse repetidamente " Función " o gire " " hacia la derecha para seleccionar la poten- 3) Pulse repetidamente " Función " o gire " " hacia la derecha para seleccionar la poten- cia del microondas del 100% al 10%. Aparecerán en orden "PL10", "PL9", "PL8", "PL7", cia del microondas del 100% al 10%.
- Página 13 Nota: Instrucciones de combinación Función Pantalla Microonda Parrilla Convección Combi.1 Combi.2 Combi.3 6. Cocina por convección (con función de precalentamiento) 6. Cocina por convección (con función de precalentamiento) 6. Cocina por convección (con función de precalentamiento) La cocción por convección permite cocinar los alimentos como en un horno tradicional. No La cocción por convección permite cocinar los alimentos como en un horno tradicional.
- Página 14 Nota: El temporizador de cocina, la desodorización, el menú automático y el Nota: El temporizador de cocina, la desodorización, el menú automático y el precalentamiento no pueden ajustarse como una de las etapas múltiples. Nota: El temporizador de cocina, la desodorización, el menú automático y el precalentamiento no pueden ajustarse como una de las etapas múltiples.
- Página 15 05- 95:00. 00:05- 95:00. Pulse la tecla " Confirm/Start/+30sec. " para iniciar la descongelación. 3) Pulse la tecla " Confirm/Start/+30sec. " para iniciar la descongelación. Nota: Si pasa el 40% del tiempo de descongelación, el zumbador suena dos veces, y esto ta: Si pasa el 40% del tiempo de descongelación, el zumbador suena dos veces, y esto Nota: Si pasa el 40% del tiempo de descongelación, el zumbador suena dos veces, y esto es normal.
- Página 16 4.00 Oz 4.00 Oz VEGETALES 8.00 Oz 8.00 Oz PL10 FRESCOS 16.00 Oz 16.00 Oz 4.00 Oz 4.00 Oz 8.00 Oz 8.00 Oz VEGETALES PL10 CONGELADOS 16.00 Oz 16.00 Oz 4.00 Oz 4.00 Oz 8.00 Oz 8.00 Oz 12.00 Oz 12.00 Oz PESCADO 16.00 Oz...
-
Página 17: Grill Crujiente
12. Freír en casa 1) Pulse la tecla "Freidora de Aire" una vez, "H1" parpadeará. 2) Gire " " para elegir el menú de H1 a H9. Aparecerá "H1", "H2", "H3"... "H9". 3) Pulse "Confirmar/lnicio/+30seg." para iniciar la cocción. Nota: En el menú H2-H9, cuando pasan 2/3 del tiempo, el zumbador suena dos veces para recordar al usuario que debe dar la vuelta a los alimentos. -
Página 18: Desodorización
mostrará "L1". 2) Pulse repetidamente el "Low Temp.Control" o gire "L1", "L2", "L3", "L4" o "L5" parpadearán. Nombre de Receta Porciones Tiempo (min) Función Accesorio/Recipiente 3) Pulse "Confirm/Start/+30sec. " para confirmar. Rejilla baja / Rojo Inglés 30-35 6 porciones Convección 400°F Lomo de Res asados sartén de freír al aire Medio 40-45... - Página 19 El zumbador suena una vez por pulsación eficiente, la pulsación ineficiente no tendrá mostrará "L1". puesta. 2) Pulse repetidamente el "Low Temp.Control" o gire 13. Grill crujiente Pulse "Stop/Clear" para salir del ajuste y volver al estado de espera. "L1", "L2", "L3", "L4" o "L5" parpadearán. 1) Gire "...
- Página 20 mostrará "L1". 2) Pulse repetidamente el "Control de baja Temp." o gire 2) Pulse repetidamente el "Low Temp.Control" o gire "L1", "L2", "L3", "L4" o "L5" parpadearán. "L1", "L2", "L3", "L4" o "L5" parpadearán. 3) Pulse "Confirmar/Inicio/+30seg. " para confirmar. 3) Pulse "Confirm/Start/+30sec.
- Página 21 4) El zumbador suena una vez por pulsación eficiente, la pulsación ineficiente no tendrá respuesta. 17. Especificaciones 5) Pulse "Stop/Clear" para salir del ajuste y volver al estado de espera. 1) El zumbador sonará una vez al girar el mando al principio; 6) El zumbador sonará...
-
Página 22: Mantenimiento
MANTENIMIENTO Solución de problemas Compruebe su problema utilizando la tabla siguiente y pruebe las soluciones para cada problema. Si el horno microondas sigue sin funcionar correctamente, póngase en contacto con el centro de servicio autorizado más cercano. PROBLEMA POSIBLE CAUSA POSIBLE REMEDIO a. - Página 23 INDEX PRECAUTIONS TO AVOID POSSIBLE EXPOSURE TO EXCESSIVE MICROWAVE ENERGY........................P2 IMPORTANT SAFETY INSTRUCTIONS..............P3 GROUNDING INSTRUCTIONS.................. P4 RADIO INTERFERENCE.................... P5 UTENSILS........................P6 SETTING UP YOUR OVEN..................P8 COUNTERTOP INSTALLATION.................P9 OPERATION......................P10 MAINTENANCE......................P19...
-
Página 24: Precautions To Avoid Possible Exposure To Excessive Microwave
PRECAUTIONS TO AVOID POSSIBLE EXPOSURE TO EXCESSIVE MICROWAVE ENERGY Read these instructions carefully before using your microwave oven, and keep it carefully. If you follow the instructions, your oven will provide you with many years of good service. (a) Do not attempt to operate this oven with the door open since operation can result in harmful exposure to microwave energy. -
Página 25: Important Safety Instructions
IMPORTANT SAFETY INSTRUCTIONS When using electrical appliances basic safety precautions should be followed, including When using electrical appliances basic safety precautions should be followed, including the following: the following: WARNING - To reduce the risk of burns, electric shock, fire, injury to persons or exposure WARNING - To reduce the risk of burns, electric shock, fire, injury to persons or exposure to excessive microwave energy: to excessive microwave energy:... -
Página 26: Grounding Instructions
THIS COULD RESULT IN VERY HOT LIQUID SUDDENLY BOILING OVER WHEN THE THIS COULD RESULT IN VERY HOT LIQUID SUDDENLY BOILING OVER WHEN THE CONTAINER IS DISTURBED OR A UTENSIL IS INSERTED INTO THE LIQUID. CONTAINER IS DISTURBED OR A UTENSIL IS INSERTED INTO THE LIQUID. To reduce the risk of injury to persons: To reduce the risk of injury to persons: 1) Do not overheat the liquid. -
Página 27: Radio Interference
appliance is properly installed and grounded. 1. A short power-supply cord is provided to reduce the risks resulting from becoming 1. A short power-supply cord is provided to reduce the risks resulting from becoming entangled in or tripping over a longer cord. entangled in or tripping over a longer cord. -
Página 28: Utensils
UTENSILS CAUTION - Personal Injury Hazard Tightly-closed utensils could explode. Closed containers should be opened and plastic pouches should be pierced before cooking. See the instructions on "Materials you can use in microwave oven or to be avoided in microwave oven." There may be certain non-metallic utensils that are not safe to use for microwaving. -
Página 29: Materials To Be Avoided In Microwave Oven
Materials to be avoided in microwave oven Utensils Remarks Aluminum tray May cause arcing. Transfer food into microwave-safe dish. Food carton with May cause arcing. Transfer food into microwave-safe dish. metal handle Metal or metal- trimmed Metal shields the food from microwave energy. Metal trim may cause utensils arcing. -
Página 30: Setting Up Your Oven
SETTING UP YOUR OVEN Names of Oven Parts and Accessories Remove the oven and all materials from the carton and oven cavity. Your oven comes with the following accessories: Glass tray Turntable ring assembly Instruction Manual A) Control panel Grill tray (Cannot be used in microwave B) Turntable shaft function and must be placed on the grill rack) C)Turntable ring assembly... -
Página 31: Countertop Installation
COUNTERTOP INSTALLATION Remove all packing material and accessories. Examine the oven for any damage such as dents or broken door. Do not install if oven is damaged. Cabinet: Remove any protective film found on the microwave oven cabinet surface. Do not remove the light brown Mica cover that is attached to the oven cavity to protect the magnetron. -
Página 32: Operation
OPERATION This microwave oven uses modern electronic control to adjust cooking parameters to meet your needs better for cooking. 1. Clock Setting When the microwave oven is electrified,the oven will display "0:00", buzzer will ring once. Oven into waiting state. 1) In waiting state, Press "Temporizador/Reloj "... - Página 33 NOTE: the step quantities for the adjustment time of the coding switch are as follow: 0---1 min : 5 seconds 1---5 min : 10 seconds 5---10 min : 30 seconds 10---30 min : 1 minute 30---95 min : 5 minutes Microwave Power Chart Level Power...
- Página 34 6. Convection Cooking (With preheating funtion) 6. Convection Cooking (With preheating funtion) 6. Convection Cooking (With preheating funtion) The convection cooking can let you to cook the food as a traditional oven. Microwave is not The convection cooking can let you to cook the food as a traditional oven. Microwave is The convection cooking can let you to cook the food as a traditional oven.
- Página 35 7) Turn " " to adjust the cooking time of 7 minutes; 7) Turn " " to adjust the cooking time of 7 minutes; 8) Press " Confirm/Start/+30sec." to start cooking. 7) Turn " 8) Press " Confirm/Start/+30sec." to start cooking. "...
- Página 36 d you should preheat first following the auto menu operation, when the oven reaches the and you should preheat first following the auto menu operation, when the oven reaches the mperature, it will stop working and sound to remind opening temperature, it will stop working and sound to remind opening and you should preheat first following the auto menu operation, when the oven reaches the door to put cake in, then press "Confirm/Start/+30sec."...
- Página 37 16.00 OZ 16.00 OZ First PL10 24.00 OZ 24.00 OZ Then 400℉ convection power 2/3 convection time 32.00 OZ 32.00 OZ passes, the buzzer sound CHICKEN twice remind user to turn the food over 40.00 OZ 40.00 OZ (excluding microwave time) 48.00 OZ 48.00 OZ...
- Página 38 Weight Crispy grill Power 7.00 Oz 10.5 Oz 15% microwave power 14.00 Oz Cordon bleu (fresh mini pizza) + 85% grill power 18.00 Oz 21.00 Oz 7.00 Oz 10.5 Oz 14.00 Oz 15% microwave power C2(lasagna) 18.00 Oz + 85% grill power 21.00 Oz 3.50 Oz 15% microwave power...
- Página 39 NOTE: In Slow cook(L1), Food dry(L3), and Yougut /ferment(L4), the step quantities for the adjustment time of the coding switch are as follow: 10 min---3 hour : 10 min 3 hour---10 hour : 30 min 10 hour---12 hour : 60 min 15.
- Página 40 19. Mute Function Enter mute function: In waiting state, press "Parar/Borrar " and hold, then press " Confirmar/Inicio/+30seg". within 3 seconds, the buzzer will sound once and the oven will enter mute mode. Any operation cannot make the buzzer sound. Exit mute function: In waiting state, press "...
-
Página 41: Maintenance
NOTE: In Slow cook(L1), Food dry(L3), and Yougut /ferment(L4), the step quantities for the adjustment time of the coding switch are as follow: MAINTENANCE 10 min---3 hour : 10 min 3 hour---10 hour : 30 min 10 hour---12 hour : 60 min Troubleshooting Check your problem by using the chart below and try the solutions for each problem. - Página 42 econds, the buzzer will sound once and the oven will exit mute mode. 3 seconds, the buzzer will sound once and the oven will exit mute mode. ECO Function 20. ECO Function waiting state, enter ECO mode: In waiting state, press " Stop/Clear " briefly, the screen In waiting state, enter ECO mode: In waiting state, press "...
- Página 43 NOTE: In Slow cook(L1), Food dry(L3), and Yougut /ferment(L4), the step quantities for the adjustment time of the coding switch are as follow: 10 min---3 hour : 10 min 3 hour---10 hour : 30 min 10 hour---12 hour : 60 min 15.
- Página 44 Household Solutions, S.A., licenciatario oficial de este producto. Garantía limitada de un año. Hecho en China. © 2022 Sunbeam Products, Inc. All rights reserved. The Oster™ logo is a trademark of Sunbeam Products, Inc. used under license. Manufactured, distributed or sold by Household Solutions, S.A., official licensee for this product.