Tabla de contenido
Publicidad
Idiomas disponibles
Idiomas disponibles
Enlaces rápidos
Publicidad
Tabla de contenido

Manuales relacionados para Dream On Me HYGGE


Resumen de contenidos para Dream On Me HYGGE
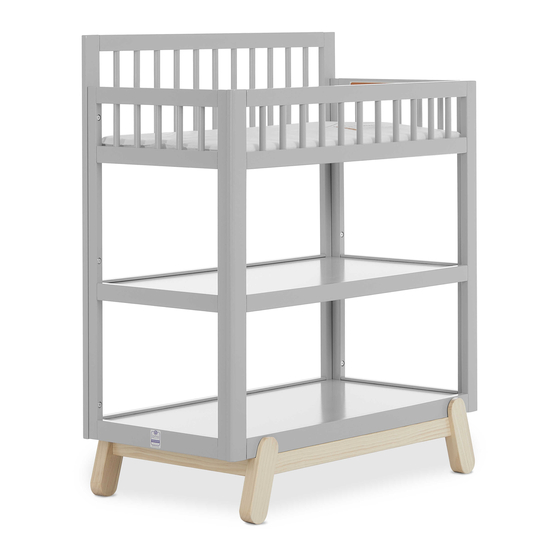
- Página 1 HYGGE Changing Table Owner’s Manual Scan the QR code to register your product https://dreamonme.com/customercare/registration/ Read all instructions before assembling and using product. IMPORTANT - Keep instructions for 0622R1-787 future use.
-
Página 2: Safety Tips
SAFETY TIPS Small parts may Adult Assembly present choking Required. hazard prior to assembly. DO NOT use the Please read the product if it is instructions damaged, broken, thoroughly. Identify all and/or components are parts & hardware. missing or broken. To protect your parts Do Not Use Power during assembly,... - Página 3 LIMITED WARRANTY: • Dream On Me warrants its product to be free from defects in material and workmanship and agrees to remedy any such defect. • This warranty covers 1 year from the date of original purchase.
- Página 4 • BEFORE EACH USE OR ASSEMBLY, INSPECT THE UNIT FOR DAMAGED HARDWARE, LOOSE JOINT, MISSING PARTS, OR SHARP EDGES. • DO NOT USE THE UNIT IF ANY PARTS ARE MISSING OR DAMAGED. CONTACT DREAM ON ME INC., 1532 S, WASHINGTON AVE, PISCATAWAY, NJ, USA, FOR REPLACEMENT PARTS AND INSTRUCTIONAL LITERATURE IF NEEDED.
- Página 5 PARTS If there are any missing parts, please contact Dream On Me before using the product. Left End Frame Right End Frame Rear Rail Front Rail Top Shelf Inserts Shelf Inserts (x2) Base Stretcher (x2) Center Base Rail (x2) Left Front and...
- Página 6 HARDWARE If there are any missing parts, please contact Dream On Me before using the product. Bolt M6 X 55mm (×4) Bolt M6 X 45mm (×8) Bolt M6 X 40mm (x12) Bolt M6 X 20mm (×2) Washer (×2) Nut (x2)
- Página 7 CHANGING TABLE ASSEMBLY - FEET ASSEMBLY 1a. Place all the parts on a soft surface before assembly. Align the Left Front and Right Rear Feet (9) and the Right Front and Left rear Feet (10) to the Center Base Rail (8) as shown in the illustration.
- Página 8 CHANGING TABLE ASSEMBLY - BASE ASSEMBLY 2a. Align the assembled feet to the Base Stretcher (7). Position the Metal Pins (H) between the four feet and the Base Stretcher. 2b. Position the Half Moon Washers (G) in the designated slots on the Base Stretcher (7). Similarly, attach the Bolts (B) in the insertions provided on the Base Stretcher, fixing them to the feet.
- Página 9 CHANGING TABLE ASSEMBLY - RAIL AND FRAME ASSEMBLY 3a. The Rear Rail (3) should be upright and aligned with the Left End Frame (1) and the Right End Frame (2), as shown in the illustration below. 3b. Attach the Bolts (C) in the insertions on the left and right frames and tighten them using the Allen Key (J)
- Página 10 CHANGING TABLE ASSEMBLY - SHELF ASSEMBLY 4a. Align the Top Shelf Insert (5) and the Shelf Inserts (6) to the assembled frame as shown in the illustration. 4b. Install the Top Shelf Insert in the highest slot of the frame. Additionally, install the Shelf Inserts (6) in the two slots provided at the bottom.
- Página 11 CHANGING TABLE ASSEMBLY - FRONT RAIL ASSEMBLY 5a. Align the Front Rail (4) to the half-assembled changing table. 5b. Attach the Bolts (C) in the insertions on the frames. Tighten the bolts using the Allen Key (J). Bolt M6 X 40mm (x6) www.dreamonme.com/help...
- Página 12 CHANGING TABLE ASSEMBLY - FEET ASSEMBLY 6a. Lay the half-assembled changing table on its back. Align the assembled base to the shelf and panel assembly as shown in the illustration. 6c. Attach the Bolts (A) in the insertions on the bottom of the Base Stretcher, fixing the base to the bottom of the rails.
- Página 13 CHANGING TABLE ASSEMBLY - SAFETY RESTRAINT HARNESS ASSEMBLY 7a. Unlock the Restraint Harness Belts, and place the belts below the top Panels as shown in the diagram. 7b. Bring the belt from behind the Top Rail onto the Top Panel. 7c.
- Página 14 CHANGING TABLE ASSEMBLY - MATTRESS PAD ASSEMBLY 8a. Place the Mattress Pad (11) onto (11) the Top Shelf Insert on the attached strap. 8b. Make sure that the locking system comes at the center. Adjust the length accordingly. www.dreamonme.com/help...
- Página 15 FURNITURE CARE INSTRUCTIONS ROOM CLIMATE CONTROL: • Wood, when first cut contains more than 50 percent water. When it is prepared for furniture construction it is placed in a Kiln and the moisture content is brought down to 8 to 10 percent. Wood is porous and responds to its environment. If the room has high humidity it will absorb it and expand and if the humidity is low it will lose moisture and shrink.
- Página 16 • Clean with a damp, not wet, cloth. Use only a mild soap. Do not use the abrasive cleaners. • Do not scratch or chip the finish. • Inspect the product periodically, contact Dream On Me for replacement parts or questions. • Do not store the product or any parts in extreme temperatures and conditions such as a hot attic or a damp, cold basement.
- Página 17 1532 S. WASHINGTON AVE STE1 PISCATAWAY, NJ 08854-9908 E-mail: info@dreamonme.com www.dreamonme.com Follow Us @dreamonmeinc to get your nursery featured on our social media. Enter our monthly giveaway! Chat with us! Scan the QR code to register. Scan the QR code to Live Chat.
-
Página 18: Important
HYGGE Table à langer Manuel du propriétaire Scannez le code QR pour enregistrer votre produit https://dreamonme.com/customercare/registration/ Lisez toutes les instructions avant avant d'assembler et d'utiliser le produit. IMPORTANT- Conservez les instructions pour pour 0622R1-787 une utilisation ultérieure. -
Página 19: Conseils De Sécurité
CONSEILS DE SÉCURITÉ Les petites pièces Assemblage par un peuvent présenter adulte requis. un risque d'étouffement avant l'assemblage. NE PAS utiliser le Veuillez lire produit s'il est attentivement les endommagé, cassé, instructions. Identifiez et/ou si des toutes les pièces et le composants sont matériel. - Página 20 GARANTIE LIMITÉE : • Dream On Me garantit que son produit est exempt de tout défaut de matériel et de fabrication et s'engage à remédier à tout défaut de ce type. • Cette garantie couvre 1 an à partir de la date d'achat originale.
- Página 21 • NE PAS UTILISER L'APPAREIL SI DES PIÈCES SONT MANQUANTES OU ENDOMMAGÉES. CONTACTEZ DREAM ON ME INC, 1532 S, WASHINGTON AVE, PISCATAWAY, NJ, USA, POUR OBTENIR DES PIÈCES DE RECHANGE ET DES INSTRUCTIONS SI NÉCESSAIRE. NE PAS SUBSTITUER LES PIÈCES.
- Página 22 PIÈCES S'il y a des pièces manquantes, veuillez contacter Dream On Me avant d'utiliser le produit. Cadre de l'extrémité Cadre de l'extrémité Rail arrière gauche droite Rail avant Inserts d'étagère Inserts pour supérieure étagères (x2) Brancard de base Rail de base central (x2)
- Página 23 HARDWARE S'il y a des pièces manquantes, veuillez contacter Dream On Me avant d'utiliser le produit. Boulon M6 X 55mm Boulon M6 X 45mm Boulon M6 X 40mm (×4) (×8) (x12) Boulon M6 X 20mm Lave-linge (×2) Écrou `(x2) Demi-lune (×2)
- Página 24 ASSEMBLAGE DE LA TABLE À LANGER - ASSEMBLAGE DES PIEDS 1a. Placez toutes les pièces sur une surface souple avant de les assembler. Alignez les pieds avant gauche et arrière droit arrière droit (9) et les pieds avant droit et arrière gauche (10) sur le rail central de la base (8) comme indiqué...
-
Página 25: Assemblage De La Table À Langer - Assemblage De La Base
ASSEMBLAGE DE LA TABLE À LANGER - ASSEMBLAGE DE LA BASE 2a. Alignez les pieds assemblés sur le support de base (7). Placez les goupilles métalliques (H) entre les quatre pieds et le support de base. 2b. Positionner les rondelles demi-lune (G) dans les fentes prévues à... - Página 26 ASSEMBLAGE DE LA TABLE A LANGER - ASSEMBLAGE DU RAIL ET DU CADRE 3a. Le rail arrière (3) doit être vertical et aligné avec le cadre d'extrémité gauche (1) et le cadre d'extrémité droit (2), comme le montre l'illustration ci-dessous. 3b.
- Página 27 ASSEMBLAGE DE LA TABLE À LANGER - ASSEMBLAGE DE L'ÉTAGÈRE 4a. Alignez l'insert de la tablette supérieure (5) et les inserts de la tablette (6) sur le cadre assemblé, comme indiqué sur l'illustration. 4b. Installez la tablette supérieure dans la fente la plus haute du cadre.
- Página 28 ASSEMBLAGE DE LA TABLE À LANGER - ASSEMBLAGE DU RAIL AVANT 5a. Alignez le rail avant (4) sur la table à langer semi-assemblée. 5b. Fixez les boulons (C) dans les insertions sur les cadres. Serrez les boulons à l'aide de la clé Allen (J). Boulon M6 X 40mm (x6) www.dreamonme.com/help...
- Página 29 ASSEMBLAGE DE LA TABLE À LANGER - ASSEMBLAGE DES PIEDS 6a. Posez la table à langer semi-assemblée sur son dos. Alignez la base assemblée sur l'ensemble tablette et panneau, comme indiqué sur l'illustration. 6c. Fixez les boulons (A) dans les insertions du bas de la base, en fixant la base au bas des rails.
- Página 30 ASSEMBLAGE DE LA TABLE À LANGER - ASSEMBLAGE DU HARNAIS DE RETENUE DE SÉCURITÉ 7a. Déverrouillez les ceintures du harnais de retenue et placez les ceintures sous les panneaux supérieurs comme indiqué sur le schéma. 7b. Amenez la ceinture de derrière la traverse supérieure sur le panneau supérieur.
- Página 31 ASSEMBLAGE DE LA TABLE À LANGER - ASSEMBLAGE DU MATELAS 8a. Placez le matelas (11) sur l'insert (11) de la tablette supérieure, sur la sangle attachée. 8b. Assurez-vous que le système de verrouillage arrive au centre. Ajustez la longueur en conséquence.
- Página 32 INSTRUCTIONS D'ENTRETIEN DES MEUBLES LE CONTRÔLE DU CLIMAT DE LA PIÈCE : • Le bois, lorsqu'il est coupé à l'origine, contient plus de 50 % d'eau. Lorsqu'il est préparé pour la construction de meubles, il est placé dans un four et son taux d'humidité...
- Página 33 • Ne rayez pas et n'écrasez pas la finition. • Inspectez le produit périodiquement, contactez Dream On Me pour des pièces de rechange ou des questions. • Ne stockez pas le produit ou ses pièces dans des températures et des conditions extrêmes, comme un grenier chaud ou un sous-sol humide et froid.
- Página 34 1532 S. WASHINGTON AVENUE PISCATAWAY, NJ 08854 Courriel : info@dreamonme.com www.dreamonme.com Suivez-nous @dreamonmeinc pour que votre crèche soit présentée sur nos médias sociaux. Chattez avec nous ! Participez à notre concours mensuel ! Scannez le code QR pour accéder au Scannez le code QR pour vous inscrire.
-
Página 35: Importante
HYGGE Cambiador Manual del usuario Escanee el código QR para registrar su producto https://dreamonme.com/customercare/registration/ Lea todas las instrucciones antes de montar y utilizar el producto. IMPORTANTE- Guarde las instrucciones para su uso 0622R1-787 futuro. -
Página 36: Consejos De Seguridad
Vigile siempre la limpiacristales o actividad de su hijo en limpiadores abrasivos, ya la guardería o cerca de que rayarán la superficie los muebles. y pueden dañar el revestimiento protector. Póngase en contacto con Dream On Me Inc si necesita ayuda. www.dreamonme.com/help... -
Página 37: Garantía Limitada
GRACIAS..por elegir Dream On Me y enhorabuena por unirse a nuestra familia; ¡una familia que lleva más de 30 años transformando vidas! Agradecemos sus comentarios y le deseamos lo mejor en los próximos años con su nueva incorporación. Si tiene alguna pregunta o duda, no dude en ponerse en contacto con nosotros. - Página 38 • NO UTILICE LA UNIDAD SI FALTA ALGUNA PIEZA O ESTÁ DAÑADA. PÓNGASE EN CONTACTO CON DREAM ON ME INC, 1532 S, WASHINGTON AVE, PISCATAWAY, NJ, EE.UU., PARA OBTENER LAS PIEZAS DE REPUESTO Y LAS INSTRUCCIONES SI ES NECESARIO. NO SUSTITUYA LAS PIEZAS.
- Página 39 PARTES Si falta alguna pieza, póngase en contacto con Dream On Me antes de utilizar el producto. Marco final a la Marco final a la Riel trasero izquierda derecha Carril frontal Inserciones en las Inserciones para estanterías top Estanterías (x2) Camilla básica...
- Página 40 HARDWARE Si falta alguna pieza, póngase en contacto con Dream On Me antes de utilizar el producto. Perno M6 X 55mm Perno M6 X 45mm Perno M6 X 40mm (×4) (×8) (x12) Perno M6 X 20mm Lave-linge (×2) Tuerca `(x2) Media luna (×2)
-
Página 41: Montaje Del Cambiador - Montaje De Los Pies
MONTAJE DEL CAMBIADOR - MONTAJE DE LOS PIES 1a. Coloque todas las piezas sobre una superficie blanda antes del montaje. Alinee los pies delanteros izquierdo y Pies traseros derechos (9) y los pies delanteros derechos y traseros izquierdos (10) al riel central de la base (8) como se muestra en la ilustración. -
Página 42: Montaje Del Cambiador - Montaje De La Base
MONTAJE DEL CAMBIADOR - MONTAJE DE LA BASE 2a. Alinee los pies montados con el ensanchador de la base (7). Coloque los pasadores metálicos (H) entre los cuatro pies y el soporte de la base. 2b. Coloque las arandelas de media luna (G) en las ranuras designadas en el ensanchador de base (7). -
Página 43: Montaje Del Cambiador - Montaje De Rieles Y Marco
MONTAJE DEL CAMBIADOR - MONTAJE DE RIELES Y MARCO 3a. El riel trasero (3) debe estar en posición vertical y alineado con el marco del extremo izquierdo (1) y el marco del extremo derecho (2), como se muestra en la siguiente ilustración. 3b. -
Página 44: Montaje Del Cambiador - Montaje Del Estante
MONTAJE DEL CAMBIADOR - MONTAJE DEL ESTANTE 4a. Alinee el inserto del estante superior (5) y los insertos del estante (6) con el marco ensamblado como se muestra en la ilustración. 4b. Instale el inserto de estante superior en la ranura más alta del marco. -
Página 45: Montaje Del Cambiador - Montaje De La Barra Frontal
MONTAJE DEL CAMBIADOR - MONTAJE DE LA BARRA FRONTAL 5a. Alinee el raíl frontal (4) con el cambiador semimontado. 5b. Coloque los pernos (C) en las inserciones de los marcos. Apriete los pernos con la llave Allen (J). Perno M6 X 40mm (x6) www.dreamonme.com/help... - Página 46 MONTAJE DEL CAMBIADOR - MONTAJE DE LOS PIES 6a. Coloque el cambiador a medio montar sobre su espalda. Alinee la base ensamblada con el conjunto de estante y panel como se muestra en la ilustración. 6c. Coloque los pernos (A) en las inserciones de la parte inferior del bastidor, fijando la base...
-
Página 47: Conjunto Del Cambiador - Conjunto Del Arnés De Sujeción De Seguridad
CONJUNTO DEL CAMBIADOR - CONJUNTO DEL ARNÉS DE SUJECIÓN DE SEGURIDAD 7a. Desbloquee los cinturones del arnés de retención y coloque los cinturones debajo de los paneles superiores como se muestra en el diagrama. 7b. Lleve el cinturón desde detrás del riel superior hasta el panel superior. -
Página 48: Montaje Del Cambiador - Montaje Del Colchón
MONTAJE DEL CAMBIADOR - MONTAJE DEL COLCHÓN 8a. Coloque la almohadilla del colchón (11) (11) sobre el inserto del estante superior en la correa adjunta. 8b. Asegúrese de que el sistema de cierre llegue al centro. Ajuste la longitud en consecuencia. -
Página 49: Instrucciones Para El Cuidado De Los Muebles
INSTRUCCIONES PARA EL CUIDADO DE LOS MUEBLES CONTROL DEL CLIMA DE LA HABITACIÓN: • La madera, cuando se corta originalmente, contiene más del 50% de agua. Cuando se prepara para la construcción de muebles, se introduce en un horno y su contenido de humedad se reduce al 8-10%. - Página 50 • No raye ni aplaste el acabado. • Inspeccione el producto periódicamente, póngase en contacto con Dream On Me para obtener piezas de repuesto o hacer preguntas. • No almacene el producto o sus piezas en temperaturas y condiciones extremas, como un ático caliente o un sótano húmedo y frío.
- Página 51 1532 S. WASHINGTON AVENUE PISCATAWAY, NJ 08854 Correo electrónico: info@dreamonme.com www.dreamonme.com Siga con nosotros @dreamonmeinc para que su guardería aparezca en nuestras redes sociales. Participa en nuestro sorteo mensual. Chatea con nosotros. Escanee el código QR para registrarse. Escanee el código QR para el chat en vivo.