Publicidad
sauder.com
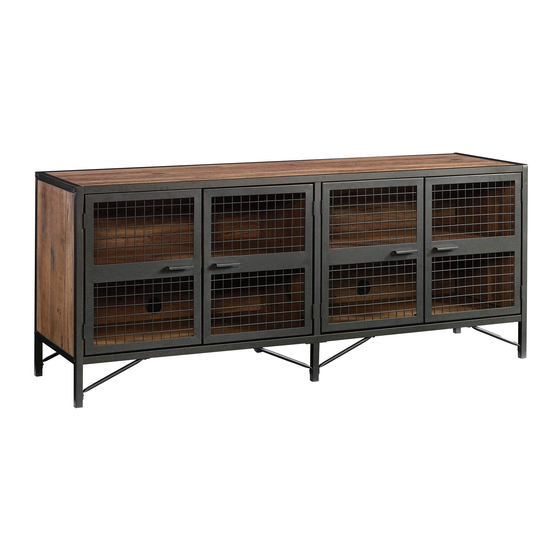
Credenza
Boulevard Cafe Collection | Model 420649
Need help? Visit Sauder.com to view video assembly tips or chat with a live rep.
Prefer the phone? Call 1-800-445-1527.
Share your journey!
It stands. You sit.
A thing of beauty,
this one.
NOTE: THIS INSTRUCTION
BOOKLET CONTAINS IMPORTANT
SAFETY INFORMATION.
PLEASE READ AND KEEP FOR
FUTURE REFERENCE.
English pg 1-18
Français pg 19-21
Español pg 22-24
Lot #: 531649
Date Purchased: __________________
09/09/19
Be sure to give us a ring before
making any returns. 1-800-445-1527
Publicidad
Tabla de contenido

Manuales relacionados para Sauder 420649


Resumen de contenidos para Sauder 420649
- Página 1 NOTE: THIS INSTRUCTION BOOKLET CONTAINS IMPORTANT SAFETY INFORMATION. PLEASE READ AND KEEP FOR Need help? Visit Sauder.com to view video assembly tips or chat with a live rep. FUTURE REFERENCE. Prefer the phone? Call 1-800-445-1527. English pg 1-18 Français pg 19-21 Español pg 22-24...
- Página 2 • Check the size and weight of your TV. Compare it to the diagram below – before you begin assembly! • This Sauder unit is designed for use with fl at panel televisions weighing less than 70 pounds. Never use with a TV that weighs more.
-
Página 3: Part Identifi Cation
DD FOOT BRACE (8) UPRIGHT (1) UPRIGHT TUBE (1) EE LEFT DOOR (2) TOP (1) REAR BOTTOM TUBE (1) FF RIGHT DOOR (2) REAR TOP TUBE (1) AA BOTTOM (1) FRONT TOP TUBE (1) BB FRONT BOTTOM TUBE (1) 420649 www.sauder.com Page 3... - Página 4 BLACK 2-1/4" FLAT HEAD SCREW - 6 BLACK 1-15/16" HEX HEAD SCREW - 8 BLACK 13/16" PAN HEAD SCREW - 8 BLACK 9/16" LARGE HEAD SCREW - 34 BLACK 1/2" HEX HEAD SCREW - 20 BLACK 1/2" PAN HEAD SCREW - 16 Page 4 www.sauder.com 420649...
- Página 5 The TUBE should cover the long edge of the TOP. These holes must be here. The TUBE should cover the long edge of the TOP. These holes must be here. The tabs should face each other. 420649 www.sauder.com Page 5...
- Página 6 Fasten two BLOCKS (21) and two MAGNETIC å CATCHES (23) to the TOP (T). Use four BLACK 13/16" PAN HEAD SCREWS (30). Turn two CAM SCREWS (19) into the TOP (T). å BLACK 13/16" PAN HEAD SCREW (4 used in this step) Page 6 www.sauder.com 420649...
- Página 7 Insert two GROMMETS WITH CAPS (24) into the BACK (W). å S u r f a c i t h a l l h o l e BLACK 9/16" LARGE HEAD SCREW (6 used in this step) 420649 www.sauder.com Page 7...
- Página 8 å BLACK 9/16" LARGE HEAD SCREW (4 used in this step) These edges must be even. Arrow Arrow Hole The arrow in the HIDDEN CAM must point toward the hole in the edge of the board. Page 8 www.sauder.com 420649...
- Página 9 Fasten the UPRIGHT (S) to the TOP (T). Tighten two å HIDDEN CAMS. NOTE: Be sure the WOOD DOWELS in the TOP insert å into the holes in the UPRIGHT. i t h f a c S u r D E N H I D 420649 www.sauder.com Page 9...
- Página 10 BOTTOM. The TUBE should cover the long edge of the BOTTOM. Edge with holes Two MAGNETIC CATCH holes will be located on the opposite The tabs surface near this edge. should face each other. Page 10 www.sauder.com 420649...
- Página 11 Push two WOOD DOWELS (20) into the BOTTOM (AA). å Fasten two MAGNETIC CATCHES (23) to the BOTTOM (AA). Use å four BLACK 13/16" PAN HEAD SCREWS (30). BLACK 13/16" PAN HEAD SCREW (4 used in this step) 420649 www.sauder.com Page 11...
- Página 12 Fasten the BOTTOM (AA) to the UPRIGHT (S). Use two BLACK 2-1/4" PAN HEAD SCREWS (28). å NOTE: Be sure the WOOD DOWELS in the BOTTOM insert into the holes in the UPRIGHT. å BLACK 2-1/4"" FLAT HEAD SCREW (6 used in this step) Page 12 www.sauder.com 420649...
- Página 13 (8 used in this step) f a c S u r h o l w i t h These holes must be here. f a c S u r o u t w i t h h o l 420649 www.sauder.com Page 13...
- Página 14 Step 10 Fasten the FEET (CC) to the BOTTOM TUBES (Z and BB). å Tighten four BLACK 1/2" HEX HEAD SCREWS (32) using the L-WRENCH (27). BLACK 1/2" FLAT HEAD SCREW (4 used in this step) Page 14 www.sauder.com 420649...
- Página 15 NOTE: Start each screw a few turns before tightening any of the them. å Peel APPLIQUES from the APPLIQUE CARDS (25) and stick them onto each visible HIDDEN å CAM in the UPRIGHT (S). BLACK 1/2" FLAT HEAD SCREW (16 used in this step) To cover HIDDEN CAMS 420649 www.sauder.com Page 15...
- Página 16 Insert the SHELF PINS (22) into the hole locations of your å legs. And, you know, choice in the ENDS (Q and R) and UPRIGHT (S). Set the your arms. ADJUSTABLE SHELVES (X) onto the SHELF PINS. (8 used) Page 16 www.sauder.com 420649...
- Página 17 BLACK 1/2" PAN HEAD SCREWS (33). To vertically adjust the DOORS (EE and FF), loosen the screws in the å hinges and make adjustments. Then, tighten the screws. BLACK 1/2" PAN SCREW (16 used in this step) 420649 www.sauder.com Page 17...
- Página 18 NOTE: Please read the back pages of the instruction booklet for important safety information. å This completes assembly. Clean with a damp cloth. Wipe dry. å And to celebrate, why not share your success story? 70 lbs. 31,75 kg 31,75 kg 22,68 22,68 Page 18 www.sauder.com 420649...
-
Página 19: Liste De Pièces
Modèle 420649 Crédence Utilisez les instructions d’ a ssemblage en français avec les NOUS SOMMES LA POUR VOUS AIDER! schémas étape par étape du manuel d’instruction en anglais. Nous faisons de notre mieux pour nous assurer que votre meuble Chaque étape en français correspond à la même étape arrive dans d’excellentes conditions. - Página 20 • Vérifi er la taille et le poids du téléviseur. Le comparer au le MONTANT (S). diagramme ci-dessous avant de commencer l'assemblage ! • Cette unité Sauder est conçue pour les téléviseurs à écrans plats ÉTAPE 5 pesant moins de 31,75 kg. Ne jamais utiliser avec des téléviseurs plus lourds.
- Página 21 Relever, avec précaution, l'élément dans sa position verticale. Insérer les GOUPILLES DE TABLETTE (22) dans les trous choisis dans les EXTRÉMITÉS (Q et R) et le MONTANT (S). Poser les TABLETTES RÉGLABLES (X) sur les GOUPILLES DE TABLETTE. 420649 www.sauder.com Page 21...
-
Página 22: Lista De Partes
Modelo 420649 Credencia Use estas instrucciones de ensamblaje en español junto con las ESTAMOS AQUI PARA AYUDAR! fi guras paso-a-paso provistas en el folleto inglés. Cada paso Tratamos de asegurar que su mueble llega en condición excelente. en español corresponde al mismo paso en inglés. Se destacan Nuestros representantes de Servicio al Cliente son amables y las fi... - Página 23 • Verifi que el tamaño y peso del televisor. ¡Compárelo al diagrama abajo - antes de comenzar el ensamblaje! PASO 5 • Esta unidad Sauder está diseñada para ser usada con televisores de panel plano cuyo peso sea inferior a 31,75 Kg. Empuje dos PASADORES DE MADERA (20) dentro del Nunca la use para un televisor de mayor peso.
- Página 24 Cuidadosamente ponga la unidad en posición vertical. Inserte las ESPIGAS DE ESTANTE (22) en los agujeros al nivel preferido de los EXTREMOS (Q y R) y del PARAL (S). Coloque los ESTANTES AJUSTABLES (X) sobre las ESPIGAS DE ESTANTE. Page 24 www.sauder.com 420649...
- Página 25 TOUJOURS décharger les tablettes et les tiroirs, en commençant par les surface supérieures, avant de déplacer le meuble. NE JAMAIS pousser ou tirer un meuble sur de la moquette. Demander à une autre personne de le soulever correctement pour le déplacer et/ou le repositionner. 420649 www.sauder.com Page 25...
- Página 26 SIEMPRE descargue los estantes y cajones, empezando con las superfi cies superiores, antes de moverlo. NUNCA empuje ni tire de los muebles sobre una alfombra. Obtenga que un amigo le ayude a levantarlo correctamente para moverlo y/o reposicionarlo. Page 26 www.sauder.com 420649...
-
Página 27: Garantie Limitée De 5 Ans
à compter de la date d'achat la première fois et qui sont signalés à Sauder dans les limites de couverture de la contre tout défaut de matériaux ou de fabrication des composantes de mobilier Sauder. - Página 28 Dear Valued Customer: So, how did it go? Thanks so much for choosing Sauder® furniture. I hope the Set a world record for speed? purchase and assembly process was a positive experience Feeling good about yourself? and you feel good about the furniture you just built. If you Nice.