Publicidad
sauder.com
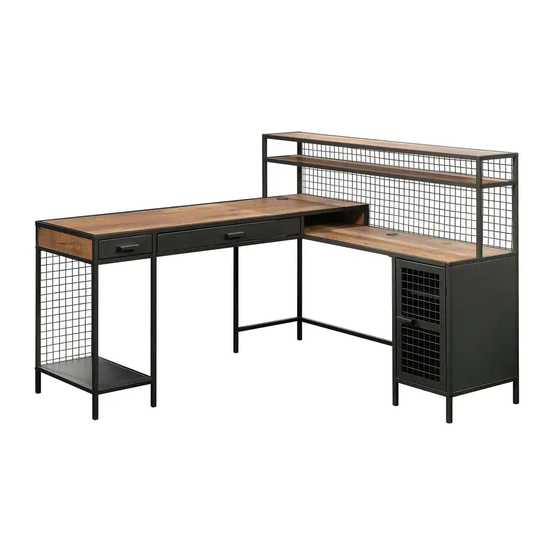
L-Shaped Desk
Boulevard Cafe Collection | Model 420650
Need help? Visit Sauder.com to view video assembly tips or chat with a live rep.
Prefer the phone? Call 1-800-445-1527.
Share your journey!
For all your
newfangled gadgetry.
NOTE: THIS INSTRUCTION
BOOKLET CONTAINS IMPORTANT
SAFETY INFORMATION.
PLEASE READ AND KEEP FOR
FUTURE REFERENCE.
English pg 1-38
Français pg 39-43
Español pg 44-48
Lot #: 510857
Date Purchased: __________________
12/07/17
Be sure to give us a ring before
making any returns. 1-800-445-1527
Publicidad
Tabla de contenido

Manuales relacionados para Sauder 420650


Resumen de contenidos para Sauder 420650
- Página 1 NOTE: THIS INSTRUCTION BOOKLET CONTAINS IMPORTANT SAFETY INFORMATION. PLEASE READ AND KEEP FOR Need help? Visit Sauder.com to view video assembly tips or chat with a live rep. FUTURE REFERENCE. Prefer the phone? Call 1-800-445-1527. English pg 1-38 Français pg 39-43 Español pg 44-48...
- Página 2 Part Identifi cation No. 2 Phillips Screwdriver Tip Shown Actual Size Hardware Identifi cation Assembly Steps 5-38 Hammer Not actual size Français 39-43 Straight Edge Screwdriver Español 44-48 Safety 49-50 Skip the power trip. This time. Warranty Page 2 www.sauder.com 420650...
-
Página 3: Part Identifi Cation
MM LARGE DRAWER BOTTOM (1) LONG BACK (1) LONG LEFT TUBE (1) NN LARGE DRAWER BRACE (1) LONG SHELF (2) AA SHORT TUBE (2) OO DOOR (1) LARGE WIRE BACK (1) BB FRONT RIGHT TUBE (1) 420650 www.sauder.com Page 3... - Página 4 BLACK 1-1/2" FLAT HEAD SCREW - 21 BLACK 5/8" PAN HEAD SCREW - 2 BLACK 1/2" LARGE HEAD SCREW - 30 BLACK 1/2" HEX HEAD SCREW - 23 BLACK 1/2" FLAT HEAD SCREW - 4 BLACK 1/2" PAN HEAD SCREW - 24 Page 4 www.sauder.com 420650...
- Página 5 BOX FRONT (R), BOX ENDS (Q and S), and BOX BOTTOM (T). Arrow (28 used) Arrow Arrow Arrow Hole The arrow in the HIDDEN CAM must point toward the hole in the edge of the board. 420650 www.sauder.com Page 5...
- Página 6 Push ten SMALL HIDDEN CAMS (5) into the DRAWER å SIDES (FF, GG, JJ, and KK) and LARGE DRAWER BRACE (NN). Arrow (10 used) The arrow in the HIDDEN CAM must point toward the hole in the edge of the board. Page 6 www.sauder.com 420650...
- Página 7 SMALL RIGHT END (C), LARGE TOP (G), SHORT TUBES (AA), and DRAWER FRONTS (DD and EE). NOTE: The SMALL CAM SCREWS are turned into the metal å portion of the part. (24 used) 420650 www.sauder.com Page 7...
- Página 8 BACK (N). Tighten two BLACK 1-3/8" HEX HEAD Just think. The sooner SCREWS (16) using the L-WRENCH (14). you do this, the sooner you do something else. BLACK 1-3/8" HEX HEAD SCREW (2 used in this step) Page 8 www.sauder.com 420650...
- Página 9 Use fi fteen BLACK 1/2" LARGE HEAD SCREWS (19). NOTE: Be sure SHELF TUBES wrap around the edges of å the LONG SHELVES. BLACK 1/2" LARGE HEAD SCREW (15 used in this step) These edges should be even. These edges should be even. 420650 www.sauder.com Page 9...
- Página 10 Use fi ve BLACK 1/2" LARGE HEAD SCREWS (19). e w s s c r i t h f a c S u r BLACK 1/2" LARGE HEAD SCREW (5 used in this step) BLACK 1-3/8" HEX HEAD SCREW (1 used in this step) Page 10 www.sauder.com 420650...
- Página 11 LEFT END (B). Tighten two BLACK 1-3/8" HEX HEAD SCREWS (16) using the L-WRENCH (14). e w s s c r i t h f a c S u r BLACK 1-3/8" HEX HEAD SCREW (2 used in this step) 420650 www.sauder.com Page 11...
- Página 12 (2 used for the MAGNETIC CATCH) HEAD SCREWS (18). The magnets are on this side. These edges should be even. BLACK 1/2" LARGE HEAD SCREW (5 used in this step) The block on the SMALL TOP (F) should be here. Page 12 www.sauder.com 420650...
- Página 13 NOTE: Be sure the WOOD DOWELS in the SMALL TOP å insert into the BOX FRONT. BLACK 1-1/2" FLAT HEAD SCREW (4 used in this step) The HIDDEN CAMS are closer to the fl oor and face each other. 420650 www.sauder.com Page 13...
- Página 14 BOX BOTTOM. Fasten the BOX ENDS (Q and S) to the BOX BOTTOM (T). å Use four BLACK 1-1/2" FLAT HEAD SCREWS (17). Surface with HIDDEN CAMS BLACK 1-1/2" FLAT HEAD SCREW (4 used in this step) Page 14 www.sauder.com 420650...
- Página 15 Fasten the SMALL TOP (F) to the LARGE WIRE BACK (N). Use å fi ve BLACK 1/2" LARGE HEAD SCREWS (19). BLACK 1/2" LARGE HEAD SCREW (5 used in this step) BLACK 1-3/8" HEX HEAD SCREW (1 used in this step) 420650 www.sauder.com Page 15...
- Página 16 å Rome. This can be built LARGE RIGHT END (A). Tighten fi ve BLACK 1/2" HEX in a day. HEAD SCREWS (20) using the L-WRENCH (14). BLACK 1/2" HEX HEAD SCREW (5 used in this step) Page 16 www.sauder.com 420650...
- Página 17 NOTE: Do not completely tighten the SCREWS in this step. å Fasten the SHORT RIGHT TUBES (Y) to the RIGHT END (A). å Tighten two BLACK 1-3/8" HEX HEAD SCREWS (16) using the L-WRENCH (14). BLACK 1-3/8" HEX HEAD SCREW (2 used in this step) 420650 www.sauder.com Page 17...
- Página 18 BLACK 1-3/8" HEX HEAD SCREWS (16) using the L-Wrench (14). NOTE: Now, completely tighten all of the SCREWS from Steps 12-14. å BLACK 1/2" HEX HEAD SCREW (5 used in this step) BLACK 1-3/8" HEX HEAD SCREW (2 used in this step) Page 18 www.sauder.com 420650...
- Página 19 Fasten the LARGE RIGHT END (A) to the SMALL TOP (F) å and LONG SHELVES (M). Tighten six BLACK 1-3/8" HEX HEAD SCREWS (16) using the L-Wrench (14). BLACK 1-3/8" HEX HEAD SCREW (6 used in this step) 420650 www.sauder.com Page 19...
- Página 20 BLACK 1/2" HEX HEAD SCREWS (20) using the L-Wrench (14). BLACK 1/2" HEX HEAD SCREW (4 used for the METAL BRACKETS) Edge with hole Elongated hole BLACK 1-3/8" HEX HEAD SCREW (1 used in this step) Page 20 www.sauder.com 420650...
- Página 21 SLIDE from the RAIL. Open end Use these holes. BLACK 1/2" PAN HEAD SCREW (6 used in this step) Open end The CAM SCREWS should be here. Surface with HIDDEN CAMS Surface with HIDDEN CAMS Open end 420650 www.sauder.com Page 21...
- Página 22 EXTENSION RAIL in to fi nd the other hole that lines up with the hole in the END. Turn a SCREW into this hole. Open end Use these holes. BLACK 1/2" PAN HEAD SCREW (3 used in this step) The CAM SCREWS should be here. Open end Page 22 www.sauder.com 420650...
- Página 23 Fasten the SHORT BACK (J) to the SMALL WIRE BACK (K). å Use two BLACK 1-1/2" FLAT HEAD SCREWS (17). Now might be a good time to refresh your drink. BLACK 1-1/2" FLAT HEAD SCREW (2 used in this step) 420650 www.sauder.com Page 23...
- Página 24 Fasten the SHORT LEFT TUBES (X) to the SMALL LEFT END (D). Tighten å two BLACK 1-3/8" HEX HEAD SCREWS (16) using the L-Wrench (14). BLACK 1/2" HEX HEAD SCREW (3 used in this step) BLACK 1-3/8" HEX HEAD SCREW (4 used in this step) Page 24 www.sauder.com 420650...
- Página 25 BLACK 1/2" HEX HEAD SCREWS (20) using the L-Wrench (14). NOTE: Now, completely tighten all of the SCREWS from Steps 20-21. å BLACK 1-3/8" HEX HEAD SCREW (4 used in this step) BLACK 1/2" HEX HEAD SCREW (3 used in this step) 420650 www.sauder.com Page 25...
- Página 26 EXTENSION RAIL in to fi nd the other hole that lines up with the hole in the UPRIGHT. Turn a SCREW into this hole. Surface with HIDDEN CAMS Open end Use these holes. BLACK 1/2" PAN HEAD SCREW (3 used in this step) Open end Page 26 www.sauder.com 420650...
- Página 27 Peel one APPLIQUE from the BROWN APPLIQUE CARD (12) å and stick it onto the SCREW head. BLACK 1-1/2" FLAT HEAD SCREW Edge with (1 used in this step) HIDDEN CAMS Surface with HIDDEN CAMS Surface with HIDDEN CAMS 420650 www.sauder.com Page 27...
- Página 28 NOTE: You may need to loosen and then retighten some å screws to fasten the SMALL UPRIGHTS. BLACK 2-1/4" PAN HEAD SCREW (4 used in this step) NOTE: You may need to loosen and then retighten these screws. Page 28 www.sauder.com 420650...
- Página 29 With someone's help, carefully stand the two assemblies upright. å Fasten the SMALL RIGHT END (C) to the LONG BACK (L). å Tighten two HIDDEN CAMS. NOTE: Do not lift up on the LONG BACK (L). 420650 www.sauder.com Page 29...
- Página 30 Fasten one METAL BRACKET (8) to the LONG LEFT å TUBE (Z) and SMALL RIGHT END (C). Tighten two BLACK 1/2" HEX HEAD SCREWS (20) using the L-Wrench (14). BLACK 1/2" HEX HEAD SCREW Elongated hole (3 used in this step) Page 30 www.sauder.com 420650...
- Página 31 SMALL UPRIGHTS (H and I), and BACKS (J and L). Tighten fourteen HIDDEN CAMS. NOTE: Be sure the WOOD DOWELS in the SMALL RIGHT END å and SMALL LEFT UPRIGHT insert into the LARGE TOP. This large hole should be here. 420650 www.sauder.com Page 31...
- Página 32 PINS (9) into the hole locations of your choice in the Almost time to LARGE RIGHT END (A) and LARGE UPRIGHT (E). Set celebrate! With a nap. the SHELF (U) onto the SHELF PINS. (4 used) Page 32 www.sauder.com 420650...
- Página 33 å Use four BLACK 1/2" FLAT HEAD SCREWS (21). Insert three GROMMETS WITH CAPS (11) into the large å holes in the TOPS (F and G). BLACK 1/2" FLAT HEAD SCREW (4 used in this step) 420650 www.sauder.com Page 33...
- Página 34 LARGE DRAWER SIDES (JJ and KK) and LARGE DRAWER BRACE (NN). Use six BLACK 1-1/2" FLAT HEAD SCREWS (17). NOTE: Be sure the LARGE DRAWER BOTTOM (MM) å inserts into the groove of the LARGE DRAWER BACK (LL). Page 34 www.sauder.com 420650...
- Página 35 SMALL DRAWER SIDES (FF and GG). DRAWER SIDES (FF and GG). Use four BLACK 1-1/2" FLAT HEAD SCREWS (17). NOTE: Be sure the SMALL DRAWER BOTTOM (II) inserts å into the groove of the SMALL DRAWER BACK (HH). 420650 www.sauder.com Page 35...
- Página 36 Fasten two EXTENSION SLIDES (2) to the LARGE å DRAWER SIDES (JJ and KK). Use six BLACK 1/2" PAN HEAD SCREWS (22). Open end Use these holes. Open end BLACK 1/2" PAN HEAD SCREW (6 used in this step) Open end Page 36 www.sauder.com 420650...
- Página 37 Fasten two EXTENSION SLIDES (2) to the SMALL å DRAWER SIDES (FF and GG). Use six BLACK 1/2" PAN HEAD SCREWS (22). Open end Use these holes. Open end BLACK 1/2" PAN HEAD SCREW (6 used in this step) Open end 420650 www.sauder.com Page 37...
- Página 38 This completes assembly. Clean with a damp cloth. Wipe dry. å And to celebrate, why not share your success story? 25 lbs. 15 lbs. 45 lbs. 20 lbs. 15 lbs. 60 lbs. 10 lbs. 30 lbs. To cover HIDDEN CAMS Page 38 www.sauder.com 420650...
-
Página 39: Liste De Pièces
Modèle 420650 Bureau en L Utilisez les instructions d’ a ssemblage en français avec les NOUS SOMMES LA POUR VOUS AIDER! schémas étape par étape du manuel d’instruction en anglais. Nous faisons de notre mieux pour nous assurer que votre meuble Chaque étape en français correspond à... - Página 40 Fixer la GRANDE EXTRÉMITÉ GAUCHE (B) à GRAND ARRIÈRE DESSUS (F) exactement comme il l’est indiqué. Utiliser deux VIS MÉTALLIQUE (N). Serrer deux VIS TÊTE HEX 35 mm NOIRES (16) TÊTE GOUTTE DE SUIF 16 mm NOIRES (18). avec la Clé en L (14). Page 40 www.sauder.com 420650...
- Página 41 EXTRÉMITÉ DROITE (A). Serrer cinq VIS TÊTE HEX 13 mm exactement comme il l’est indiqué. Serrer deux VIS TÊTE NOIRES (20) avec la Clé en L (14). HEX 13 mm NOIRES (20) avec la Clé en L (14). 420650 www.sauder.com Page 41...
- Página 42 Utiliser quatre VIS TÊTE GOUTTE DE SUIF 57 mm NOIRES (15). avec la Clé en L (14). REMARQUE : Il est peut-être nécessaire de desserrer et serrer quelques-unes des vis pour fi xer les PETITS MONTANTS. Page 42 www.sauder.com 420650...
- Página 43 REMARQUE : Prière de lire les informations importantes sur la Décoller les APPLIQUÉS de la FICHE D'APPLIQUÉS NOIRE (13) sécurité fi gurant sur les pages arrière du manuel d’instructions. et coller les sur chaque EXCENTRIQUE ESCAMOTABLE. Ceci complète l'assemblage. Nettoyer avec un tissu humide. Essuyer. 420650 www.sauder.com Page 43...
-
Página 44: Lista De Partes
Modelo 420650 Escritorio en L Use estas instrucciones de ensamblaje en español junto con las ESTAMOS AQUI PARA AYUDAR! fi guras paso-a-paso provistas en el folleto inglés. Cada paso Tratamos de asegurar que su mueble llega en condición excelente. en español corresponde al mismo paso en inglés. Se destacan Nuestros representantes de Servicio al Cliente son amables y las fi... - Página 45 PANEL SUPERIOR PEQUEÑO. LLAVE EN L (14). Fije el AGARRADOR MAGNÉTICO (10) al bloque en el PANEL SUPERIOR PEQUEÑO (F) exactamente como se muestra. Utilice dos TORNILLOS NEGROS DE CABEZA REDONDA de 16 mm (18). 420650 www.sauder.com Page 45...
- Página 46 TUBO DELANTERO DERECHO (BB) sobre el PANEL SUPERIOR LLAVE EN L (14). PEQUEÑO (F) exactamente como se muestra. Apriete los dos TORNILLOS NEGROS DE CABEZA HEXAGONAL de 13 mm (20) utilizando la Llave en L (14). Page 46 www.sauder.com 420650...
- Página 47 IZQUIERDO PEQUEÑO (D). Apriete los dos TORNILLOS NEGROS DE CABEZA HEXAGONAL de 35 mm (16) utilizando la NOTA: Puede ser necesario afl ojar y luego apretar algunos de los Llave en L (14). tornillos para fi jar los PARALES PEQUEÑOS. 420650 www.sauder.com Page 47...
- Página 48 Apriete seis EXCÉNTRICOS ESCONDIDOS. Esto completa el ensamblaje. Limpiar con un trapo húmedo. Separe las APLICACIONES de la TARJETA CON APLICACIONES Seque con un paño. NEGRA (13) y aplique las sobre cada EXCÉNTRICO ESCONDIDO. Page 48 www.sauder.com 420650...
- Página 49 à Les téléviseurs peuvent être particulièrement un téléviseur. cet eff et. lourds. De plus, le poids et l’emplacement du tube image ont tendance à rendre les téléviseurs instables et enclins à tomber vers l’ a vant. 420650 www.sauder.com Page 49...
- Página 50 Además, el peso y la ubicación del tubo de imagen tienden a causar la inestabilidad de televisores y propensa a volcarse hacia adelante. Page 50 www.sauder.com 420650...
-
Página 51: Garantie Limitée De 5 Ans
à compter de la date d'achat la première fois et qui sont signalés à Sauder dans les limites de couverture de la contre tout défaut de matériaux ou de fabrication des composantes de mobilier Sauder. - Página 52 Dear Valued Customer: So, how did it go? Thanks so much for choosing Sauder® furniture. I hope the Set a world record for speed? purchase and assembly process was a positive experience Feeling good about yourself? and you feel good about the furniture you just built. If you Nice.