Tabla de contenido
Publicidad
Enlaces rápidos
sauder.com
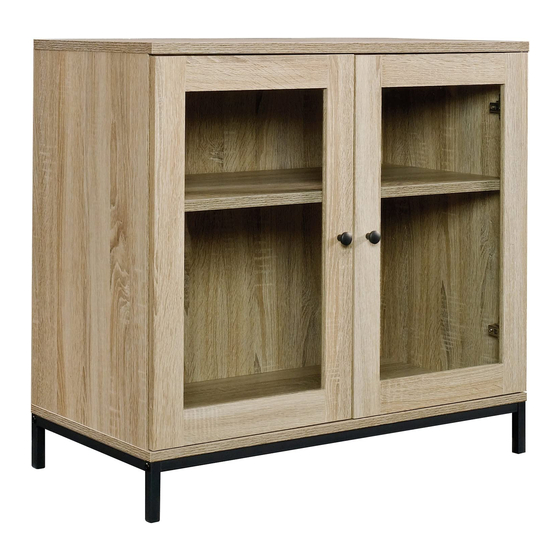
Display Cabinet
North Avenue Collection | Model 420035
Need help? Visit Sauder.com to view video assembly tips or chat with a live rep.
Prefer the phone? Call 1-800-445-1527.
Share your journey!
You'll love what we
have in storage.
NOTE: THIS INSTRUCTION
BOOKLET CONTAINS IMPORTANT
SAFETY INFORMATION.
PLEASE READ AND KEEP FOR
FUTURE REFERENCE.
English pg 1-17
Français pg 18-20
Español pg 21-24
Lot #: 392458
Date Purchased: __________________
06/15/16
Be sure to give us a ring before
making any returns. 1-800-445-1527
Publicidad
Tabla de contenido

Manuales relacionados para Sauder North Avenue 420035


Resumen de contenidos para Sauder North Avenue 420035
- Página 1 NOTE: THIS INSTRUCTION BOOKLET CONTAINS IMPORTANT SAFETY INFORMATION. PLEASE READ AND KEEP FOR Need help? Visit Sauder.com to view video assembly tips or chat with a live rep. FUTURE REFERENCE. Prefer the phone? Call 1-800-445-1527. English pg 1-17 Français pg 18-20 Español pg 21-24...
- Página 2 • Check the size and weight of your TV. Compare it to the diagram below – before you begin assembly! • This Sauder unit is designed for use with televisions weighing less than 35 pounds. Never use with a TV that weighs more.
-
Página 3: Part Identifi Cation
Use this part identifi cation to help identify similar parts. TOP (1) ADJUSTABLE SHELF (1) LEFT END (1) DOOR (2) RIGHT END (1) END LEG (2) BOTTOM (1) BACK BRACE (1) BACK (1) FRONT BRACE (1) TOP MOLDING (1) 420035 www.sauder.com Page 3... -
Página 4: Tabla De Contenido
1-3/8" ALLEN SCREW - 4 1-5/8" FLAT HEAD SCREW - 4 1-3/16" ALLEN SCREW - 7 3/4" MACHINE SCREW - 2 9/16" FLAT HEAD SCREW - 24 1/2" PAN HEAD SCREW - 2 Page 4 www.sauder.com 420035... - Página 5 Look for this icon. It means a Step 1 video assembly tip is available at www.sauder.com/services/tips Assemble your unit on a carpeted fl oor or on the empty å carton to avoid scratching your unit or the fl oor. Remember: Righty tighty.
- Página 6 Step 2 Push twelve WOOD DOWELS (4) into the ENDS (B and C) å and TOP MOLDING (F). Be sure to use the exact holes shown. Page 6 www.sauder.com 420035...
-
Página 7: Cam Screw
This surface will be facing out of the part after it is pushed in the TOP MOLDING (F). The arrow must point toward the edge of the board and CAM SCREW. 420035 www.sauder.com Page 7... - Página 8 MOLDING (F). Tighten the HIDDEN CAMS. NOTE: Be sure the WOOD DOWELS in the ENDS and å TOP MOLDING insert into the holes in the TOP. The arrow must point toward the edge of the board. These edges must be even. Page 8 www.sauder.com 420035...
-
Página 9: 1-5/8" Flat Head Screw
NOTE: Be sure the WOOD DOWELS in the ENDS insert å into the holes in the BOTTOM. 1-5/8" FLAT HEAD SCREW (4 used in this step) These holes must be here. These edges must be even. 420035 www.sauder.com Page 9... - Página 10 BACK fastened. The unit may collapse. Push on opposite corners of your unit if needed to make it "square". Fasten the BACK (E) to your unit using the NAILS (9). å NAIL (16 used in this step) Notch Notch Page 10 www.sauder.com 420035...
- Página 11 Side Step: Make nachos. (Optional, but NOTE: Do not tighten the ALLEN SCREWS at this time. å recommended.) These holes must be here. The fl anges should be up. 1-3/8" ALLEN SCREW (4 used in this step) 420035 www.sauder.com Page 11...
-
Página 12: 1-3/16" Allen Screw
BACK BRACE and into the BOTTOM. NOTE: Tighten all of the ALLEN SCREWS. å The fl anges should be down. 1/2" PAN HEAD SCREW (2 used in this step) 1-3/16" ALLEN SCREW (7 used in this step) Page 12 www.sauder.com 420035... -
Página 13: 9/16" Flat Head Screw
Step 9 Fasten two HINGES (6) to a DOOR (H). Use four 9/16" å FLAT HEAD SCREWS (15). Repeat this step for the other DOOR (H). å 9/16" FLAT HEAD SCREW (8 used in this step) 420035 www.sauder.com Page 13... -
Página 14: 3/4" Machine Screw
TOP MOLDING (F). Repeat this step fastening the other DOOR (H) to the å RIGHT END (C). 9/16" FLAT HEAD SCREW (16 used for the HINGES) 3/4" MACHINE SCREW (2 used in this step) Page 14 www.sauder.com 420035... - Página 15 To adjust the DOORS in or out (depth), loosen the mounting å screw one turn and move the DOORS in or out, as needed. Tighten the mounting screw after making adjustments. Mounting screw (depth) Adjusting screw (horizontal) 420035 www.sauder.com Page 15...
- Página 16 Step 12 Insert the METAL PINS (2) into the hole locations of your å choice in the ENDS (B and C). Set the ADJUSTABLE SHELF (G) onto the METAL PINS. Page 16 www.sauder.com 420035...
-
Página 17: Avertissement
Causará daño a la super retirer. Causer des dommages à la furniture polish or a damp cloth. Wipe dry. surface. 11-07 And to celebrate, why not share your success story? 35 lbs. 25 lbs. 60 lbs. 420035 www.sauder.com Page 17... -
Página 18: Liste De Pièces
élément et conserver le livret pour future référence. DESSUS ................1 VIS D'EXCENTRIQUE ..........7 Pour contacter Sauder EXTRÉMITÉ GAUCHE ..........1 GOUPILLE EN MÉTAL ..........4 en ce qui concerne cet EXTRÉMITÉ DROITE ..........1 EXCENTRIQUE ESCAMOTABLE ..... 7 élément, faire référence... - Página 19 EXTRÉMITÉS et la MOULURE DE DESSUS dans diagramme ci-dessous avant de commencer l'assemblage ! les trous du DESSUS (A). • Cette unité Sauder est conçue pour les téléviseurs pesant moins de 16 kg. Ne jamais utiliser avec des téléviseurs plus lourds. ÉTAPE 5 •...
- Página 20 Pour ajuster les PORTES vers l'intérieur où vers l'extérieur (profondeur), desserrer la vis de montage un tour et déplacer les PORTES vers l'intérieur ou vers l'extérieur. Serrer la vis de montage après avoir ajusté. Page 20 www.sauder.com 420035...
-
Página 21: Lista De Partes
BIELA DE EXCÉNTRICO ........7 et conserver le livret pour future référence. EXTREMO IZQUIERDO ............1 ESPIGA DE METAL ............4 Pour contacter Sauder EXTREMO DERECHO ............1 EXCÉNTRICO ESCONDIDO ....... 7 en ce qui concerne cet FONDO .................... 1 PASADOR DE MADERA ........12 élément, faire référence... - Página 22 - antes de comenzar el ensamblaje! inserten dentro de los agujeros del PANEL SUPERIOR (A). • Esta unidad Sauder está diseñada para ser usada con televisores cuyo peso sea inferior a 16 Kg. Nunca la use para un PASO 5 televisor de mayor peso.
-
Página 23: Ajuste De La Puerta
Para ajustar las PUERTAS hacia atrás o hacia adelante (profundidad), afl oje el tornillo de montaje una vuelta y mueva las PUERTAS hacia el interior o hacia el exterior según sea necesario. Apriete el tornillo de montaje después de hacer los ajustes. 420035 www.sauder.com Page 23... - Página 24 • This product is not designed to support a not designed to support a television is heavy. Plus the weight and location of the television. hazardous. picture tube tends to make TVs unbalanced and prone to tipping forward. Page 24 www.sauder.com 420035...
- Página 25 Les téléviseurs peuvent être particulièrement un téléviseur. n’en est pas équipé. lourds. De plus, le poids et l’emplacement du tube image ont tendance à rendre les téléviseurs instables et enclins à tomber vers l’ a vant. 420035 www.sauder.com Page 25...
- Página 26 Además, el peso y la ubicación del tubo de imagen tienden a causar la inestabilidad de televisores y propensa a volcarse hacia adelante. Page 26 www.sauder.com 420035...
-
Página 27: Garantía Limitada De 1 Año
GARANTIE LIMITÉE DE 1 AN 1. Sauder Woodworking Co. (Sauder®) off re une couverture de garantie limitée à l’ a cheteur 4. La présente garantie ne s’ a pplique qu’ a ux défauts garantis qui se produisent pour initial du présent produit pendant une période un an à... - Página 28 Dear Valued Customer: So, how did it go? Thanks so much for choosing Sauder® furniture. I hope the Set a world record for speed? purchase and assembly process was a positive experience Feeling good about yourself? and you feel good about the furniture you just built. If you Nice.