Tabla de contenido
Publicidad
Enlaces rápidos
sauder.com
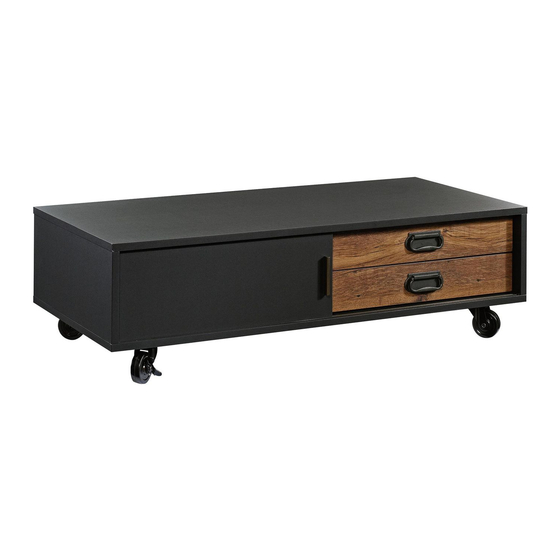
Coff ee Table
Boulevard Cafe Collection | Model 420645
Need help? Visit Sauder.com to view video assembly tips or chat with a live rep.
Prefer the phone? Call 1-800-445-1527.
Share your journey!
It's addicting.
NOTE: THIS INSTRUCTION
BOOKLET CONTAINS IMPORTANT
SAFETY INFORMATION.
PLEASE READ AND KEEP FOR
FUTURE REFERENCE.
English pg 1-19
Français pg 20-22
Español pg 23-25
Lot #: 510022
Date Purchased: __________________
10/26/17
Be sure to give us a ring before
making any returns. 1-800-445-1527
Publicidad
Tabla de contenido

Manuales relacionados para Sauder 420645


Resumen de contenidos para Sauder 420645
- Página 1 NOTE: THIS INSTRUCTION BOOKLET CONTAINS IMPORTANT SAFETY INFORMATION. PLEASE READ AND KEEP FOR Need help? Visit Sauder.com to view video assembly tips or chat with a live rep. FUTURE REFERENCE. Prefer the phone? Call 1-800-445-1527. English pg 1-19 Français pg 20-22 Español pg 23-25...
- Página 2 Assembly Tools Required Part Identifi cation No. 2 Phillips Screwdriver Tip Shown Actual Size Hardware Identifi cation Assembly Steps 5-19 Hammer Not actual size Français 20-22 Español 23-25 Skip the power trip. Safety This time. Warranty Page 2 www.sauder.com 420645...
-
Página 3: Part Identifi Cation
RIGHT END (1) BACK (2) DRAWER BACK (2) LEFT END (1) SLIDING DOOR (1) DRAWER BOTTOM (2) UPRIGHT (1) DRAWER FRONT (2) DRAWER BRACE (2) TOP (1) RIGHT DRAWER SIDE (2) BOTTOM (1) LEFT DRAWER SIDE (2) 420645 www.sauder.com Page 3... -
Página 4: Tabla De Contenido
PULL - 2 BLACK 1-1/2" FLAT HEAD SCREW - 22 BLACK 1/2" WAFER HEAD SCREW - 16 BLACK 1/2" MACHINE HEAD SCREW - 4 BLACK 1/2" PAN HEAD SCREW - 24 BLACK 3/8" MACHINE HEAD SCREW - 2 Page 4 www.sauder.com 420645... -
Página 5: Cam
Push fourteen LARGE HIDDEN CAMS (3) into the ENDS (A å and B), UPRIGHT (C), and BACKS (F). Arrow (14 used) Arrow Arrow Hole The arrow in the HIDDEN CAM must point toward the hole in the edge of the board. 420645 www.sauder.com Page 5... - Página 6 SLIDE from the RAIL. Open end Use these holes. Open end BLACK 1/2" PAN HEAD SCREW (12 used in this step) This HIDDEN CAM must be here. These holes are closer to this edge. Open end Page 6 www.sauder.com 420645...
- Página 7 SCREWS (6). Do not confuse these CAM SCREWS. Turn twelve ANGLED HEAD CAM SCREWS (4) å Angled head into the ENDS (A and B) and TOP (D). NOTE: Use the exact holes shown. å (12 used) 420645 www.sauder.com Page 7...
- Página 8 Step Step 4 Insert thirteen WOOD DOWELS (8) into the TOP (D). å (13 used) Page 8 www.sauder.com 420645...
-
Página 9: Double Dowel
S u r D E N Tighten the HIDDEN H I D CAM onto the DOUBLE DOWEL. Edge without HIDDEN CAMS i t h f a c S u r D E N H I D 420645 www.sauder.com Page 9... - Página 10 HIDDEN CAMS i t h f a c S u r D E N H I D Edge without HIDDEN CAMS i t h f a c S u r D E N H I D Page 10 www.sauder.com 420645...
- Página 11 TOP (D). Tighten ten HIDDEN CAMS. NOTE: Be sure the WOOD DOWELS in the TOP insert å into the ENDS, UPRIGHT, and BACKS. Peel APPLIQUES from the APPLIQUE CARD (14) and å stick them onto the visible HIDDEN CAMS. Groove 420645 www.sauder.com Page 11...
-
Página 12: Long Pull
NOTE: Be sure the WOOD DOWELS in the ENDS, UPRIGHT, å and BACKS insert into the BOTTOM. BLACK 1-1/2" FLAT HEAD SCREW (10 used for the BOTTOM) Groove (13 used) Groove The LONG PULL must be here. Page 12 www.sauder.com 420645... -
Página 13: Black 1/2" Wafer Head Screw
Fasten the CASTERS (10 and 11) to the BOTTOM (E). Use sixteen å BLACK 1/2" WAFER HEAD SCREWS (16). Carefully turn your unit over and stand it upright on the CASTERS. å BLACK 1/2" WAFER HEAD SCREW (16 used in this step) 420645 www.sauder.com Page 13... - Página 14 Turn twelve STRAIGHT HEAD CAM SCREWS (6) into å the DRAWER FRONTS (H). Arrow (12 used) The arrow in the HIDDEN CAM must point toward the hole in the edge of the board. (12 used) Straight head Page 14 www.sauder.com 420645...
-
Página 15: Black 1/2" Pan Head Screw
Repeat this step for the other drawer. å BLACK 1/2" PAN HEAD SCREW (12 used in this step) Open end Use these holes. Open end These holes must be here. Open end These holes must be here. Groove Groove 420645 www.sauder.com Page 15... - Página 16 å DRAWER FRONT (H) and DRAWER SIDES (I and J). Repeat this step for the other drawer. å Surface with HIDDEN CAMS Groove n i s h U n fi f a c s u r Page 16 www.sauder.com 420645...
- Página 17 J) and DRAWER BRACE (M). Use six BLACK 1-1/2" FLAT HEAD SCREWS (15). Repeat this step for the other drawer. å BLACK 1-1/2" FLAT HEAD SCREW (12 used in this step) Be sure the DRAWER BOTTOM inserts into the DRAWER BACK groove. 420645 www.sauder.com Page 17...
- Página 18 NOTE: The drawers must be pushed completely in for the SLIDING DOOR to clear the PULLS. å Peel APPLIQUES from the APPLIQUE CARD (14) and stick them onto the visible HIDDEN CAMS. å BLACK 1/2" MACHINE HEAD SCREW (4 used for the PULLS) Page 18 www.sauder.com 420645...
- Página 19 NOTE: Please read the back pages of the instruction booklet for important safety information. å This completes assembly. Clean with your favorite furniture polish or a damp cloth. Wipe dry. å And to celebrate, why not share your success story? 50 lbs. 35 lbs. 20 lbs. each 420645 www.sauder.com Page 19...
-
Página 20: Liste De Pièces
Modèle 420645 Table de salon Utilisez les instructions d’ a ssemblage en français avec les NOUS SOMMES LA POUR VOUS AIDER! schémas étape par étape du manuel d’instruction en anglais. Nous faisons de notre mieux pour nous assurer que votre meuble Chaque étape en français correspond à... - Página 21 REMARQUE : S’ a ssurer que de bien insérer la PORTE COULISSANTE dans la rainure du DESSOUS. REMARQUE : S'assurer de bien insérer les CHEVILLES EN BOIS situées sur les EXTRÉMITÉS, le MONTANT et les ARRIÈRES dans le DESSOUS. 420645 www.sauder.com Page 21...
- Página 22 Enfi ler le FOND DE TIROIR (L) dans les rainures du DEVANT DE Ceci complète l'assemblage. Nettoyer à l’ a ide d’une encaustique TIROIR (H) et des CÔTÉS DE TIROIR (I et J). pour meubles ou d’un chiff on humide. Essuyer. Répéter cette étape pour l'autre tiroir. Page 22 www.sauder.com 420645...
-
Página 23: Lista De Partes
Modelo 420645 Mesa de sala Use estas instrucciones de ensamblaje en español junto con las ESTAMOS AQUI PARA AYUDAR! fi guras paso-a-paso provistas en el folleto inglés. Cada paso Tratamos de asegurar que su mueble llega en condición excelente. en español corresponde al mismo paso en inglés. Se destacan Nuestros representantes de Servicio al Cliente son amables y las fi... - Página 24 NOTA: Asegúrese de que la PUERTA CORREDIZA se inserte en la ranura en el FONDO. NOTA: Asegúrese de que los PASADORES DE MADERA sujetados a los EXTREMOS, al PARAL y a los DORSOS se inserten dentro del FONDO. Page 24 www.sauder.com 420645...
- Página 25 CARA DE CAJÓN (H) y de los LADOS DE CAJÓN (I y J). Esto completa el ensamblaje. Limpie con su pulimento para Repita este paso para el otro cajón. muebles preferido o un paño húmedo. Seque con un paño. 420645 www.sauder.com Page 25...
- Página 26 Además, el un televisor. soportar un televisor. peso y la ubicación del tubo de imagen tienden a causar la inestabilidad de televisores y son propensos a inclinarse hacia adelante. Page 26 www.sauder.com 420645...
-
Página 27: Garantie Limitée De 5 Ans
à compter de la date d'achat la première fois et qui sont signalés à Sauder dans les limites de couverture de la contre tout défaut de matériaux ou de fabrication des composantes de mobilier Sauder. - Página 28 Dear Valued Customer: So, how did it go? Thanks so much for choosing Sauder® furniture. I hope the Set a world record for speed? purchase and assembly process was a positive experience Feeling good about yourself? and you feel good about the furniture you just built. If you Nice.