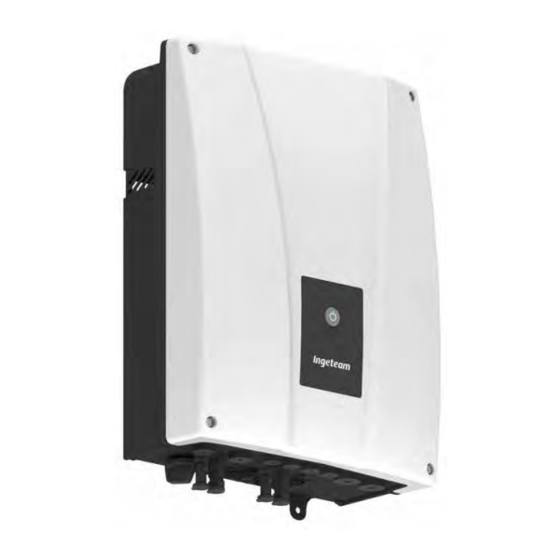
Ingeteam STORAGE 1Play TL M Manual De Instrucciones
Ocultar thumbs
Ver también para STORAGE 1Play TL M:
- Manual de instalacion y uso (244 páginas) ,
- Manual de uso y configuración (25 páginas) ,
- Manual del usuario (21 páginas)
Publicidad
Idiomas disponibles
Idiomas disponibles
Enlaces rápidos
INGECON SUN STORAGE 1Play TL M
Uso y configuración del ISS 1Play TL M conectado a la
batería B3/B4850/A48100/POWERBOX de DYNESS
Use and Settings of the ISS 1Play TL M working with the
battery B3/B4850/A48100/POWERBOX of DYNESS
Publicidad

Resumen de contenidos para Ingeteam STORAGE 1Play TL M
- Página 1 INGECON SUN STORAGE 1Play TL M Uso y configuración del ISS 1Play TL M conectado a la batería B3/B4850/A48100/POWERBOX de DYNESS Use and Settings of the ISS 1Play TL M working with the battery B3/B4850/A48100/POWERBOX of DYNESS...
- Página 2 Tabla de contenido INTRODUCCIÓN ............................ 3 BATERÍA B3/B4850/A48100/POWERBOX ..................... 4 Conexión de la batería al inversor ....................4 2.1.1 Conexión del cableado DC ...................... 4 2.1.2 Conexión del cable de comunicaciones CAN ................5 Encender inversor ........................... 8 Configuración del ISS 1Play TL M ....................8 REVISIÓN FINAL ............................
- Página 3 Ingeteam Uso y configuración del INGECON SUN STORAGE 1Play TL M conectado a la batería B3/B4850/A48100/POWERBOX de DYNESS INTRODUCCIÓN Este documento describe el proceso para conectar y configurar el inversor INGECON SUN STORAGE 1Play (ISS 1Play para trabajar batería B3/B4850/A48100/POWERBOX de DYNESS.
- Página 4 Ingeteam Uso y configuración del INGECON SUN STORAGE 1Play TL M conectado a la batería B3/B4850/A48100/POWERBOX de DYNESS BATERÍA B3/B4850/A48100/POWERBOX Este capítulo describe el proceso de conexión, encendido y configuración del ISS 1Play TL M para trabajar con la batería B3/B4850/A48100/POWERBOX.
- Página 5 Ingeteam Uso y configuración del INGECON SUN STORAGE 1Play TL M conectado a la batería B3/B4850/A48100/POWERBOX de DYNESS 2.1.2 Conexión del cable de comunicaciones CAN La comunicación entre la batería y el inversor se hace mediante un cable de comunicación que conecte la boca “IN”...
- Página 6 Ingeteam Uso y configuración del INGECON SUN STORAGE 1Play TL M conectado a la batería B3/B4850/A48100/POWERBOX de DYNESS Ejemplo. En un sistema de almacenamiento con 4 baterías A48100, los DIP Switch se tendrían que colocar de la siguiente manera: Por otro lado, el ISS 1Play TL M requiere de un cable CAN de dos hilos. Los hilos se pueden obtener cortando el extremo del cable Ethernet con el conector RJ45.
- Página 7 Ingeteam Uso y configuración del INGECON SUN STORAGE 1Play TL M conectado a la batería B3/B4850/A48100/POWERBOX de DYNESS Una vez identificados los pines 4 y 5, los dos hilos se tienen que conectar en el terminal J8 del inversor tal y como se detalla a continuación: ISS 1Play TL M 1.
- Página 8 Ingeteam Uso y configuración del INGECON SUN STORAGE 1Play TL M conectado a la batería B3/B4850/A48100/POWERBOX de DYNESS Encender inversor El inversor se puede encender alimentándolo desde la batería B3/B4850/A48100/POWERBOX, sin que previamente así se haya configurado. Para usar está función, seguir los siguientes pasos: 1.
- Página 9 Ingeteam Uso y configuración del INGECON SUN STORAGE 1Play TL M conectado a la batería B3/B4850/A48100/POWERBOX de DYNESS REVISIÓN FINAL En este capítulo se describen las instrucciones para revisar que la conexión y la configuración se han realizado correctamente. 1) Verificar que el cable de comunicaciones CAN está conectado a la batería y al inversor.
- Página 10 Contents INTRODUCTION ..........................11 B3/B4850/A48100/POWERBOX BATTERY ..................12 Connecting the battery pack to the inverter ................. 12 2.1.1 Wiring of DC wire ........................12 2.1.2 Wiring of CAN communication cable ..................13 Switch on the inverter from battery ..................... 16 Configuration of the ISS 1Play TL M ....................
- Página 11 Ingeteam Use and settings of the INGECON SUN STORAGE 1Play TL M working with B3/B4850/A48100/POWERBOX of DYNESS 1 INTRODUCTION This document describes the process to connect and configure INGECON SUN STORAGE 1Play TL M (ISS 1Play TL M) to work with the battery B3/B4850/A48100/POWERBOX of DYNESS.
- Página 12 Ingeteam Use and settings of the INGECON SUN STORAGE 1Play TL M working with B3/B4850/A48100/POWERBOX of DYNESS 2 B3/B4850/A48100/POWERBOX BATTERY This chapter describes the process of connection, switch on and configuration of the ISS 1Play TL M to work with the B3/B4850/A48100/POWERBOX battery.
- Página 13 Ingeteam Use and settings of the INGECON SUN STORAGE 1Play TL M working with B3/B4850/A48100/POWERBOX of DYNESS 2.1.2 Wiring of CAN communication cable The communication between the battery and the inverter can be done by an Ethernet wire that it connects to the “IN”...
- Página 14 Ingeteam Use and settings of the INGECON SUN STORAGE 1Play TL M working with B3/B4850/A48100/POWERBOX of DYNESS For example. In a storage system with 4 x A48100 batteries, the DIS Switches would have to be placed as follows: On the other hand, the ISS 1Play TL M requires a two-wire CAN cable. The wires can be obtained by cutting the end of the Ethernet cable with the RJ45 connector.
- Página 15 Ingeteam Use and settings of the INGECON SUN STORAGE 1Play TL M working with B3/B4850/A48100/POWERBOX of DYNESS After identifying the pin 4 and pin 5. Both wires of the communication cable must be connected to the J8 terminal of the inverter.
- Página 16 Ingeteam Use and settings of the INGECON SUN STORAGE 1Play TL M working with B3/B4850/A48100/POWERBOX of DYNESS Switch on the inverter from battery The inverter can be supplied from the B3/B4850/A48100/POWERBOX battery, without previous configuration. To do so, follow these steps: 1.
- Página 17 Ingeteam Use and settings of the INGECON SUN STORAGE 1Play TL M working with B3/B4850/A48100/POWERBOX of DYNESS 3 FINAL CHECK This chapter describes the instructions to check that all the connections and settings have been successfully done. 1) Verify that the CAN communication cable from the battery to the inverter is connected.


