Publicidad
Idiomas disponibles
Idiomas disponibles
Enlaces rápidos
ATTACH YOUR RECEIPT HERE
_________________________
Serial Number
Questions, problems, missing parts? Before returning to your retailer, call our
customer service department at 866-389-8827, 8 a.m. - 8 p.m., EST, Monday - Sunday.
You could also contact us at partsplus@lowes.com or visit www.lowespartsplus.com.
RR20398
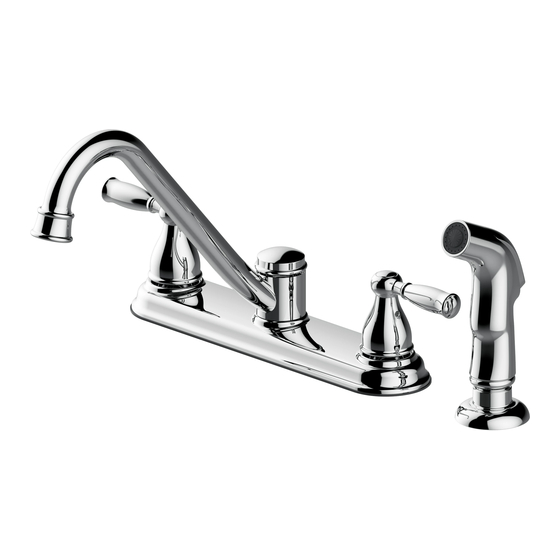
2-Handle Kitchen Faucet
_________________________
Purchase Date
1
ITEM #1159012
MODEL #67686-1001
Español p. 9
Publicidad

Manuales relacionados para Project Source 67686-1001


Resumen de contenidos para Project Source 67686-1001
- Página 1 ITEM #1159012 2-Handle Kitchen Faucet MODEL #67686-1001 Español p. 9 ATTACH YOUR RECEIPT HERE _________________________ _________________________ Serial Number Purchase Date Questions, problems, missing parts? Before returning to your retailer, call our customer service department at 866-389-8827, 8 a.m. - 8 p.m., EST, Monday - Sunday.
- Página 2 PACKAGE CONTENTS PART DESCRIPTION QUANTITY Faucet Base Plate (Preassembled to Faucet (A)) Mounting Nut (Preassembled to Faucet (A)) Block (Preassembled to Faucet (A)) Plug (Preassembled to Faucet (A)) Side Spray Hose Guide Lock Nut (Preassembled to Hose Guide (G)) Hose Connector (Preassembled to Hose (F))
- Página 3 SAFETY INFORMATION Please read and understand this entire manual before attempting to assemble, operate, or install the product. WARNING • Follow the installation instructions carefully. Proper installation is the installer’s responsibility. • Failure to follow correct installation procedures can result in the faucet being loose, which can result in serious injury.
- Página 4 ASSEMBLY INSTRUCTIONS 1. Shut off the water supply and remove the old faucet. Skip this step if install with side spray. 2. a. Push the plug (E) firmly upward and snap onto the block (D). b. Pull down moderately to ensure the connection has been made.
- Página 5 ASSEMBLY INSTRUCTIONS 4. Install the side spray: a. Insert the side spray (F) down through the hose guide (G) and into the sink. b. From underneath the sink, push the preassembled hose connector (I) firmly upward and snap onto the block (D). c.
- Página 6 OPERATION INSTRUCTIONS 1. After the installation is complete: a. Remove the aerator on the faucet (A). b. Turn on the water supply and allow both hot and cold water to run for at least one minute each. c. While the water is running, check for leaks. d.
- Página 7 CARE AND MAINTENANCE • Clean carefully by gently wiping with a grit-free damp cloth. • Use only mild soap with water • Never use acids, harsh chemicals, or abrasive detergents to clean the faucet surface. TROUBLESHOOTING PROBLEM POSSIBLE CAUSE CORRECTIVE ACTION There is a leak from 1.
- Página 8 WARRANTY This faucet has been manufactured under the highest standard of workmanship. All parts of this faucet are warranted to be free from leaks or drips during domestic use for as long as the original purchaser owns this product. THIS EXCLUDES INDUSTRIAL, COMMERCIAL, OR BUSINESS USE. The manufacturer will replace FREE OF CHARGE, under the warranty conditions the entire unit or any part (at our option) which proves defective in material and/or workmanship under normal installation, use and service.
- Página 9 ARTÍCULO #1159012 Grifo para cocina de 2 manijas MODELO #67686-1001 ADJUNT E SU RECIBO AQUÍ _________________________ _________________________ Número de serie Fecha de compra ¿Preguntas, problemas, piezas faltantes? Antes de volver a la tienda, llame a nuestro Departamento de Servicio al Cliente al 866-389-8827, de lunes a viernes de...
- Página 10 CONTENIDO DEL PAQUETE PIEZA DESCRIPCIÓN CANTIDAD Grifo Placa de base (Preensamblado al grifo (A)) Tuerca de montaje (preensamblado al grifo (A)) Bloque (Preensamblado al grifo (A)) Tapón (Preensamblado al grifo (A)) Rociador lateral Guía para manguera Contratuerca (Preensamblado en la guía para manguera (G)) Conector de manguera (Preensamblado en la manguera del rociador (F))
- Página 11 INFORMACIÓN DE SEGURIDAD Lea y comprenda completamente este manual antes de intentar ensamblar, usar o instalar el producto. ADVERTENCIA • Siga atentamente las instrucciones de instalación. El instalador tiene la responsabilidad de realizar una instalación adecuada. • Si no sigue los procedimientos correctos de instalación el grifo puede soltarse y provocar lesiones graves.
- Página 12 INSTRUCCIONES DE ENSAMBLAJE 1. Cierre el suministro de agua. Retire el grifo antiguo. Omita este paso si se instala con rociador lateral. 2. a. Presione el tapón (E) firmemente hacia arriba e inserte a presión en el bloque (D). b. Jálelo suavemente hacia abajo para asegurarse de que la conexión esté...
- Página 13 INSTRUCCIONES DE ENSAMBLAJE 4. Instale la manguera del rociador: a. Inserte la manguera del rociador (F) hacia abajo a través de la guía para manguera (G) y el fregadero. b. Desde abajo del fregadero, presione el conector de la manguera (I) firmemente hacia arriba e insértelo a presión en el bloque (D).
- Página 14 INSTRUCCIONES DE FUNCIONAMIENTO 1. Cuando la instalación esté completa: a. Retire el aireador del grifo (A). b. Abra el suministro de agua y deje que fluya el agua caliente y el agua fría durante un minuto cada una, como mínimo. c.
- Página 15 CUIDADO Y MANTENIMIENTO • Limpie cuidadosa y suavemente con un paño limpio. • Lave solo con agua y jabón suave. • Nunca limpie la superficie con ácidos, agentes químicos fuertes ni detergentes abrasivos. SOLUCIÓN DE PROBLEMAS PROBLEMA CAUSA POSIBLE ACCIÓN CORRECTIVA Hay una filtración debajo 1.
- Página 16 GARANTÍA Este grifo ha sido fabricado bajo los estándares de mano de obra más elevados. Todas las piezas de este grifo están garantizadas contra fugas o goteos durante el uso doméstico mientras lo posea el propietario original. ESTO EXCLUYE EL USO INDUSTRIAL, COMERCIAL O EN OFICINA. El fabricante reemplazará...